EaseUS RecExperts Online Help
This is a dedicated online help to assist you understand our product easily and quickly, for any questions and concerns not addressed on this page, please do not hesitate to contact and we will always be happy to help.
RecExperts
- Hardware Requirements
- System Requirements
- General
- Video and Audio
- Hotkeys
- Mouse Settings
- Game
- More
- Start Recording
- Stop Recording
- Manage Library
- Trim
- Watermark
- Video Intro and Outro
Welcome
Thank you for using EaseUS RecExperts. RecExperts is a multipurpose screen recording software integrated with the ability to annotate recordings, create recording tasks, upload captured videos, take screenshots, and more. No matter whether it's your first time using RecExperts or just want to know more about this recorder, this guide will meet your ultimate demands along with the instructions for installation as well as technical support.
Getting Started
This part outlines the basic parameters for using EaseUS RecExperts. It is to help you acquire a general understanding before you get started.
Hardware Requirements
1.0 GHz processor or faster
A minimum of 1 gigabyte (GB) RAM; A minimum of 2 GB RAM for Windows 7/8/8.1/10
A minimum of 1 GB of available space on the hard disk
CD-R/RW, DVD-R/RW, DVD+R/RW or DVD+R DL drive
Keyboard, mouse, and other compatible pointing devices
System Requirements
Make sure you are running any one of the listed operating systems:
Windows® 7/8/8.1/10/11
Activation
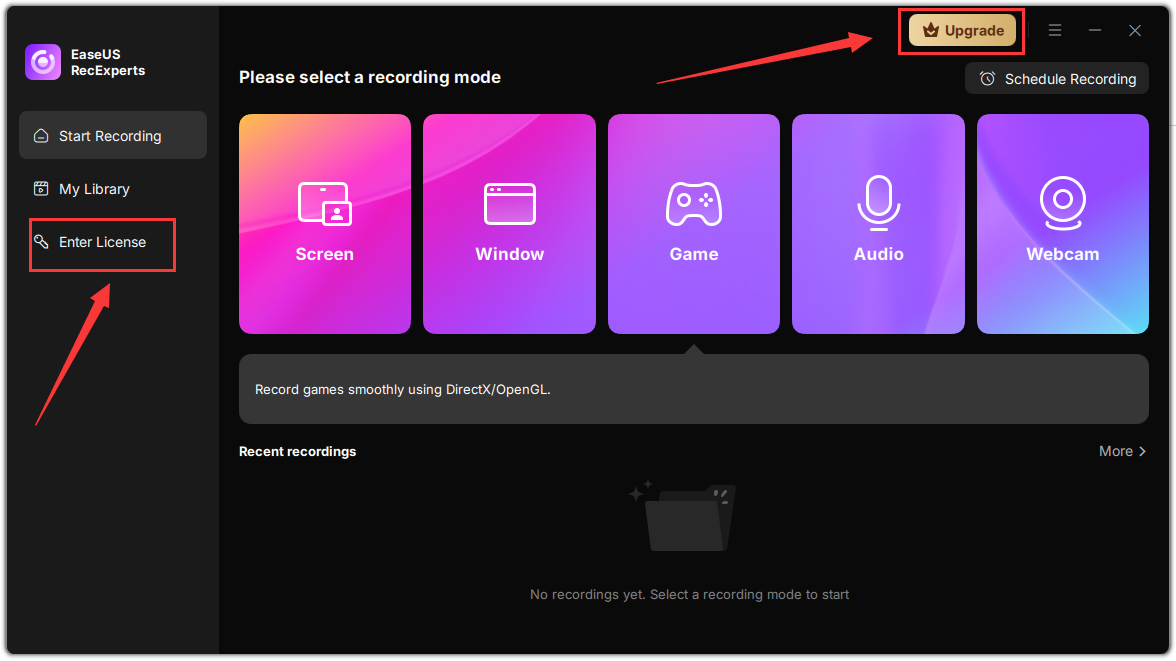
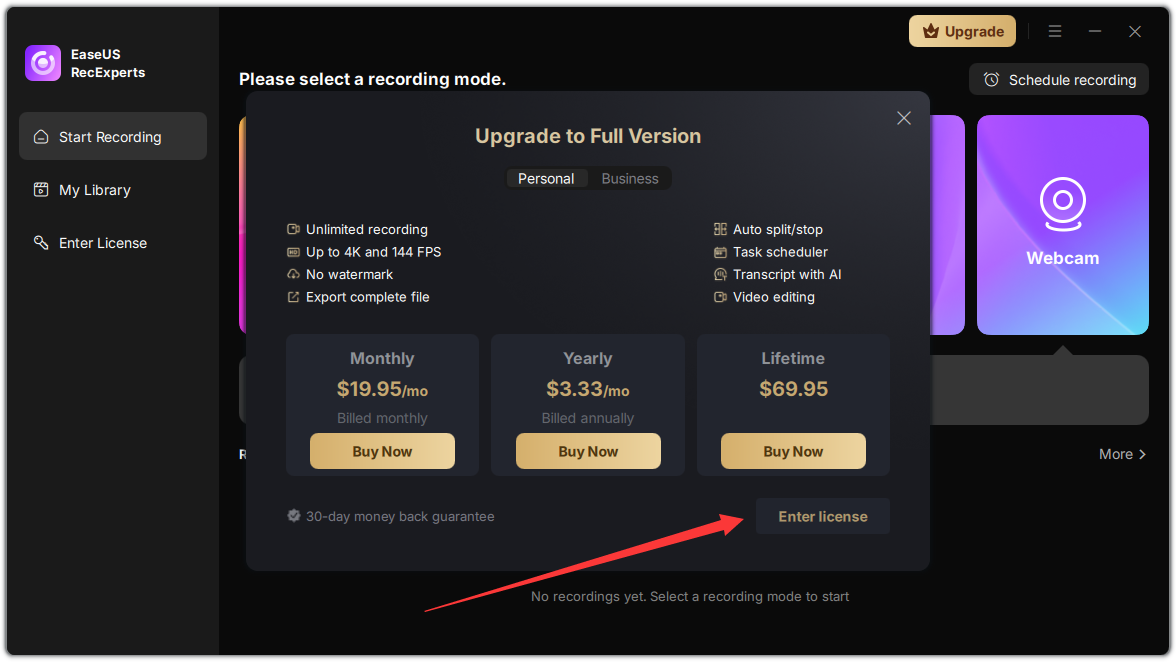
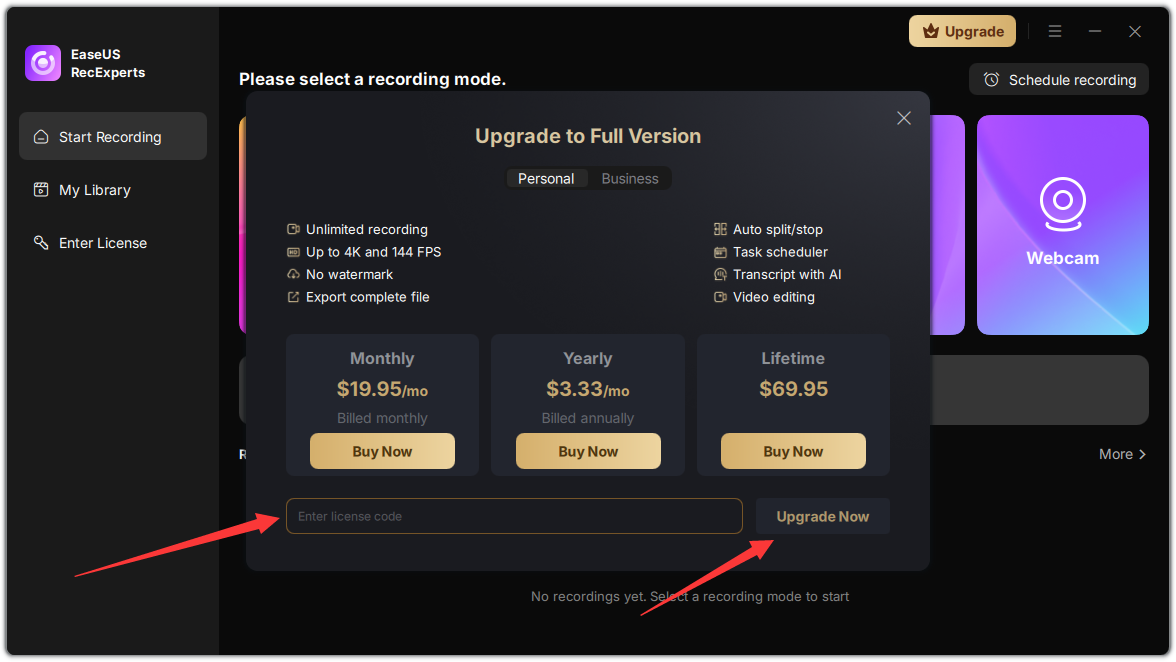
Once downloaded the Trial version, you will see the Upgrade button on the top right corner of the main interface and the Enter License button on the left menu. Click on one of these two options to trigger the Upgrade to Full Version window, then click the Enter License, copy your license code into the activation box, and click on the Upgrade Now button. The Trial will be upgraded to the Professional edition once the license code is properly applied.
Set Preferences
This part helps you quickly learn how to use the basic settings of EaseUS RecExperts.
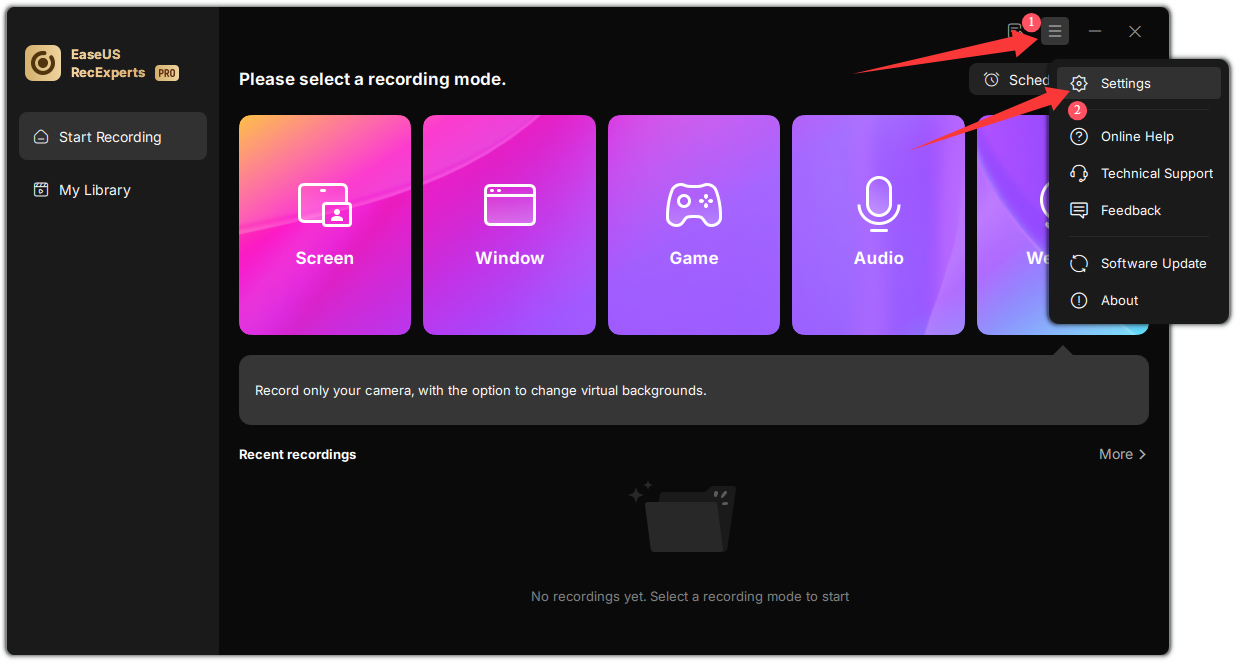
General
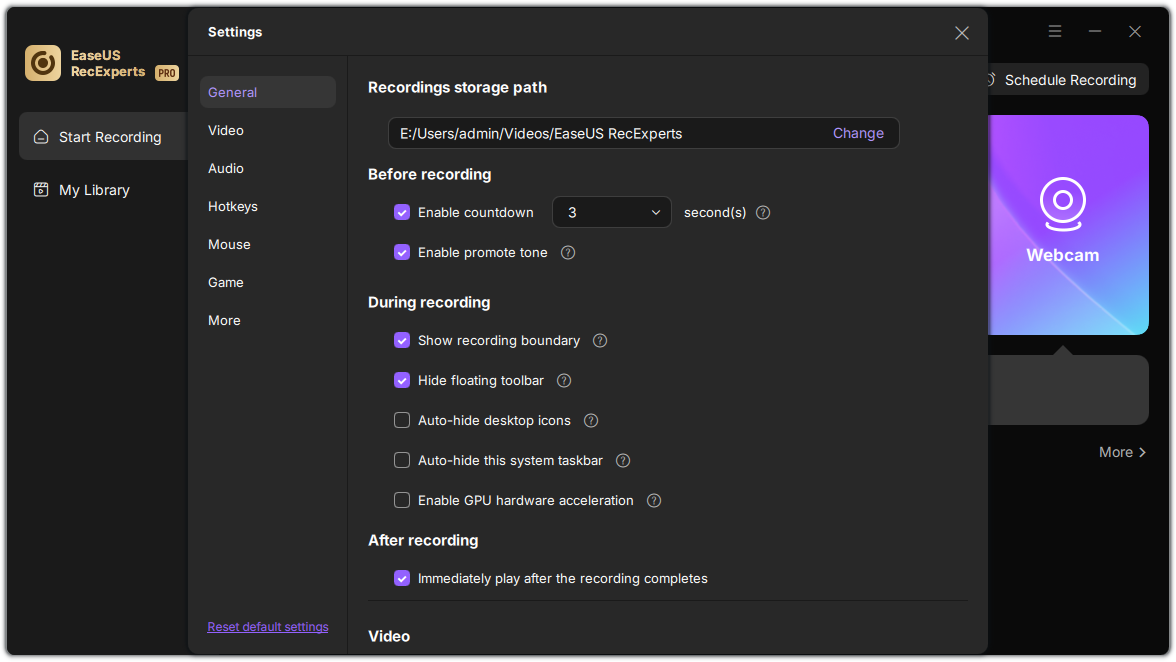
Recording storage path
Within the settings, you have the option to choose a designated folder in the Recording storage path for saving all recorded files. This makes it convenient to quickly locate a specific recording by accessing this folder directly.
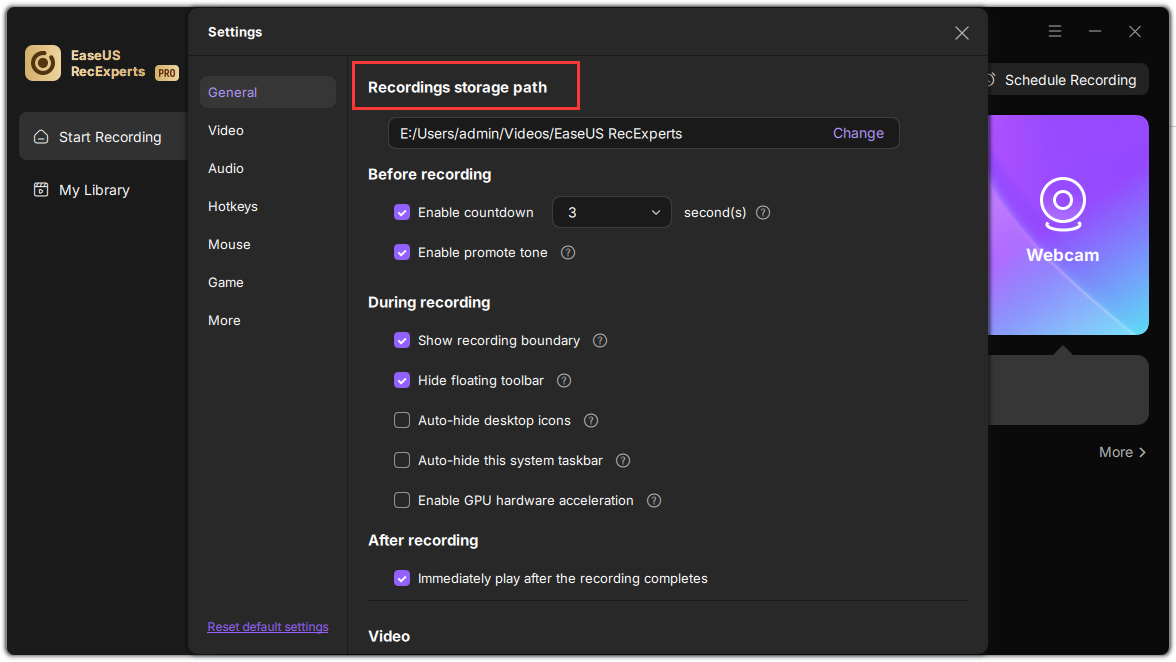
Before Recording
Enable delay for several seconds before recording starts or set the play tone when recording begins.
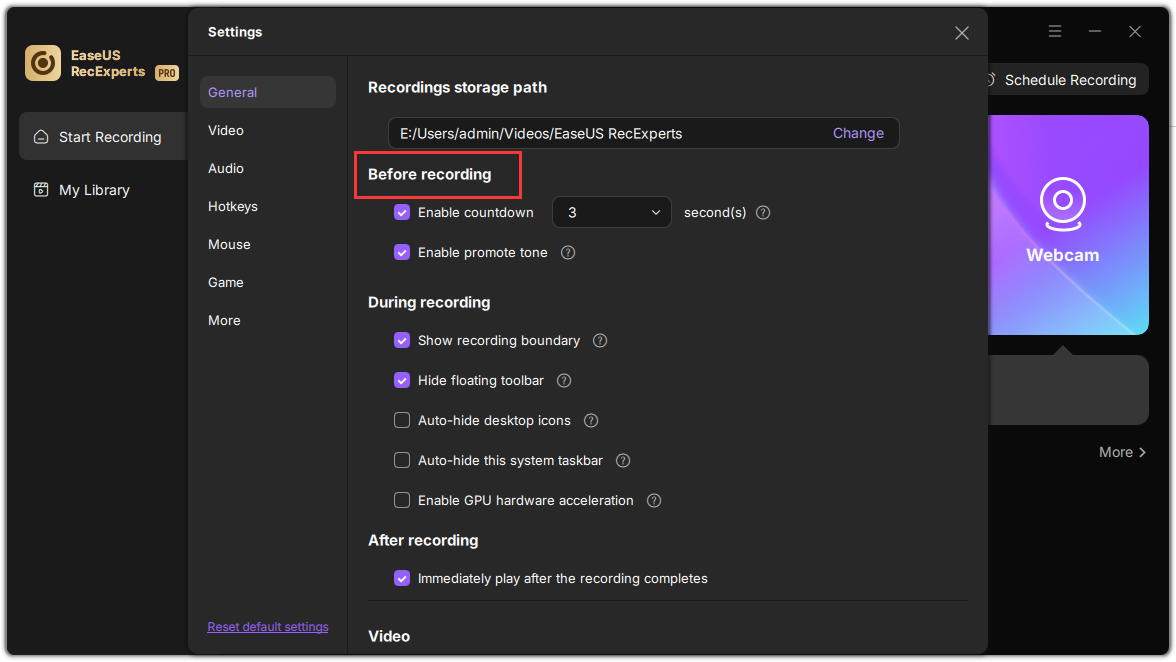
During Recording
here are several settings to configure during recording.
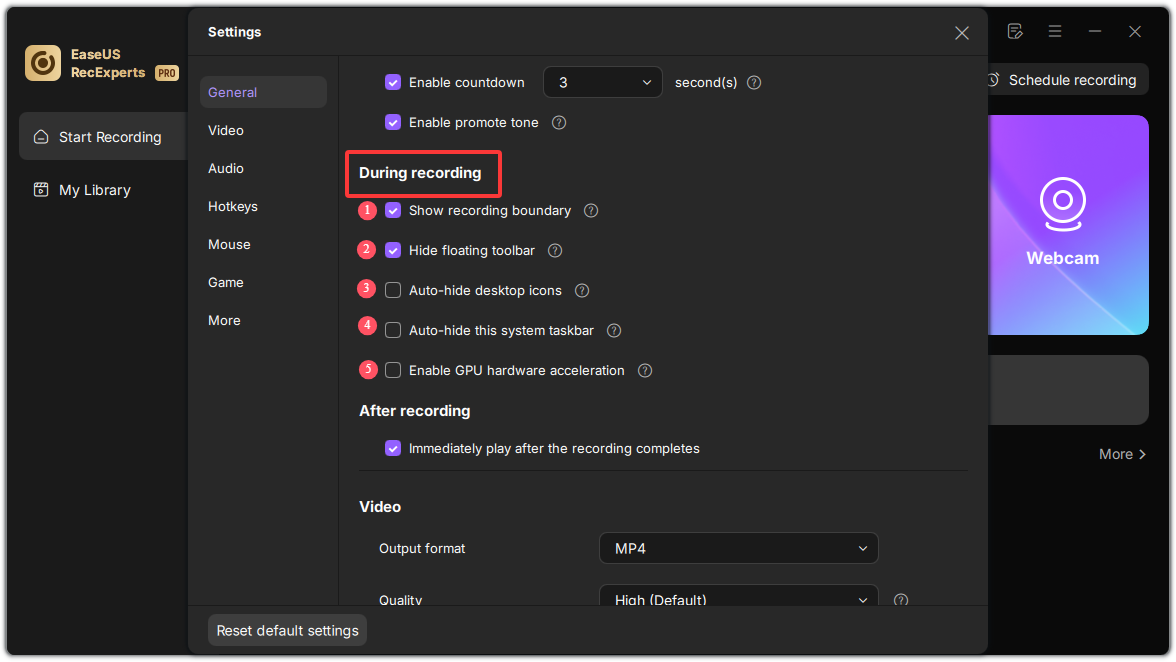
1. Show recording boundary
By enabling this option, you will see the recording boundary during the recording process.
2. Hide Floating Toolbar
The floating toolbar appears when the recording is started, however, you have the option to hide this toolbar during the recording in case you don't want any other applications shown on the recorded screen.
During the recording, a toolbar will appear on the screen providing various options including pause/stop, screenshot, zoom, and annotating features. If you don't need the toolbar shown on your screen, just click and drag it to the edge of your PC screen and release your mouse. After that, the toolbar will hide behind the screen side, and you can pull it out by putting the mouse cursor in the original place.

3. Auto-hide desktop icons
This option is to help hide the desktop icons while recording.
4. Auto-hide this system taskbar
Likewise, you have the option to hide the system taskbar while recording.
5. Enable GPU hardware acceleration
At times, the CPU usage may become too high, causing audio and video to be choppy and encoding to become stuck. In order to remedy this issue, you can enable the GPU hard acceleration option, which will result in smoother video playback.
Video and Audio
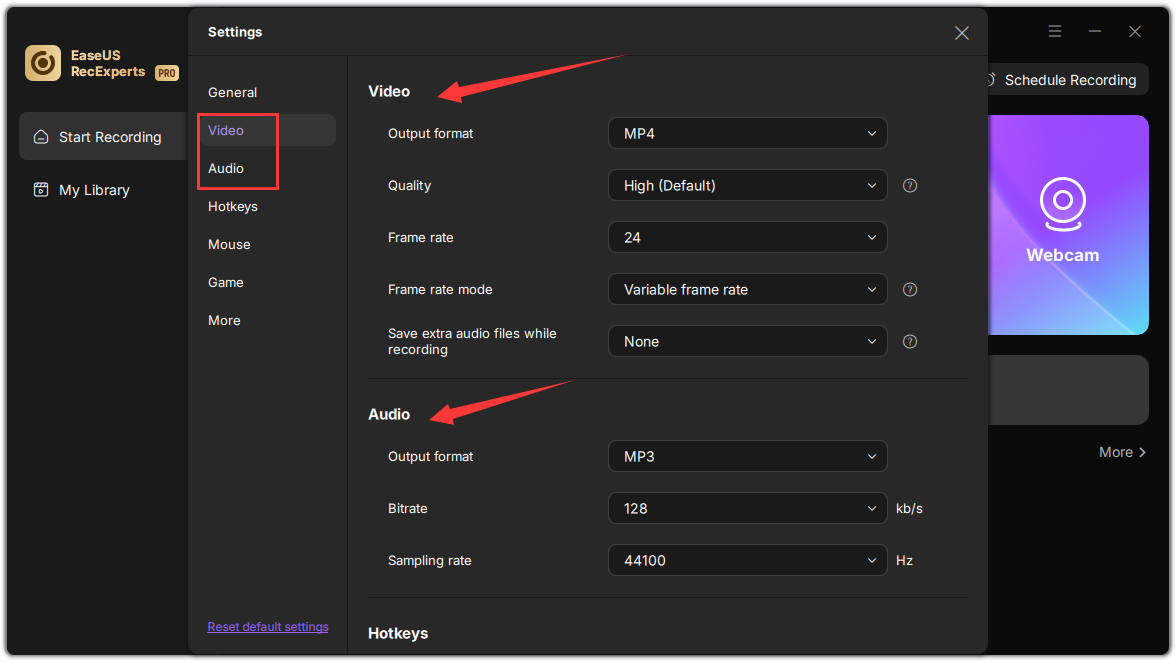
Select the correct mode based on your original video aspect ratio. Multiple formats are also available for you to select for video output (MP4, MKV, AVI, MOV, FLV, etc.), Video Quality, Frame rate, etc. As well as the audio output (MP3, AAC, OGG, WAV, WMA, FLAC, etc.), Birtrate(128kb/s, 192kb/s, 256kb/s), etc.
Hotkeys
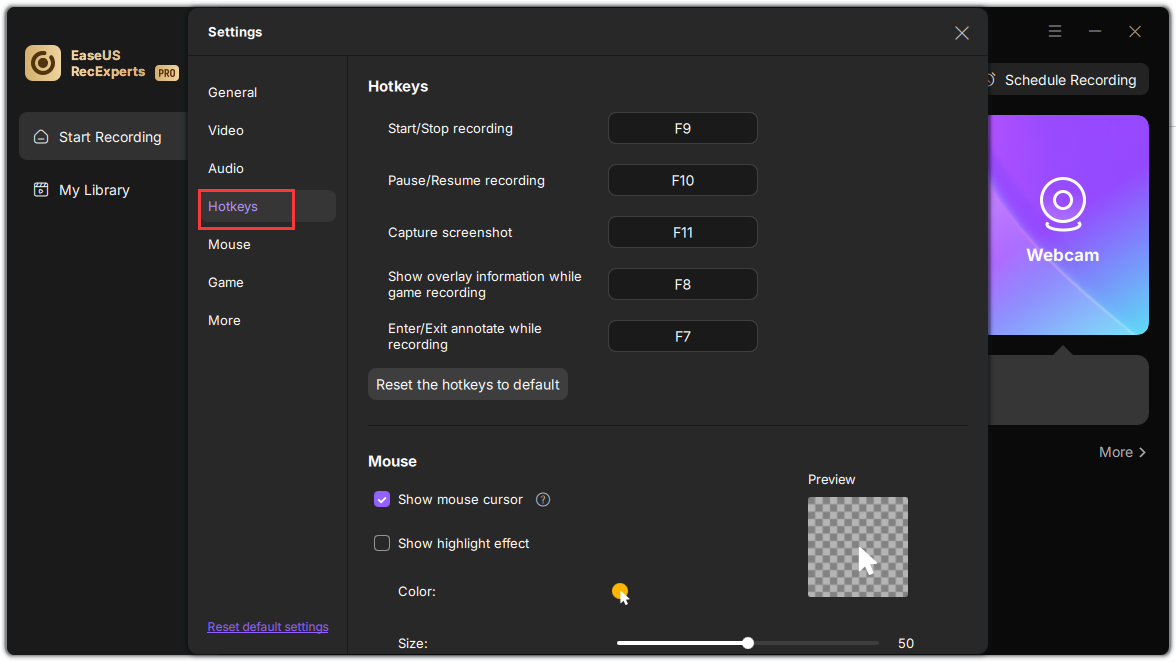
If you are a shortcut-key lover, hotkeys would be your best choice rather than the recording toolbar. Although the program itself is already equipped with default hotkeys, you can still change those settings and set the hotkeys according to your preference.
Mouse Settings
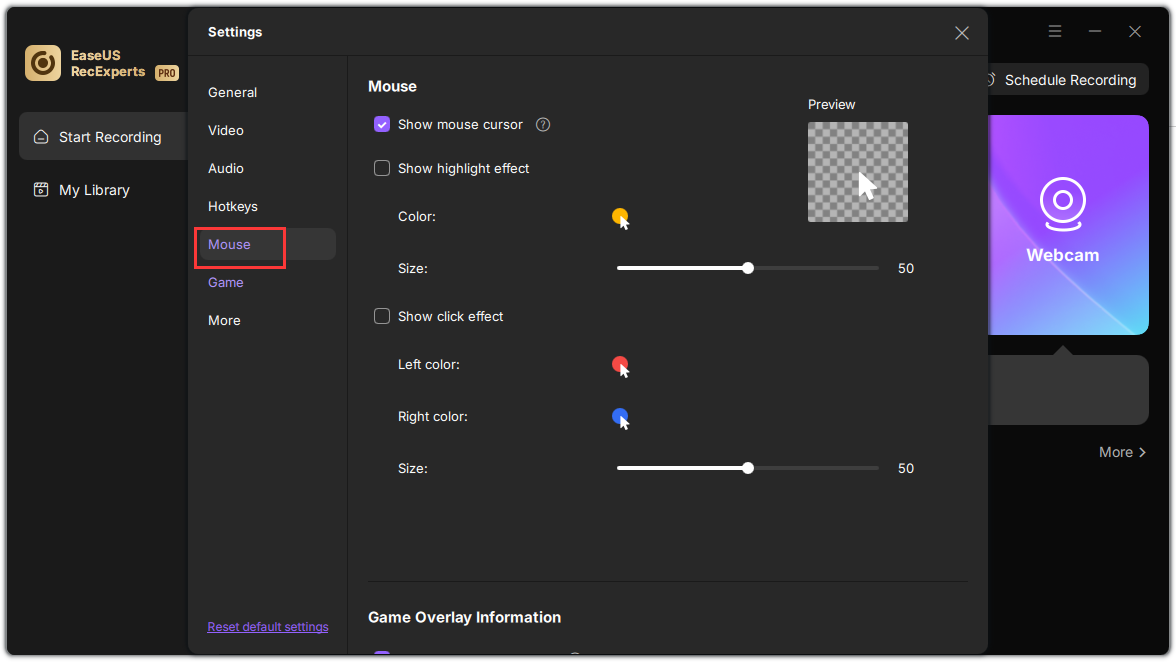
Not only you can decide how the mouse cursor will appear in your recording, but also you can choose whether you want to hide or show the mouse clicks as well as the mouse area. It is also possible to set up different colors for mouse clicks and add highlight effects.
Game
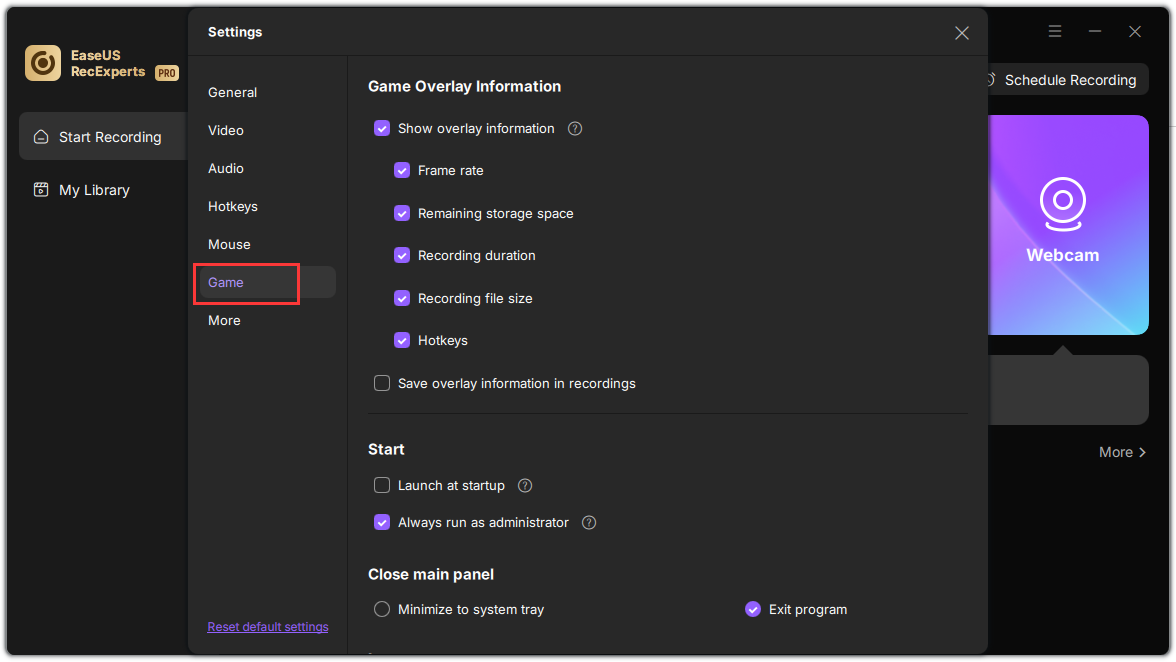
The Game Settings section provides specialized tools for recording PC games. These settings help maintain frame rates while capturing gameplay footage, live streams, or competitive gaming sessions. The configuration options balance visual quality with system resource usage, ensuring your games run smoothly during recording.
More
These options control how RecExperts integrates with your operating system, allowing you to customize launch preferences, permission levels, and window management for optimal workflow efficiency.
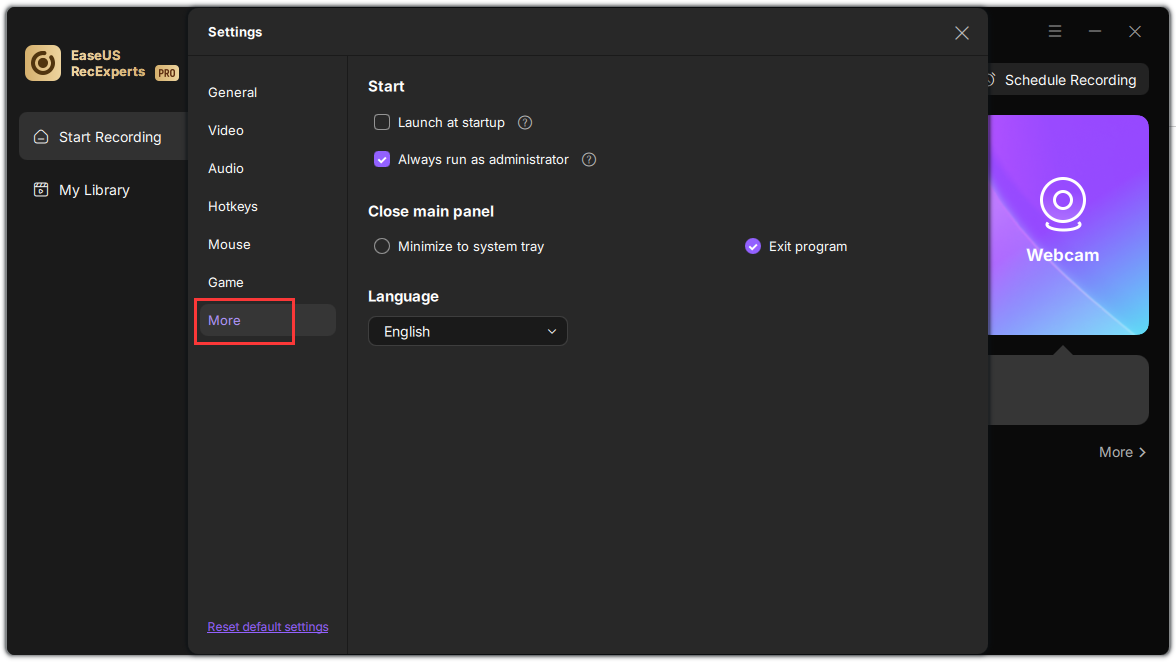
Launch at startup
Automatically starts EaseUS RecExperts when you log into Windows.
Always run as administrator:
Ensures full access to system resources for uninterrupted recording.
Window management:
Choose between minimizing to tray (for background operation) or exiting completely when closed.
Record Screen
With RecExperts, you're able to record the full screen, customized region, webcam or create a picture-in-picture video. System sound, microphone, or both can be included in the recorded video as well. Now, let's check how to start with the recording!
Start Recording
Screen Recording
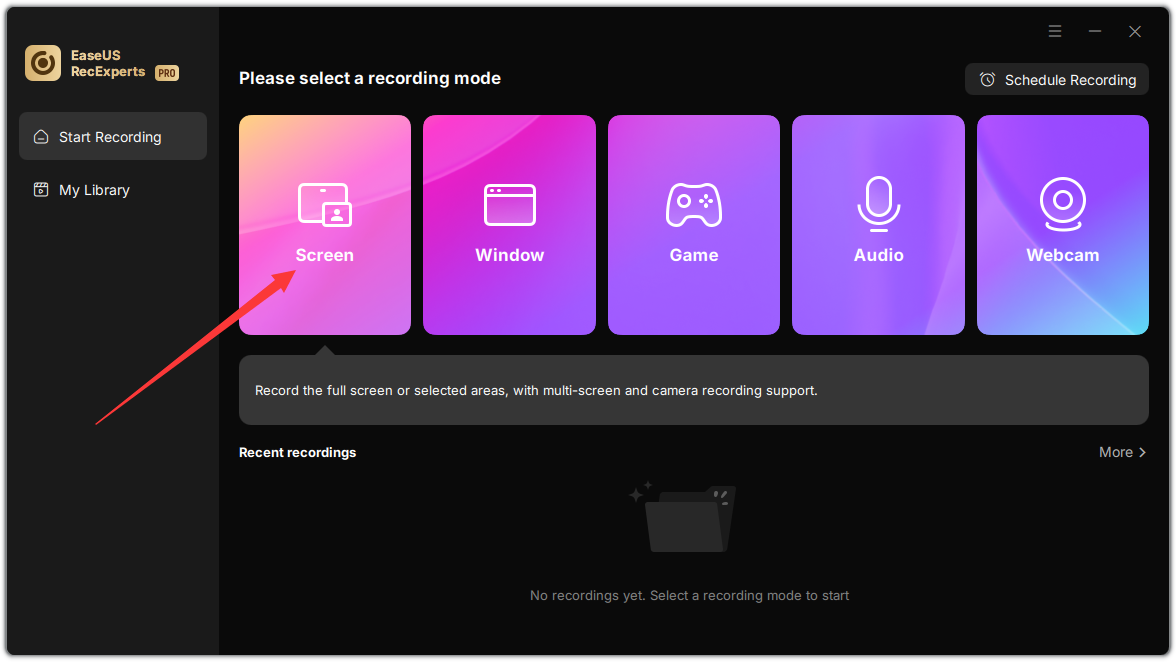

1. Launch the software and select the Screen option.
2. Choose the recording area in All Display, select Full Screen to capture your entire display or choose Custom to manually select a specific area.
3. Click the REC button to begin. During the session, use the on-screen toolbar to pause, resume, or stop the recording as needed.
Black Screen Fix
When recording videos from streaming platforms like Netflix, Hulu, or Amazon Prime, you may encounter a black screen due to HDCP (High-bandwidth Digital Content Protection) or DRM (Digital Rights Management) encryption. These security measures are designed to prevent unauthorized copying of protected content, which can interrupt screen capture and result in a blank output.
If you experience this issue, enable the Black Screen Fix option on the floating toolbar. This bypasses the encryption barrier, allowing you to record videos smoothly from these platforms.

Window Recording
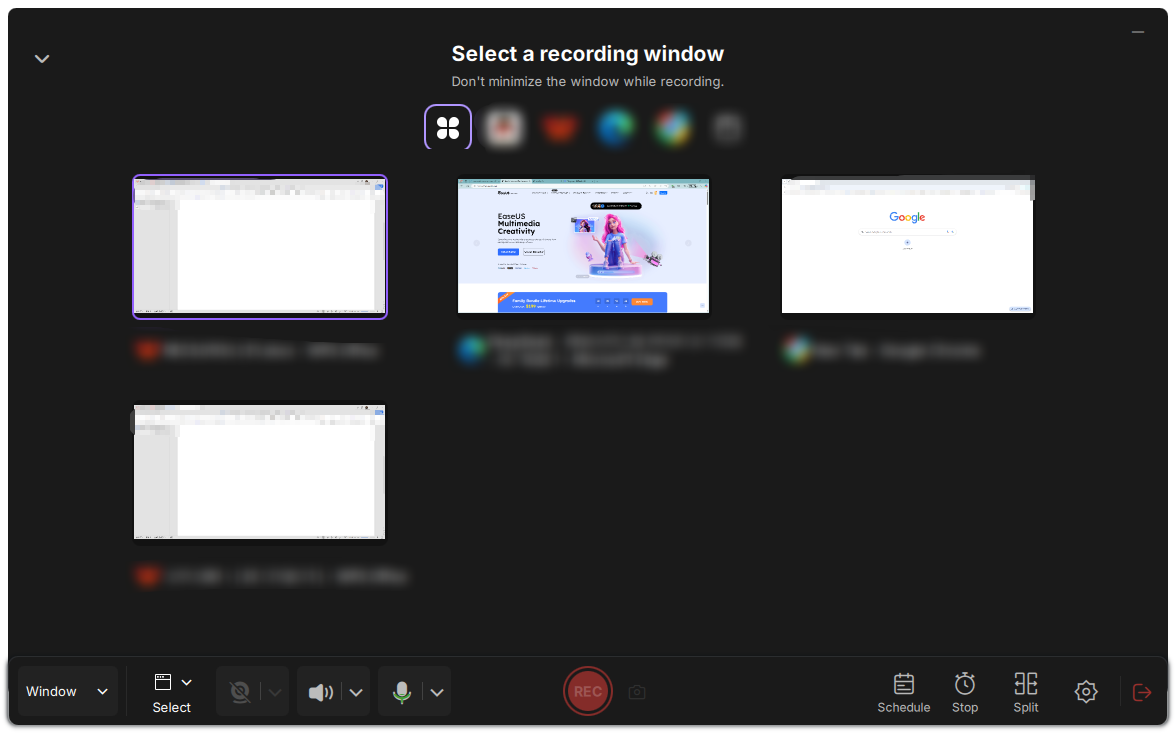
EaseUS RecExperts lets you effortlessly record any application window while multitasking. Simply click the Window button, select your target window from the list or by clicking directly on it, then start recording with the floating REC button in the bottom. The capture continues seamlessly in the background, allowing you to work normally during recording. Stop anytime using the toolbar button or hotkey (default: F9).
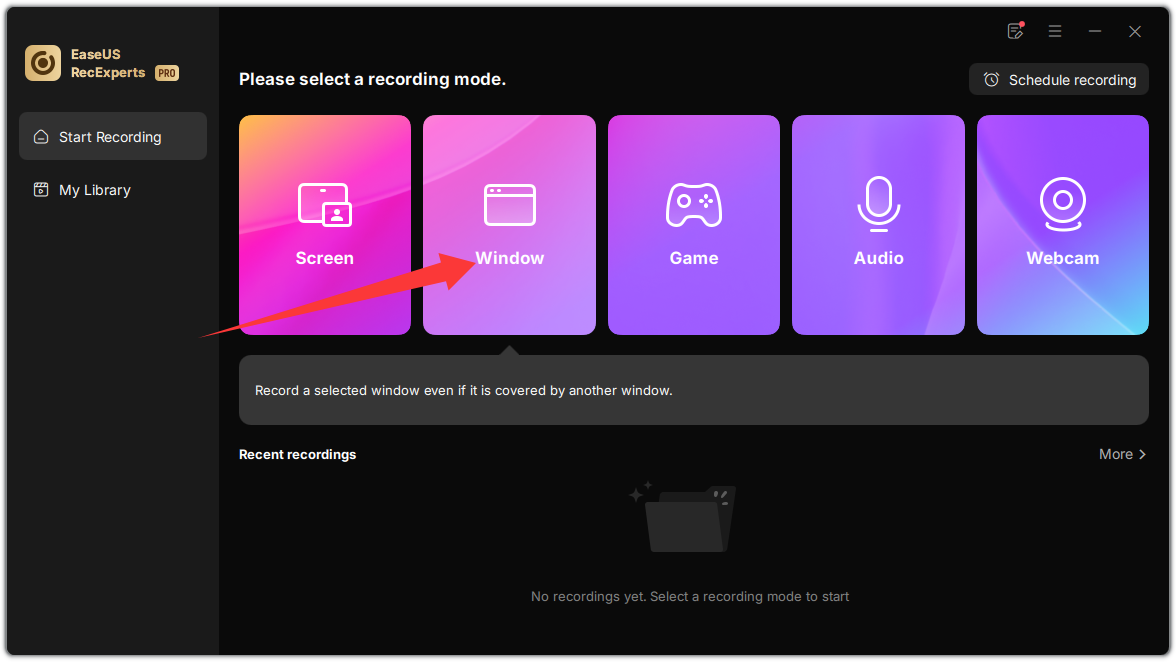
The tool supports multi-window selection for recording. Choose one of your target windows and initiate recording with the REC button.

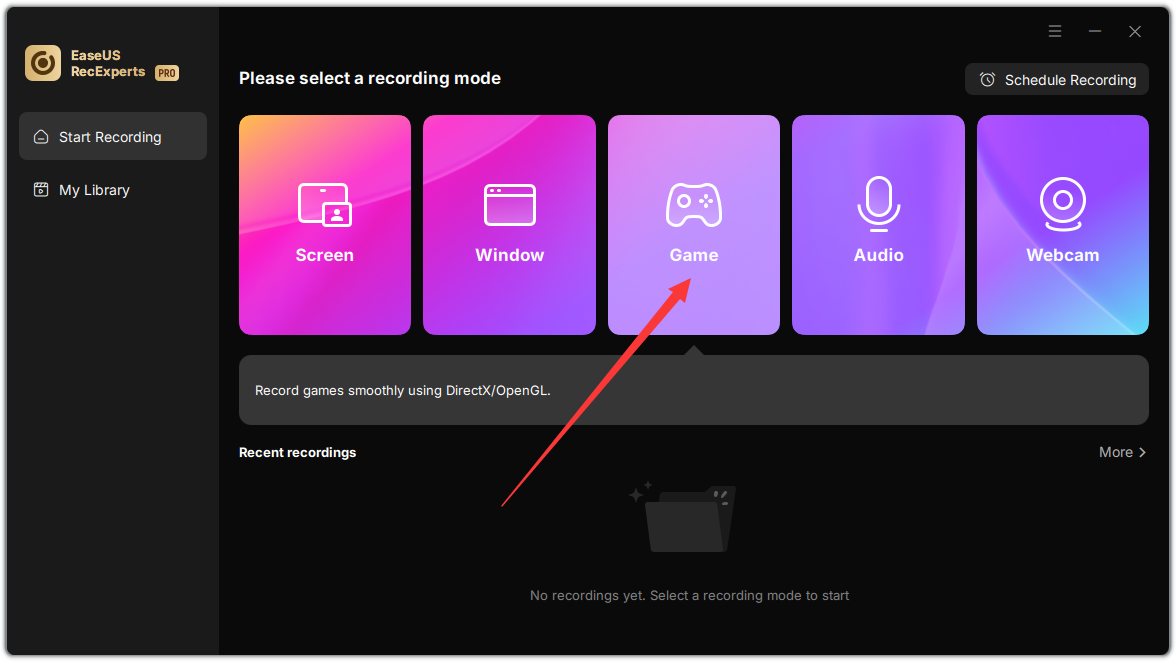
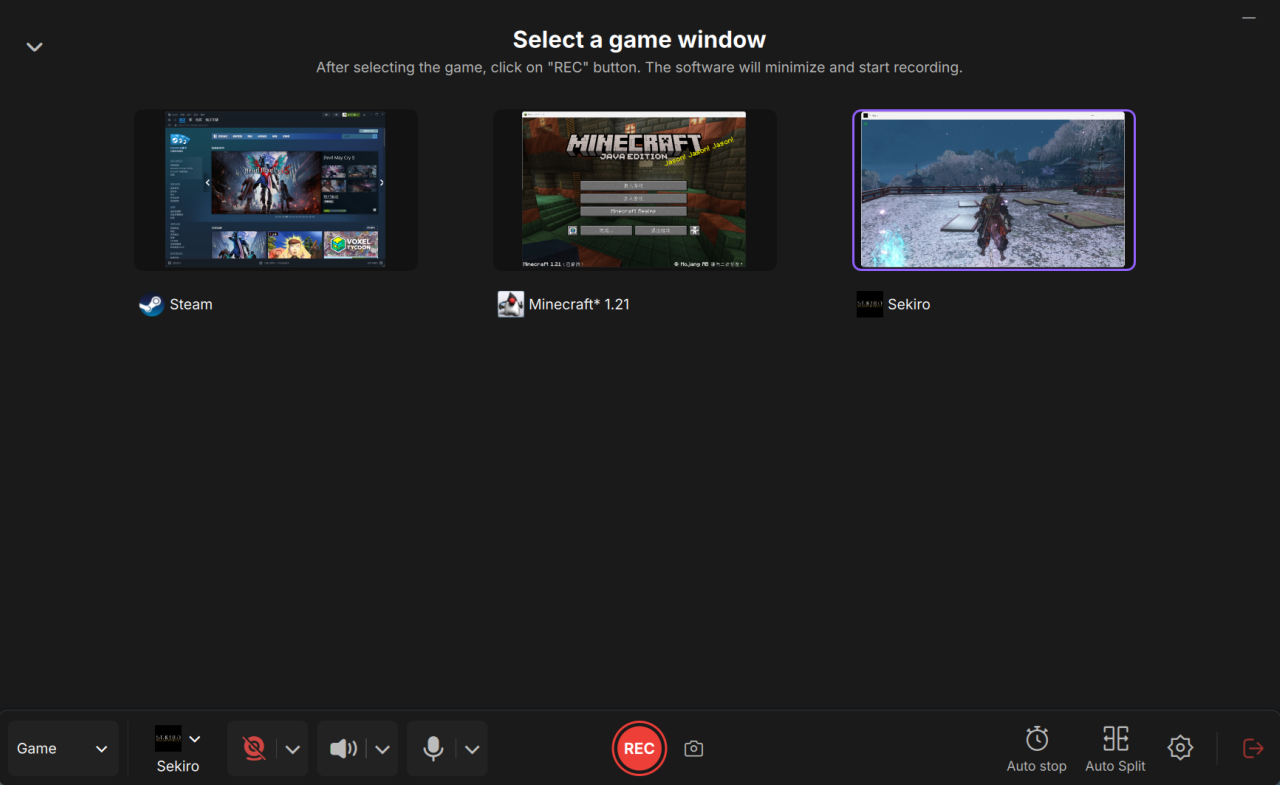
Game Recording
This feature allows you to select specific game windows for recording, simply highlight the target game window and click REC to start capturing seamlessly.
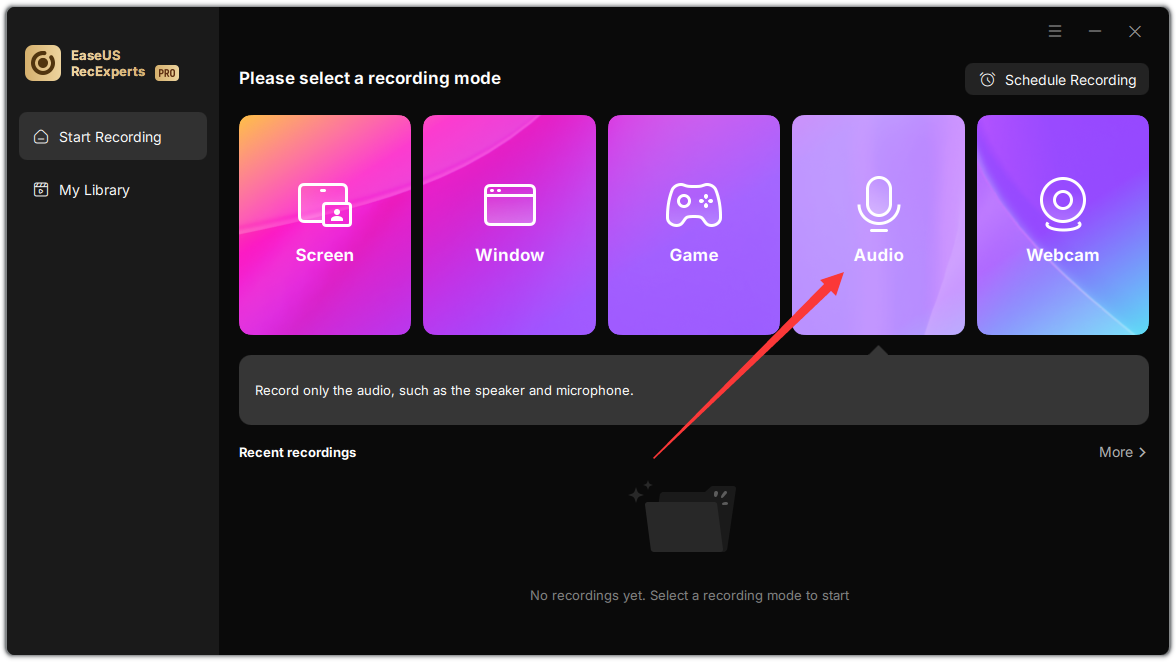
Audio
Click the Audio icon to choose whether to record system sound, microphone, both, or no sound at all. Moreover, sound volume can be adjusted accordingly within the option.
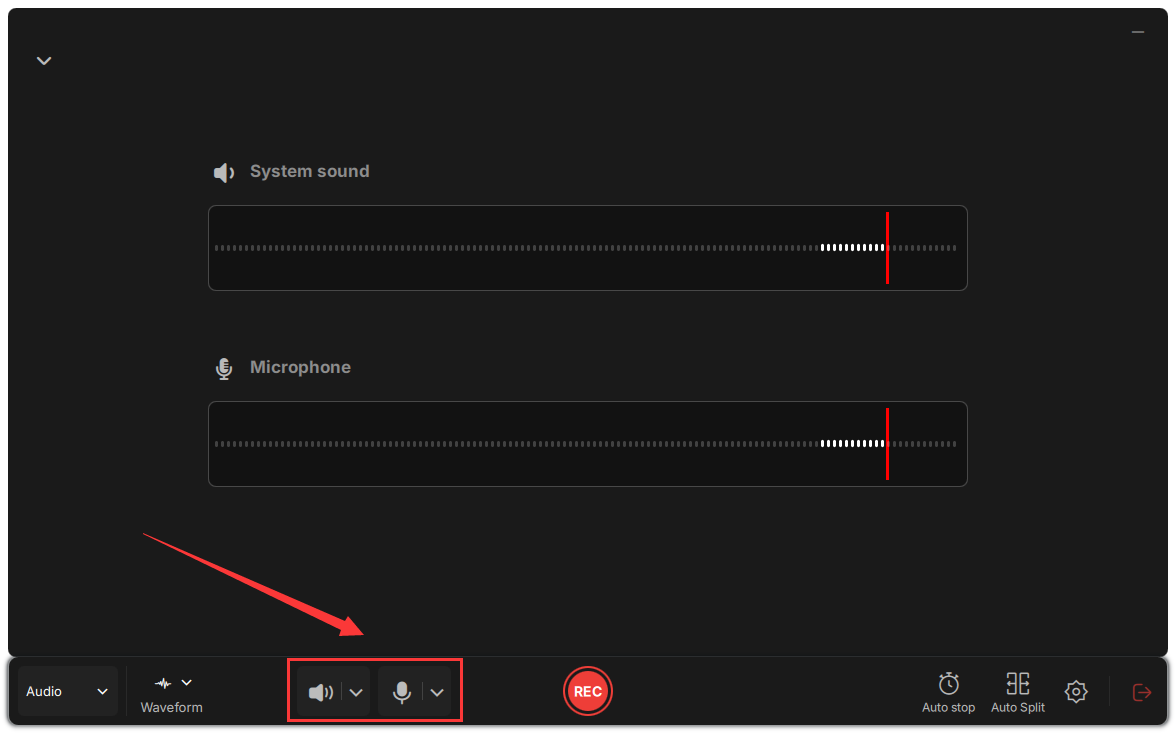
If you have already selected the screen for recording but have not set the audio options yet, you can easily access the system sound and microphone options on the floating toolbar at the bottom. Simply adjust the settings to include audio in your recording.

Webcam Recording
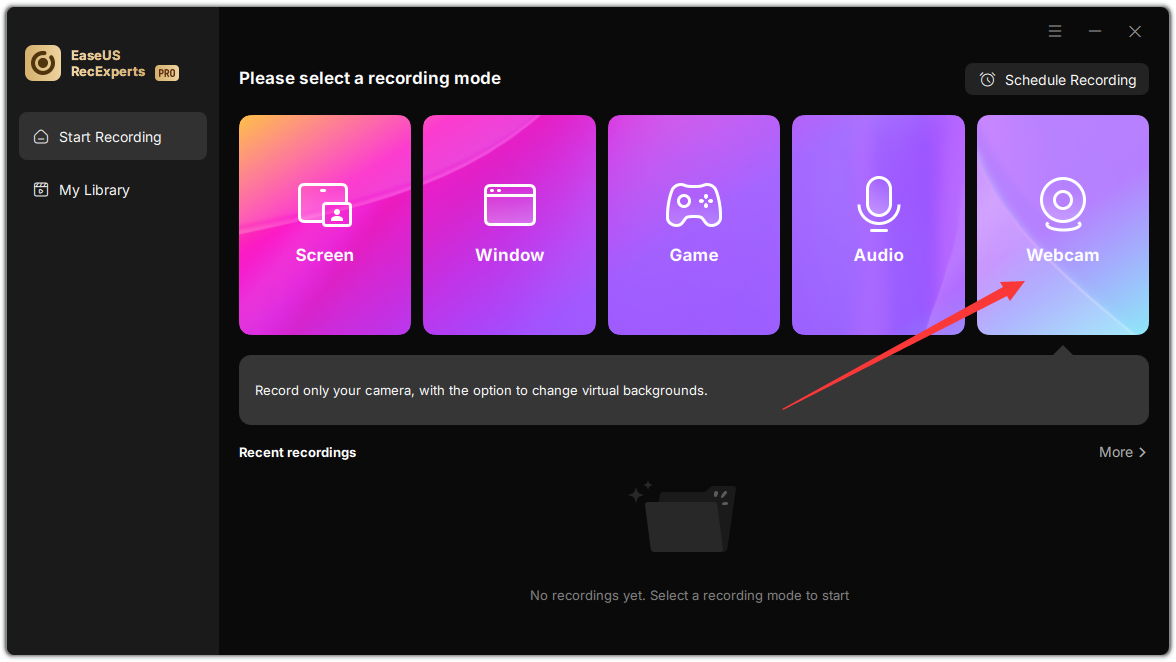
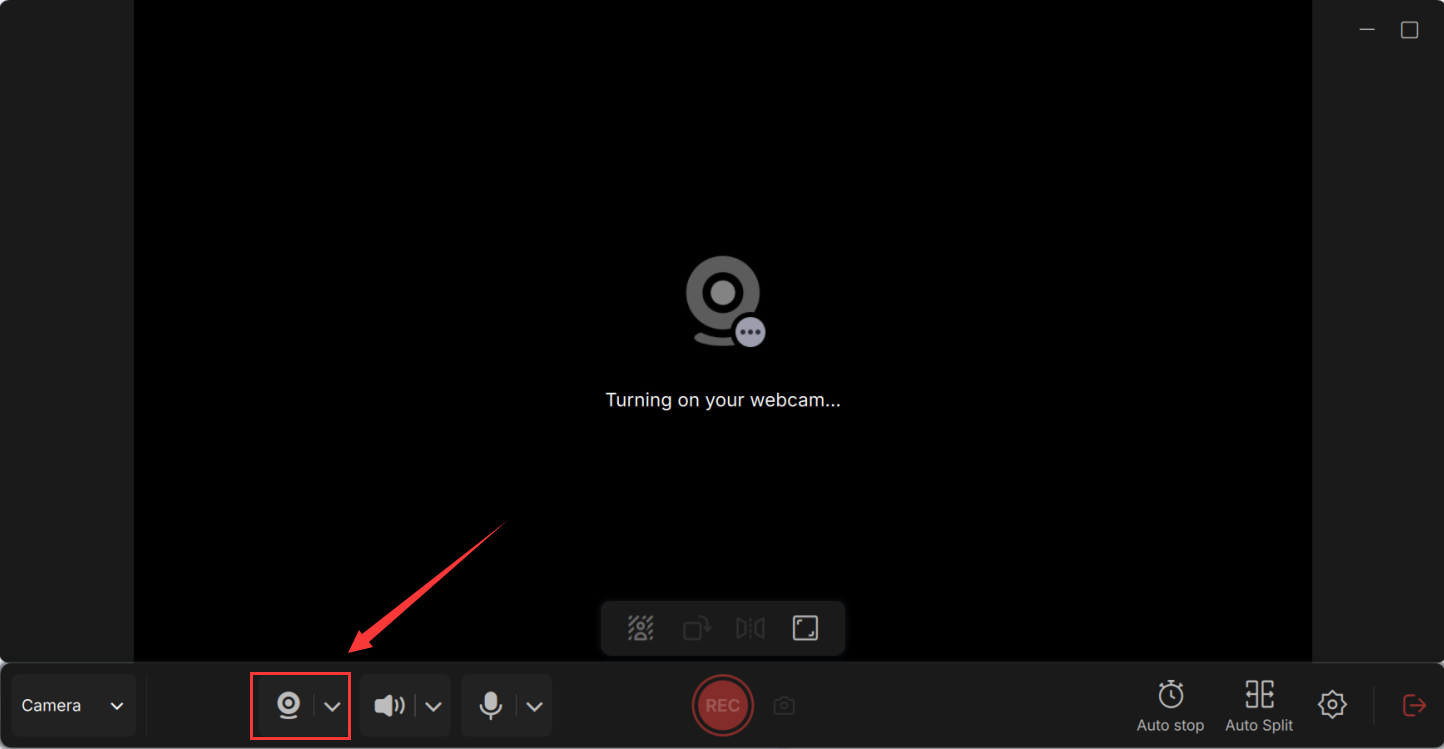
To record your webcam along with your PC screen, simply click on the Webcam icon and select your webcam device. If the program is unable to detect your webcam, try plugging in the camera before starting RecExperts and then restarting the program. This should resolve any issues with detection.
If the camera is not turned on, please click the camera symbol button located at the bottom right of the interface to choose the camera.
Stop Recording
To finish recording, you can manually click the stop button at the recording toolbar or use the default hotkey (F9) to end the video.
Once the recording is complete, you will be able to enter the preview window to play your recorded video or audio.
Auto Stop
The Auto Stop function allows you to set the recording time and file size before starting so that the recording can be automatically stopped based on your preferences.
Schedule
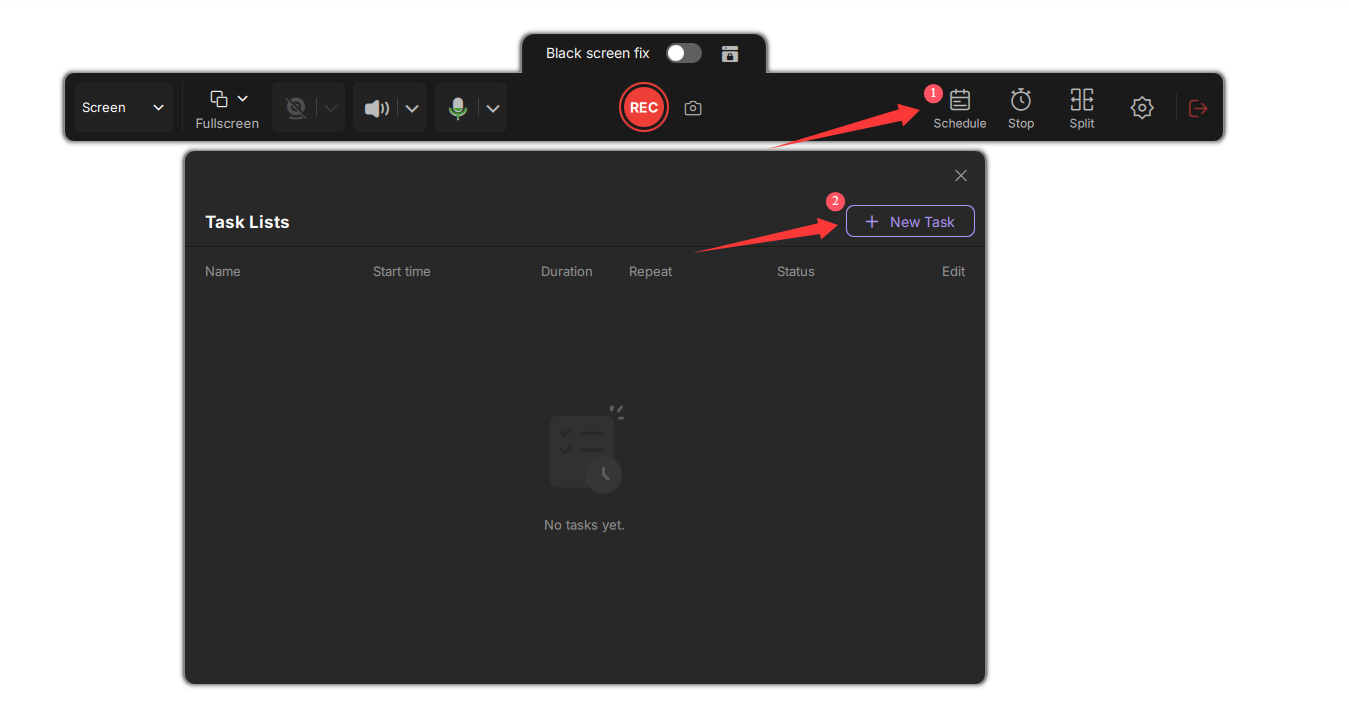
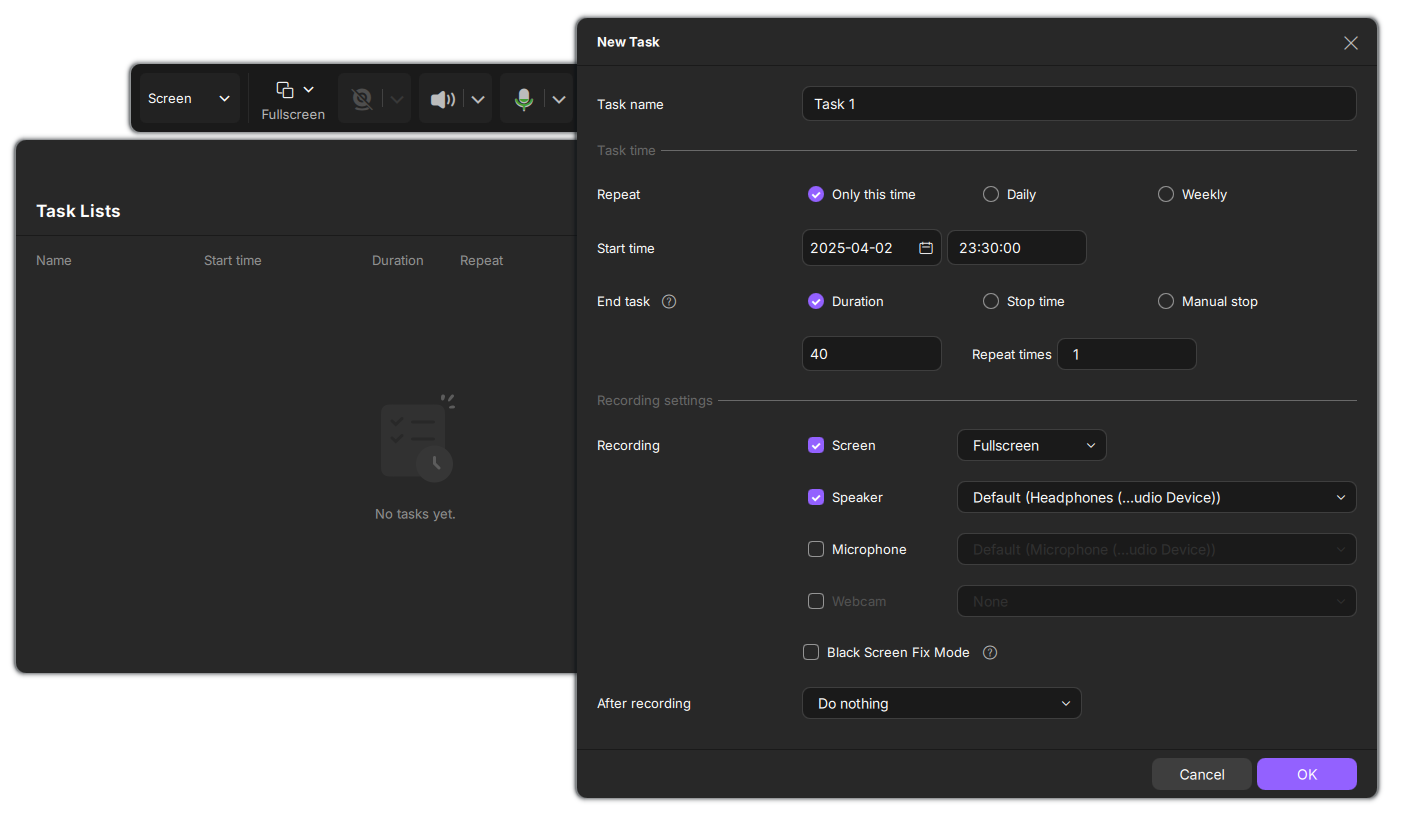
The Schedule function allows you to schedule the start time, duration, stop time, recording area, audio input, and more for your recording. By using this feature, you won't have to continuously monitor the recording process.
Split
If you have any additional requirements for the video file or recording time, the Split feature is available. To split the video file when the recording reaches a certain time or when the file reaches certain limitations, select the appropriate settings under the main interface.

My Library
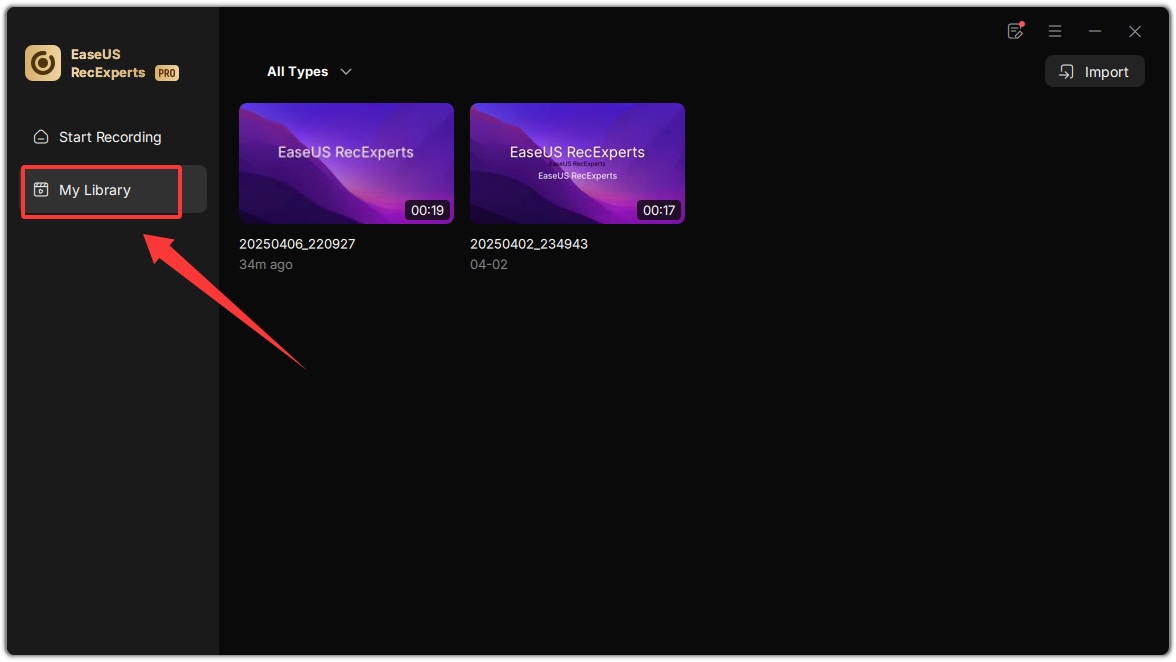
In the software's left sidebar, the My Library option stores all the video files. Access them by clicking this option.
Manage Recording
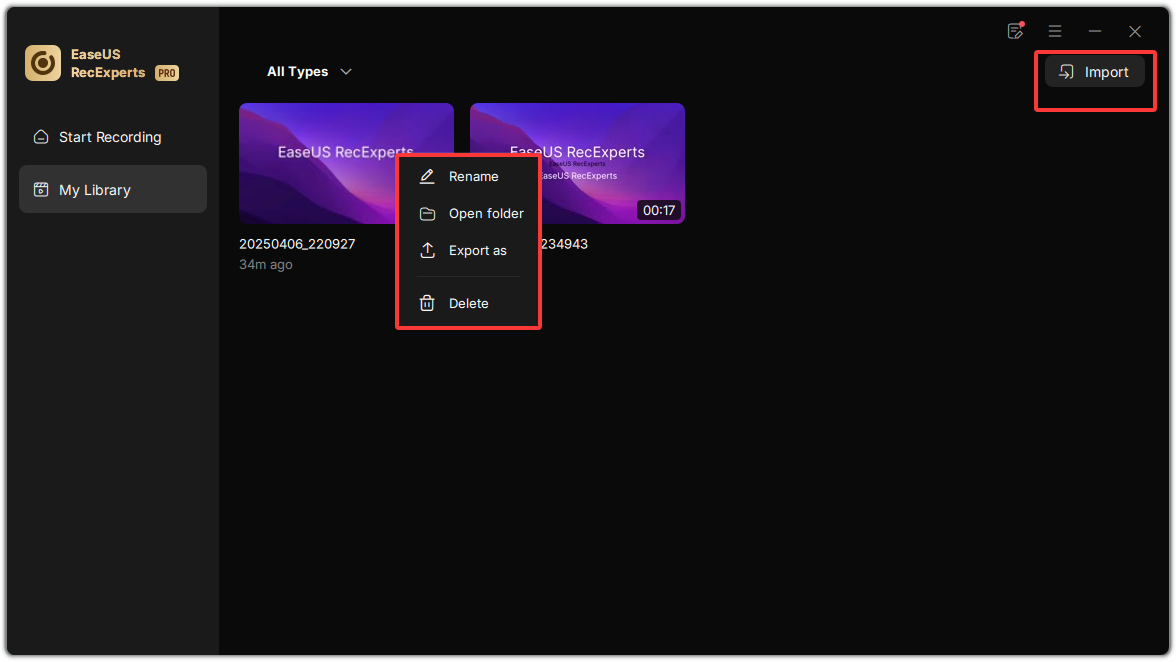
The My Library interface offers improved recording management options. Utilize the Rename function to customize the name of your recorded video, navigate to the save path effortlessly by selecting Open Folder, or opt for Save As to preserve any edited videos. If you are unsatisfied with the result, simply click the Delete option to remove the file.
Import
To import local videos, click this option and select the desired file to add.
Edit
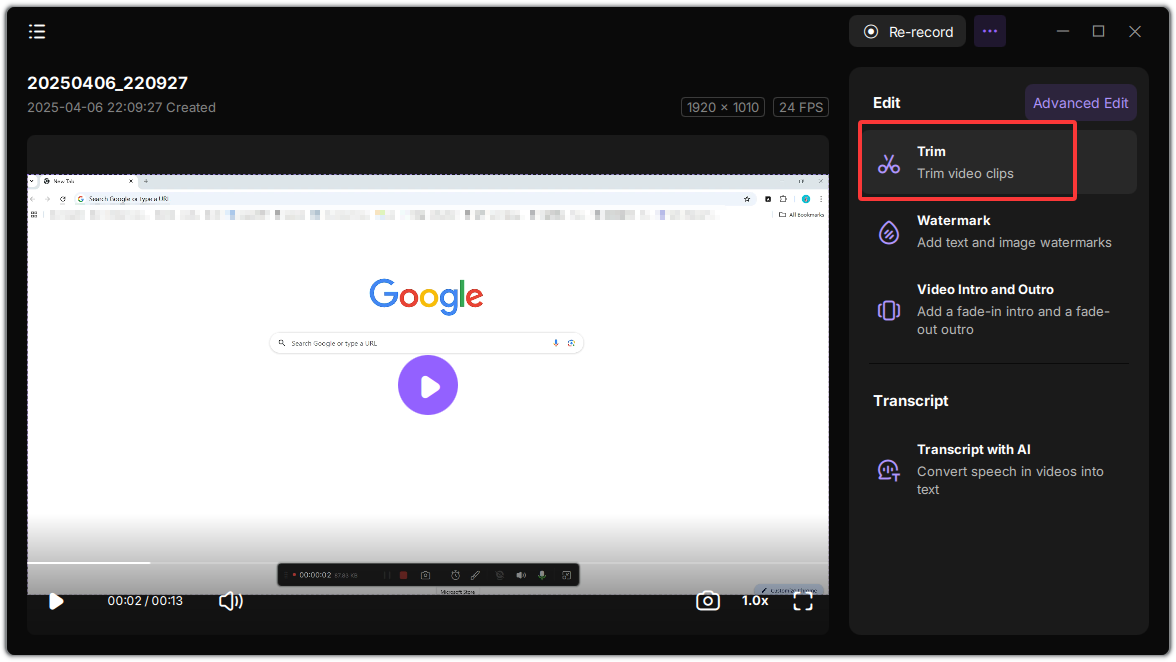
The software provides basic editing tools for video processing. These built-in features enable users to perform essential modifications and enhancements to their video content without requiring external applications.
Trim
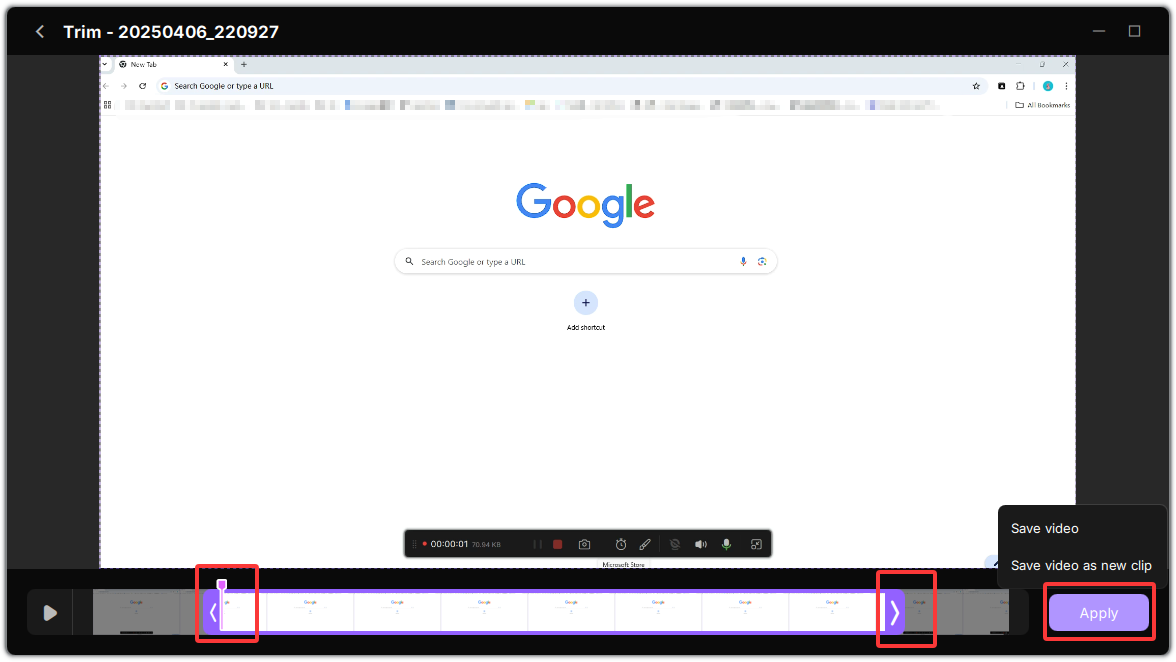
To trim a video, simply drag the two icons pointed out below to trim the video length.
Select your clip and click Apply to save - or save as a new clip.
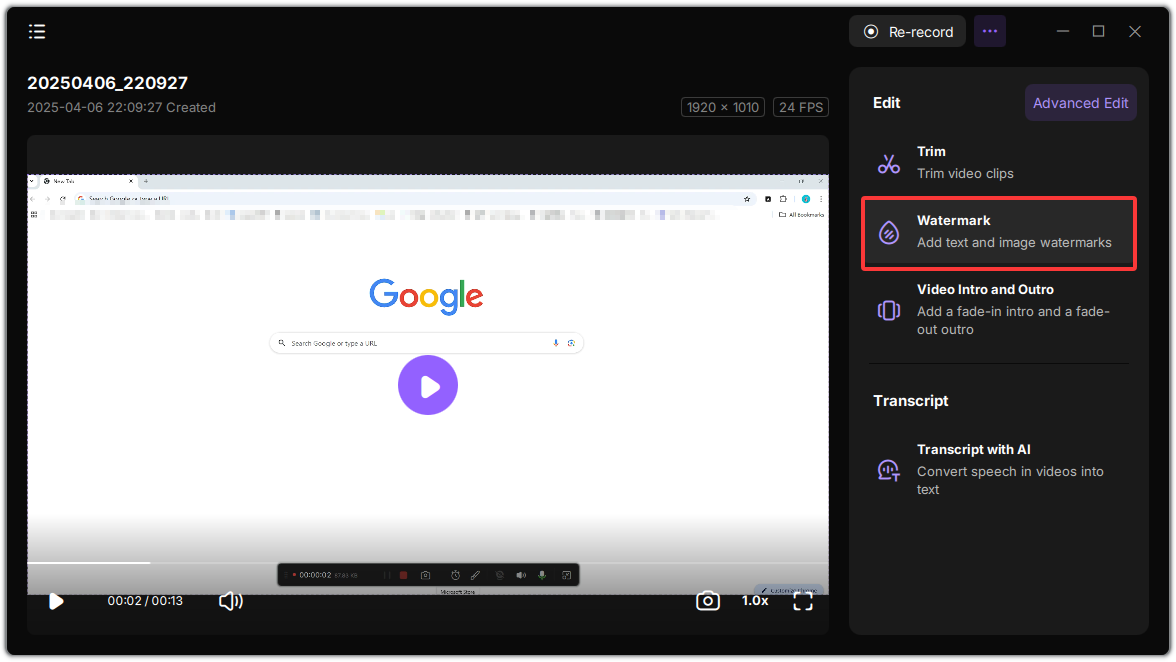
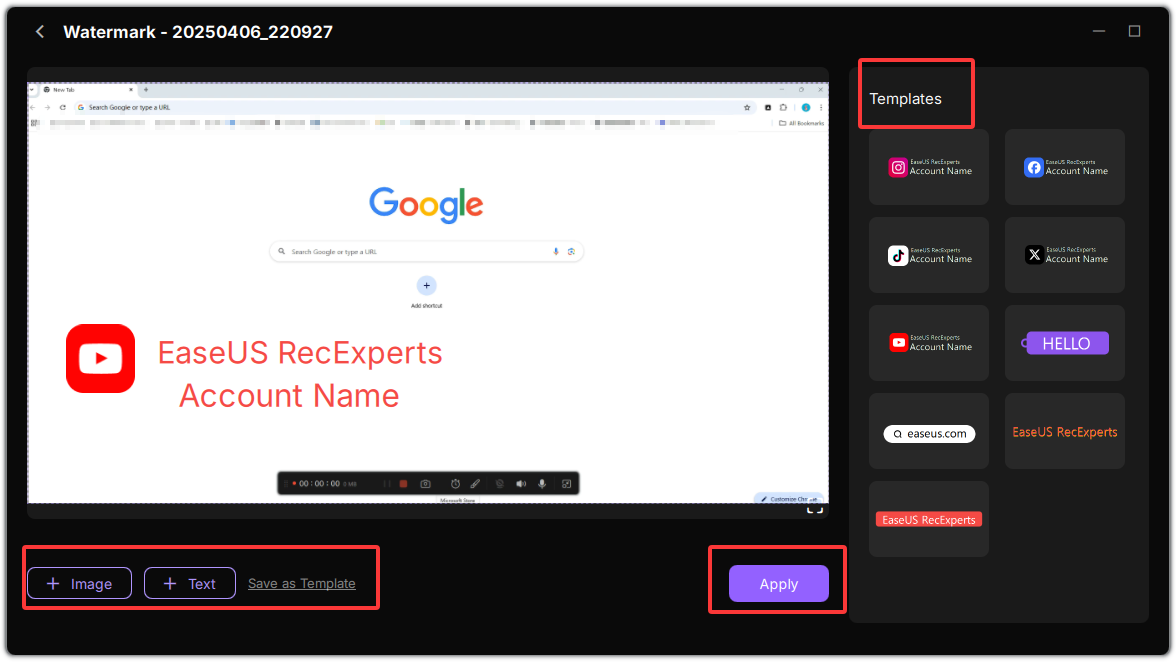
Watermark
The Watermark feature allows you to add text or image watermarks to your recordings. Choose from our pre-designed templates or upload your custom image.
Video Intro and Outro
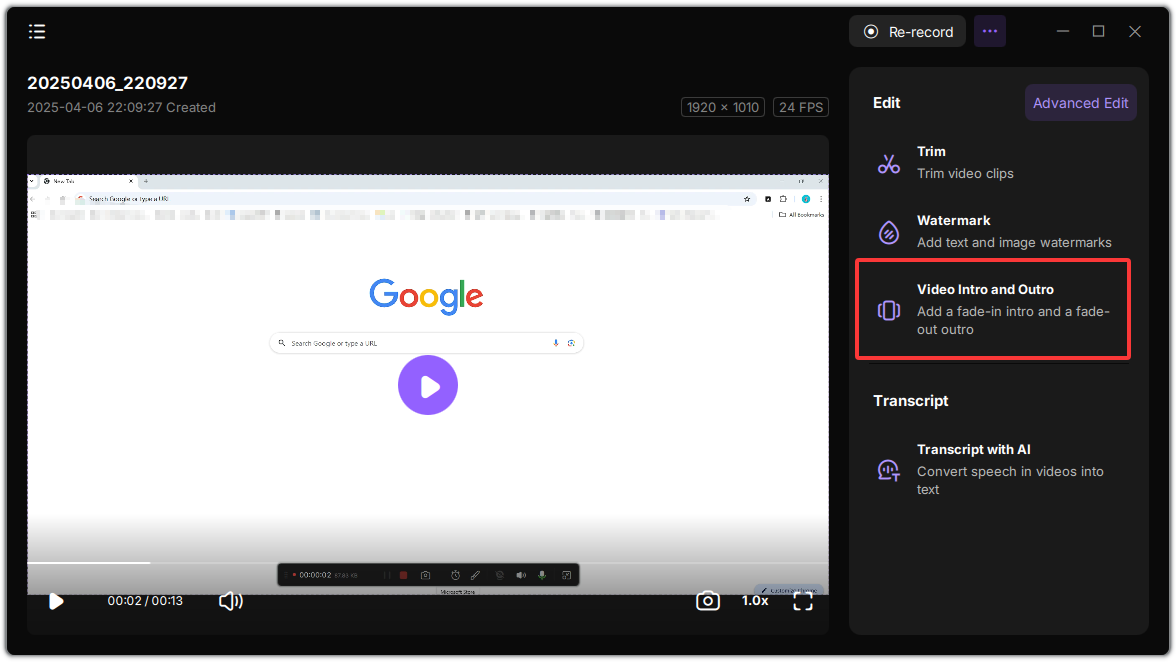
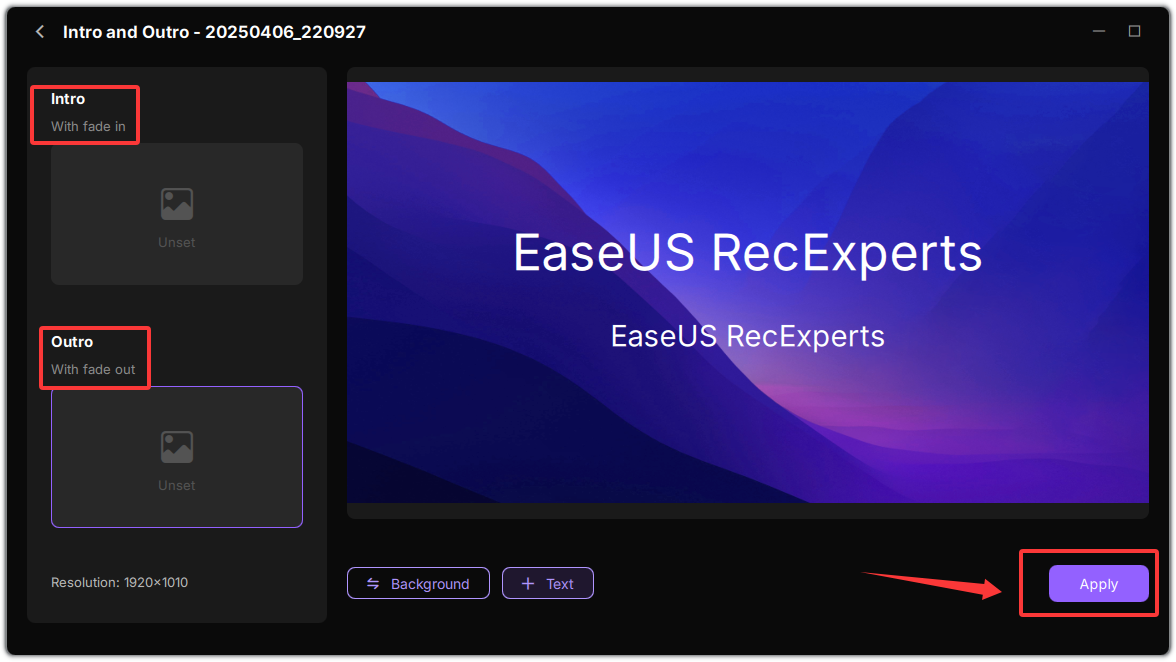
Whether you are creating a personal video or sharing a public video on social media, you can easily add intro and outro segments during the editing process. Simply click on the Video Intro and Outro feature in the Edit menu to enter the title and subtitle content.
Adjust the fade-in and fade-out effects to create smooth transitions, then click Apply to add these professional touches to the beginning and end of your video. The process is quick and effortless, instantly elevating your content's quality.
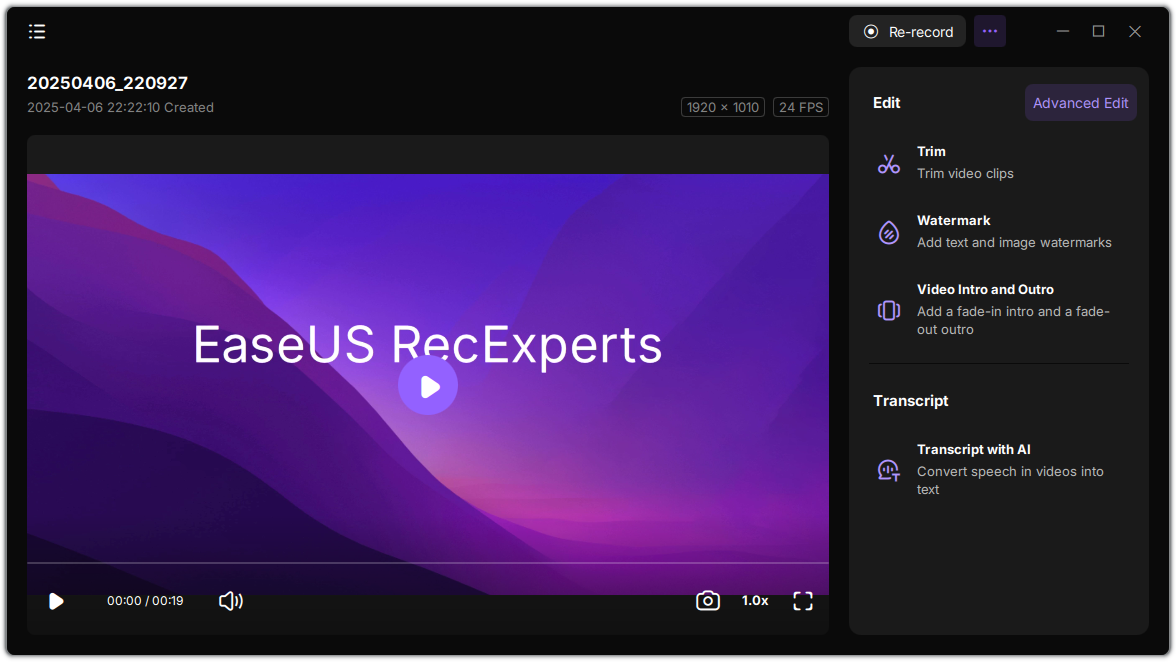
Transcript with AI
The Transcript function is an AI-powered feature in the software that enables you to automatically transcribe speech from videos into text, providing a convenient and efficient way to generate accurate transcripts.
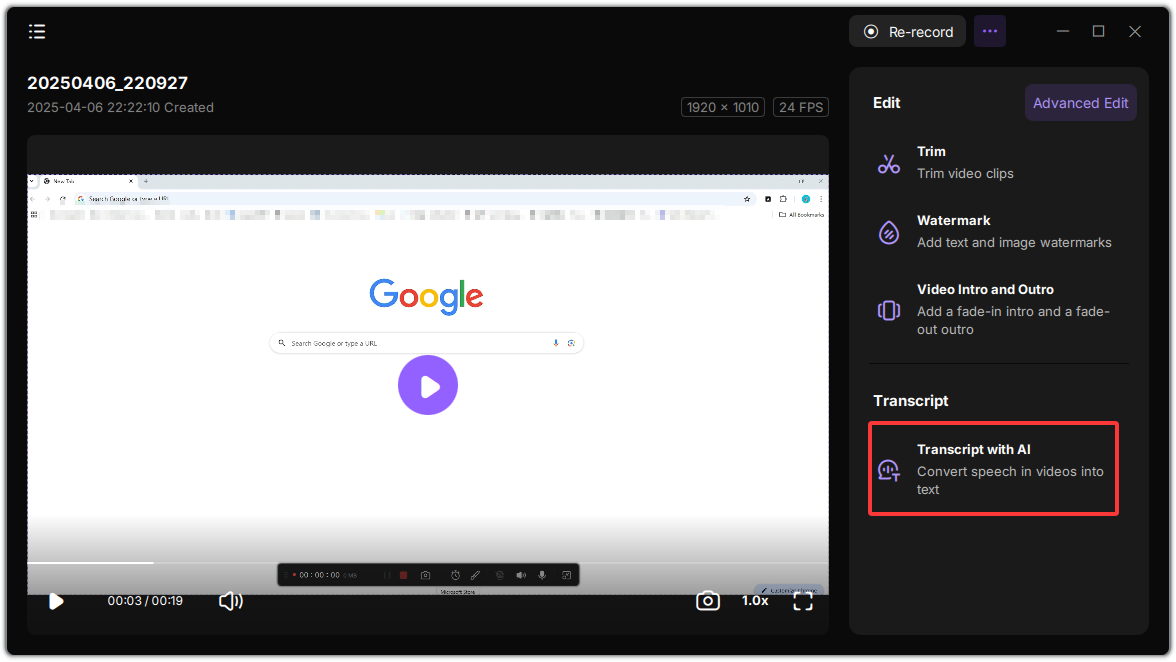
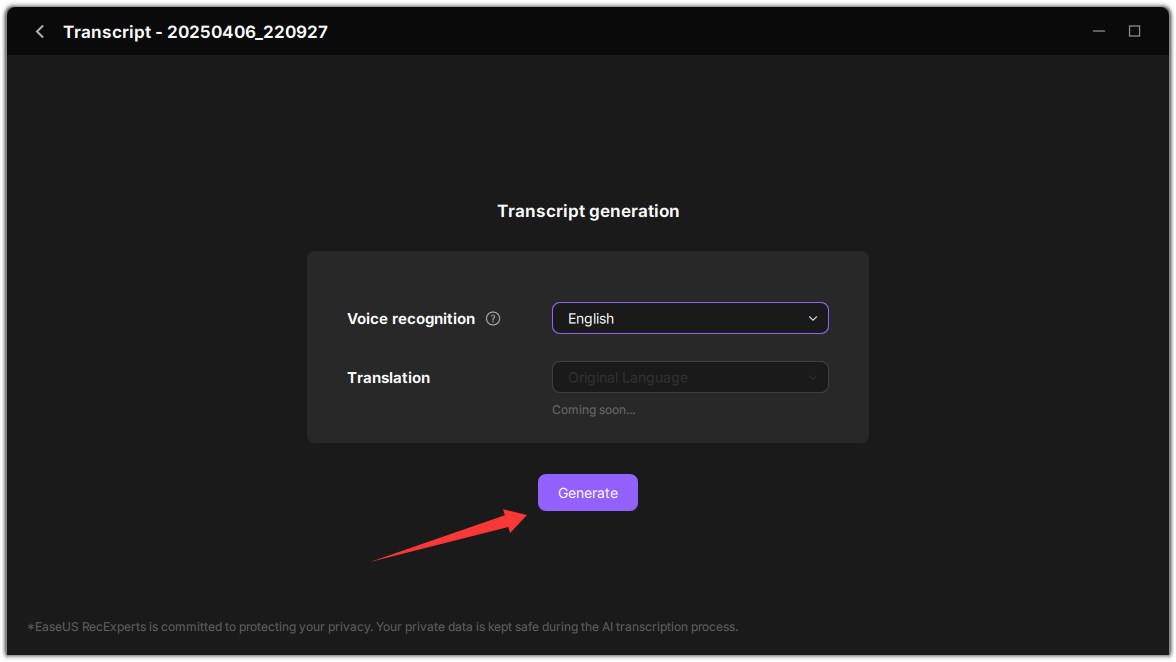
To begin, select Transcript with AI from the right sidebar. The system will automatically initiate a one-time download of the required AI model in the background. This process may take several minutes, during which other tasks can be performed. When complete, choose the desired transcript language and click Generate to proceed.
Feedback and Support
Some accidental issues might happen when you are recording. If this happens, you need to describe the issue take some screenshots about the issue, and send them to us. Click Technical Support to submit the details to our support team.
You can also directly send the details to [email protected] to receive efficient assistance.

