- About
- Discover EaseUS
- Reviews & Awards
- License Agreement
- Privacy Policy
- Student Discount
EaseUS Screenshot Online Help
This is a dedicated online help to assist you understand our product easily and quickly, for any questions and concerns not addressed on this page, please do not hesitate to contact and we will always be happy to help.
EaseUS Screenshot
Welcome
Thanks for using EaseUS ScreenShot.
EaseUS ScreenShot is a simple and intuitive tool to help you take a screenshot of your computer. With two major modes provided, it allows to customize the screenshot range you want.
Getting Started
This part outlines the basic parameters to use EaseUS ScreenShot. It is to help you acquire a general understanding before you get started.
System Requirements
EaseUS ScreenShot can be installed on the following operating systems:
Windows® 7/8/8.1/10/11
Take screenshot
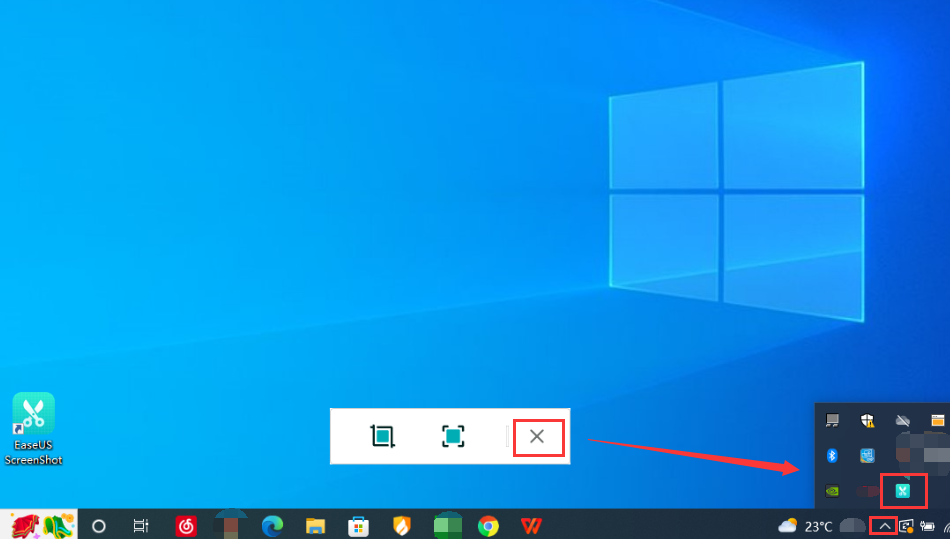
When you run the product, there will be a pop up window at the bottom of the screen, offering two methods to take a screenshot.
The “Minimize to tray” function can help you hide the window to the Tray. By the way, you can also double click the product icon in the Tray to get it back onto the main screen.
Please refer to the guide below for taking screenshots with 2 methods.
Rectangular screenshot
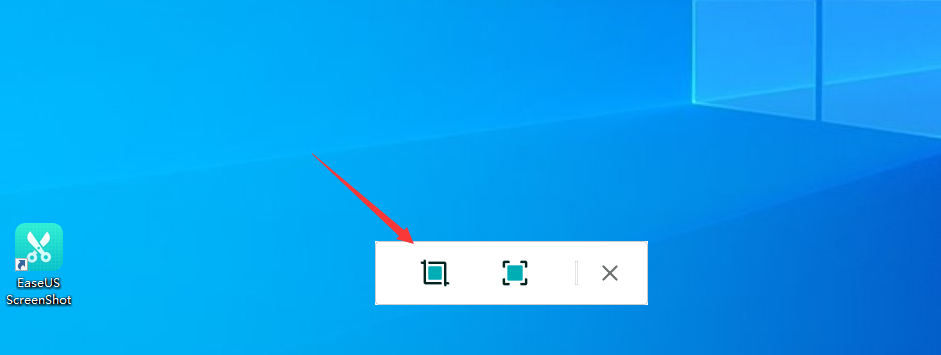
To capture a specific range of the screen, please click the Rectangular screenshot button. Then left-click the mouse and move it to customize the range you need.
When moving the mouse, you can copy the color by clicking the hotkey C, or switch Hex/RGB by clicking Shift.
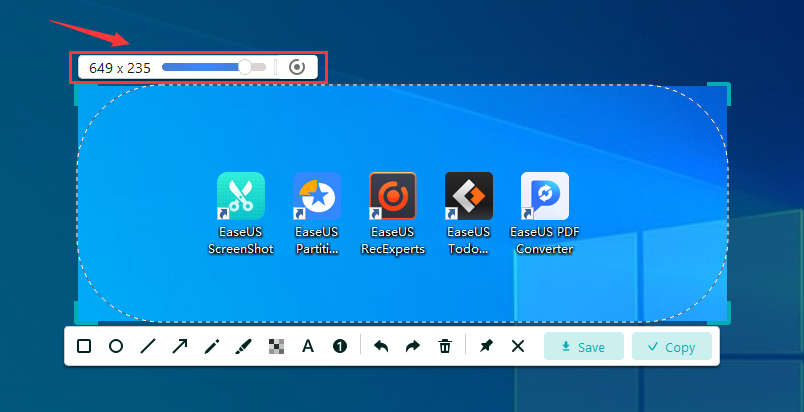
You are also allowed to change the oval screenshot by adjusting the parameter on the top-left corner.
Full screenshot
Please click the Full screenshot button to take a full screenshot of the desktop with one click.
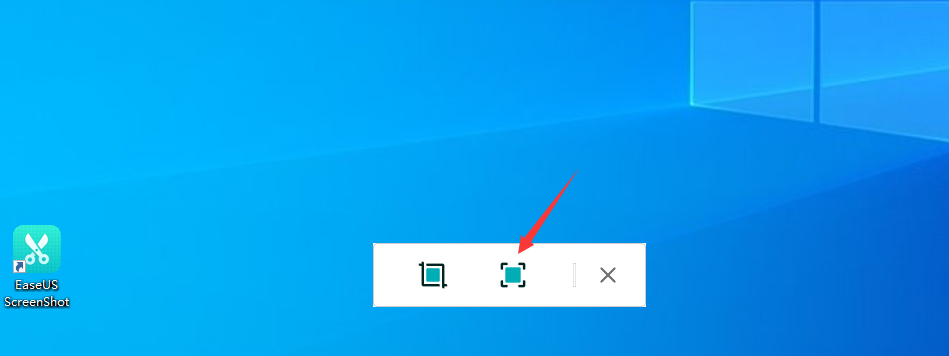
Note:
There are also other Hotkeys that help you take a screenshot quickly.
Double-click Ctrl: Rectangular screenshot
Double-click Alt: Full screenshot
Enter: Copy the screenshot to the clipboard
Space: Save the screenshot
ESC or right-click mouse: Exit screenshot
Mouse Wheel: Change tool size
Edit screenshot
After taking a screenshot, please click the Save button to save it as a file. Or click the Copy button and then paste it where you want.
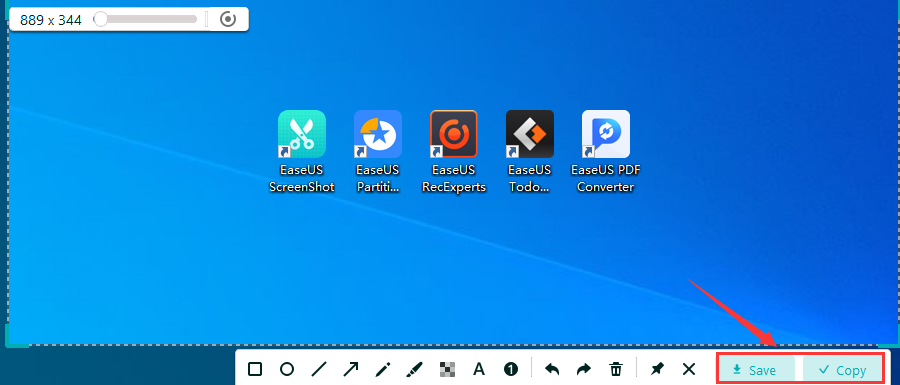
We also provide other useful options to edit before saving.
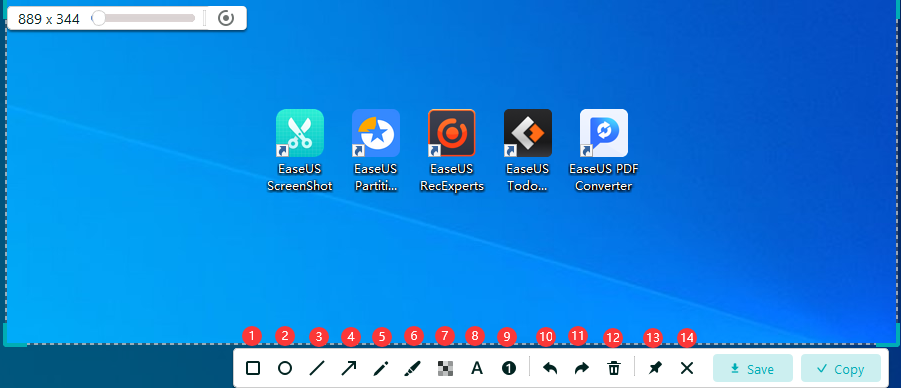
1.Rectangle: add a rectangle to the the screenshot.
2.Oval: add an oval to the screenshot.
3.Line: add a straight line to the screenshot.
4.Arrow: add an arrow to the screenshot.
5.Pen: highlight the specific content just the same was as using a pen.
6.Highlight: highlight the specific content with a brush.
7.Mosaic: add mosaic to the screenshot.
8.Text: add text to the screenshot. The text format, color and size are selectable.
9.Numbering: specify the content with number.
10.Undo: cancel the last edit you made to the screenshot.
11.Redo: restore the last undo edit.
12.Clear: clear all the changes with one-click.
13.Pinned to the Screen: pin the screenshot on your desktop.
14.Exit: exit the screenshot-taking process.
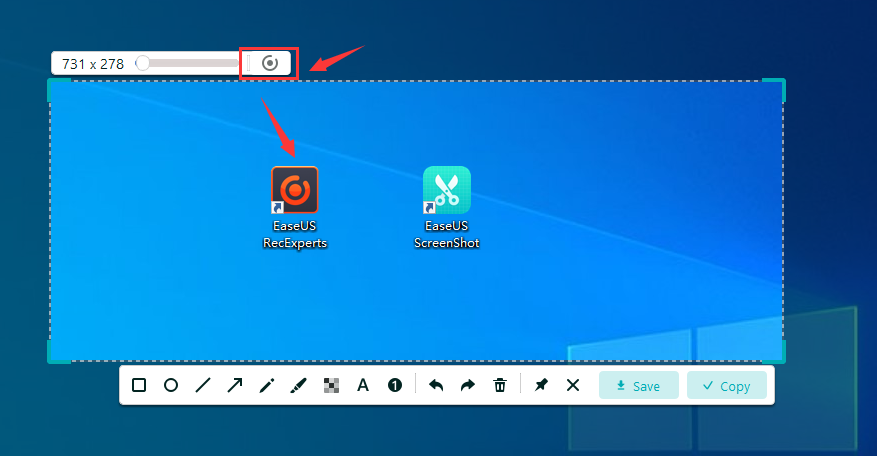
You can find a screen recording button in the floating bar. Click it to get EaseUS RecExperts if you want to record your screen.
