- About
- Discover EaseUS
- Reviews & Awards
- License Agreement
- Privacy Policy
- Student Discount
If you are seeking what a screencast is, and searching for clear-cut information about how to create an effective one, you have come to the right place. This post will discuss the SCREENCAST in detail. In the end, you will learn some tips for creating a screencast video. Now, let's dive into it!
What Is A Screencast?
As its name implies, screencasting is a digital recording technique that captures the entire computer screen display along with accompanying audio narration. It can capture everything on your screen and webcam, including mouse movements, clicks, keyboard actions, and more. It can also record the screen and audio to add your explanations. This recording method is commonly used to demonstrate software applications, create tutorials, offer online educational content, and provide visual instructions.
Remember that it differs from the screenshot. A screencast can also be called a screen capture video or screen recording, which creates a video instead of an image!
Share this helpful guide with others!
What Is Screencast Used for?
Now, you might already have a better understanding of the screencast. This time, let's explore its applications. It is used for a variety of purposes across different industries and fields. Some common uses of screencasts include:
#1. Software Demonstrations
Screencasts are often used to showcase the features and functionality of software applications. Companies and individuals create screencasts to demonstrate how to use specific tools, navigate through different menus, and perform various tasks within the software.
#2. Tutorials and Training
Screencasts are widely used to create tutorial videos and online training courses. They provide step-by-step instructions on how to complete tasks, solve problems, or learn new skills. Screencasts are particularly helpful in providing visual demonstrations of complex concepts or processes.
#3. Educational Content
In the field of education, teachers and educators use screencasts to create engaging and interactive learning materials. Screencasts can be used to explain difficult topics, present study materials, or deliver virtual lectures to students.
#4. Presentations and Reports
Screencasts can be utilized to create dynamic presentations or reports that showcase data, charts, and other visual elements. Compared to traditional slide shows or text-based documents, they offer a more engaging way to present information.
#5. Remote Collaboration
In remote work environments, screencasts are valuable tools for communicating ideas, sharing project progress, and providing feedback to colleagues. They allow team members to visually demonstrate their work, collaborate on projects, and share information effectively.
#6. Technical Support
Screencasts are often used in technical support scenarios to guide users through troubleshooting steps, resolving issues, or setting up software or devices. They provide visual instructions to help users easily understand and follow the troubleshooting process.
Spread out this post with others on social platforms!
How to Create a Screencast Quickly
This section will walk you through the steps to create a screencast video quickly!
Step 1. Download and Install A Screen Recorder
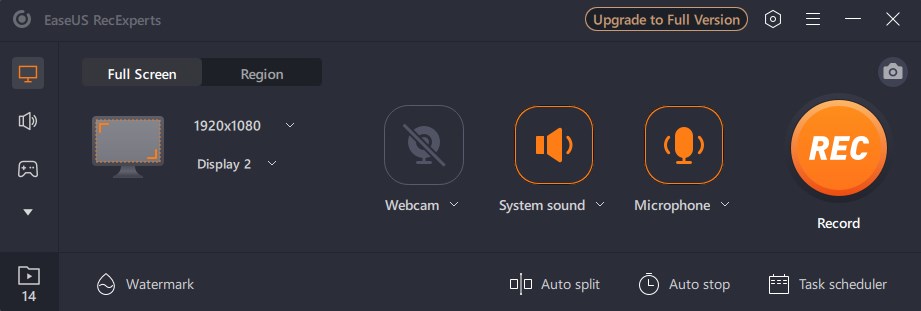
First of all, you need to choose an excellent screen recorder based on your needs. Considering you might use a PC or Mac, we take EaseUS RecExperts as an example. This video recorder is compatible with both macOS and Windows, helping users complete almost all recording tasks in simple steps. It is worth mentioning that this software will leave no watermark on any of your recordings! So, you can hit the below button to get it!
Step 2. Adjust the Recording Parameters and Start the Recording
Next, you need to customize your preferences and check if you have enabled all the necessary recording features. For example, if you want to create some video classes, you might need to capture screen, audio, and your webcam at the same time. If you are going to create a technical support video, you might need to capture your screen in high quality. So, you need to remember to adjust all the recording settings before starting recording. When all settings are changed, you can start recording.

Step 3. Edit Your Recording
Once your recording is over, you can enhance it with editing tools. EaseUS RecExperts offers some basic ones to trim videos, add opening titles, and more. If you want to use advanced tools, you can switch to professional video editors!
Tips for Creating Effective Screencast Videos
To help you make effective and high-quality screencast videos, we list some tips below for you:
Write and follow your script. You'd better write your script first of all and follow it to practice. This way, your screencast video will be ordered and organized.
Find a professional screen recorder. An easy-to-use screen recorder will always be helpful, as it lets you create screencasts easily and quickly.
Pay attention to your tone (if you want to add some audio narrations). You should stay positive and friendly, as personality and energy are communicated through subtle messaging.
Edit your screencast videos with professional tools. You can enhance your screencast videos with transitions, sound effects, background music, etc.
The Bottom Line
Now, I believe you must have a better understanding of the SCREENCAST. If you find this post helpful, don't forget to share it now!
Was This Page Helpful?
Jane is an experienced editor for EaseUS focused on tech blog writing. Familiar with all kinds of video editing and screen recording software on the market, she specializes in composing posts about recording and editing videos. All the topics she chooses
Related Articles
-
Starfield 30 FPS: Everything You Want to Know
 Jane Zhou/2025-01-10
 -
Instagram Video Length Limit: 2025 Ultimate Guide for Posts/Stories/Lives/Reels/Ads
 Jean/2025-01-10
 -
The Game Awards 2025 (TGA): Winners, Top Games, and Tools for Gamers
 Jean/2025-01-10
 -
OnlyFans Banner Size/Dimensions [2025 Tips&Tricks]
 Jane Zhou/2025-01-10