-
![]()
Daisy
Daisy is the Senior editor of the writing team for EaseUS. She has been working in EaseUS for over ten years, starting from a technical writer to a team leader of the content group. As a professional author for over 10 years, she writes a lot to help people overcome their tech troubles.…Read full bio -
Jane is an experienced editor for EaseUS focused on tech blog writing. Familiar with all kinds of video editing and screen recording software on the market, she specializes in composing posts about recording and editing videos. All the topics she chooses …Read full bio
-
![]()
Alin
Alin is an experienced technical blog writing editor. She knows the information about screen recording software on the market, and is also familiar with data cloning and data backup software. She is expert in writing posts about these products, aiming at providing users with effective solutions.…Read full bio -
Jean is recognized as one of the most professional writers in EaseUS. She has kept improving her writing skills over the past 10 years and helped millions of her readers solve their tech problems on PC, Mac, and iOS devices.…Read full bio
-
![]()
Jerry
Jerry is a fan of science and technology, aiming to make readers' tech life easy and enjoyable. He loves exploring new technologies and writing technical how-to tips. All the topics he chooses aim to offer users more instructive information.…Read full bio -
![]()
Rel
Rel has always maintained a strong curiosity about the computer field and is committed to the research of the most efficient and practical computer problem solutions.…Read full bio -
![]()
Gemma
Gemma is member of EaseUS team and has been committed to creating valuable content in fields about file recovery, partition management, and data backup etc. for many years. She loves to help users solve various types of computer related issues.…Read full bio -
![]()
Shelly
"I hope my articles can help solve your technical problems. If you are interested in other articles, you can check the articles at the bottom of this page. Similarly, you can also check my Twitter to get additional help."…Read full bio
Page Table of Contents
Alin
Updated on Jan 21, 2026
0 Views |
0 min read
Screenshots are one of the most beneficial features that allow the user to capture their exact screen. By taking screenshots, users can share them with their friends and colleagues for multiple purposes. For instance, you can take screenshots of your chats with friends instantly to read the important messages in them anytime. Moreover, if you find any helpful material on web pages that you want to use for academic purposes, a screenshot saved on your PC can assist you in revisiting the information easily.
Some users, while taking screenshots on their PC, do not know the exact location of saved screenshots. If you don't have an idea about screenshot locations in your Lenovo, read this article to learn about multiple easy methods.
Where Do Screenshots Go on Lenovo?
Do you think about where do screenshots go on Lenovo? Once you take a screenshot on your computer, it can be saved in various locations that you may not know. To learn about multiple screenshot locations, read this part carefully.
- Location 1: Copy Screenshots to Clipboard
- Location 2: Save Screenshots to the Screenshots Folder
- Location 3: Save Screenshots to the Captures Folder
- Location 4: Upload Screenshots to OneDrive
Location 1: Copy Screenshots to Clipboard
Many users take a screenshot on Windows by pressing the "PrtSc" button, also known as Print Screen. Through this, the screenshot does not get saved on any file; instead, it gets saved on the clipboard. By pasting the screenshot on any image editor such as Paint, you can save your screenshot easily. If you have taken a screenshot from the "PrtSc" button, follow these steps next:
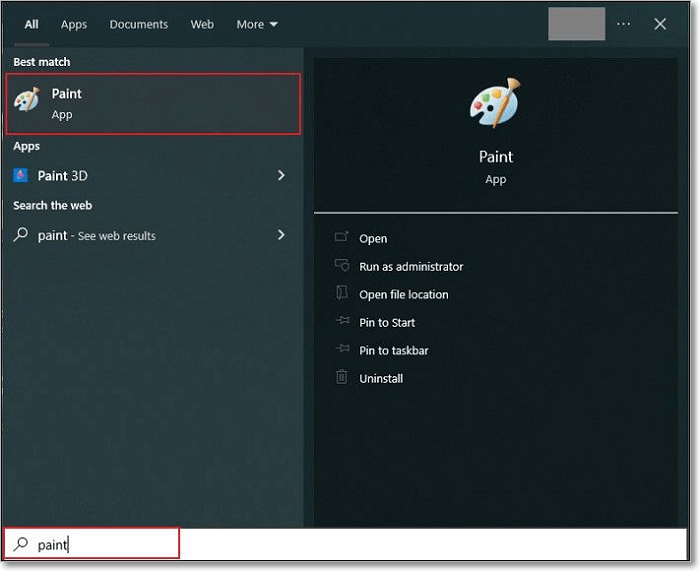
Step 1: Tap on the "Search" icon on the taskbar. Next, type Paint on the Window's search bar and press "Enter."
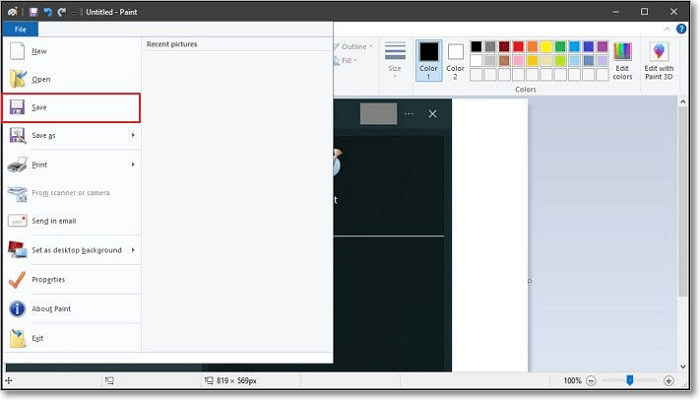
Step 2: To paste the screenshot, press "Ctrl + V" from your keyboard. Once done, go to the "File" button and tap on "Save." Now give the file name and choose the location before pressing the "Save" button.
Location 2: Save Screenshots to the Screenshots Folder
If you have not used the "PrtSc" button to capture a screenshot and have saved it in the screenshot folder, this method will tell you about the related screenshot location. To navigate to the screenshot folder, follow the below steps:
Step 1: Start by clicking on the "File Explorer" on your computer. From the left section of the File Explorer, click on the "This PC" option.

Step 2: Under the section of "This PC," tap on "Pictures." In this category, you would be able to see the folder named "Screenshots." Double-click on this folder to find your captured screenshots on your PC.

Location 3: Save Screenshots to the Captures Folder
To save screenshots on the Captures folder, you can either press the "Windows," "Alt," and "PrtSc" keys or can utilize the "Windows 10 Game Bar". Through either of these methods, you can save the screenshot to the captures folder easily. To find the screenshot location in the captures folder, use the below steps:
Step 1: Open the "File Explorer" on your PC by clicking on it. Once done, click on "Videos" given in the left section of the window.

Step 2: In the "Videos" section, you can find the "Captures" folder. By opening this folder, you can find your saved screenshots.

Location 4: Upload Screenshots to OneDrive
If you don't want to lose the saved screenshots from your device because of accidental deletion or some virus, you can use the Auto-Save feature provided by the OneDrive app. By enabling the Auto-Save feature of OneDrive, your screenshots will be saved on this platform automatically, and you access those screenshots from any device linked with your OneDrive account. If you want to enable this option, follow the instructions guided below:
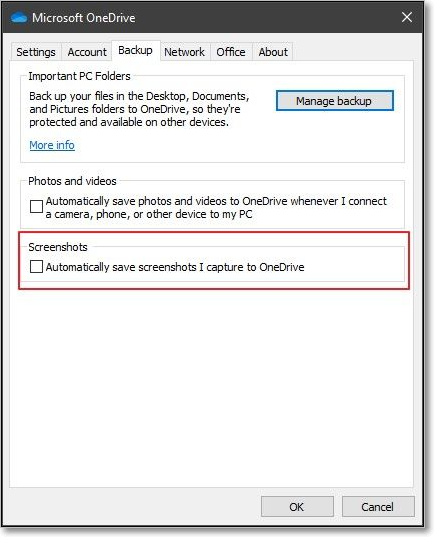
Step 1: Tap on the "OneDrive" icon given on the taskbar of your PC. After opening it, tap on the "Gear" icon from the top right corner and select the "Settings" option.

Step 2: After opening the Settings, click on the "Backup" tab and check the box "Automatically save screenshots I capture to OneDrive." Through this, the screenshots will automatically be saved on OneDrive. To check your screenshots, you can open OneDrive and then click on the "Pictures" tab easily.
Bonus Tips: How to Create Screenshot on Lenovo
Do you want to create screenshots on Lenovo? As we have discussed screenshot locations in the previous section, now we will shed light on the multiple methods to make a screenshot on a PC.
- Method 1: Take a Screenshot on Lenevo Using the EaseUS RecExperts
- Method 2: Take a Screenshot on Lenovo Using Snip and Sketch
- Method 3: Take a Screenshot of Lenovo Using the Snipping Tool
Method 1: Take a Screenshot on Lenevo Using the EaseUS RecExperts
To create screenshots on Lenovo, you can use the EaseUS RecExperts for your convenience. Using this freeware, you can freely capture a full screen, a window, or any specific area of your desktop. Just press F11 to screenshot on Lenevo easily. You can also preview and add a watermark to the captured screenshot if needed. More importantly, you can take screenshot of Amazon Prime Video, Hulu, Disney+, or other platforms without black screen issues.
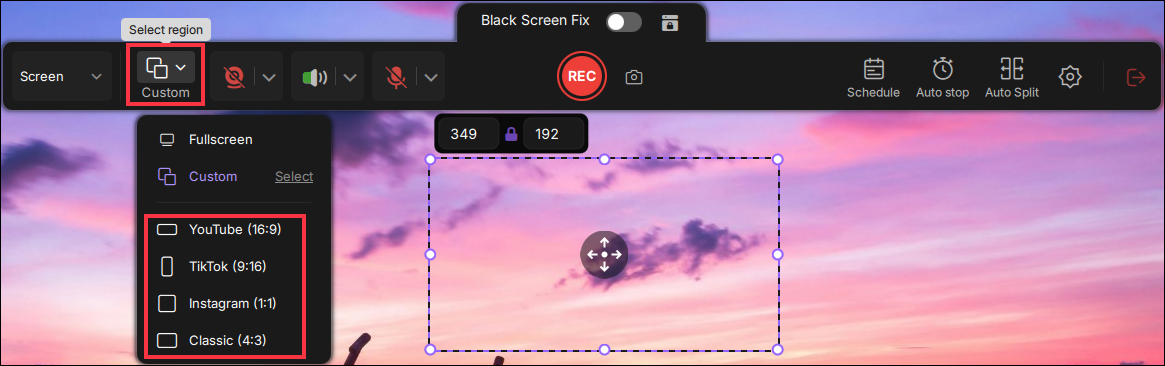
Step 1. Install and launch EaseUS RecExperts on your computer. Then, select the screenshot mode you want: Full Screen, Custom, or Window.

Step 2. By clicking the dropdown icon for area selection in the taskbar, you can also adjust the desired screen ratio, such as 16:9, 9:16, 4:3, or 1:1.
Step 3. After selecting the region, click the Screenshot button (camera icon) on the main toolbar or hit the F11 shortcut key to take a screenshot.
![]()
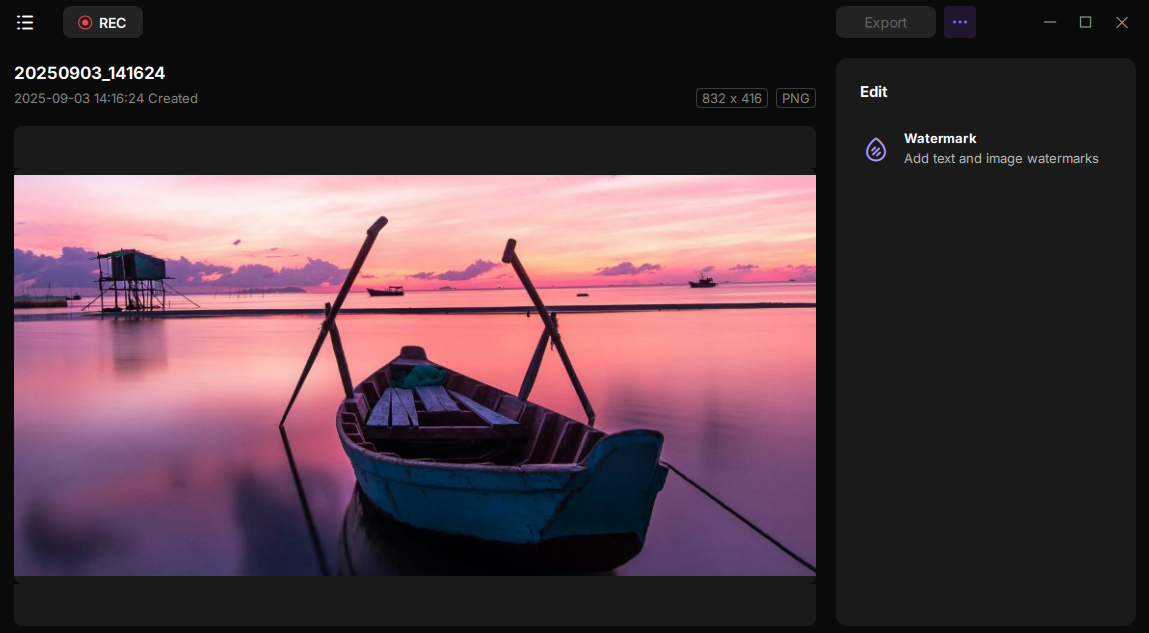
Step 4. The screenshot will be automatically saved to your default folder in PNG format. You can go to My Library to view the image. You can also add text and image watermarks.
Method 2: Take a Screenshot on Lenovo Using Snip and Sketch
Windows 10 has a built-in software called Snip and Sketch, through which users can also take screenshots easily. This software gives you an option to capture entire screens, custom screens, and free forms flawlessly. To create a screenshot on Lenovo using the Snip and Sketch tool, use the below steps:
Step 1: Tap the "Search" icon on the taskbar and type "Snip & Sketch." From the results, click on this tool to open it. You can also press the "Window logo + Shift + S" keys to capture a screenshot using this tool.

Step 2: After opening it, tap on the "New" button displayed at the top of the tool to open the screenshot toolbar. From the toolbar, choose the screenshot type you like. Now click and drag the mouse cursor to select a specific area and release it.

Step 3: After taking the screenshot, you can edit it on this tool. Afterward, press "Ctrl + S" to save the screenshot.

Method 3: Take a Screenshot of Lenovo Using the Snipping Tool
The snipping tool is also an efficient platform to capture screenshots easily. If you don't want to use keyboard shortcuts or any other tool, you can open the Snipping tool for taking screenshots on Lenovo.
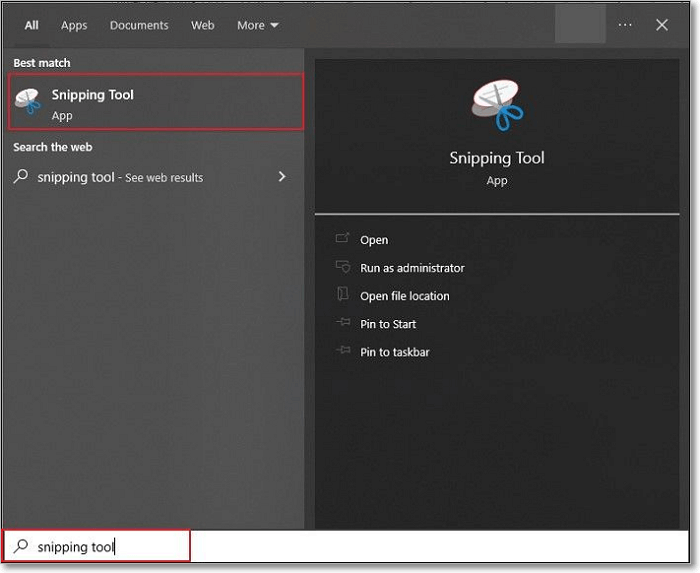
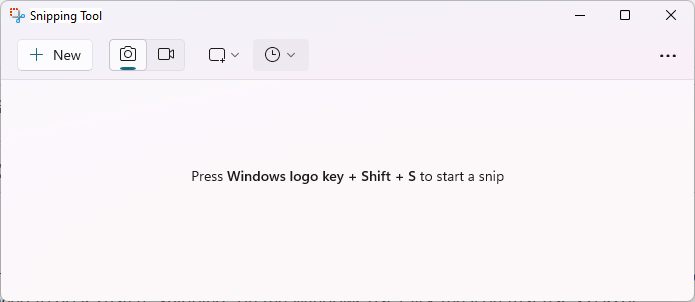
Step 1: Tap the "Search" icon on the taskbar and type "Snipping Tool" on the search bar. Now, click on the Snipping Tool to proceed.
Step 2: On the interface of the Snipping tool, click on the "+New" button given at the top of the screen. Now select the area you want to capture and then press "Ctrl + S" to save the captured screenshot.
Conclusion
Screenshots can make our daily tasks more accessible as we can save important images, webpages, and messages instantly with a single click. In this article, we have discussed screenshot locations on Lenovo so you can easily find your saved screenshots. Moreover, we have also addressed multiple methods to create screenshots on Lenovo flawlessly.
When you see all the contents above, you will consider the EaseUS RecExperts is the most suitable tool for you.
Screenshot Location on Lenovo FAQs
We have already discussed the screenshot locations and the easy ways to create screenshots on your PC. To provide you with more information about screenshots, these frequently asked questions and related answers can help you to understand screenshots more precisely.
1. How to change the default screenshot folder on Lenovo?
Go to File Explorer and tap on "Pictures" from the left section. From here, open the "Screenshots" folder. Right-click on this folder and select "Properties." On the pop-up window, choose the "Location" tab and tap on the "Move" button. Now find the location you want to set as default and then tap on "Select Folder." Once the newly selected location appears in the edit box, press the "OK" button.
2. What to do if the Print screen key won't capture screenshots?
If the Print screen key is not working, you can use the following combination keys to capture the screenshot:
"Alt key + PrintScreen or Fn key + PrintScreen"
These combination keys will capture the screenshot of your opened window, and you can save it with any editing app like Paint.
3. How do you screenshot on a Lenovo Chrome laptop?
If you want to take a screenshot of the full screen, press the "Ctrl + Windows Switcher" keys. Or, if you want to take a screenshot of any selected part, press the "Ctrl + Shift + Windows Switcher" keys.
EaseUS RecExperts

One-click to capture anything on screen!
No Time Limit, No watermark
Start Recording