-
![]()
Daisy
Daisy is the Senior editor of the writing team for EaseUS. She has been working in EaseUS for over ten years, starting from a technical writer to a team leader of the content group. As a professional author for over 10 years, she writes a lot to help people overcome their tech troubles.…Read full bio -
Jane is an experienced editor for EaseUS focused on tech blog writing. Familiar with all kinds of video editing and screen recording software on the market, she specializes in composing posts about recording and editing videos. All the topics she chooses …Read full bio
-
![]()
Alin
Alin is an experienced technical blog writing editor. She knows the information about screen recording software on the market, and is also familiar with data cloning and data backup software. She is expert in writing posts about these products, aiming at providing users with effective solutions.…Read full bio -
Jean is recognized as one of the most professional writers in EaseUS. She has kept improving her writing skills over the past 10 years and helped millions of her readers solve their tech problems on PC, Mac, and iOS devices.…Read full bio
-
![]()
Jerry
Jerry is a fan of science and technology, aiming to make readers' tech life easy and enjoyable. He loves exploring new technologies and writing technical how-to tips. All the topics he chooses aim to offer users more instructive information.…Read full bio -
![]()
Rel
Rel has always maintained a strong curiosity about the computer field and is committed to the research of the most efficient and practical computer problem solutions.…Read full bio -
![]()
Gemma
Gemma is member of EaseUS team and has been committed to creating valuable content in fields about file recovery, partition management, and data backup etc. for many years. She loves to help users solve various types of computer related issues.…Read full bio -
![]()
Shelly
"I hope my articles can help solve your technical problems. If you are interested in other articles, you can check the articles at the bottom of this page. Similarly, you can also check my Twitter to get additional help."…Read full bio
Page Table of Contents
Alin
Updated on Jan 21, 2026
0 Views |
0 min read
Online working and learning through technology has become the new trend. Cloud-based video conferencing services like Zoom, Google Meet, and Microsoft Teams are playing an important role in our lives today.
When you are participating in a Zoom meeting or listening to an online lesson in Zoom, there may be times when you need to take a screenshot. Maybe you need to capture the data or knowledge points on the screen for later reference. Or you just need to show other people the activities going on on your screen.
In fact, Zoom has a built-in screen recording tool that can be used to take screenshots from your screen or the Zoom window. But we give you more than that. In this tutorial, we will give you five feasible ways to take a Zoom screenshot easily.
PAGE CONTENT:
- Best Way to Take a Zoom Screenshot
- Take Screenshots on Zoom with Builtin Tool
- Take a Zoom Screenshot on Windows
- Take a Zoom Screenshot on Mac
- FAQs about Taking a Zoom Screenshot
Best Way to Take a Zoom Screenshot
There are some hotkeys that can help you take screenshots on Windows or Mac computers. However, it's better to give you a screen capturer that is compatible with both Windows and macOS systems. This tool is EaseUS RecExperts.
This is an efficient and quick screenshot taker that enables users to capture a full screen or take a partial screenshot on Windows. After taking a screenshot, you can even add a watermark to the images as you like. Besides, this tool is also a powerful screen recorder that can record Google Meet, Zoom, or Teams easily.
- Customize the window size of the screenshot
- Screenshot streaming services like HBO Max, Hulu, or YouTube without black screen issue
- Manage the screenshots with one click
- Take screenshots of two or one monitor in high resolution
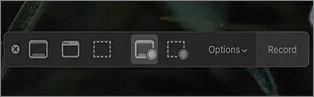
Step 1. Install and launch EaseUS RecExperts on your computer. Then, select the screenshot mode you want: Full Screen, Custom, or Window.

Step 2. By clicking the dropdown icon for area selection in the taskbar, you can also adjust the desired screen ratio, such as 16:9, 9:16, 4:3, or 1:1.
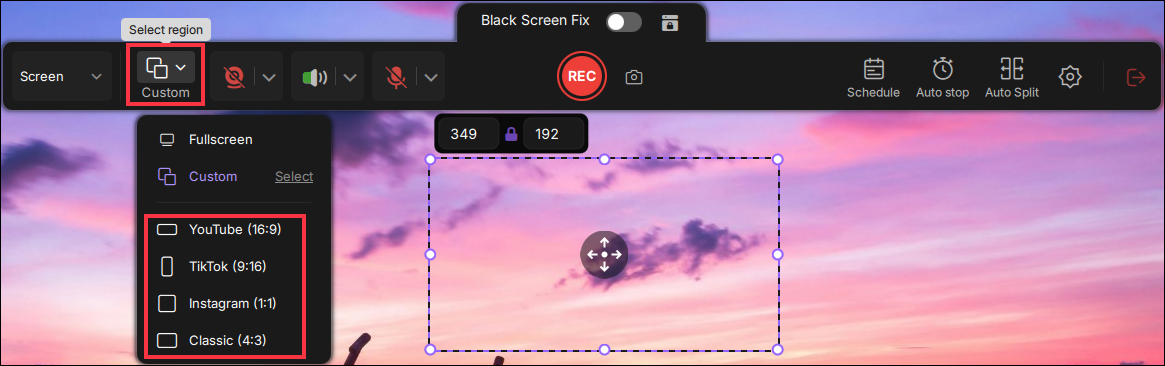
Step 3. After selecting the region, click the Screenshot button (camera icon) on the main toolbar or hit the F11 shortcut key to take a screenshot.
![]()
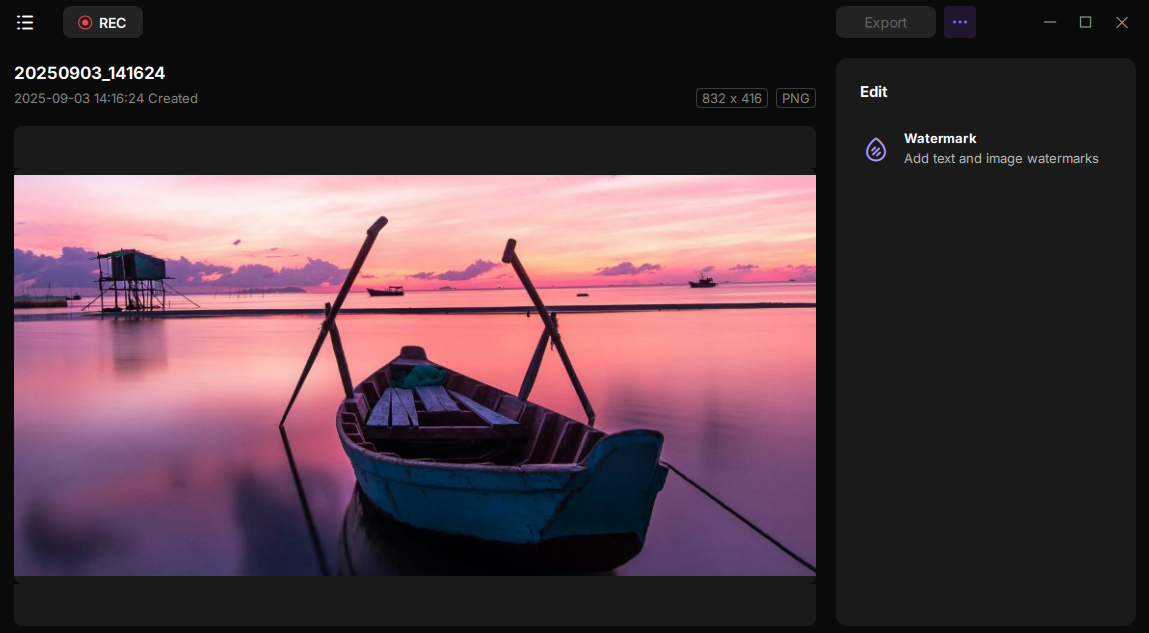
Step 4. The screenshot will be automatically saved to your default folder in PNG format. You can go to My Library to view the image. You can also add text and image watermarks.
Take Screenshots on Zoom with Built-in Tool
Zoom comes with a built-in tool that helps you take screenshots during Zoom meetings. This tool also helps to record a Zoom meeting. However, this function is disabled by default.
Therefore, if you want to use this function, you need to enable it in the settings first. After enabling it, you may follow the steps listed below to take a Zoom screenshot.
Step 1. Open Zoom and go to the "Home" tab. Then click on the cogwheel sign under your profile picture.
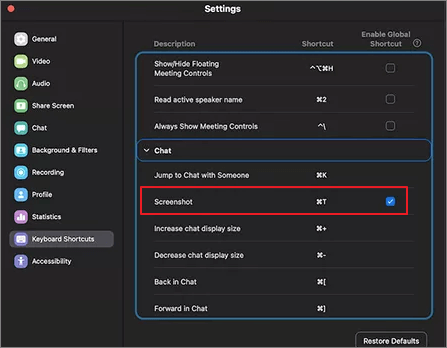
Step 2. Go to the "Keyboard Shortcuts" tab and expand the "Chat" settings.
Step 3. In the drop-down menu, enable "Screenshot" by selecting it.
Step 4. In the Mac OS, you will need to grant additional Zoom permissions. After that, you can use the Zoom native screenshot tool on your Mac.
Take a Zoom Screenshot on Windows
In this part, we give you two ways to help you take a Zoom screenshot on Windows computers. You can use Windows hotkeys or the snipping tool to get the job done. Let's have a look at the details.
Method 1. Take Zoom Screenshots with Hotkeys
In fact, Windows has its own hotkeys to take a screenshot from your screen. If you want to take a screenshot during a Zoom meeting, you only need to press the correct keyboard combination. If you are not familiar with these hotkeys, just follow the steps below to take a screenshot on Windows 10.
Step 1. Launch Zoom and start a meeting. Share your screen so it will be displayed on the PC screen.
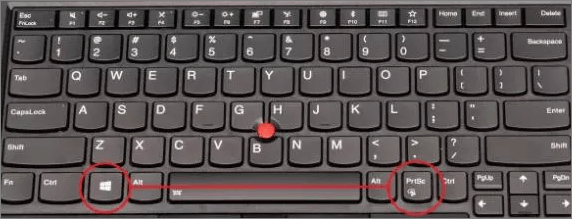
Step 2. When you need to take a screenshot, just press the "Win+ PrintScreen" keys. And a screenshot will be copied to your clipboard.
Method 2. Take Zoom Screenshots with Snipping Tool
The second way is to use Snipping Tool for Windows. This is an excellent program for Windows 10. You can use it when you want to take a screenshot. Unlike using hotkey combinations, this tool can save your screenshots as files without pasting them to the clipboard. Now, let's check the steps of taking a screenshot with the Snipping Tool.
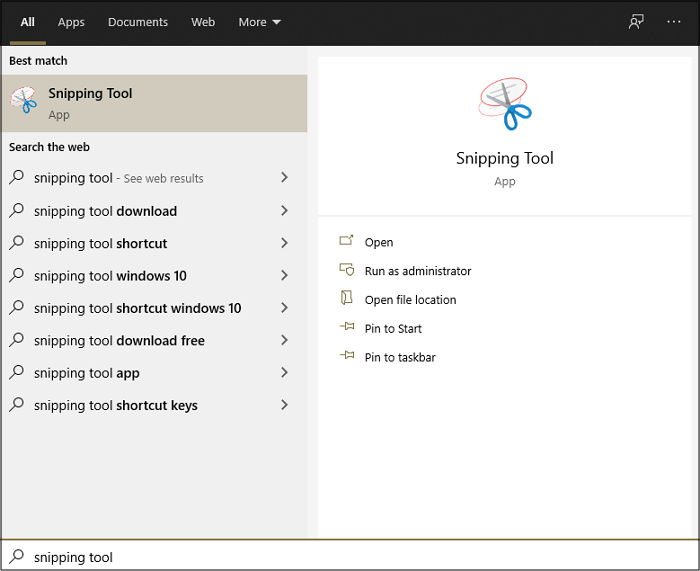
Step 1. Search for Snipping Tool in Windows and run the program.
Step 2. Then, select the snip mode you want under "Mode". There are four modes for you to choose from. They are Rectangle, Free form, Windows, and Fullscreen modes.
Step 3. After choosing a mode, click "New" or press "Windows + Shift + S" to take a screenshot.
Step 4. Click "File" > "Save As" to store the screenshot in the desired position.
Take a Zoom Screenshot on Mac
Similar to Windows, Mac computers also offer an inbuilt screen capture tool to take a screenshot. With this tool, you can take a screenshot of the whole screen, an active window, or a part of the screen. In this part, we will show you the ways to take a screenshot of the screen and of an active window on your Mac computer. Follow these steps to take a Zoom screenshot on Mac:
Take a screenshot from the screen:
Navigate to the meeting screen in Zoom and press the "Command + Shift + 3" keys together to take the screenshot.
Take a screenshot from the active window:
- Step 1. Start a Zoom meeting and hit ''Command+Shift+4 Shortcut".
- Step 2. Press the "Space" key when the cursor turns into a crosshair.
- Step 3. Click on the Zoom meeting window to take the screenshot.
FAQs about Taking a Zoom Screenshot
In this part, we will show you some frequently asked questions and their answers. Let's check them together.
1. Can you take a screenshot on Zoom?
The answer is yes. With EaseUS RecExperts, you can take a screenshot in the way you like. For instance, you can take a screenshot of the full screen or a specific window. Also, you can customize the window size if you like. The operation is quite simple. Only a few clicks are needed.
2. Does Zoom notify if you screenshot?
The answer is no. There is no setting in Zoom that can detect screenshots.
Conclusion
In this article, we give you some feasible ways to take a Zoom screenshot. From using built-in screenshot shortcuts on your computer to using third-party software, we hope you can achieve your goal successfully. In case you need to do more than take screenshots on Zoom, we suggest you download and use EaseUS RecExperts.
EaseUS RecExperts

One-click to capture anything on screen!
No Time Limit, No watermark
Start Recording