- About
- Discover EaseUS
- Reviews & Awards
- License Agreement
- Privacy Policy
- Student Discount
[2025] How to Screenshot on Toshiba Laptop
Nowadays, screenshots are widely used on computers, tablets, etc. It is the name given to the capture of visual content on your computer screen. Taking screenshots on a Toshiba laptop is an effortless thing. Since most Toshiba laptops run on Windows operating system, the process is similar to most Windows devices. There are many ways to take screenshots on a Toshiba laptop. If you want to learn how to screenshot on Toshiba laptop, follow this post to know easy methods that you can learn.
How to Screenshot on a Toshiba via EaseUS ScreenShot
Although Windows 10 has a default screenshot tool to take screenshots, it is advisable to use more advanced software that has functional features. Therefore, a great choice is EaseUS ScreenShot, which is a fast and easy-to-use screen capture software that allows you to snapshot screen in seconds. It was designed to be simple. Therefore, you can take screenshots of the entire screen or specific parts. In addition, you can save screenshots in PNG. With EaseUS ScreenShot, you don't need to remember any Windows keyboard combinations!
Without registration, you can download this beneficial screenshot tool!
Here is a list of steps on how to take a screenshot with this tool!
Step 1. Download and install EaseUS Screenshot on your PC, then launch it.
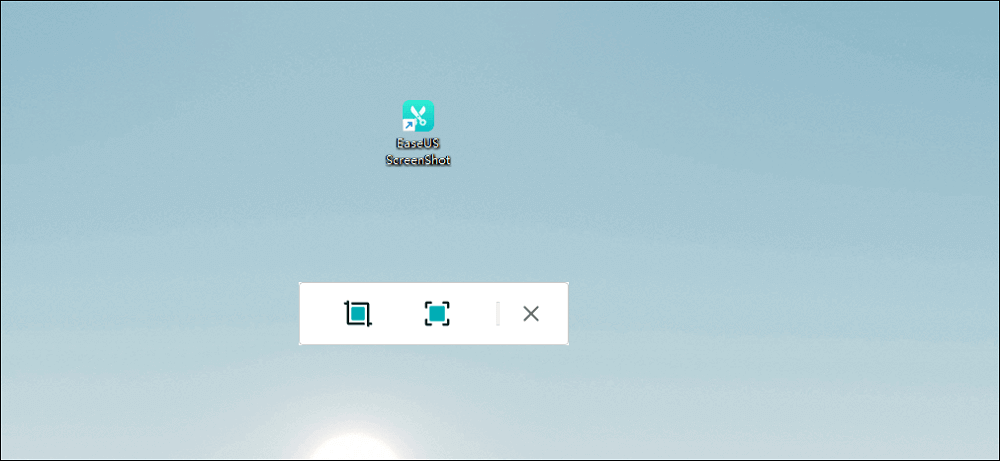
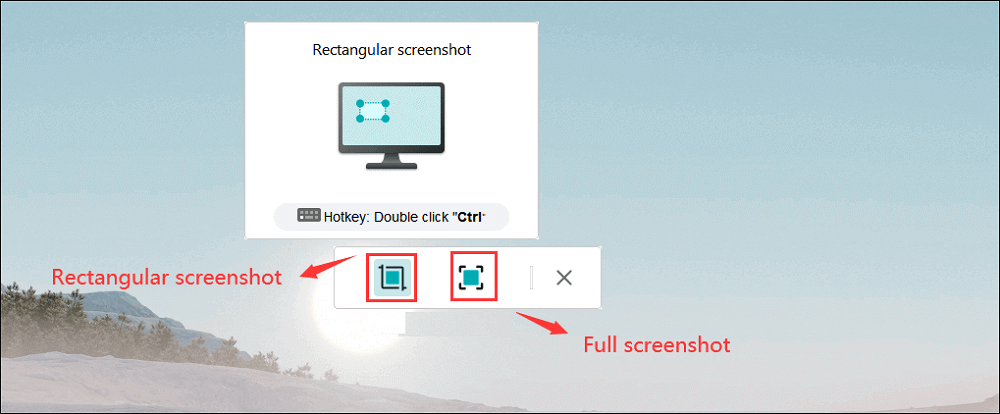
Step 2. You will see two options on the toolbar. The left one is for "Rectangular screenshot", and the right one is for "Full screenshot".
To take a partial screenshot, you just click on the left button (or double click the "Ctrl" key), then drag your mouse to select the area on your screen; To take a full screenshot, you can click the right button (or double click "Alt" on keyboard).
Step 3. When the screen is captured, you can see an editing toolbar below the screenshot. It provides a set of tools to modify the screenshot by drawing, adding text, mosaic, etc.
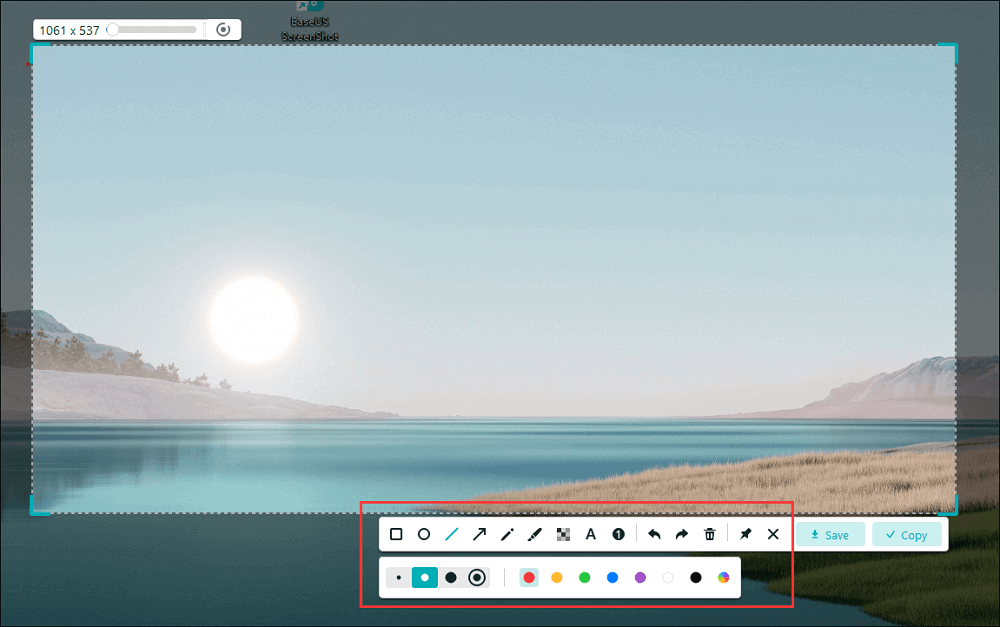
Step 4. Once done, click the "Save" button or press "Space" to save the screenshot. Or, you can click "Copy" or hit the "Enter" key to copy the screenshot to the clipboard.
How to Screenshot on Toshiba with Snipping Tool
Almost all Toshiba laptop in Windows operating systems comes with the Snipping Tool. It has been around ever since Windows Vista. Taking a screenshot with the Windows Snipping Tool is easy. Likewise, your snips are automatically saved to the clipboard, in case you forget to save them.
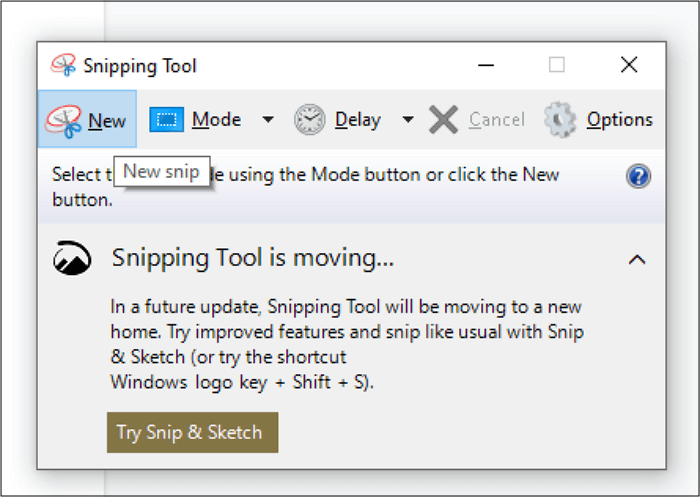
To learn how to screenshot on a Toshiba laptop with the Snipping Tool, follow these steps:
Step 1. Go to the Windows Search Feature by clicking on the Windows button. Once there, type "Snipping Tool". After you find the tool, click on it to open it.
Step 2. To take a new screenshot, click "New" on the Snipping Tool panel.
Step 3. To select the area you want to screenshot, click and drag your mouse across the chosen area. Then click "Save Snip" to save it on your computer.
How to Screenshot on Toshiba Using Keyboard Combos
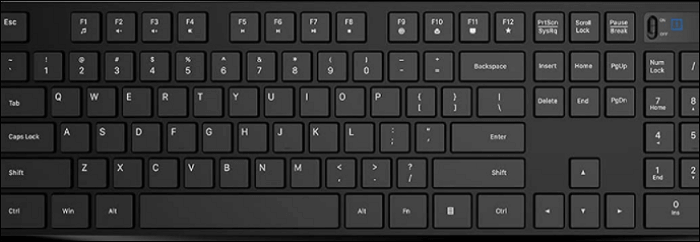
If you don't want to install any software on a Toshiba laptop, you can take advantage of the keyboard shortcuts. In most Toshiba laptops, there is a button called "PrtScn", which is fundamental to take screenshots on Windows. That is perhaps the easiest way to take a screenshot, but there are common setbacks.
Because the PrtScn keyboards on laptops are different, find the related button correctly.

Here is a guide to take a snapshot of the Toshiba screen using the keyboard:
Screenshot the Whole Screen:
Find the screen that you want to capture, and then press the "PrtScn" key to screenshot on the clipboard. There are cases where you need to press "Fn" + "Windows" + "PrtScn" together to activate the screenshot function.
If you run Windows 8, you will need to press the "Windows" key + PrtScn.
Screenshot Active Screen:
Step 1. Select the window to capture. Ensure that there are no other windows that interfere.
Step 2. Press the "PrtScn" key to take a capture of the screen on Windows 10. If you run Windows 8, press the "Windows" key + PrtScn.
Step 3. Then, press the Windows key and type "Paint". Launch it and paste the screenshot. If you wish to make any adjustments, use Paint's editing features. Then, click "Save as" and choose the image format to save it.
Conclusion
Screenshots are the fastest and most direct way to save important content on a laptop. Fortunately, the Windows print screen feature has become a great tool that can capture the entire screen with the touch of a button. In this article, you learn how to screenshot Toshiba with three reliable methods. To take accurate screenshots, try EaseUS ScreenShot. It will never disappoint you!
Was This Page Helpful?
