
- About
- Discover EaseUS
- Reviews & Awards
- License Agreement
- Privacy Policy
- Student Discount
Full Guide on How to Take a Screenshot on a Windows Laptop and Mac
Jean Updated on
May 10, 2024|
min read
After the pandemic, it is evident that people from any part of the world are inclined to the new normality of working from home. And it is not surprising that everyone is busy with their laptop and phone screens for their work and leisure routines.
Therefore, knowing at least some standard software and technology-related knowledge is essential. And here comes the situation of taking screenshots on our laptops.
Screenshots have become a standard feature that we often use on our phones, but it might feel like a tricky process when it comes to our laptops. Every day, we might go through multiple incidents where you have to screenshot and send something to another person or screenshot something and keep it for yourself.
However, you no longer have to worry because we are here to help. In this article, we will learn step by step and go through various methods on how to do this on both Windows and Mac laptops.
How to Screenshot on Samsung Laptop (Windows 11/10/8/7)
Are you looking for an easy way to take screenshots on your Samsung laptop? In this blog post, we will walk through 3 simple tips that you can use to quickly and effortlessly capture screenshots on your Samsung laptop.
How to Take a Screenshot on a Windows Laptop
Windows is the first name that pops into mind when it comes to operating systems that are familiar to people. Moreover, these laptops are great at providing efficient features, and there is no shortage of methods of using them.
Windows 10/11 delivers a variety of ways through which you can screenshot anything you wish. This could be an entire page or just a particular image on the screen.
Below, we will discuss six of these methods; you can use any of them however that works for you.
- Method 1. Take screenshots with Print Screen (PrtScn)
- Method 2. Take screenshots with "Windows" and Print Screen
- Method 3. Take screenshots with "Alt" + "Print Screen"
- Method 4. Take screenshots with Snipping Tool
- Method 5. Take screenshots with the Game Bar
- Method 6. Take screenshots with the EaseUS ScreenShot
Method 1. Take Screenshots with Print Screen (PrtScn)
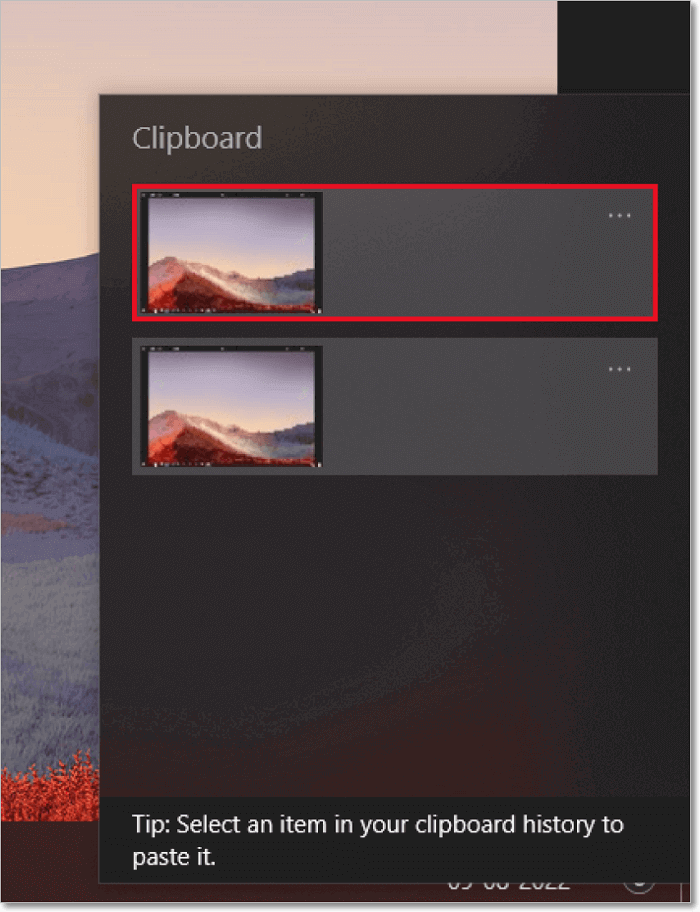
Taking screenshots using Print Screen is one of the methods that users have frequently used to take a screenshot on a laptop. It is also helpful when you want to screenshot an entire screen to the clipboard.
When you choose Print Screen or prt sc (or prt scn), it will copy the whole screen to the clipboard. On the other hand, when you select "Alt" along with Print Screen, it will only copy the active Window in use.
Step 1: Print Screen (or prt sc) is available in the top row of your keyboard with the function keys.
Step 2: After locating this key, you can use it to screenshot an image or an entire screen. The whole screen will get automatically copied to the clipboard.
Step 3: Further, you can paste your screenshot to any programs that you use, such as Paint, Paint 3D, MS Word, or even Photoshop.
Method 2. Take Screenshots with "Windows" and Print Screen
There are many ways to screenshot by using Print Screen and other keys available on your keyboard. One such method is by using the "Windows" key. This simple method was introduced along with Windows 8 and is accessible through Windows 10/11.
Step 1: You can locate the "Windows" key in the bottom row of your keyboard. Press the "Windows" key and the Print Screen option from the top row.
Step 2: This will immediately result in saving the screen as a PNG image. The image will be in the subfolder "Screenshots" available in the folder "Pictures" on your laptop.
Method 3. Take Screenshots with "Alt" + "Print Screen"
As mentioned in the second method, Print Screen and other keys are selected together to gain a screenshot from your laptop screen. This method uses "Alt, " the modifier key on your keyboard.
Step 1: "Alt" key is in the bottom row along with the "Windows" key. Press "Alt" + "prtsc".
Step 2: This method will help you copy the active Window to the clipboard, which you can further paste into any program you use.
Method 4. Take Screenshots with Snipping Tool
Taking screenshots with the help of a Snipping Tool is a more flexible way to capture an image of your likeness. And yes, here we no longer use the Print Screen option.
Step 1: Select the option "Snipping Tool" from the "Start" menu.
Step 2: Choose the "Mode" drop-down option. This option will give you choices for what kind of screenshot shape you wish to take. Therefore, you can screenshot from full screen to free form or shapes like rectangles.
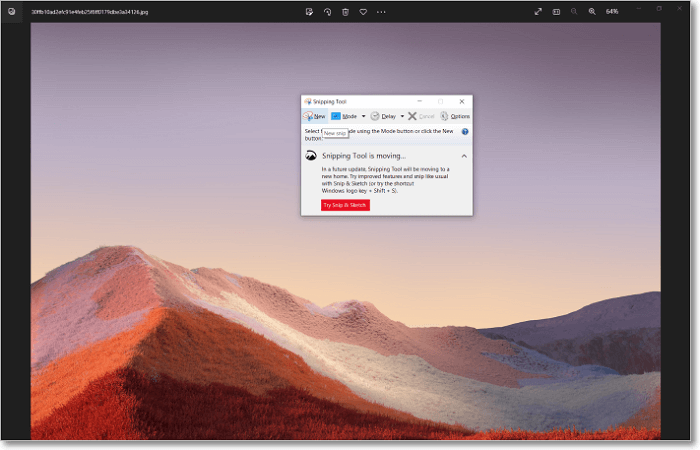
Step 3: Now, select "New," which will freeze your screen. You can then use the mouse and create the screenshot that you want. This image will appear in the Snipping Tool window.
Step 4: Click "File" and then "Save" to save the screenshot to your laptop.
Method 5. Take Screenshots with the Game Bar
The Game Bar is used to record videos and take screenshots within Windows games.
Step 1: Start a game from the "Start" menu. While playing the game, select Windows key + G, which will make the Game Bar overlay appear on the screen.
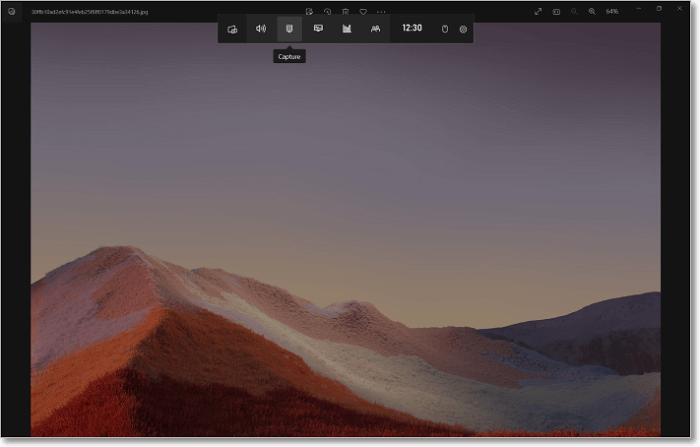
Step 2: Next, to take a screenshot, you can either select the icon that looks like a "webcam" or use the keyboard shortcut, Windows keys + Alt + PrtScn. The screenshot will get saved to your "Videos" folder in your laptop's subfolder called "Capture" in your laptop.
Method 6. Take Screenshots with the EaseUS ScreenShot
The EaseUS ScreenShot is yet another method you can use for the task of screenshotting an image on Windows. It is one of the best free software that lets you take a customizable screenshot of your PC screen effortlessly. Moreover, it supports real-time editing, which means you are able to add text, draw lines, insert shapes, etc. to enhance the screenshots.
Step 1. Download and install EaseUS Screenshot on your PC, then launch it.

Step 2. You will see two options on the toolbar. The left one is for "Rectangular screenshot", and the right one is for "Full screenshot".
To take a partial screenshot, you just click on the left button (or double click the "Ctrl" key), then drag your mouse to select the area on your screen; To take a full screenshot, you can click the right button (or double click "Alt" on keyboard).

Step 3. When the screen is captured, you can see an editing toolbar below the screenshot. It provides a set of tools to modify the screenshot by drawing, adding text, mosaic, etc.
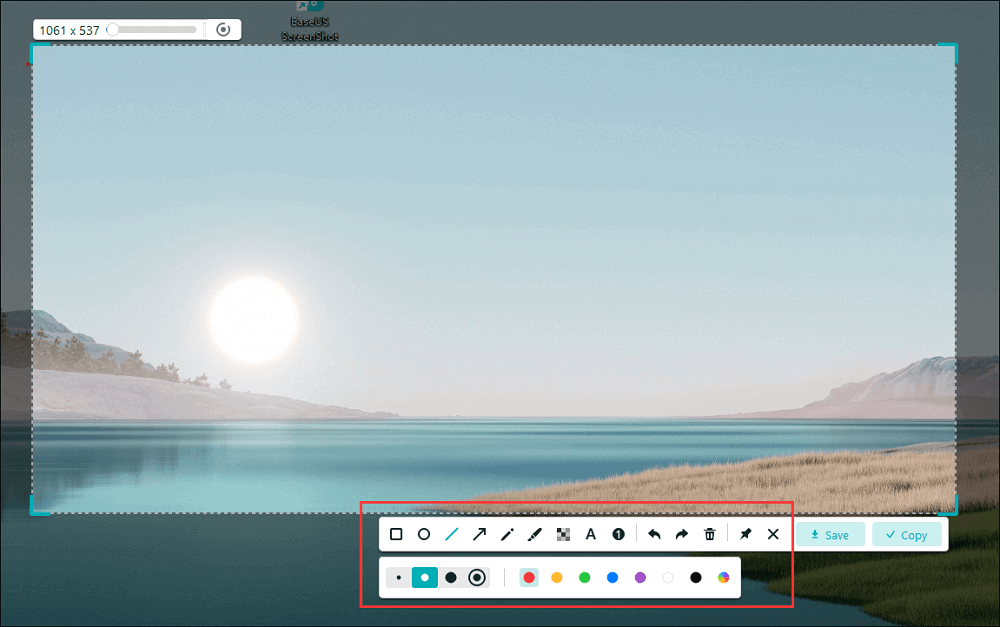
Step 4. Once done, click the "Save" button or press "Space" to save the screenshot. Or, you can click "Copy" or hit the "Enter" key to copy the screenshot to the clipboard.
How to Take a Screenshot on a Mac Laptop
This session is for all of you who own a Mac and are wondering how to crop a screenshot on a Mac. Just like Windows, Mac also provides different methods for this purpose. Below are the ways we will look into and explain in detail in this article.
- Way 1. Take a Full Screenshot on a Mac Laptop
- Way 2. Take a Portion of the Mac Laptop Screen
- Way 3. Take a Screenshot of a Window/Menu on a Mac Laptop
Way 1. Take a Full Screenshot on a Mac Laptop
You can screenshot on Mac and capture an entire screen, a portion of the screen, or even a window.
Step 1: Press the keys, shift + command + 3 together.

Step 2: You will see a thumbnail in the corner of your laptop screen. Click this to edit your screenshot and save it to your desktop.
Way 2. Take a Portion of the Mac Laptop Screen
This method uses keys to capture a selected portion of the screen by turning your cursor into a crosshair.
Step 1: Press and hold the keys, shift + command + 4 together.
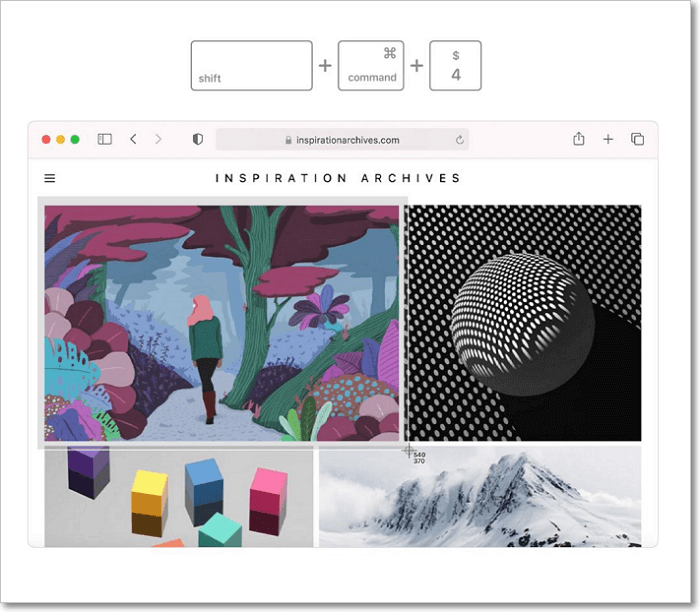
Step 2: You can see your cursor turning into a crosshair. Drag the crosshair and select the area that you want to capture. Press and hold the spacebar to move the selected part. You can always use the Escape (Esc) key to cancel the screenshot.
Step 3: You can release your mouse and get the required screenshot. Again, like the previous method, you can use the thumbnail in the corner to edit this screenshot and save it to the desktop.
Way 3. Take a Screenshot of a Window/Menu on a Mac Laptop
This particular method also follows similar steps to the last method. Let us look in detail through the following steps.
Step 1: First, open the Menu or the Window you wish to capture on your laptop.
Step 2: Press and hold the keys, shift + command + 4, and space bar together. The mouse pointer will change to a camera icon. If you want to cancel it, press the Esc key.

Step 3: Click the Window or menu to capture it. You can press and hold the Option key, excluding the Window's shadow from the screenshot. You can also use the thumbnail to edit the image and save it to the folder you want.
However, sometimes issues will be encountered on your Mac, and the screenshot on Mac doesn't work. When you're in such a condition, you can refer to the article to solve your problem:
FAQs on Take a Screenshot on a Laptop
Now that we discussed various methods of taking a screenshot both on a Windows and a Mac laptop let us discuss a few of the common and often asked questions related to this topic below.
Hopefully, this will give you further insight into this topic and help you overcome your difficulties.
1. Where do screenshots go on a Windows laptop?
The answer to this question entirely depends on the method you chose to take the screenshot. If you have taken a screenshot by using only the Print Screen option, you won't be able to access the screenshot on your laptop.
This is because the screenshot will get saved to your device's clipboard, and to keep it on your desktop, you will have to paste it into a program like Paint.
In contrast, if you are using the Snipping Tool, the screenshots will be available in the folder where the last screenshot was saved. Finally, if you have used the Windows + Prtsc option, the screenshots will get saved to the subfolder "Screenshots," which will be available in your laptop's "Pictures" folder. In this method, you can also change the location and save the image at the location of your convenience.
2. Where are screenshots located on a Mac laptop?
Unlike Windows, screenshots in Mac Laptops are saved to your desktop by default. This will require you to sort the pictures into the folders you need if you are someone who takes a lot of screenshots. These files will include the date and time you took these screenshots, so it will be easy for you to navigate them.
However, by any chance, if you find it hard to tackle these images, there are other methods. You can always check that program's preferences if you are working in a program and want to see your saved screenshots.
Go to "Finder" and select the "Applications section." You can also check your images by clicking on the "Magnifying glass" icon in the top toolbar and searching "Screenshots."
3. How do I take a screenshot without the Print Screen key on Windows?
We discussed this in the session, where we discussed the various methods to take screenshots. You can always choose alternative methods like the Snipping tool or the Snip and Sketch method. However, if you want to record a video or screenshot while gaming, go for the Game Bar method instead.
Final Thought
Screenshots might be essential for many people in today's technology-dependent lives. It can act certainly like a memory box that could remind you of specific tasks that you have to do or random things that you might have forgotten.
In this article, we have tried to cover the methods that will help you take screenshots, including the Game Bar, the Snipping Tool, and the EaseUS ScreenShot, and you can choose the one you feel is easy to do. Hopefully, this will be helpful and a game changer for you.
Was This Page Helpful?