-
![]()
Daisy
Daisy is the Senior editor of the writing team for EaseUS. She has been working in EaseUS for over ten years, starting from a technical writer to a team leader of the content group. As a professional author for over 10 years, she writes a lot to help people overcome their tech troubles.…Read full bio -
Jane is an experienced editor for EaseUS focused on tech blog writing. Familiar with all kinds of video editing and screen recording software on the market, she specializes in composing posts about recording and editing videos. All the topics she chooses …Read full bio
-
![]()
Alin
Alin is an experienced technical blog writing editor. She knows the information about screen recording software on the market, and is also familiar with data cloning and data backup software. She is expert in writing posts about these products, aiming at providing users with effective solutions.…Read full bio -
Jean is recognized as one of the most professional writers in EaseUS. She has kept improving her writing skills over the past 10 years and helped millions of her readers solve their tech problems on PC, Mac, and iOS devices.…Read full bio
-
![]()
Jerry
Jerry is a fan of science and technology, aiming to make readers' tech life easy and enjoyable. He loves exploring new technologies and writing technical how-to tips. All the topics he chooses aim to offer users more instructive information.…Read full bio -
![]()
Rel
Rel has always maintained a strong curiosity about the computer field and is committed to the research of the most efficient and practical computer problem solutions.…Read full bio -
![]()
Gemma
Gemma is member of EaseUS team and has been committed to creating valuable content in fields about file recovery, partition management, and data backup etc. for many years. She loves to help users solve various types of computer related issues.…Read full bio -
![]()
Shelly
"I hope my articles can help solve your technical problems. If you are interested in other articles, you can check the articles at the bottom of this page. Similarly, you can also check my Twitter to get additional help."…Read full bio
Page Table of Contents
Jane Zhou
Updated on Jun 09, 2026
0 Views |
0 min read
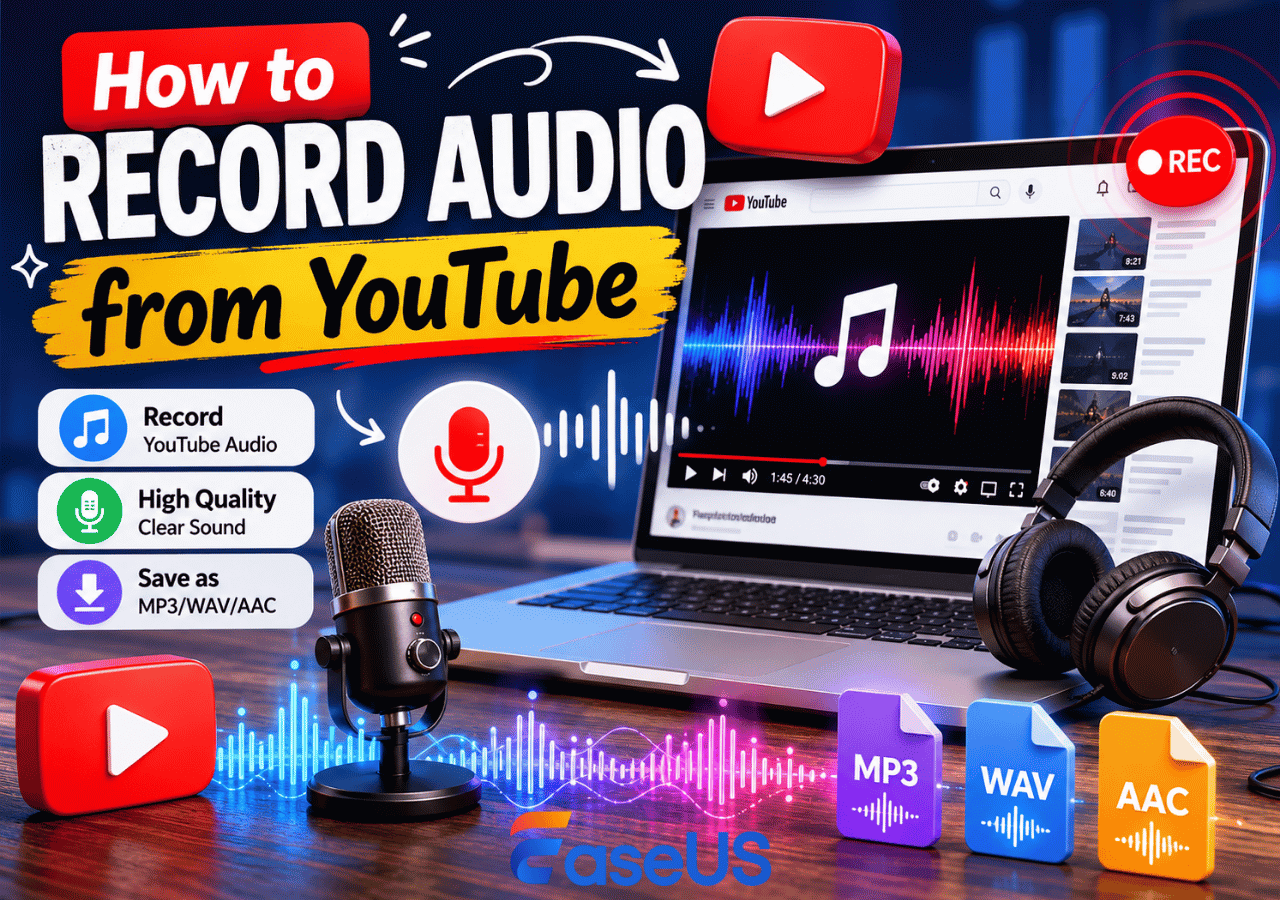
Ever wondered how to record YouTube audio on your computer? Using Audacity is great for saving a podcast, capturing background music, or creating an offline playlist. It supports Windows, Mac, and Linux, making it a free and powerful option. But setting it up correctly might be tricky. This guide walks you through the easiest way to record YouTube audio with Audacity.
What You Need to Record YouTube Audio in Audacity
Before you start recording, it's important to set up Audacity and your system audio correctly. This helps avoid common issues like no sound, distorted audio, or failed recordings.
1. Download and Install Audacity
- Download the latest stable version of Audacity (3.x) from the official website and install it on your system (Windows, macOS, or Linux).
- After installation, open Audacity to make sure it runs properly.
2. Check Built-in Codecs and Optional Libraries
- MP3 export: Recent versions of Audacity already include the LAME MP3 encoder, so no separate installation is required.
- FFmpeg (optional): Installing the FFmpeg library allows Audacity to import and export a wider range of audio formats, which can be helpful if you plan to convert or edit recordings later.
3. Configure System Audio Input
On Windows:
- If available, enable Stereo Mix in your system's recording devices.
- If Stereo Mix is missing, use Windows WASAPI in Audacity and select your system playback device. This method is generally more reliable on modern Windows systems.
On macOS:
- Users cannot record internal audio on Mac by default.
- You'll need a virtual audio device (such as Loopback or BlackHole) to route system audio into Audacity.
- Keep in mind that this is a workaround, and recording success may vary depending on your macOS version and hardware. Using a third-party Mac audio recorder might be a better choice.
On Linux:
- Most Linux systems support system audio recording via PulseAudio or PipeWire.
- In Audacity, set the Host to PulseAudio (or PipeWire) and choose a Monitor or loopback device as the input.
- If no monitor source appears, enable it in your system sound settings or a mixer tool like pavucontrol.
4. Test Your Audio Input
- In Audacity, select the correct input source and start monitoring the input.
- Play a YouTube video and check whether sound waves appear in the timeline. If you see waveform activity, your setup is working and you're ready to record.
Once these steps are completed, you're ready to start recording!
Spread out this helpful guide now!

Recording YouTube Audio with Audacity on Windows
Compared to macOS and Linux, recording YouTube audio with Audacity is generally more straightforward on Windows. Most Windows PCs support system audio capture natively through options like Windows WASAPI or Stereo Mix, without requiring third-party virtual audio drivers or complex routing. This means users can record YouTube audio directly with fewer setup steps and a higher success rate.
Additionally, Audacity's integration with Windows audio APIs makes it more stable for long recordings and less prone to system-level restrictions. For users looking for a free, offline solution to capture YouTube audio, Windows remains the most compatible and beginner-friendly platform.
🚩Here is how to record audio from YouTube video with Audacity on Windows:
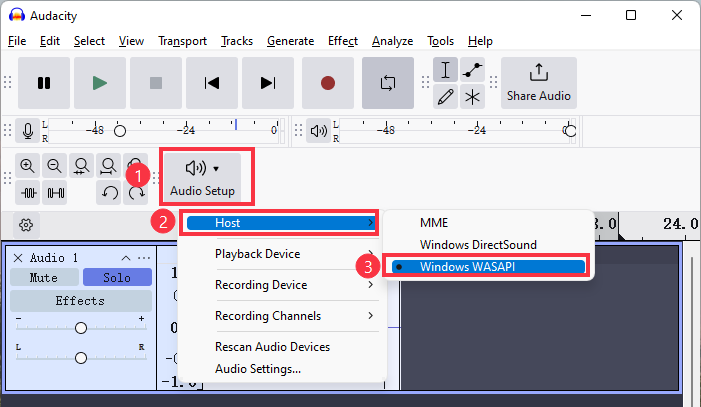
Step 1. Open Audacity and Set Up Recording
- Launch Audacity on your PC.
- Expand the Audio Host drop-down and select Windows WASAPI (recommended for recording system audio). Use MME only if WASAPI causes compatibility issues with your device.
- In the Recording Device dropdown, select your system playback device with (loopback) in its name, e.g., Speakers (Realtek High Definition Audio) (loopback).
- Set Recording Channels to 2 (Stereo) for better audio quality.
Step 2. Start Recording Audio from YouTube
- Open YouTube and play the video you want to record.
- Click the Record button in Audacity.
- Let the video play completely while Audacity captures the audio.
- Click Stop when the recording is finished.
Tip: Check the waveform while recording to ensure audio is being captured correctly.
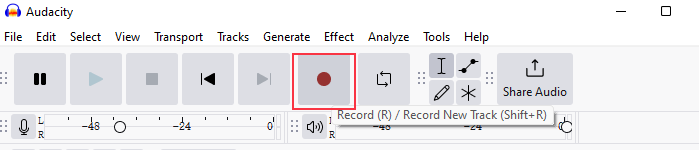
Step 3. Edit and Export
- Trim unwanted parts: Use the Selection Tool (I-beam icon) to highlight sections, then press Delete.
- Enhance audio quality: Use Effects > Noise Reduction to remove background noise. Use Equalization or Compressor to improve clarity.
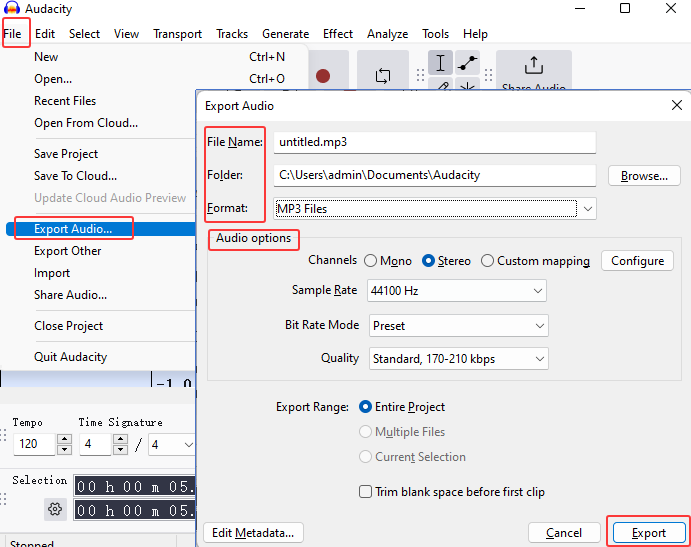
- Export final file: Click File > Export and choose your preferred format (MP3, WAV, etc.). MP3 export works out-of-the-box in recent Audacity versions.
🚩Here is a video tutorial about recording YouTube music with Audacity:
- 0:00 Intro
- 0:15 Starting Audacity
- 0:56 Recording audio
- 1:53 Recording rights
- 2:05 USB microphone
- 2:50 Editing

Don't forget to share this post with others in need!
How to Record from YouTube with Audacity on Mac
Recording YouTube audio on macOS with Audacity is slightly more complex than on Windows, because macOS does not provide native system audio capture. To record internal audio, you need to use a virtual audio device such as Loopback, BlackHole, or Soundflower to route your system audio into Audacity. Once the virtual device is set up, you can capture YouTube audio, edit it, and export it just as you would on Windows.
🚩Here's how to record audio from a YouTube video with Audacity on Mac:
Step 1. Set Up a Virtual Audio Device
- Install a virtual audio driver like BlackHole (free) or Loopback (paid).
- Configure your system audio to output through the virtual device.
- In Audacity, go to the Audio Host drop-down and select Core Audio.
- In the Recording Device dropdown, select the virtual audio device as input.
- Set Recording Channels to 2 (Stereo) for better audio quality.
Step 2. Start Recording YouTube Audio
- Open YouTube in your browser and play the video you want to record.
- Click the Record button in Audacity.
- Let the video play while Audacity captures the audio.
- Click Stop when the recording finishes.
Tip: Watch the waveform to ensure audio is being captured correctly.
Step 3. Edit and Export
- Trim unwanted parts: Use the Selection Tool (I-beam icon) and press Delete.
- Enhance audio quality: Apply Effects > Noise Reduction and Equalization to improve clarity.
- Export final file: Click File > Export and choose your preferred format (MP3, WAV, etc.). On recent Audacity versions, MP3 export works without installing additional plugins.
How to Record YouTube Audio with Audacity on Linux
Recording system audio on Linux with Audacity typically relies on PulseAudio or PipeWire providing a monitor or loopback source for your sound output. This monitor input acts like the Stereo Mix you see on Windows, so Audacity can capture audio being played by the system.
Step 1. Configure Your Audio Host
- Most distributions use PulseAudio or PipeWire by default.
- Open Audacity, set Audio Host to PulseAudio or PipeWire (depending on your system).
- In the Recording Device dropdown, look for a Monitor or loopback device associated with your playback output.
Step 2. Enable Monitor Capture (if needed)
- Install and open PulseAudio Volume Control (pavucontrol).
- In the Recording tab, select the Monitor of
as the capture source. - If using PipeWire, make sure pipewire-pulse or similar compatibility packages are installed so the monitor source appears.
Step 3. Start Recording
- Play the YouTube video in your browser.
- Hit Record in Audacity.
- If audio isn't captured, ensure the monitor source is selected and Audacity has the correct host device.
- Tip
- Some users report that the monitor input may only be available after starting recording or may require correct audio server setup; if devices are missing, verify PulseAudio/PipeWire configuration and install necessary modules.
Pros & Cons of Using Audacity for YouTube Audio Recording
Audacity is a popular free and open source audio recorder for recording YouTube audio, but it has both advantages and limitations. Here's a concise, user-friendly summary based on official documentation and real user feedback.
|
Pros |
Cons |
|
✅Free and Open Source Ideal for students and casual users who want to record and edit audio without paying for software. |
❌System Audio Capture Requires Extra Setup macOS and Linux users may struggle to install virtual audio drivers and monitor sources. |
|
✅Powerful Editing Tools Noise Reduction, Equalization, Compression, and detailed waveform editing. |
❌No Built-In One-Click System Audio Recording Audacity focuses on editing, not instant system audio capture, unlike dedicated tools. |
|
✅Cross-Platform Compatibility Runs on Windows, macOS, and Linux, giving flexibility regardless of your operating system. |
❌Recording Quality Depends on System Configuration Incorrect audio routing can cause silence, noise, or distortion — a common issue reported in user forums. |
|
✅Flexible Plugin Support Supports optional libraries like FFmpeg for extra file format compatibility, making import/export of various audio formats easy. |
❌Not Ideal for Live or High-Performance Capture Latency or glitches can occur during livestream audio capture, unlike specialized software (OBS, Audial). |
|
✅Strong Community Support A large base of tutorials and forum posts helps users troubleshoot configuration or recording issues |
❌Learning Curve for Beginners Interface and audio routing options may feel overwhelming, especially when setting up virtual devices. |
Bonus: Audacity Alternative to Record Music from YouTube
While Audacity is a powerful free audio recording software for editing YouTube audio, it can be challenging for beginners or users who want to record system audio and microphone at the same time. On macOS and Linux, capturing internal audio often requires extra virtual devices or configuration, and the hit-and-record approach isn't straightforward.
For users looking for a simpler, more versatile solution, EaseUS RecExperts is a strong alternative. It allows you to record system sound, microphone, or both simultaneously with just a few clicks. Its intuitive interface makes capturing YouTube music easier, and the built-in recording modes ensure high-quality audio without complicated setup. Whether you want to record a full playlist, a livestream, or combine voice commentary, RecExperts streamlines the process that can be cumbersome with Audacity.
Step 1. Launch the EaseUS audio recorder and choose the Audio recording mode.

Step 2. Click the Settings button to adjust audio settings like formats, bitrate, or sample rate.

Step 3. Play the YouTube video that you want to capture the audio track in your browser. When you are ready, click REC to start your audio recording.
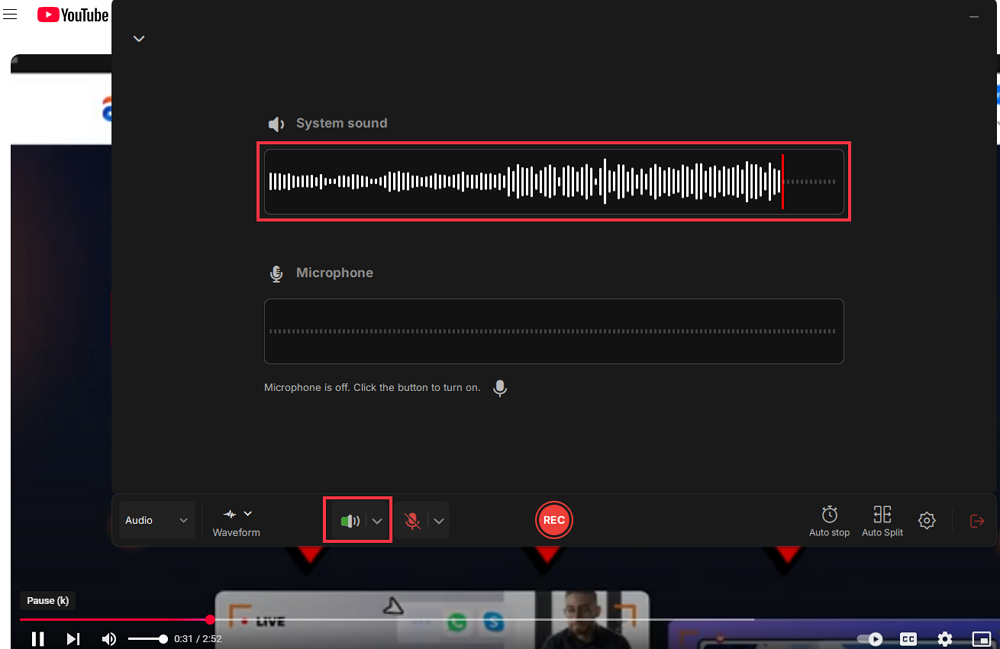
Step 4. To finish it, you just click on the red square icon to stop the recording.

Record YouTube Audio with Audacity FAQs
1. What program can record YouTube audio?
EaseUS RecExperts is the most professional recording software for capturing high-quality YouTube audio without a time limit and exporting the recordings in the desired format.
2. Can you record audio directly to Audacity?
Yes, you can effortlessly record the audio directly to Audacity by pressing the Record button to start and the Stop button to finish. It also lets you trim and edit the recorded files.
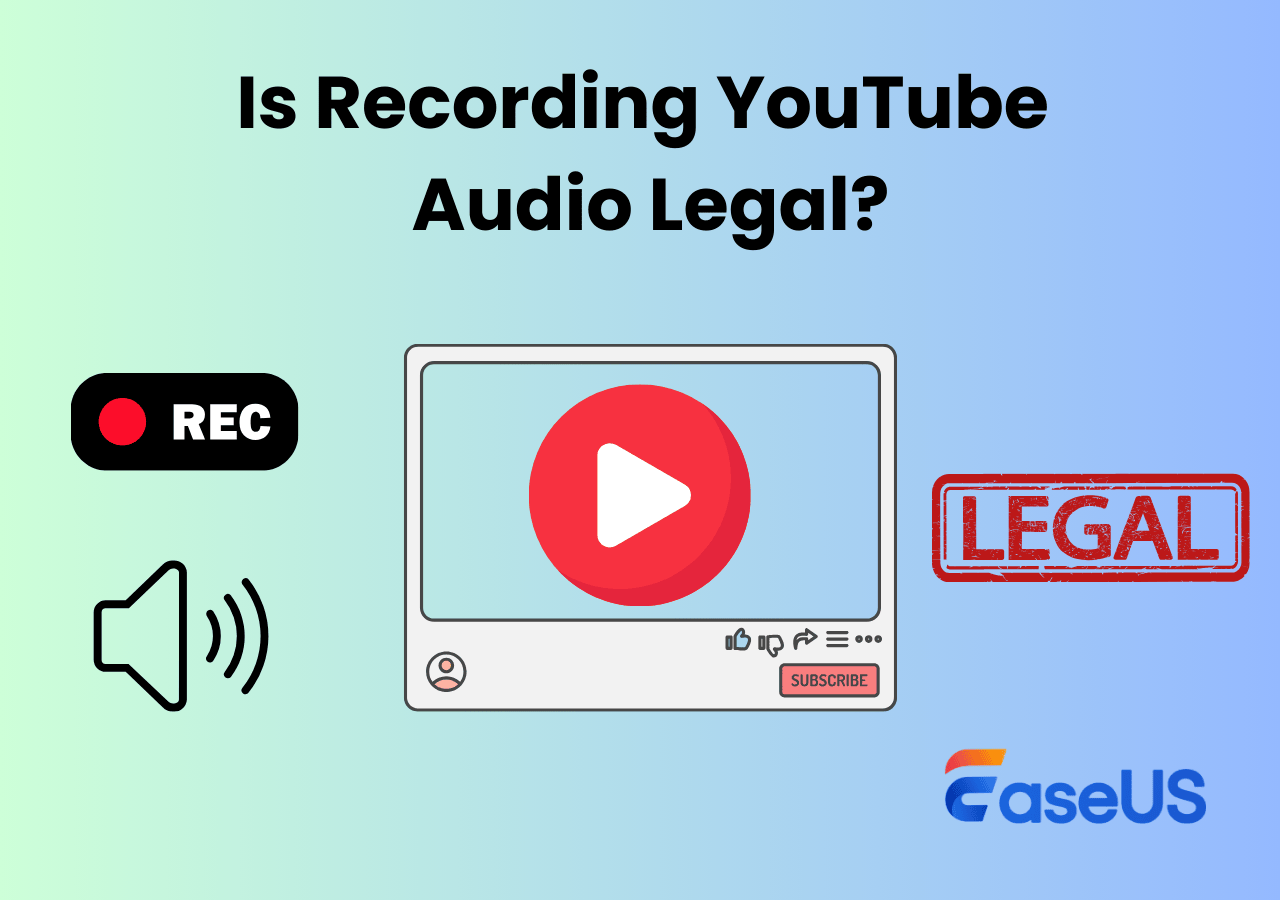
3. Is it legal to record YouTube audio?
This depends on the purpose of recording and using the YouTube audio. YouTube's TOS does not allow the recording and distribution of copyrighted content from the platform without consent, which can result in severe legal action.
4. Is Audacity good for recording audio?
Yes, Audacity is widely used for recording and producing audio tracks because it is completely free. However, beginners may struggle to work with playback devices, different audio sources, and interfaces.
✅ Article Update Log
This update expands the original article based on user search intent, author testing, and forum feedback:
1️⃣Audacity recording steps split by OS: Separate instructions for Windows, macOS, and Linux, with Linux added as a new section.
2️⃣Updated outdated info: Clarified that exporting MP3 no longer requires installing the LAME plugin (built-in since Audacity 3.x). Replaced outdated macOS virtual audio plugin Soundflower with Loopback Audio and BlackHole for better stability.
3️⃣Enhanced professional guidance: Explained key Windows settings, such as when to choose Windows WASAPI vs MME, to ensure accurate and reliable recording.
4️⃣Improved tutorial depth: Added practical tips and clarifications to make the guide more precise, beginner-friendly, and trustworthy.