
- About
- Discover EaseUS
- Reviews & Awards
- License Agreement
- Privacy Policy
- Student Discount
7 Different Methods to Print Screen on a Mac [2024 Update]
Jean Updated on
May 10, 2024|
min read
Today's topic is printing a screen on a Mac or taking a screenshot to capture or savor the information on the screen. This allows any Mac user to save the said information in the screenshot and send it.

Another key usage of this feature is to capture an image for editing or tweaking purposes. However, many people have difficulties figuring out how to benefit from this option. Not only because it can be difficult for a new Mac user but also because it's difficult to find.
On top of that, not many people are well-versed with Mac OS and how it works. Therefore, today's topic will address the 8 different methods to print screens in various situations and where you can find those screenshots.
How to Print Screen on Mac in Various Situations
Situations can arrive when you need to take a screenshot on Mac. It could be when you're doing something productive or simply wish to save something on your screen. Regardless of your needs, taking a screenshot on Mac has many ways of doing it.
To help you get there, we have compiled a list of 8 ways to print a screen on a Mac in various situations. So, without further ado, here they are:
- Solution 1. Capture The Entire Screen
- Solution 2. Capture A Selected Area
- Solution 3. Using The Touch Bar
- Solution 4. Take Screenshots With Grab
- Solution 5. Timed Screenshots With Grab
- Solution 6. Capture Selection And Save To Clipboard
- Solution 7. Print Screen On macOS Mojave And Later
- Bonus Tip. Take Screenshots on Windows
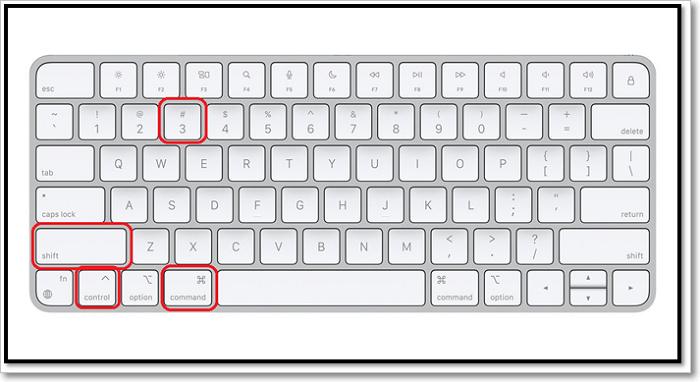
Solution 1. Capture The Entire Screen
The first and perhaps the easiest step is for you to capture your entire screen. This means everything in between will be taken as a screenshot from one corner to the next. This frozen frame will appear as a picture, allowing you to save the specific area you wish to.
But, to capture the entire screen, here's what you need to do:
Step 1. Press Command + Control + Shift + 3
Step 2. Wait for the snapshot
Step 3. Done
This will take a picture of your entire screen and save it for previewing. To open the preview, you'll have to press Control + V on your keyboard and use the screenshot in your desired location, document, image, etc. Or, you can press Shift + 3 to save the image to your Desktop as a PNG file.
Solution 2. Capture A Selected Area
You can also use your mouse and keyboard combination to take a snip out of your screen. In other words, this method will allow you to capture a selected area from your Mac screen. To do that, you'll have to follow a different route this time.
Here it is:
Step 1. Make sure the area you wish to capture is on
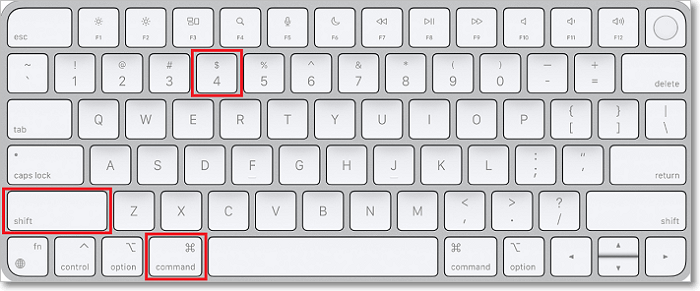
Step 2. Press Command + Shift + 4
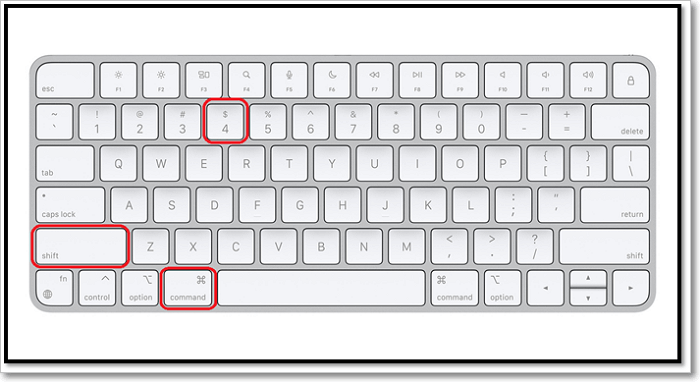
Step 3. Wait till the mouse cursor turns into a crosshair
Step 4. Use your mouse to capture a specific region on your screen
Step 5. Press Shift + 4 to save it to your Desktop
Step 6. Done
Remember, the Mac will take the entire screen's picture once more if you press space during this process. To avoid that, make sure you're using the crosshair cursor to pick out a specific region and then save it to your Desktop.
Solution 3. Using The Touch Bar
To take screenshots using the touch bar, you need to bring the screenshot icon to your touch bar in the first place. So, here's how you can do it:
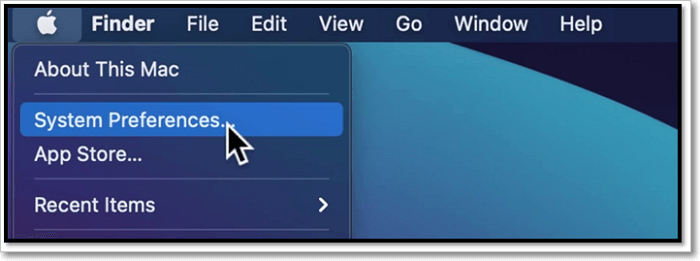
Step 1. Tap the Apple logo for the drop-down menu
Step 2. Click on "System Preferences"
Step 3. Head into Keyboard settings
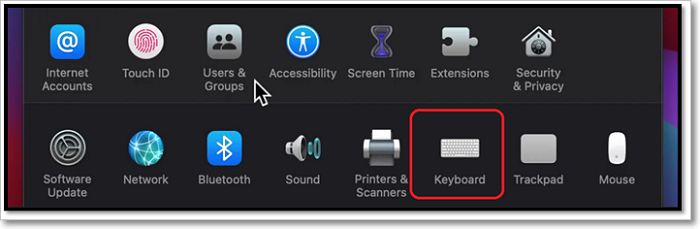
Step 4. On the bottom side, tap "Customize Control Strip"
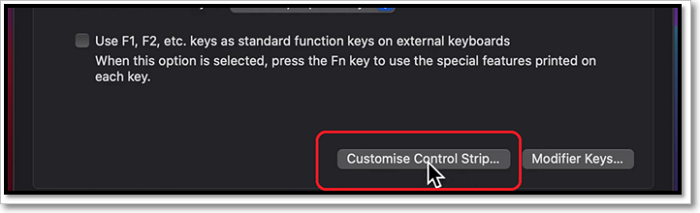
Step 5. Drag and drop the Camera (Screenshot icon) into the touch bar
![]()
Step 6. Done
Once done, your Mac will have an icon in the touch bar:
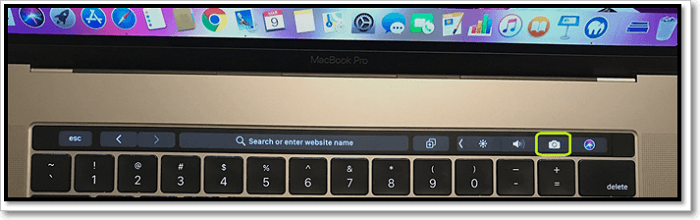
From there on, you just have to press the button to take an entire screenshot next time. However, if you're looking to screenshot the Touch bar itself, you'll have to do this:
Step 1. Press Shift + Command + 6
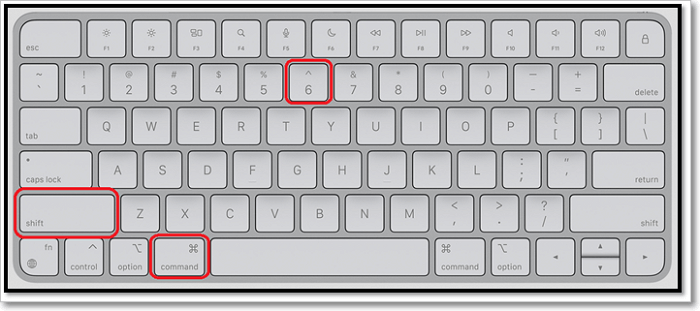
Step 2. Press Command + 6 to save the image
Step 3. Done
Once done, you can easily take screenshots of your touch bar and your screen too.
Solution 4. Take Screenshots With Grab
Grab is an in-built tool for Mac users, much like Microsoft's Snipping Tool in Windows. This tool allows you to take images and screenshots of your screen quite conveniently. Using this tool is also very easy, as you can simply use it from Utilities. Here's how:
Step 1. Head to Utilities
Step 2. Find and click Grab
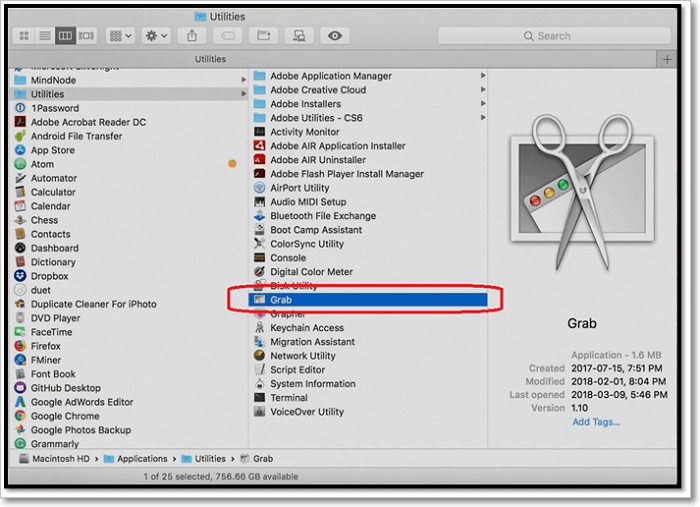
Step 3. Let it launch, and as it does, it'll be available in Dock for quick access
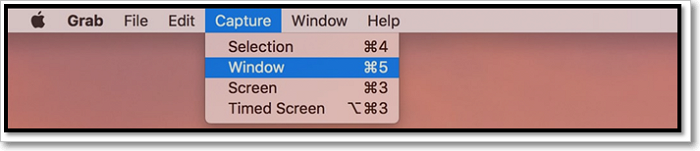
Step 4. Once done, tap on Capture to pick a selection between Window or Selection to take a screenshot
Step 5. Done
This feature will enable you to take your screenshots easily. On top of that, you can simply follow the commands mentioned next to each action to use keyboard shortcuts to take an image.
Solution 5. Timed Screenshots With Grab
Another reason Grab is an outstanding capturing tool is that it allows you to take timed screenshots. In other words, it's the same feature as a timer on your phone camera, which allows you to settle your affairs before it takes the image. Here's how you can use it:
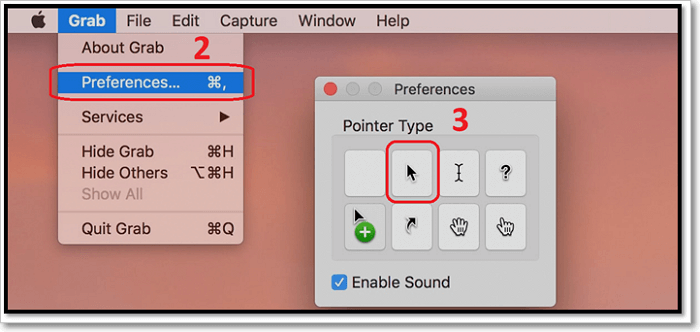
Step 1. Head to Grab once again
Step 2. Tap "Preferences"
Step 3. Pick the Cursor, so it shows during the screenshot process
Step 4. Done
This will ensure that the Cursor shows up during your timed screenshot. However, to take the screenshot itself, here's what you need to do:
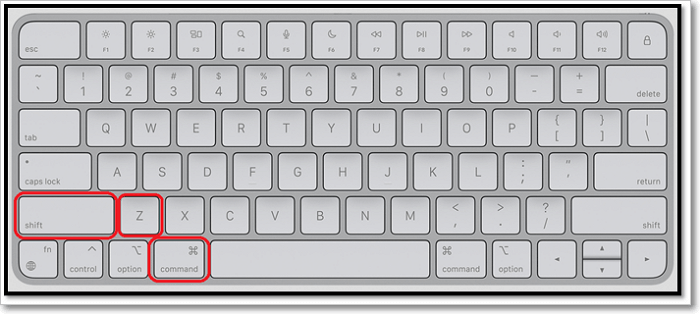
Step 1. Press Command + Shift + Z on your keyboard
Step 2. Set the screenshot, wait for the timer to end, and take the screenshot
Step3. Press Shift + Z to open the taken screenshot
Step 4. Done
Remember, you must wait for the screenshot to complete before seeing it in the preview. However, you can still use the Command + V shortcut to paste it anywhere.
Solution 6. Capture Selection And Save To Clipboard
This solution is easier and much more convenient. This allows you to take an image of specific areas of your screen, Windows, or customized selections. To be able to use this, you'll have to go back to keyboard shortcuts. Here's how to use it:
First Method: Selected Area
Step 1. Press Command + Control + Shift + 4
Step 2. Use your mouse to select the selected area to screenshot
Step 3. Save to clipboard
Step 4. Done
Method Two: Capture And Save To Desktop
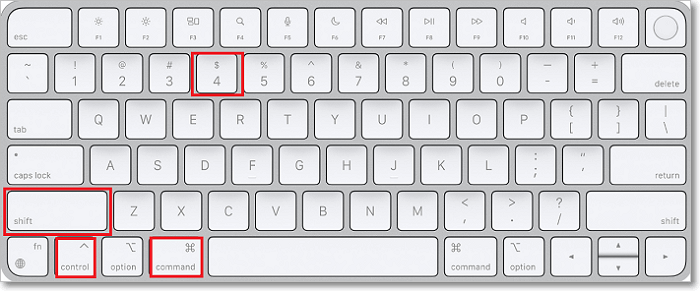
Step 1. Press Command + Shift + 4
Step 2. Use the mouse to capture the selected area
Step 3. Done
This will save the selection on your Desktop without you having to save it. Therefore, pick the method out of the two that suits you the best.
Solution 7. Print Screen On macOS Mojave And Later
On macOS Mojave and later, Apple introduced a specific bar for taking screenshots. This allowed users to take screenshots quite easily. However, this option is more like a pop-up bar, which you can easily access by using these shortcuts:
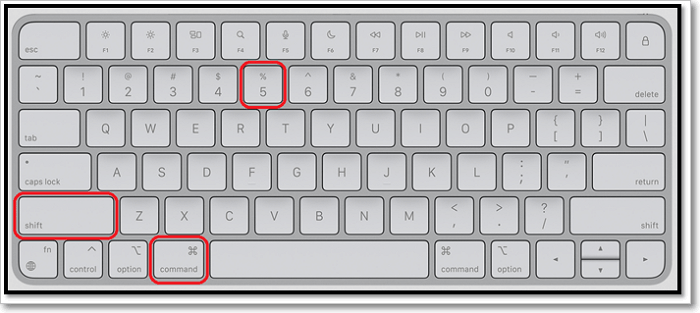
Step 1. Press Shift + Command + 5
Step 2. Wait for the bar to open

Step 3. Pick one of the five options
Step 4. Done
This will allow you to capture screenshots whichever you like, such as selected, Windows, the entire screen, etc.
Bonus Tip. How to Take Screenshots on Windows
For Mac users to take a screenshot on Mac for daily use and work, the above seven solutions are all there. How about Windows users who want to capture a screen for sharing with friends or posting online? Try the easiest way here. Apart from the keyboard rules for screenshots, it's beneficial to use the dedicated screenshot tool named EaseUS ScreenShot. Avoid using complex rules on the keyboard, and this tool allows customizing the screenshot hotkey as you like. From F1 to F12, choose the hotkey you like. It goes fully compatible with Windows 11/10/8.1/8/7!
Before referring to the guide below, click the button to download this tool!
Step 1. Download and install EaseUS Screenshot on your PC, then launch it.

Step 2. You will see two options on the toolbar. The left one is for "Rectangular screenshot", and the right one is for "Full screenshot".
To take a partial screenshot, you just click on the left button (or double click the "Ctrl" key), then drag your mouse to select the area on your screen; To take a full screenshot, you can click the right button (or double click "Alt" on keyboard).

Step 3. When the screen is captured, you can see an editing toolbar below the screenshot. It provides a set of tools to modify the screenshot by drawing, adding text, mosaic, etc.
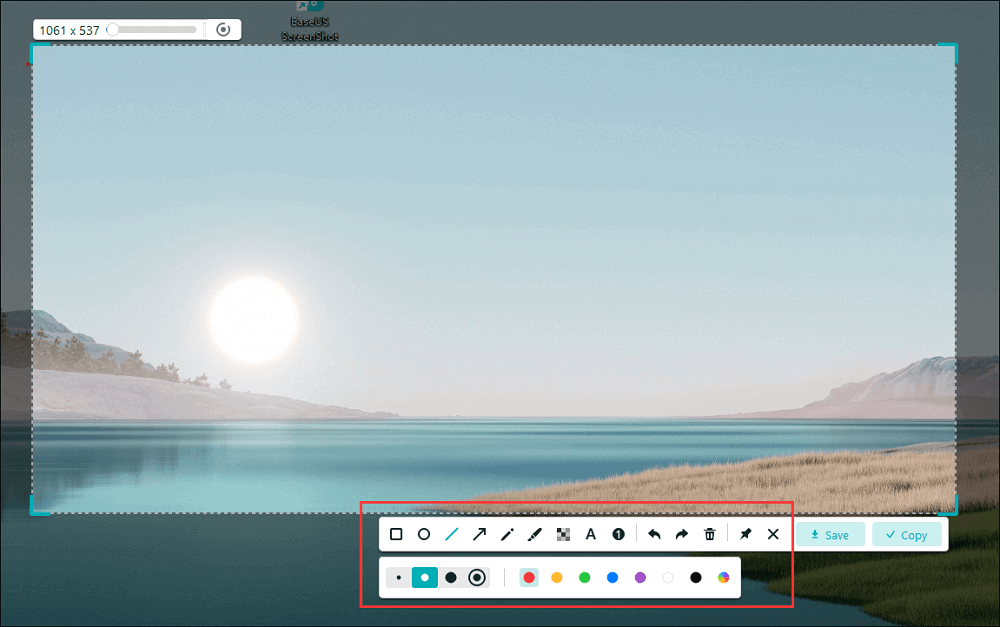
Step 4. Once done, click the "Save" button or press "Space" to save the screenshot. Or, you can click "Copy" or hit the "Enter" key to copy the screenshot to the clipboard.
Where to Find Screenshots
To know where your screenshots are saved is as easy as it comes. If you've copied and pasted, i.e., used the Command + V shortcut to paste it on specific documents or images, then you would have saved it somewhere.
Or, if you used the Command + Shift + 4 shortcut, then you'd have saved it on your Desktop automatically. However, you can still view other shortcuts on your Desktop, as by default, Apple sets these locations to your Desktop.
However, in macOS Mojave or later, you can use a different location by using the Screenshots App within your Mac's utilities.
Conclusion
There you have it, folks, all the possible ways of taking screenshots on Mac. If you're not used to Mac's way of doing things, then you might not have been aware of these methods. However, throughout this article, we covered most of the ways you can take screenshots on a Mac device. So, pick the method that suits your need the best.
FAQs
1. What does the print screen do on Mac?
When you PrintScreen on a Mac, it will be sent to the clipboard or time-stamped, then save on the desktop as a PNG file depending on the method used. You do not need to memorize all these keyboard shortcuts.
2. How to delete a screenshot on your Mac manually?
Step 1. For screenshots on the Desktop, click on the Stack to see all the screenshots.
Step 2. To delete one, click on it and drag it to the Trash, or Control-click on it and choose Move to Trash.
3. Where is the Print Screen button?
Locate the Print Screen key on your keyboard. It's usually in the upper-right-hand corner, above the "SysReq" button, and often abbreviated to "PrtSc." Press the main Win key and PrtSc at the same time. This will take a screenshot of the entire current screen.
Was This Page Helpful?