- About
- Discover EaseUS
- Reviews & Awards
- License Agreement
- Privacy Policy
- Student Discount
Full Guides to Take A Screen Capture in Chrome
Chrome is one of the most used web browsers, and we all use it to search for every second thing. Be it the meaning of a word, some product, location, or anything else, we often need to share it with someone.
One of the best ways to do so is through screen capture because most people prefer reading from images rather than visiting links.
But taking a full-page screenshot is tough, and not everyone knows about it. Of course, you can keep scrolling down and taking screenshots of every next slide using the screenshot keys, but isn't it a hassle?
Therefore, here we are to help you out. Read on to learn about the most efficient ways to take a screen capture in Chrome.
Full Steps to Take a Screen Capture in Chrome
Here we are at the beginning of the central part, and in the following sections, we will discuss in detail the methods using which you can screen capture the Chrome browser.
Worry not if you use various devices since we have solutions for all Computer, Android, and iOS users.
- Method 1. Take a Screen Capture in Chrome on a Computer
- Method 2. Take a Screen Capture in Chrome Using an iPhone
- Method 3. Take a Screen Capture in Chrome Using an Android
Method 1. Take a Screen Capture in Chrome on a Computer
One way to capture your Chrome screen is by using the screenshot shortcut key of your computer system. However, this usual way has demerits. It captures everything on the screen, including your taskbar and other open tabs and data. Besides, it only captures one small slide at a time.
We will use an extension, Awesome Screenshot and Screen Recorder, to avoid such issues and make our task smoother. It is a free tool that allows users to screenshot their Chrome screen and record it.
Since it's an extension installing and using it is very easy. To begin with the process, first, download and install the extension to Chrome, then follow the steps below:
Step 1. On the right side of the address bar, you will see the Extension icon. Click on it.
Step 2. A new window will pop, asking for Google Sign-in; you can do so or skip it. Complete the setup process through the prompts.
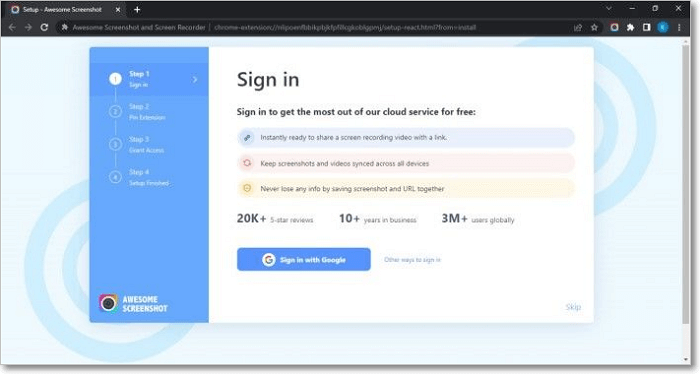
Step 3. Close this tab and go to the tab where your webpage is open.
Step 4. Tap on the Extension icon. To capture, click on the Capture tab, and to record, go to the Record tab.
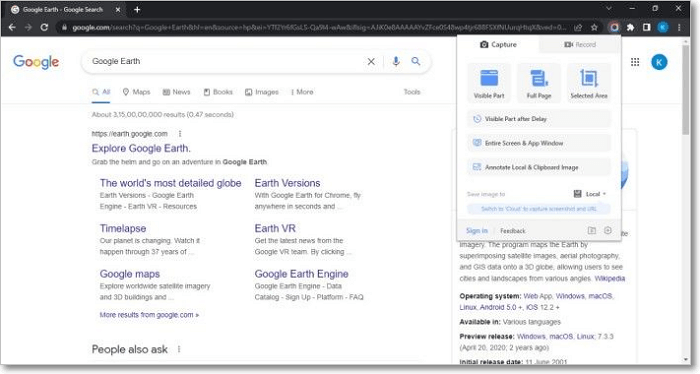
Step 5. Several options are available for different variations. Choose accordingly and let the extension to the job.
Step 6. Once completed, click on Done at the top right corner.
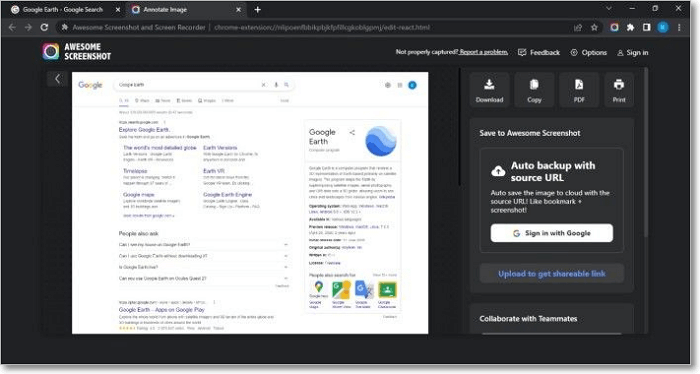
Step 7. Select the image file type on the next page, then save it.
- Note:
- Google sign-in will let you upload the images to your drive. However, it will give the extension to read your cloud data. You can also log in with Apple or Email.
Additionally, several other such extensions come in handy, some with essential attributes like editing the screenshot, are:
- Screen Capture
- Scrnli Screenshot & Screen Video Recorder
- GoFullPage
The steps are more or less the same for every extension; you just need to select based on what preferred features you want.
Method 2. Take a Screen Capture in Chrome Using an iPhone
Taking a screen capture in Chrome for iPhone is easy and can be done using the Full Page screenshot feature. Follow the steps to screen capture in Chrome using an iPhone.
Step 1. Open the webpage in Chrome and take a normal screenshot using the usual method. Either by the shortcut (depending on your iOS) or the Control Center.
Step 2. Tap on the screenshot preview box and then the Full Page option at the top.
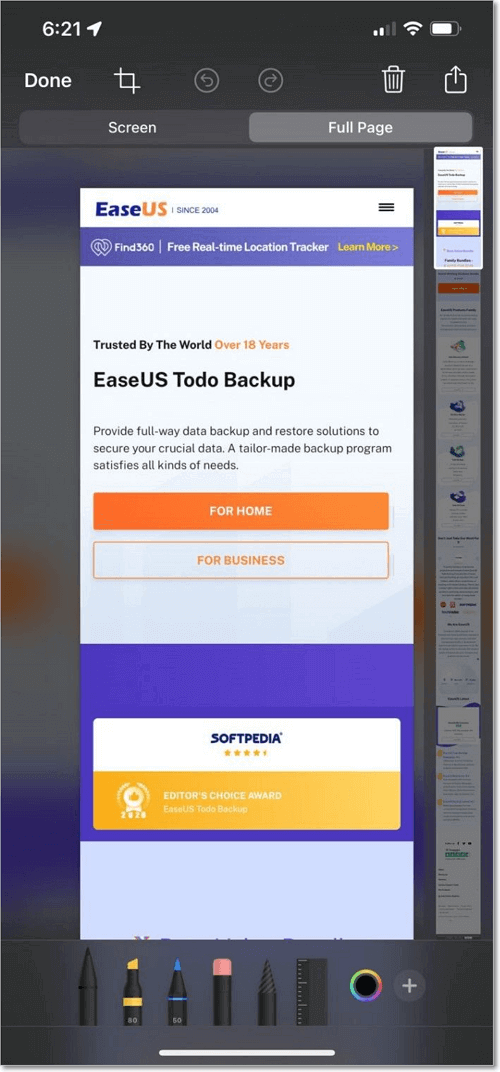
Step 3. Use the bar on the right side to scroll through the page and mark your selections.
Step 4. When your selection is complete, click on Done, then Save it or Share it directly. You have successfully taken a full-page screen capture in Chrome on your iPhone.
Method 3. Take a Screen Capture in Chrome Using an Android
Due to the existence of so many Android brands, the screen capture process for Chrome Android varies greatly. However, there is a common way, too, and here we will see both ways.
Using Usual Screenshot Method (Scrolling or Long Screenshot)
Almost every device has a feature commonly known as the Long Screenshot. The feature name varies with brands, but the steps are practically identical. To take a screen capture, follow the steps given below.
Step 1. Take a normal screenshot using the usual method. The screenshot thumbnail pops up around which you will be able to see certain options.
Step 2. Look for options such as a Down Arrow (Samsung), Expanded Screenshot (OnePlus), Scroll (Oppo/Realme/POCO/Xiaomi/Redmi), Long Screenshot (Vivo/IQOO), etc.
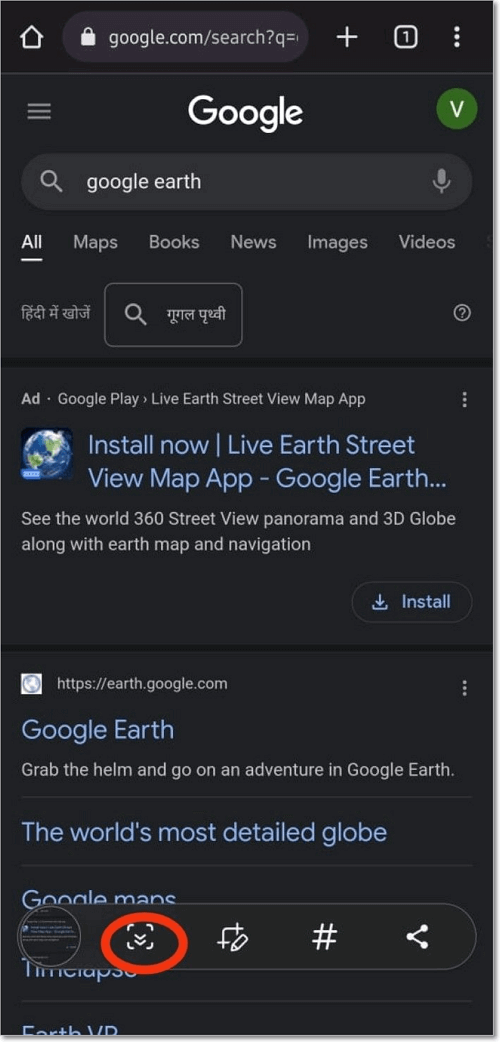
Step 3. Once you find such an option, tap on it, and you will now be able to scroll down the web page. Scroll till you want, then tap on the confirm button.
Your screenshot will now be saved. If you couldn't find such an option, it's probably because your brand doesn't support it. Move on to the next way for this.
Using Chrome Settings
The updated Google Chrome has a built-in feature for taking Long Screenshots, this feature, however, is disabled by default, and you will need to enable it. But before that, make sure both your device and Chrome are updated.
Step 1. Open Chrome, and in the address bar, type chrome://flags, and hit enter.
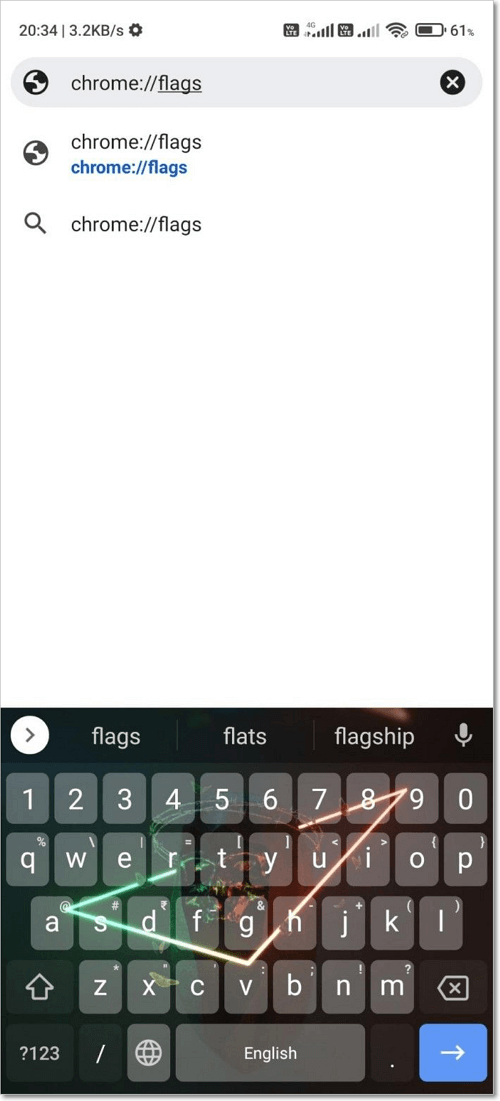
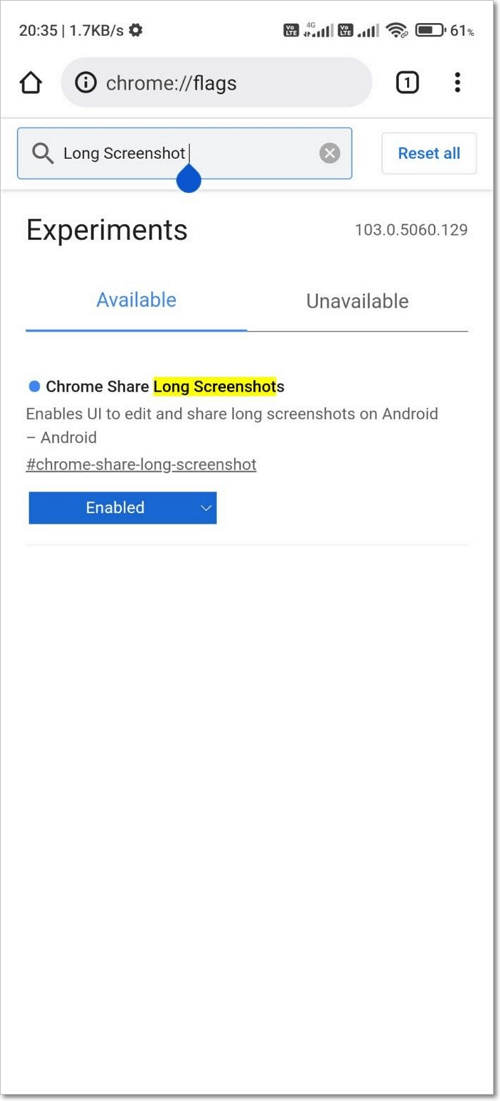
Step 2. In the search bar that appears, search for "Long Screenshot."
Step 3. You will see a result "Chrome Share Long Screenshot," enable it using the dropdown menu. Relaunch Chrome.
Step 4. Open the web page and click on the three-dot icon to open Chrome's Menu.
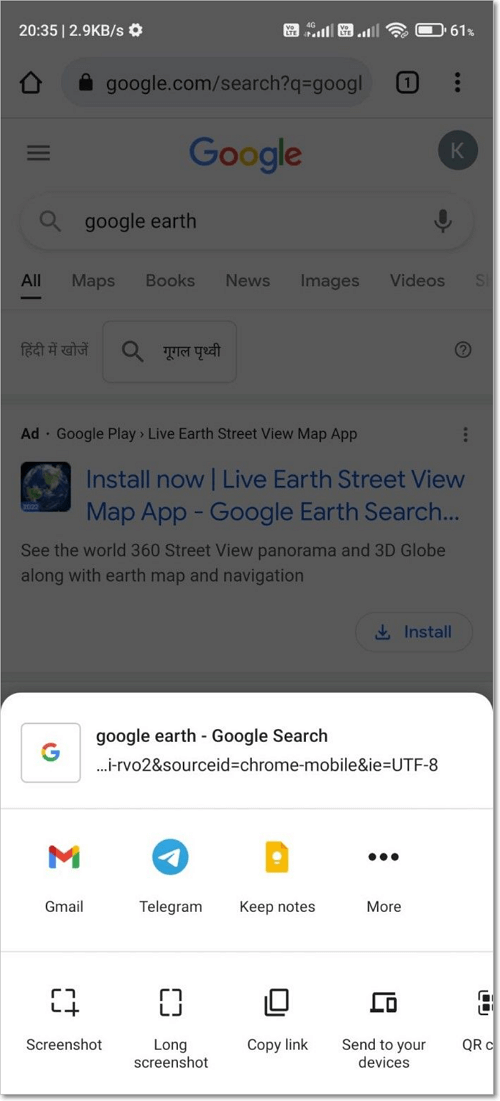
Step 5. In the Menu, click on Share. A pop-up appears, and you will see a Long Screenshot option, tap on it.
Step 6. Use the upward and downward arrows to scroll through the web page. After this, tap on Tick -> Next and save it.
Your screenshot will be saved on your device. This way works for all the devices given your device, and Chrome is updated to the most recent distributions.
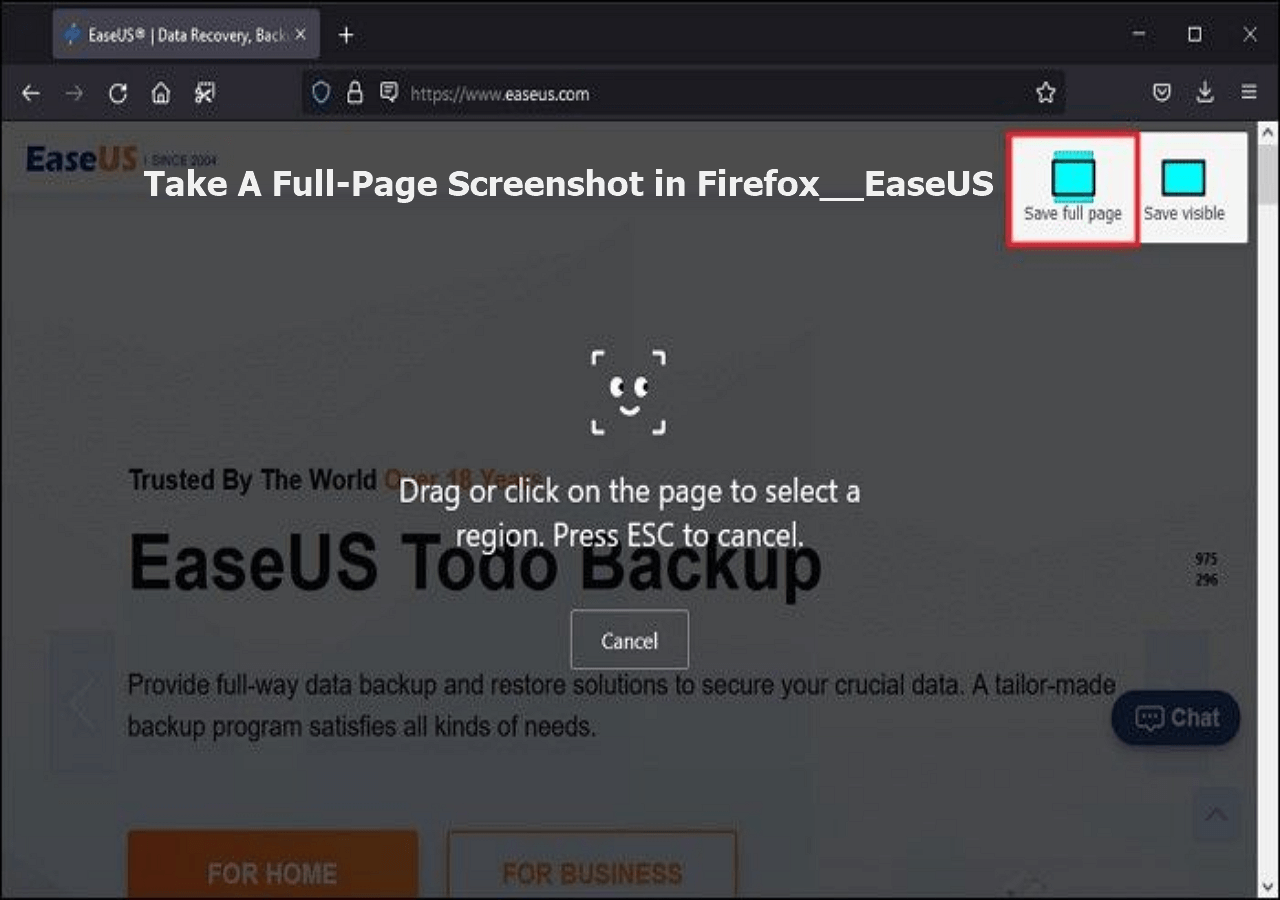
However, it's sure that not everyone like using Chrome, some prefer to Firefox. So, if you are a user of it, here's an article helpful to you for screenshotting in Firefox:
Simple Ways to Take A Full-Page Screenshot in Firefox
Web browsing is one of the most frequent functions performed across a computer. With many renowned web browsers being used across the digital space, Mozilla Firefox is one of the most consumed browsers.
How to Take a Full-Page Screenshot Without an Extension in Chrome
Taking screen captures with an extension is very easy, but many of you wouldn't want to try it. It's true because extensions ask for permission and access a lot of data. Though they are mostly safe, an alternative method is using a third-party screen capture tool--EaseUS ScreenShot. Follow the steps to take a full-page screenshot with it.
Step 1. Download and install EaseUS Screenshot on your PC, then launch it.

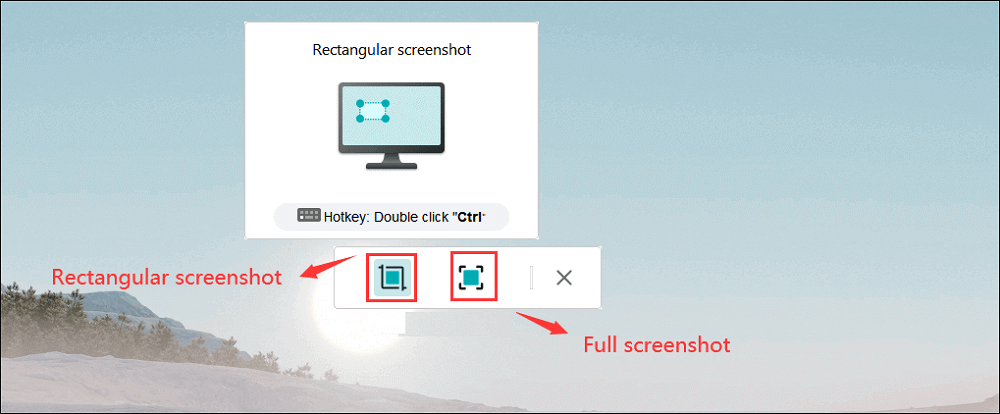
Step 2. You will see two options on the toolbar. The left one is for "Rectangular screenshot", and the right one is for "Full screenshot".
To take a partial screenshot, you just click on the left button (or double click the "Ctrl" key), then drag your mouse to select the area on your screen; To take a full screenshot, you can click the right button (or double click "Alt" on keyboard).
Step 3. When the screen is captured, you can see an editing toolbar below the screenshot. It provides a set of tools to modify the screenshot by drawing, adding text, mosaic, etc.
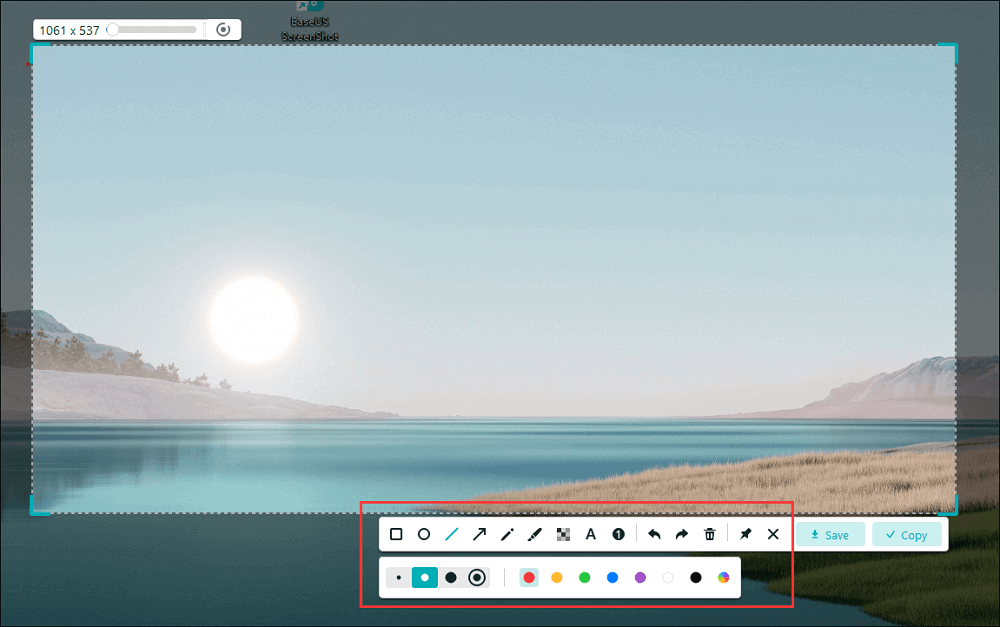
Step 4. Once done, click the "Save" button or press "Space" to save the screenshot. Or, you can click "Copy" or hit the "Enter" key to copy the screenshot to the clipboard.
However, this method is a bit inconvenient since the developer tools screen took up most of the space when I tried it. And the image dimensions were not as expected. The steps are the same for both Windows and Mac.
Conclusion
To summarise, taking a single screen or slide screenshot on chrome is easy; it just requires the usual shortcuts. However, taking a full capture of a web page is tough, you need advanced methods like extensions, third-party apps, or developer tools. We discussed every effective way in which you can take a full-page screenshot.
Doing this on computers is relatively easier than doing it on the phone. Since not every device supports Scrolling screenshots or Full-Page screenshots, users need alternate Chrome settings. Notably, using extensions for computers is a good method, credit to its features compared to the developer tools option.
Take a Screenshot in Chrome FAQs
Here are some of the people's most frequent questions regarding "Screenshots in Chrome" and their answers, so check them out.
1. How do I save my screenshots?
The screenshots taken using the device options such as Developer tools are automatically saved in default locations. You can find them in the image section on your smartphones while it is saved in the Pictures or Downloads folder on computers.
Images saved through extensions are downloaded in your default download location. You can select the site whenever you don't have a default.
2. What's the best Chrome Extension to capture a full-page screenshot?
Every extension is great in its way and attributes. However, Awesome Screenshot and Screen Recorder is the best by far. Features such as capture and recording, editing, and various save file formats with cloud upload make it the best Chrome Extension to capture a full-page screenshot.
3. How to screenshot a web page on Chrome?
You can screenshot a web page on Chrome differently depending on your device and preferred method. And in this article, we mentioned all the detailed steps and the extra knowledge required to do so.
However, the most common way to do so is by clicking the Windows + PrtScn keys (Windows) or the Command + Shift + 3 keys (macOS). You can also use an extension to help take screenshots on Chrome.
Was This Page Helpful?
