
- About
- Discover EaseUS
- Reviews & Awards
- License Agreement
- Privacy Policy
- Student Discount
How to Screenshot on PC Windows 10 Without Print Screen
Jane Zhou Updated on
May 10, 2024|
min read
The screenshot has become essential to work-life with all the technological advancements. Sometimes, the computer screen shows significant content that must be saved or shared with others. Screenshots enable you to capture exactly what's displayed on your PC screen.
There are many ways to screenshot on PC Windows 10, either with or without the print screen. You have to spend a lot of time using Print Screen with the help of short keys because it involves extra steps of finding, pasting, and saving the image file. To avoid unnecessary and time-consuming steps, you need to download software on your PC once.
Here is a detailed procedure to take screenshots on windows 10 using software and the print screen function on your PC via short keys or snipping tool.
How to Take Screenshots on Windows 10 PC Without Print Screen
To capture a screenshot on PC Windows 10 without a print screen, you need fast software to do the task without consuming your time and energy. That software would be EaseUS ScreenShot.
It is an easy-to-use and quick screen capturer that can enable you to capture a full screen or take a partial screenshot on Windows. It has unlimited features to make this screen-capturing process easier for everyone.
Taking and saving screenshots has never been as smoother and faster as with this software. You have to perform some simple steps to get the desired results free of cost. Check other features of this tool below.
EaseUS ScreenShot
- Customize the width and height of the screenshot
- Flexible capture on any area of your screen
- Take a screenshot on Lenovo, Dell, Asus, etc.
- Edit the screenshots with essential editing tools
- Manage the screenshots with one click
Step 1. Download and install EaseUS Screenshot on your PC, then launch it.

Step 2. You will see two options on the toolbar. The left one is for "Rectangular screenshot", and the right one is for "Full screenshot".
To take a partial screenshot, you just click on the left button (or double click the "Ctrl" key), then drag your mouse to select the area on your screen; To take a full screenshot, you can click the right button (or double click "Alt" on keyboard).

Step 3. When the screen is captured, you can see an editing toolbar below the screenshot. It provides a set of tools to modify the screenshot by drawing, adding text, mosaic, etc.
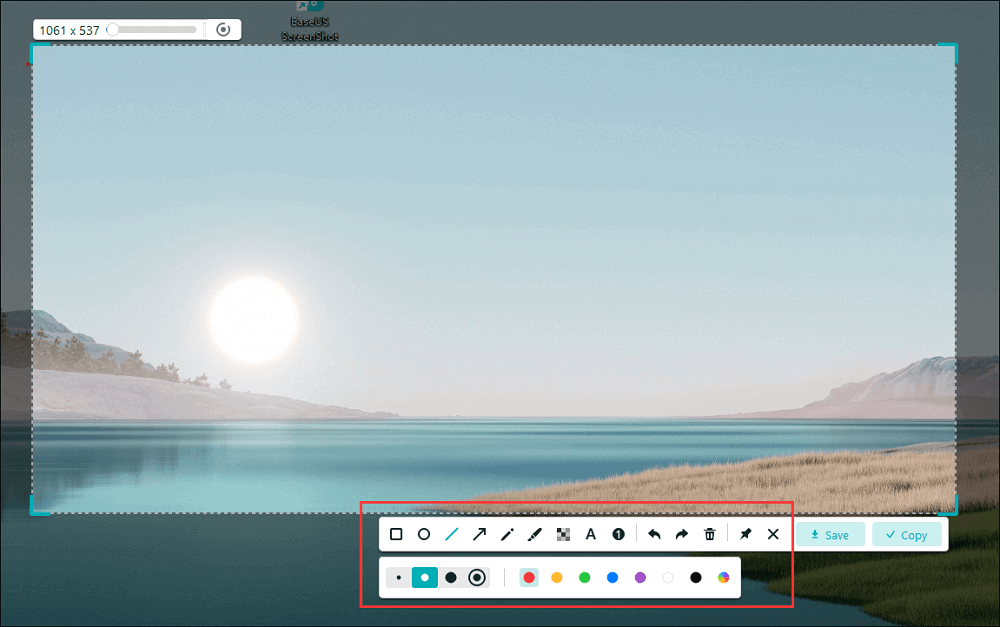
Step 4. Once done, click the "Save" button or press "Space" to save the screenshot. Or, you can click "Copy" or hit the "Enter" key to copy the screenshot to the clipboard.
How to Screenshots on PC Windows 10 with Print Screen
If you don't want to install software on your Windows PC, you may benefit from the solutions below.
#1. How to screenshots on PC with Print Screen
Print Screen Key is one of the most used and beneficial ways to take a Windows 10 screenshot. It is denoted as PrtScn on the keyboard. All you have to do is press this PrtScn key to capture the entire PC screen.
The screenshot is saved in your Clipboard now. Insert the screenshot in any programs (e.g., Paint) that allow image insertion to save the file.
- Screenshot the entire screen
This option is applicable if you want to screenshot the entire screen and automatically save it to This PC > Pictures > Screenshot's folder.
For this method, you need to press the Windows key + PrtScn. The PC screen will get dimmed on the press for you to select the only part you want a screenshot of. That is all, as easy as that!
- Screenshot an active window
This method is proper when you need a screenshot of an active window you are working in. To apply this, press Alt + PrtScn. The screenshot is saved in the clipboard. Open it in any image, insert programs like Paint, and save it.
#2. How to Capture Portion of Screen with Snipping Tool
Snipping Tool is an excellent program for Windows 10. It is flexible and works swiftly and efficiently. You can use it when you want to take a screenshot and save it as a file. Impressively, it excludes the step of pasting the screenshot first into another program to save it.
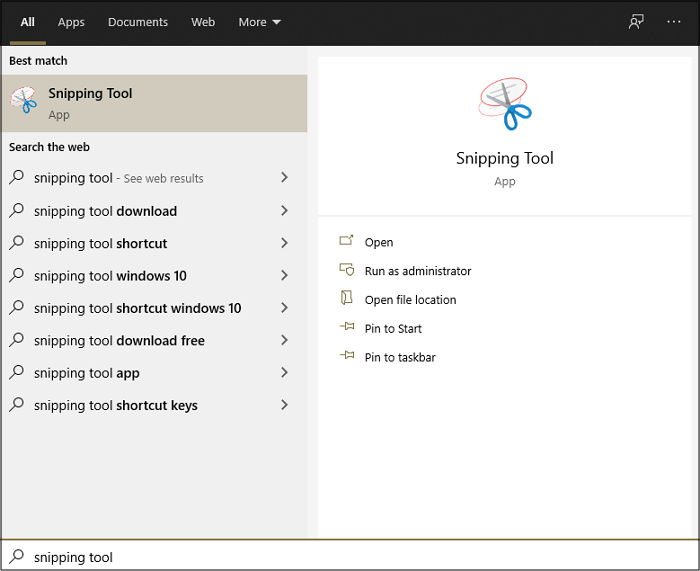
Step 1. Search the Snipping Tool in Windows and open the program.
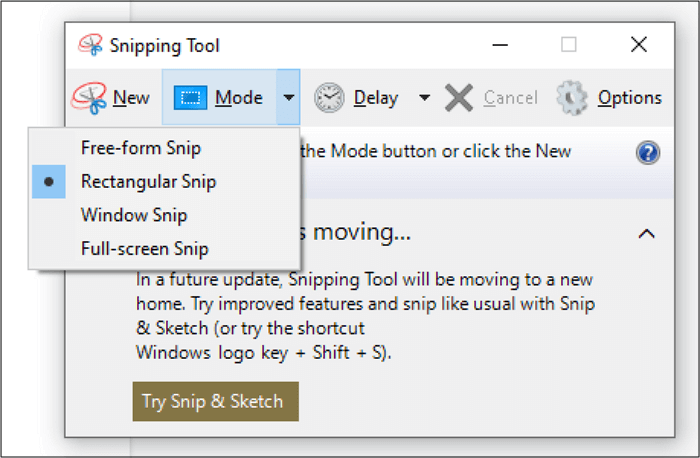
Step 2. Then, select the type of snip you want in the Mode dropdown. This tool offers you the following variety of screenshots:
- Rectangle: draw a rectangle covering what you want to be in the screenshot
- Free form: draw with your cursor, and it will become a screenshot
- Windows: select a specific window
- Fullscreen: take a screenshot of your entire screen
Step 3. Once you know what screenshot you want, click "New" at the top bar or press Windows + Shift + S. On this command, the PC screen will go dim. Draw with the help of the cursor.

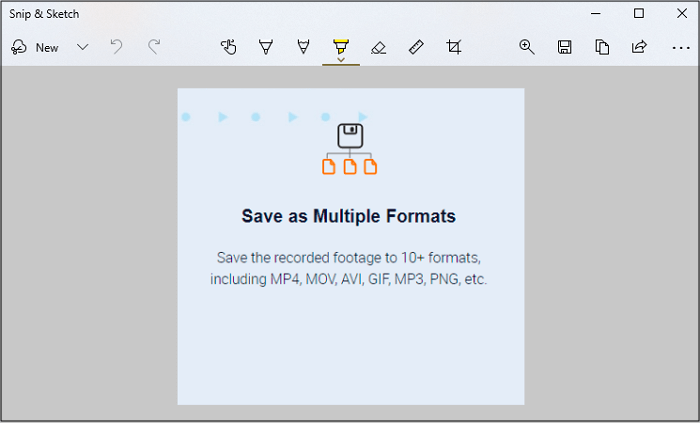
Step 4. After taking the screenshot, it will open in a window where you can annotate, edit, and save it.
Step 5. Click File > Save As to store the screenshot in the desired PC folder.
See also:
Conclusion
Taking a screenshot on PC Windows 10 is a daily need as the times are getting purely technological. Print Screen of Windows has a dedicated technique to screenshot your entire screen, a part of your screen, and a window. Snipping Tool is also a great help to screenshot whatever you want to.
However, these keys require you to open the image in a program with an image insertion tool and then save it. To avoid this and access a straightforward screen recording and process of the screenshot, get yourself EaseUS ScreenShot. It is easy to download and has a user-friendly interface. Moreover, it supports many file formats like PNG, GIF, MP3, etc. It will enable you to record the entire or a part of the screen and then use many editing tools to make it per your demands.
Was This Page Helpful?