-
![]()
Daisy
Daisy is the Senior editor of the writing team for EaseUS. She has been working in EaseUS for over ten years, starting from a technical writer to a team leader of the content group. As a professional author for over 10 years, she writes a lot to help people overcome their tech troubles.…Read full bio -
Jane is an experienced editor for EaseUS focused on tech blog writing. Familiar with all kinds of video editing and screen recording software on the market, she specializes in composing posts about recording and editing videos. All the topics she chooses …Read full bio
-
![]()
Alin
Alin is an experienced technical blog writing editor. She knows the information about screen recording software on the market, and is also familiar with data cloning and data backup software. She is expert in writing posts about these products, aiming at providing users with effective solutions.…Read full bio -
Jean is recognized as one of the most professional writers in EaseUS. She has kept improving her writing skills over the past 10 years and helped millions of her readers solve their tech problems on PC, Mac, and iOS devices.…Read full bio
-
![]()
Jerry
Jerry is a fan of science and technology, aiming to make readers' tech life easy and enjoyable. He loves exploring new technologies and writing technical how-to tips. All the topics he chooses aim to offer users more instructive information.…Read full bio -
![]()
Rel
Rel has always maintained a strong curiosity about the computer field and is committed to the research of the most efficient and practical computer problem solutions.…Read full bio -
![]()
Gemma
Gemma is member of EaseUS team and has been committed to creating valuable content in fields about file recovery, partition management, and data backup etc. for many years. She loves to help users solve various types of computer related issues.…Read full bio -
![]()
Shelly
"I hope my articles can help solve your technical problems. If you are interested in other articles, you can check the articles at the bottom of this page. Similarly, you can also check my Twitter to get additional help."…Read full bio
Page Table of Contents
Jean
Updated on Jun 09, 2026
0 Views |
0 min read
Want to know how to save a screenshot as a PDF but don't know where to start? Whether you're on Windows, Mac, iPhone, Android, Chromebook, or online, each device handles this task differently - some easily, some confusingly. This guide provides practical solutions to your problems, offering step-by-step instructions and comparisons of tools to help you save, convert, and organize screenshots as PDFs effortlessly.
|
Tool/Method |
Compatibility |
Multi-image PDF |
Best For |
|
Windows & Mac |
✅ Yes |
Beginners and professionals |
|
|
Windows 10/11 |
❌ No |
Quick single screenshot conversion |
|
|
macOS |
✅ Yes |
Mac users comfortable with Preview |
|
|
iOS |
✅ Yes (manually) |
Mobile users needing fast conversion |
|
|
Android 10 |
❌ Limited support |
Basic conversion with built-in features |
Best Tool to Save Screenshots as PDF on Windows and Mac
Although an extra installation is required, EaseUS RecExperts offers the simplest and most powerful solution. More than just a screen recorder, this all-in-one lightweight tool lets you take HD screenshot, save, and manage screenshots in multiple formats. Whether you're documenting tutorials or saving online receipts, it quickly and effortlessly converts your images into PDFs.
Beyond screenshots, it also supports screen recording, webcam overlay, and audio capture, ideal for professionals, educators, and creators who want both visuals and audio in one place.
⭐Key Features of EaseUS RecExperts:
- Save screenshots as JPG, PNG, BMP, or export directly as PDF with just one click.
- Choose where to save your images and keep your folders organized.
- Combine multiple screenshots into a single PDF file easily.
- Annotate, crop, or highlight parts of your screenshot before saving or exporting
- Switch between screenshot, video recording, webcam, and audio modes without switching tools.
🚩Here is how to save screenshots as PDF in Windows and Mac:
Step 1. Launch EaseUS RecExperts and get the screen ready that you want to capture. Click Custom.

Step 2. Then drag your mouse to select the area you want to capture. After that, click the Screenshot button (camera icon) on the main toolbar.
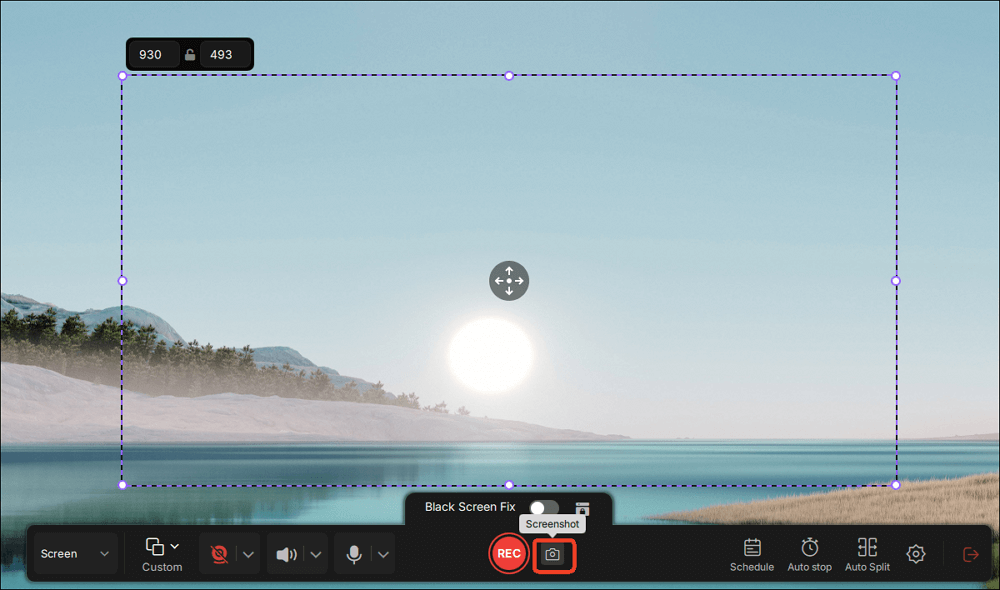
Step 3. The screenshot will be captured instantly and saved to the default folder. You can view or manage it later in My Library.
Share this post to help more users!

How to Take a Screenshot of a PDF in Windows 10/11
If you want to capture part of a PDF and save it as a separate PDF file, Windows 10/11 offers a built-in solution that doesn't require extra tools. This tool also lets you save screenshots to clipboard.
You can use Snipping Tool to take a screenshot in JPG, PNG, or GIF format and then use Microsoft Print to PDF to convert it to a PDF. Although it's a two-step process, it's convenient and doesn't require third-party downloads.
🚩Here are the steps to copy screenshots as PDF file in Windows:
Step 1. Press Windows + Shift + S to activate Snipping Tool.
Step 2. Select the area of the screen you want to capture.
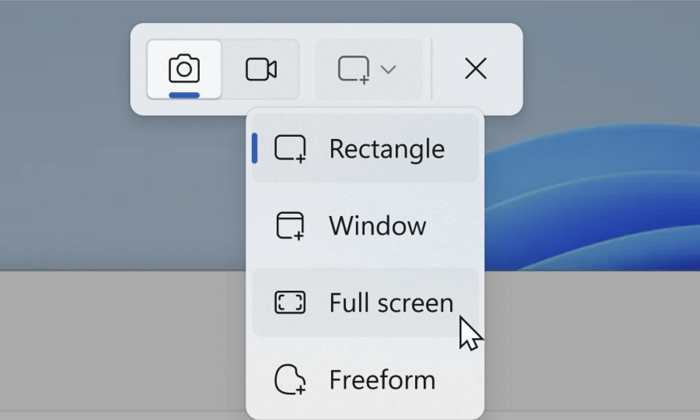
Step 3. You will be led to the Snipping Tool editor, then click the Save icon to save it as a PNG, JPG, or GIF.
Step 4. Locate the saved image on your computer.
Step 5. Right-click the image and select Print.
Step 6. In the Printer drop-down menu, choose Microsoft Print to PDF.
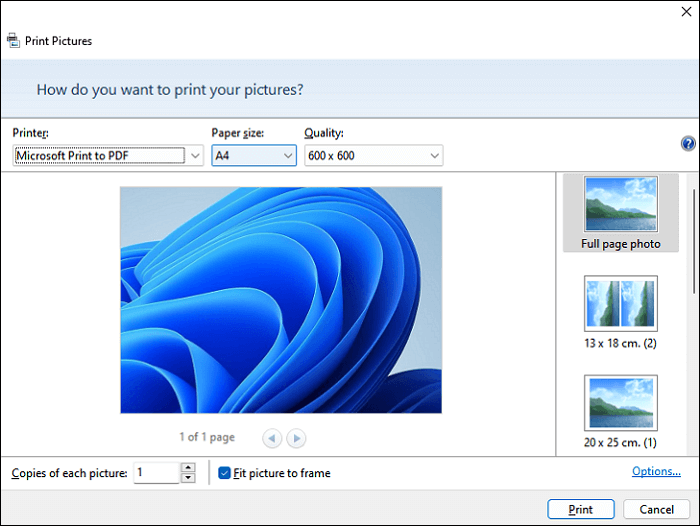
Step 7. Adjust the paper size and layout if needed, then click Print.
Step 8. Choose a name and location to save your PDF file.
- Editor's tips
-
1. To stay organized, create a dedicated folder (e.g., PDF Screenshots) and name each file based on content or page number for easy searching later.
2. If you've captured multiple images, you can select all and right-click to choose Print, then select Microsoft Print to PDF as the printer to merge them into a single PDF file.
3. When capturing text-heavy PDFs, save the screenshot in PNG format instead of JPG to maintain higher clarity and avoid compression artifacts.
Share this post to help more users!
How to Save a Screenshot as a PDF on Mac
If you're using a Mac, you can easily take a screenshot and convert it into a PDF without installing third-party software. macOS supports saving screenshots in PNG format by default, and you can use the built-in Preview app to convert them into PDF. While it's not a one-click PDF export, the process is fast, secure, and software-free.
The pros are: no extra software is needed; high-quality image capture; and easy PDF export using the built-in tools. The cons are that screenshots are not saved directly as PDFs and that multi-image PDFs require manual handling.
🚩Steps to take a screenshot and convert it to PDF on Mac:
Step 1. Use one of the following shortcuts to take a screenshot.:
- Command + Shift + 3: Capture the entire screen.
- Command + Shift + 4: Select a portion of the screen.
- Command + Shift + 5: Open the screenshot menu (for capturing windows or recording the screen).
Step 2. Locate your screenshot. By default, macOS saves screenshots to your desktop with names like Screenshot [time].png.
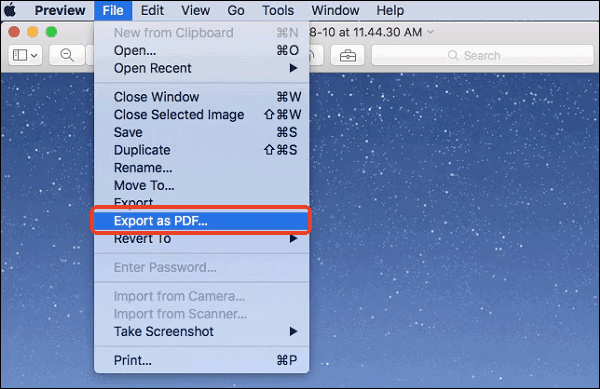
Step 3. Double-click the screenshot, and it will open in the Preview app by default.
Step 4. Click File > Export as PDF, then choose the destination folder and filename. Hit Save.
- Editor's Tips for Mac Users:
-
1. Can't find the screenshot? Check your desktop first. If it's not there, go to System Settings > Keyboard > Shortcuts > Screenshots to verify the save location. If the location is set to Clipboard, screenshots are not saved but copied.
2. Want to combine multiple screenshots into one PDF? Open all screenshots in Preview, then go to the left sidebar and drag them into the correct order. Select File > Print, then choose Save as PDF.
3. Learn more information about how to screenshot on Mac without keyboard if needed.
4. Here are the official documents from Apple Support about Take a picture of your screen in Preview on Mac and Use the Preview pane in the Finder on Mac. Check more details if needed.
Share this post to help more users!
How to Save a Screenshot as a PDF on iPhone
iPhones come with a built-in Print feature that allows you to save screenshots directly as PDFs without the need for any third-party apps. This method is fast and secure, especially useful for users who want to share screenshots in a more formal, document-friendly format, but some users may find the interface a bit hidden or confusing.
🚩Steps to Convert a Screenshot to PDF on iPhone:
Step 1. Press the Side button + Volume Up (on Face ID models) or Home button + Power (on older models) to take a screenshot.
Step 2. Tap the screenshot preview in the bottom-left corner.
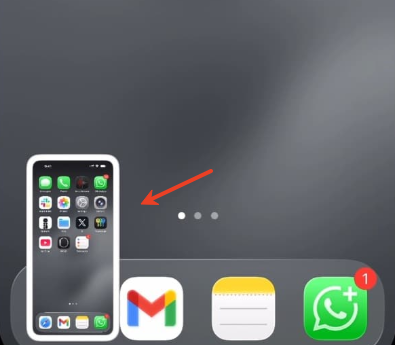
Step 3. Tap the Share icon (box with an upward arrow) in the top-right corner.
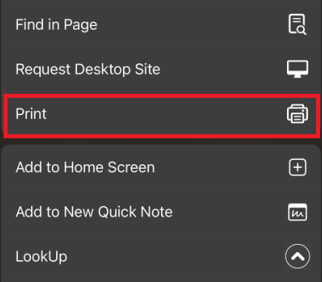
Step 4. Scroll down and choose Print from the list of share options.
Step 5. Use the two-finger zoom-in gesture on the preview to open the screenshot in PDF preview mode.
Step 6. Tap the Share icon again and choose Save to Files.
Step 7. Choose a folder and tap Save. Your screenshot is now saved as a PDF file.
Step 8. Open the Files app, go to the folder where you saved the PDF, and now you can rename, share, mark up, or upload it to other apps (like Mail, Notes, Drive, etc.), depending on your needs.
- Editor's Tips
-
1. The zooming step is crucial - many users miss it and think the method doesn't work.
2. Files saved in On My iPhone can be easily located later through Spotlight search.
3. If you're taking a scrolling screenshot (also called a full-page screenshot) in Safari, Notes, Mail, or other supported apps, you can save it directly as a PDF without using any third-party tools.
How to take scrolling screenshot in iPhone? Reddit
Share this post to help more users!
How to Make PDF of Screenshot in Android Mobile
On Android devices, saving a screenshot as a PDF is straightforward and doesn't require any third-party app. You can use the built-in Print function within the Gallery or Photos app. This method is fast, doesn't compromise image quality, and is compatible with most Android brands, including Samsung, Xiaomi, Oppo, and Google Pixel.
However, the specific naming or placement of the Print option may vary by brand or Android version, which could initially confuse some users.
🚩Steps to Save a Screenshot as PDF on Android:
Step 1. Take a screenshot on your Android phone using the common key combo:
- Press Power + Volume Down simultaneously.
- Or use the three-finger swipe gesture (if supported by your phone).
Step 2. Open the screenshot from your photo gallery or Google Photos.
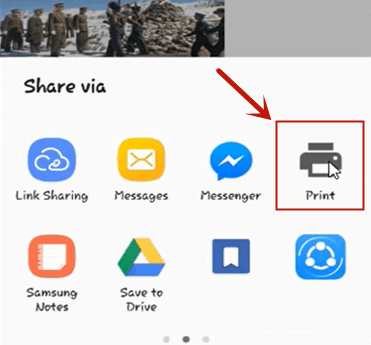
Step 3. Tap the Share icon (usually shaped like <). In the share menu, select Print.
Step 4. Then, tap the three-dot icon (︙), four-dot icon, or More settings in the upper-right corner. Look for the Save as PDF option.
Step 5. Choose a folder to save the file, such as Downloads or Documents, and tap Save.
- Tips
-
1. After saving, open the Files or My Files app to locate the PDF for editing, sharing, or uploading to other platforms.
2. If your phone supports scrolling screenshots (e.g., Capture More or Scroll option), you can also convert long screenshots into PDF format using the same method.
3. In some Android versions, if you can't find the Print option, try opening the screenshot in Google Photos and accessing it from the three-dot menu > Print.
Share this post to help more users!
Conclusion
Creating a PDF from a screenshot is easy, regardless of whether you're using an Android device, iPhone, Windows, or Mac. You can use built-in features like Google Photos or Print options on Android, the Files app on iPhone, or screenshot + Save as PDF tools on desktop.
For a smarter way to capture high-quality screenshots or full-screen content, we recommend using EaseUS RecExperts - an all-in-one screen recorder and snipping tool for both beginners and pros.
Convert Screenshot to PDF FAQs
Below are some frequently asked questions about converting screenshots to PDF files. Whether you're using Windows, Mac, Chromebook, mobile, or online tools, you'll find accurate and quick solutions.
1. How do I save a screen shot to PDF?
To save a screenshot as a PDF, first take a screenshot using your device's built-in tool (like Snipping Tool or Print Screen on Windows). Then open the image in a viewer (e.g., Photos or Preview), click Print, and select Save as PDF as the output. Choose a folder, rename the file, and click Save.
2. How do I save a screenshot as a file?
After capturing a screenshot, your device will usually save it automatically (e.g., to the Desktop, Pictures, or Downloads folder). On Windows, press Windows + Shift + S and paste into Paint to save it manually. On Mac, use Command + Shift + 4 to save directly as an image file.
3. How to convert image to PDF on phone?
Open your screenshot in the Photos or Files app. Tap Share, then choose Print. Pinch out on the preview to open a full-page view, then tap Share again and select Save to Files or Save as PDF. Alternatively, use a dedicated app like Adobe Scan.
4. How to save a screenshot as a PDF on Chromebook?
Open your screenshot from the Files app. Right-click the image and choose Print. In the print preview window, change the destination to Save as PDF, then click Save and choose the location to store the file.
5. How to save multiple screenshots as one PDF?
You can combine multiple screenshots into a single PDF using tools like EaseUS PDF Editor, Preview (Mac), or any online PDF merger. Upload all your image files, arrange the order, and export as one combined PDF file.
6. How to save a screenshot as a PDF online?
Use an online converter such as Smallpdf, iLovePDF, or EaseUS online image to PDF tool. Upload your screenshot, wait for processing, and download the PDF. These tools support drag-and-drop, batch conversion, and require no installation.
Share this post to help more users!