- About
- Discover EaseUS
- Reviews & Awards
- License Agreement
- Privacy Policy
- Student Discount
[All You Need] How to Screenshot on Asus Laptop on PC
Screentaking is a basic feature on any laptop, and the Asus laptop also supports it. With the Windows operating system, Asus allows you to take screenshots with a few simple shortcuts easily. If you don't want to remember the combo rules, try one screenshot tool that allows custom settings.
You can take a snapshot of the entire display or a window on the computer and find it in the snip folder. Also, after pasting snip to Windows built-in tools like Paint, you can edit it. Here, follow this tutorial. You'll learn some efficient ways how to screenshot on Asus laptop.
Screenshot on Asus Laptop with EaseUS ScreenShot
The benefit of using this video screenshot tool is that you can choose a screenshot mode you like. Also, it offers hotkeys for taking a full or partial screenshot, so you can take screenshots without looking for the exact button. What's more, you can adjust the width and length of the snapshot using this tool.
It can not only help you take a screenshot, but also help you edit the screenshots. Most users will choose this tool as its powerful features meet their needs. Now, let's take a look at its main features.
Key Features of EaseUS ScreenShot:
- Take a screenshot of your full or partial screen
- A long screenshot can be taken from your PC
- Custom the screenshot window as you like
- Screenshot on PC Windows 10 and other computers
- Edit and save the screenshots to your device
Do you want to have a free trial? Download it Now!
Here is a list of simple and fast steps for you to follow with:
Step 1. Download and install EaseUS Screenshot on your PC, then launch it.

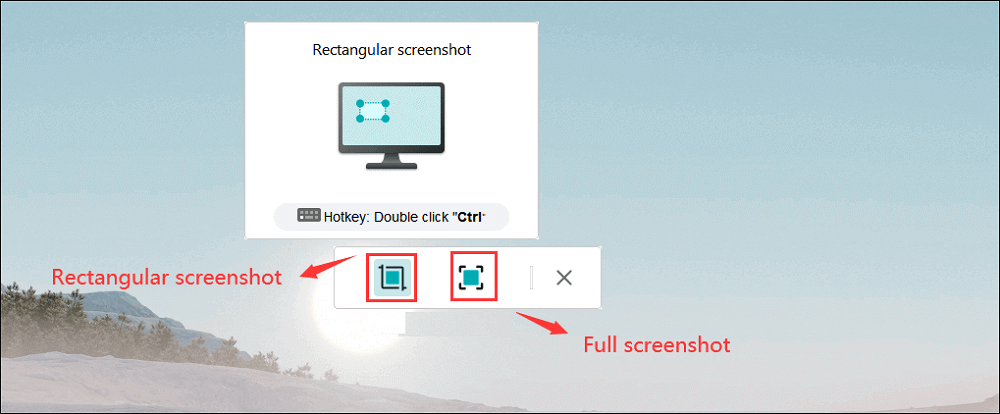
Step 2. You will see two options on the toolbar. The left one is for "Rectangular screenshot", and the right one is for "Full screenshot".
To take a partial screenshot, you just click on the left button (or double click the "Ctrl" key), then drag your mouse to select the area on your screen; To take a full screenshot, you can click the right button (or double click "Alt" on keyboard).

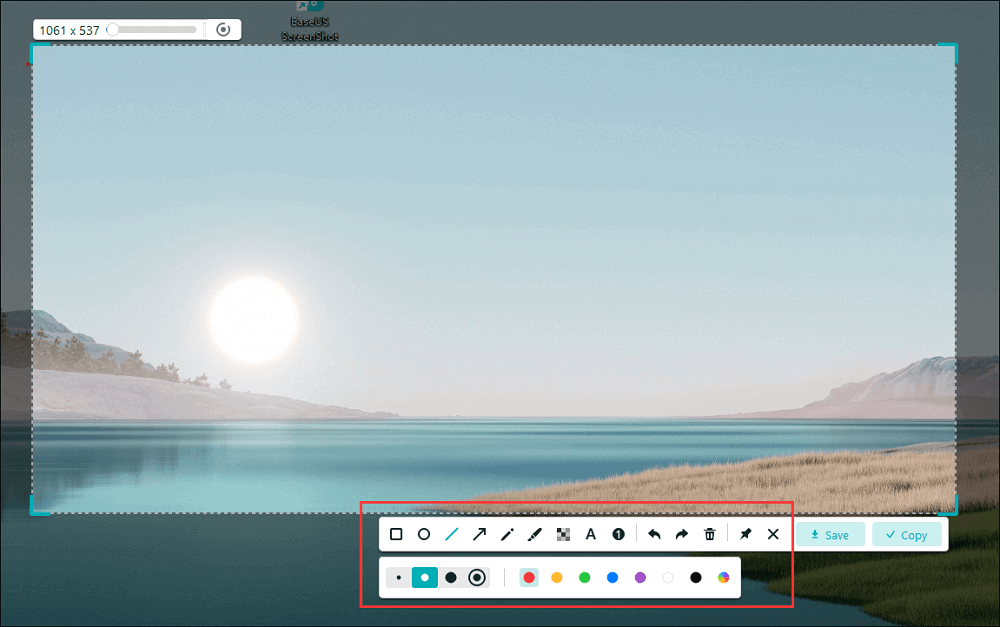
Step 3. When the screen is captured, you can see an editing toolbar below the screenshot. It provides a set of tools to modify the screenshot by drawing, adding text, mosaic, etc.

Step 4. Once done, click the "Save" button or press "Space" to save the screenshot. Or, you can click "Copy" or hit the "Enter" key to copy the screenshot to the clipboard.
Tips: You may also want to know how to screen record on Asus laptop
Snapshot on Asus Laptop with Keyboard
This part introduces to you how to screenshot on Asus laptop, using various combo rules. Depending on the size of the snip, the method will be different. It divides it into a full screen and active windows.
Asus laptop usually uses the Print Screen key to accomplish the task. Firstly, you need to find it out on the keyboard. It could be PrintScreen, PrntScrn, PrntScr, PrtScr, etc. Then, you learn the combo rules below.

Take a full-screen screenshot - Two Methods
Method 1. Press the Windows key + Print Screen.
Method 2. Press Print Screen and open Microsoft Paint to paste it.
To search for the snip, for Windows 8 and 10 users, the picture is saved on the "Screenshots" from the "Pictures" folder. Also, for Windows 7, XP, and Vista users, find it with the help of the application like Paint.
Take a snapshot of the active window
Open the window you want to take a screenshot. Don't let other windows show above that window. Then, press the Alt key first and then hold down the Print Screen key. Now, you will see the appearing window picture.
Screenshot on Asus Laptop Using Paint
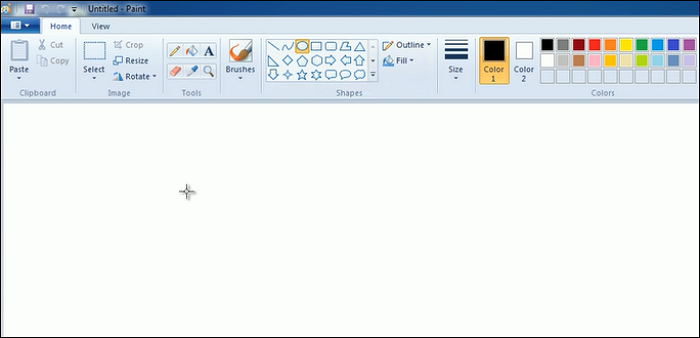
You can have snips using Paint, which is a Microsoft application. After pressing "Print Screen" on your keyboard, paste it to Paint for more editing functions. Then, it helps you crop, resize, and rotate the screenshot freely.
To find Paint, you have two ways, one is by searching it in the Windows searching bar. Another way is pressing the Windows + P and type its name. In Paint, you should hold down Ctrl+V to paste the snapshot. Then, you are allowed to edit this image as you like.

Snapshot on Asus Laptop Using Snipping Tool
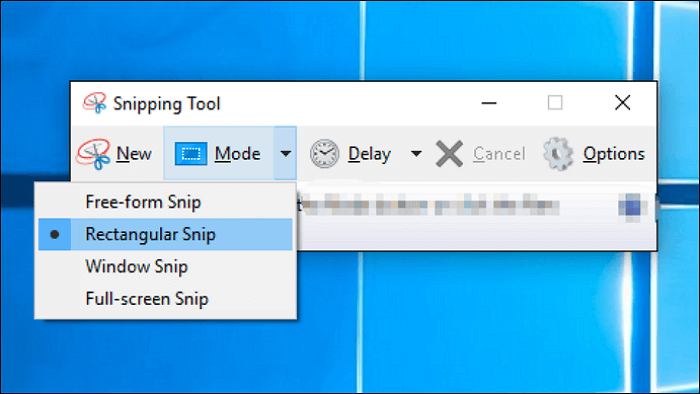
Windows has one functional default tool that allows capturing from all or parts of the computer display. Its interface is very simple, and you choose Mode to start your work. According to your needs for the image, the choice is different. You can also see more details on how to use this application after the interface image.

Here is a list of steps in detail:
Step 1. Type Snipping Tool in the Windows searching bar, and open it.
Step 2. Press Alt + M, and then choose what you want to capture. Before holding down Enter, you can choose it from the custom display, rectangular window, as well as a full-screen snapshot.
Step 3. Hold down Ctrl + S to save your work.
Conclusion
Now, after learning about how to screenshot on Asus laptop, find a suitable method from this post. Most users choose EaseUS ScreenShot for screenshots as its custom hotkey setting. If you agree with that, download it!
Was This Page Helpful?
