-
![]()
Daisy
Daisy is the Senior editor of the writing team for EaseUS. She has been working in EaseUS for over ten years, starting from a technical writer to a team leader of the content group. As a professional author for over 10 years, she writes a lot to help people overcome their tech troubles.…Read full bio -
Jane is an experienced editor for EaseUS focused on tech blog writing. Familiar with all kinds of video editing and screen recording software on the market, she specializes in composing posts about recording and editing videos. All the topics she chooses …Read full bio
-
![]()
Alin
Alin is an experienced technical blog writing editor. She knows the information about screen recording software on the market, and is also familiar with data cloning and data backup software. She is expert in writing posts about these products, aiming at providing users with effective solutions.…Read full bio -
Jean is recognized as one of the most professional writers in EaseUS. She has kept improving her writing skills over the past 10 years and helped millions of her readers solve their tech problems on PC, Mac, and iOS devices.…Read full bio
-
![]()
Jerry
Jerry is a fan of science and technology, aiming to make readers' tech life easy and enjoyable. He loves exploring new technologies and writing technical how-to tips. All the topics he chooses aim to offer users more instructive information.…Read full bio -
![]()
Rel
Rel has always maintained a strong curiosity about the computer field and is committed to the research of the most efficient and practical computer problem solutions.…Read full bio -
![]()
Gemma
Gemma is member of EaseUS team and has been committed to creating valuable content in fields about file recovery, partition management, and data backup etc. for many years. She loves to help users solve various types of computer related issues.…Read full bio -
![]()
Shelly
"I hope my articles can help solve your technical problems. If you are interested in other articles, you can check the articles at the bottom of this page. Similarly, you can also check my Twitter to get additional help."…Read full bio
Page Table of Contents
Jean
Updated on Jun 09, 2026
0 Views |
0 min read
Do you know how to record a presentation with your face and voice on Microsoft PowerPoint? Adding narration in a presentation helps enhance audience engagement and convey insights better for tutorials, lectures, and video creation.
This article will focus on how to video record yourself in PowerPoint and teach you to add your face, voice, and video easily when narrating a PPT.
PAGE CONTENT:
How to Video Record Yourself Presenting PowerPoint on Windows/Mac with EaseUS Screen Recorder
One of the most important reasons why you need a professional screen recorder for presentation is that it simplifies your task and gives you the smoothest experience.
EaseUS RecExperts lets you record yourself doing a presentation on PowerPoint, Google Slides, Zoom, Keynote, and other presenting apps without lag and watermark.
It has both Windows and Mac versions, allowing you to record high-quality about-me presentations, self-presenting videos, and slideshows on multiple applications. The AI-empowered functions enable you to AI transcribe video to text, reduce background noise, and enhance video quality.
Download the EaseUS recording software on your Windows or Mac to record MS PowerPoint with your face and audio.
Let's see how to video record yourself in PowerPoint with EaseUS recording software.
(The stepwise guide applies to the Windows version; Mac users can find steps similar in the application.)
✅Preparations to do:
- Configure your microphone as the input audio device.
- Configure your camera as the input video device if you need to record PowerPoint presentation with webcam.
- Open the MS presentation in advance.
- Shut down other applications to avoid distraction.
- Practice your narration.
Step 1. Launch EaseUS RecExperts and choose a screen recording mode from the main interface. You can select Full Screen to capture the entire display or Custom to record a specific area on your screen.

Step 2. Toggle on the Webcam, and click the small arrow next to the camera icon to select your preferred device. You can also enable Speaker or Microphone if audio is needed in your recording.

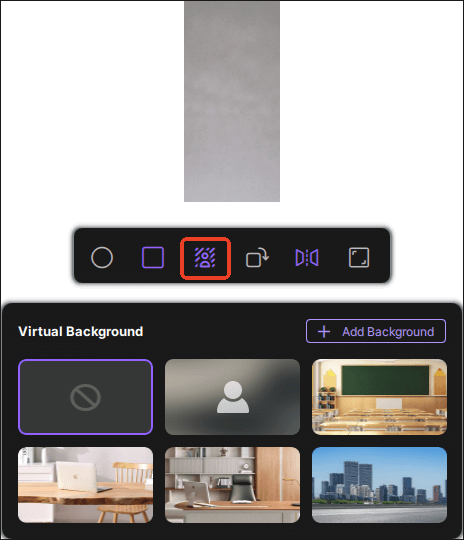
Step 3. In the webcam preview window, you can customize your camera feed. Options include changing the shape of the webcam overlay, rotating or mirroring the view, adjusting the resolution, and even adding a virtual background for a more professional look.
Step 4. Click the red REC button to start recording. During the recording, use the white Pause button to pause or the red Stop button to finish and save your video.
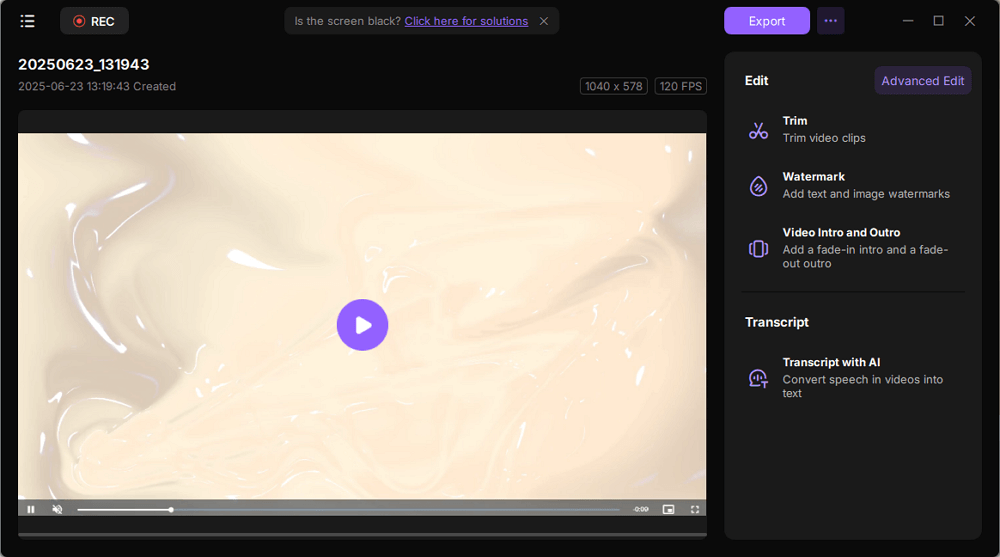
Step 5. After recording, you'll be taken to the preview window where you can trim, edit, and manage your recording files.
How to Record PowerPoint Presentation with Audio and Video on Windows/Mac with Internal Recorder
If you don't want to install additional software, use MS PowerPoint's built-in recording function. Both Windows and Mac users can screen record PowerPoint with audio.
Before you get started, there are some tips you need to pay attention to:
- The recording feature is only available on PowerPoint 2016, PowerPoint 2019, and PowerPoint 365.
- You cannot go back to the previous slide when you are recording. Make sure you have covered everything on a slideshow before you go to the next one.
- MS PowerPoint cannot record full screen. It only captures the app area.
- The saved recording can be very large. Ensure that your laptops or desktops have enough capacity.
- Only support MP4 and WMV video types.
After reading these notes, follow the steps below to record a voice-over PowerPoint.
Step 1. Open the presentation on your Windows or Mac computer. Click Slide Show on the toolbar.
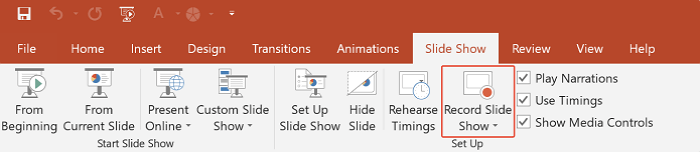
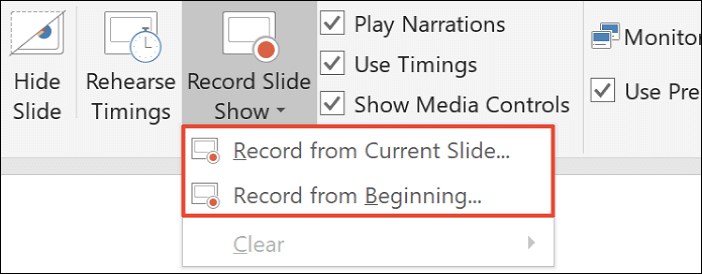
Step 2. Under the tab, click Record Slide Show and select From Current Slide… or From Beginning….
Step 3. You will enter the recording page. Click SETTINGS in the upper-right corner to turn on the Microphone and Camera. Then, click the red RECORD button to start recording. A 3-second countdown timer will appear on the screen.
Step 4. During the process, you can:
- Use the RECORD, PAUSE, STOP, and REPLAY button at any time.
- Use the pen to take notes.
- Click CLEAR to clear recordings on the current side or all slides.
- Click the close button to quit recording.

Step 5. Go to File > Export > Create a video to export the PowerPoint presentation as a video. Here you can change the recording settings such as video quality, recorded timings and narrations, and even the seconds for every slide.
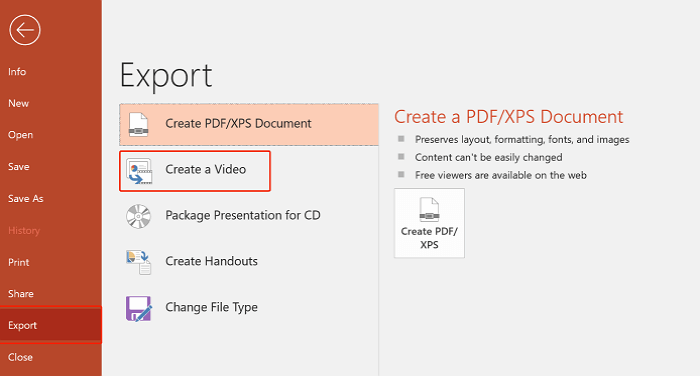
Step 6. Click Create Video again to select a location, file name, and file type (MP4 or WMV) for the recording. Click Save to close the window.
Spread this post out to help more people!
How to Record on PowerPoint on iOS/Android Mobile with Built-in Tools
Some narrators may need to record PowerPoint on the go for a quick presentation. Both iOS and Android can install Microsoft PowerPoint on mobile phones and tablets to open, edit, and create presentations.
Although the app MS PowerPoint does not have a screen recording feature, iOS and Android users can record a video with their mobile phones' built-in screen recorders.
Video record yourself in PowerPoint on iPhone/iPad
- Tip: The recording feature is only available on iOS version 12 or higher.
Step 1. Launch the PowerPoint app and open the PPT you want to add narration.
Step 2. Enable the screen recording feature on your iPhone and iPad. Navigate to Settings > Control Center > Customize Controls and tap the green plus icon next to Screen Recording. (It is usually enabled by default.)
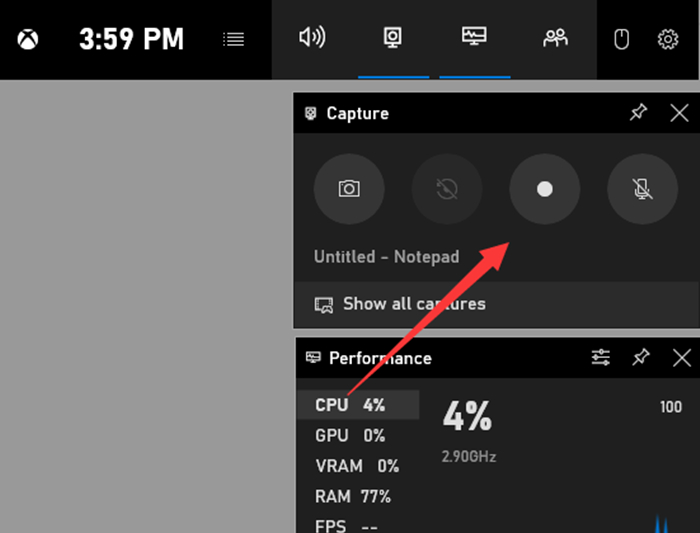
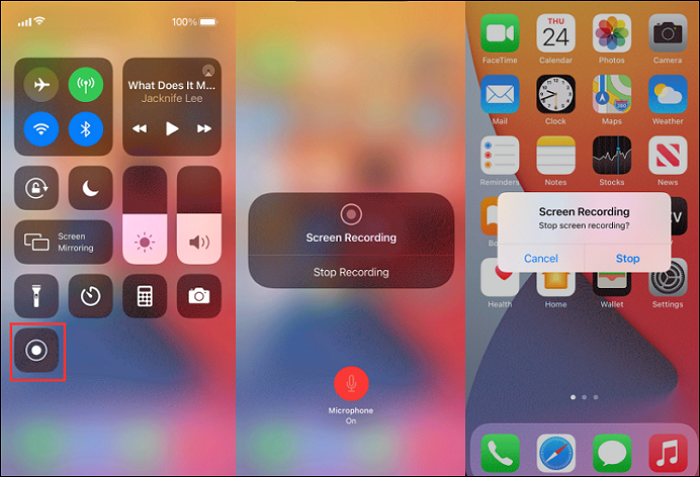
Step 3. Swipe down from the top right corner of the screen and scroll to click the screen recording button (a circle within a circle). A 3-second countdown will appear before the recording begins.
Step 4. Play the presentation while you are talking. You can see the red dot recording icon in the upper left corner of the screen, which means your recording is in progress.
Step 5. Tap the red dot recording icon again to stop recording. Click Stop in the popup to confirm operations.
Step 6. You can find the recording in the Photos app.
Video record yourself in PowerPoint on Android phones and tablets
- Tip: The recording feature is only available on Android 6 or higher.
Step 1. Launch the PowerPoint app and open the PPT you want to add narration.
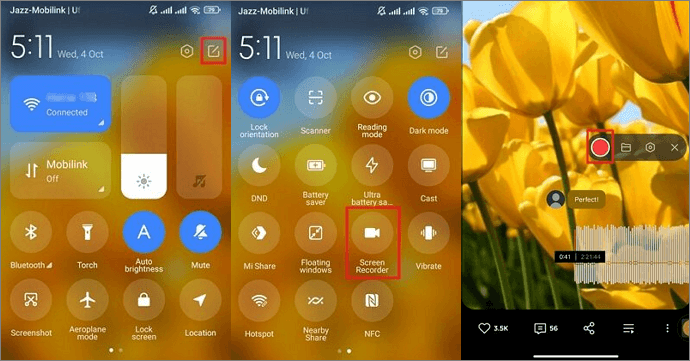
Step 2. Swipe down from the top of the phone screen to launch Quick Settings.
Step 3. Tap the Screen Record button from the list, give permission to track your activity if prompted, and click Start recording.
Step 4. When the 3-second countdown appears, play the presentation and start talking.
Step 5. If you want to stop recording, access Quick Settings and tap the Screen Record button again.
Step 6. You can find the recording in the Gallery app.
- Notices: If your mobile device does not have a built-in recorder or you want to record your face, you need third-party iOS screen recorders:
- For iOS: Record it, TechSmith Capture, DU Recorder, and more.
- For Android: AZ Recorder, XRecorder, and Mobizen, and more.
Final Words
Now, you have learned how to video record yourself in PowerPoint on different devices, including Windows, Mac, iOS, and Android. Capturing your face and audio in the presentation recording can be easy if you choose the proper method.
It is recommended that EaseUS RecExperts be used to screen record a presentation on Mac and Windows computers. Its intuitive interface and robust features let you easily record presentations on Microsoft PowerPoint, Google Slides, Zoom, and more platforms.
Download and use it to make your presentation narration smoother and more effective.
Record PowerPoint with Face FAQs
If you want more information on how to record a video of yourself in PowerPoint, continue reading.
1. How do I insert a voice recording into PowerPoint?
To add a voice-over to PowerPoint:
Step 1. If you have a computer, save this automated voice file. Open the presentation PPT and locate the slide where you want to add audio.
Step 2. Click Insert on the toolbar, tap Audio under the tab, and click Audio on my PC… to select an existing audio file or click Record Audio… to record audio immediately.
Step 3. Now, you can play and pause the audio on the slide.
2. Why don't I have a record button on PowerPoint?
You cannot find a record button because you have not activated this function in your PowerPoint 2016, 2019, or 365. To enable the recording feature in PowerPoint:
Step 1. Go to Files > Options > Customize Ribbon.
Step 2. Under Main Tab, scroll down to find Record, check the box, and click OK to save changes.
Step 3. Go back to the toolbar, and you will see the Record tab.
3. What is the shortcut to start a video in PowerPoint?
To start a video in PowerPoint, press Alt + P or Ctrl + spacebar.