-
![]()
Daisy
Daisy is the Senior editor of the writing team for EaseUS. She has been working in EaseUS for over ten years, starting from a technical writer to a team leader of the content group. As a professional author for over 10 years, she writes a lot to help people overcome their tech troubles.…Read full bio -
Jane is an experienced editor for EaseUS focused on tech blog writing. Familiar with all kinds of video editing and screen recording software on the market, she specializes in composing posts about recording and editing videos. All the topics she chooses …Read full bio
-
![]()
Alin
Alin is an experienced technical blog writing editor. She knows the information about screen recording software on the market, and is also familiar with data cloning and data backup software. She is expert in writing posts about these products, aiming at providing users with effective solutions.…Read full bio -
Jean is recognized as one of the most professional writers in EaseUS. She has kept improving her writing skills over the past 10 years and helped millions of her readers solve their tech problems on PC, Mac, and iOS devices.…Read full bio
-
![]()
Jerry
Jerry is a fan of science and technology, aiming to make readers' tech life easy and enjoyable. He loves exploring new technologies and writing technical how-to tips. All the topics he chooses aim to offer users more instructive information.…Read full bio -
![]()
Rel
Rel has always maintained a strong curiosity about the computer field and is committed to the research of the most efficient and practical computer problem solutions.…Read full bio -
![]()
Gemma
Gemma is member of EaseUS team and has been committed to creating valuable content in fields about file recovery, partition management, and data backup etc. for many years. She loves to help users solve various types of computer related issues.…Read full bio -
![]()
Shelly
"I hope my articles can help solve your technical problems. If you are interested in other articles, you can check the articles at the bottom of this page. Similarly, you can also check my Twitter to get additional help."…Read full bio
Page Table of Contents
0 Views |
0 min read
Webinars can be used for online conferences with thousands of attendees, training courses, public discussions, or workgroup remote meetings. Participants in a webinar can discuss, share desktop, invite guests, or start polls in real-time. It's necessary to record the webinar to view it later as the recordings store a lot of information.

How to record a webinar on Windows 10 or Mac? The webinar recording software can be helpful, and you can capture the whole screen with audio in a seminar. To see more details, keep on reading this post.
- Part 1. How to Record a Webinar on Windows 10 PC
- Part 2. How to Record a Webinar on Mac
- Bonus Tips: Record a Webinar on Zoom
How to Record a Webinar on Windows 10 PC
To capture an online conference on PC, the competent webinar recording software is indispensable. In this part, one beneficial tool is introduced to you, EaseUS RecExperts for Windows, a versatile but user-friendly recorder. It is a rich-featured tool as you can capture all the things that happened in the live-streamed meeting, including the display and sound. Also, you can use it to capture your face with a webcam.
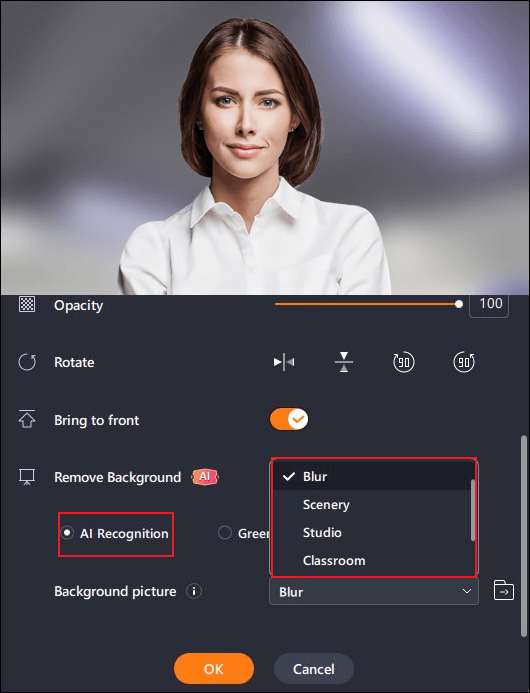
When record screen and webcam, you have some opinions to change the background if you do not want to present the real background. It provides an AI background removal feature, and you choose some background effects, like blur, classroom, studio, and scenery. Moreover, you can also upload a picture from your device to be the virtual background. A pure and solid real background will make the AI background removal feature better.
Main features of this helpful webinar recorder:
- Customize the recording region freely
- Support recording videos in high quality
- Record streaming audio and video on various platforms
- Adjust the format of the output files easily
- Take a screenshot from the saved webinar videos
Download it and start capturing an online conference now! Follow the guide below to record the webinar easily.
Recording a webinar on Windows 10 PC, using EaseUS RecExperts:
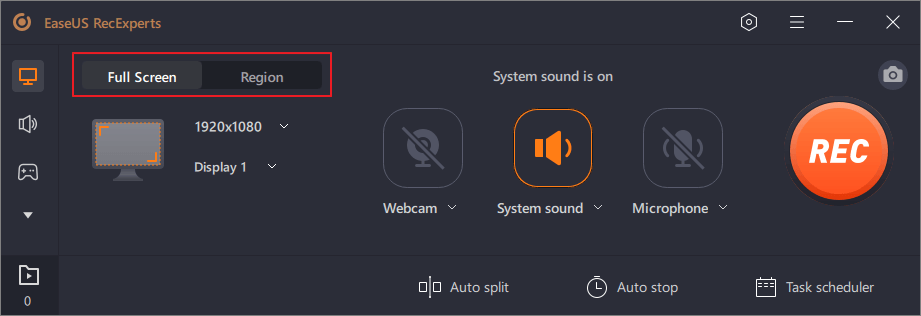
Step 1. Go to the meetings that you want to record. Then, launch EaseUS RecExperts on your devices. Choose the "Full Screen" recording mode or select the recording area in the "Region" mode.
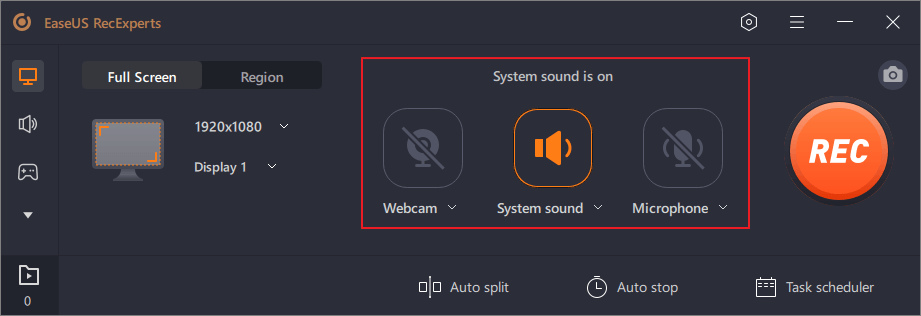
Step 2. Choose to record the webcam, system sound, microphone sound or none by clicking on the according buttons.
Step 3. It offers an AI background changer and green screen feature to users. You can change the video conference background as you like. When all is done, click on the red "REC" button to begin and click "F10" and "F9" to pause or stop recording.
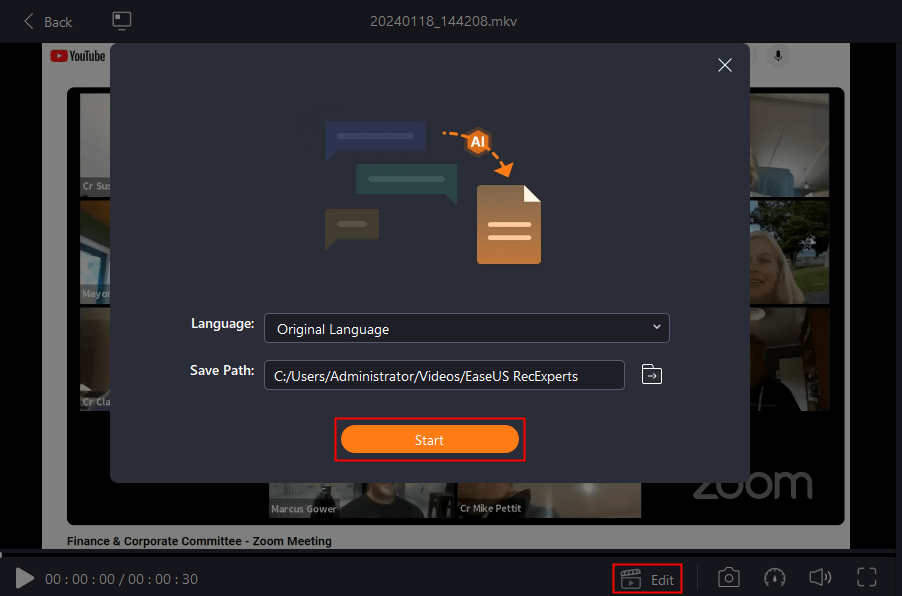
Step 4. After recording, you can view the meeting videos in the pop-up recording list. You can even click "Edit" > "AI Assistant" > "Start" to get a text file of what has been said.
How to Record a Webinar on Mac
Here are two available webinar recording software on Mac, including a third-party recorder and the default program. And the first one is very efficient as it can deal with the system sound.
Video Recording a Webinar with EaseUS RecExperts for Mac
For capturing a web seminar on Mac, choose EaseUS RecExperts, which allows choosing the recording area based on your actual demands instead of the whole screen - so you can record part of the screen.
Luckily, it can be used to record internal audio on Mac. Also, its task scheduler helps record periodic events like online classes or webinars. Only by clicking a small timer icon can you set an appropriate recording duration for the scheduled recording. When it reaches the time limit, this tool will stop the recording task automatically.
Key features of this live webinar recorder on Mac:
- Fully support high definition videos
- Capture your meeting screen with a webcam
- Choose the output formats for recording videos
- Offer built-in tools to edit the captured video and audio files
Download and install this user-friendly webinar recorder now. Even beginners can use it easily.
Recording webinars on Mac, using this powerful online conference recorder:Step 1. Before joining the meeting, download and launch EaseUS RecExperts for Mac. Then, choose a suitable meeting recording area from two options: "Full Screen" or "Region".
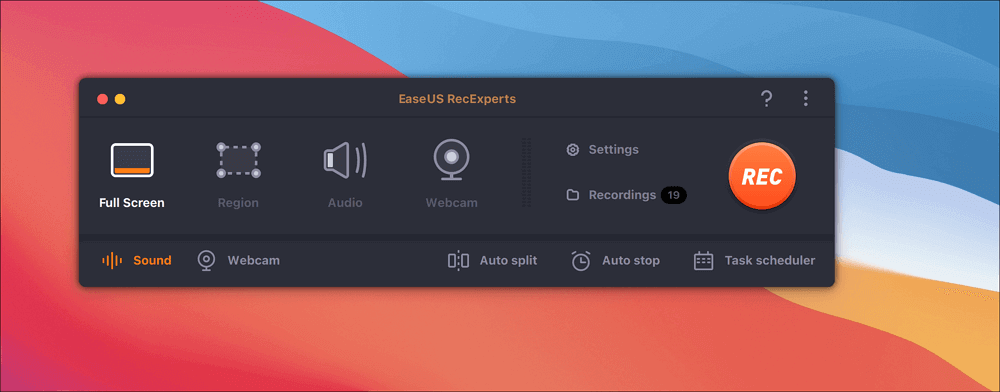
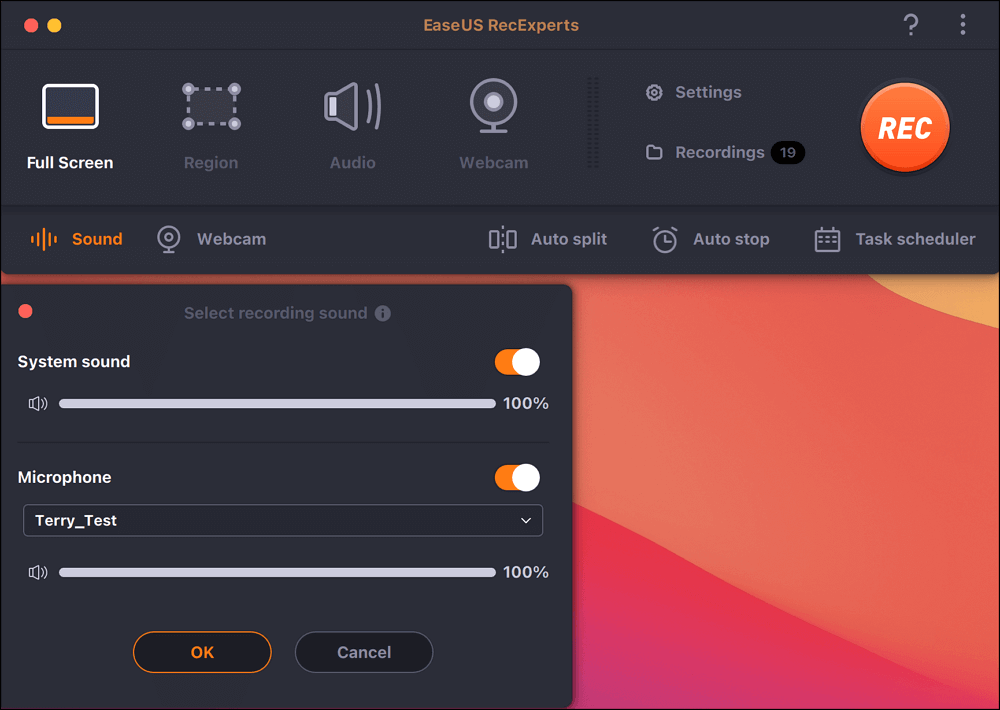
Step 2. Then, click on the "Sound" button at the bottom left corner to select the suitable audio source. The two buttons on the "Select recording sound" window are available to decide if you want to capture system sound, microphone audio, or both of them.
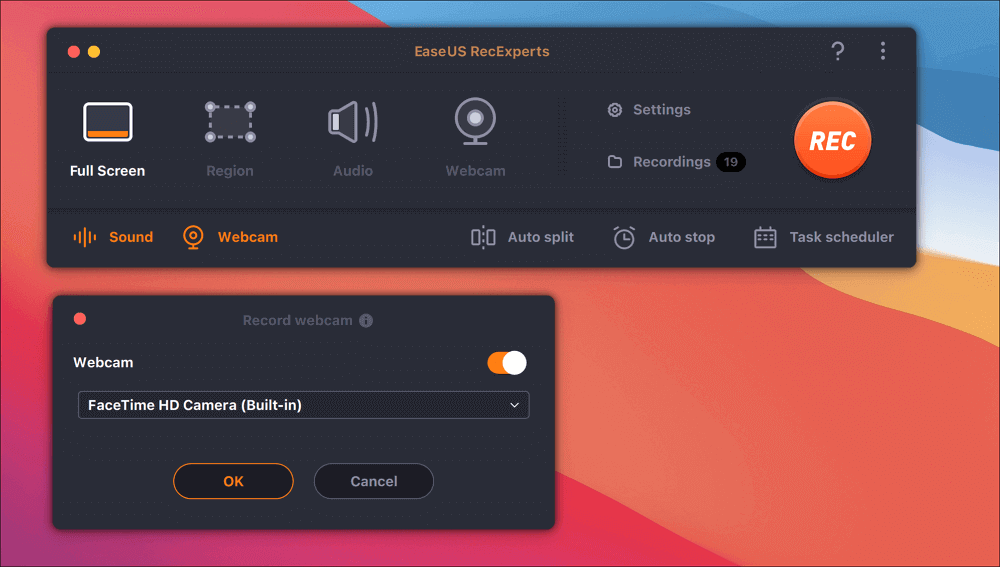
(Optional) To capture the webcam along with the meeting screen, the "Webcam" icon beside the "Sound" button can help activate a built-in camera or an external camera.
After adjusting the settings, hit "REC" to start recording.
Step 3. During the recording, there will be a floating toolbar that enables you to pause or stop the recording, as well as take screenshots. When you want to save the video you captured, click "Stop" on this toolbar.

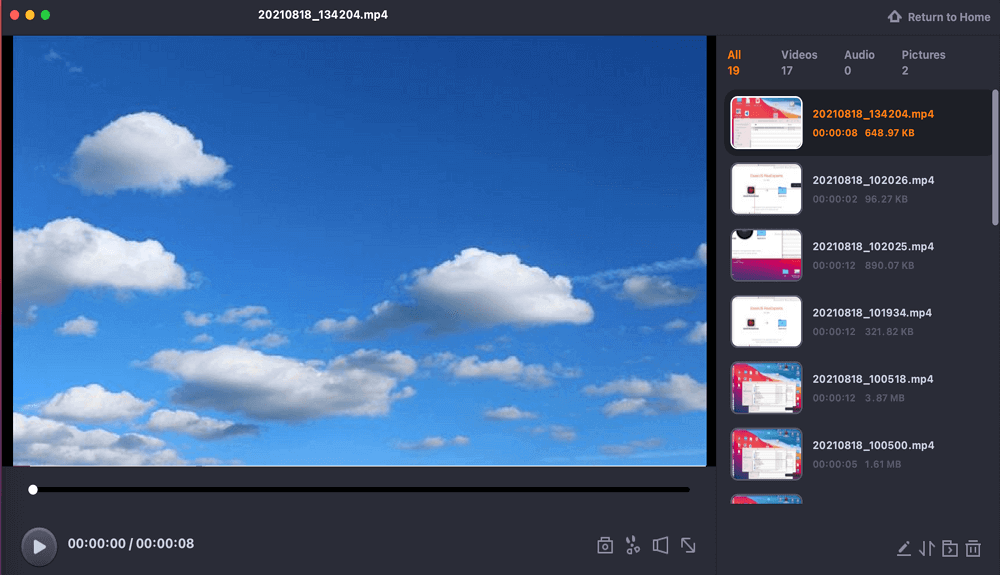
Step 4. When the recording stops, a built-in player will pop up, and you can view the recorded video directly.
Recording a Webinar with Microphone Sound on QuickTime Player
If you are a Mac fan, try GoToWebinar, Zoom, Webex, or other Mac-friendly webinar services. For better capturing the seminar, try a free screen recorder – QuickTime Player.
Unfortunately, you can only use it to capture the external voice, which comes from your microphone. To fully capture sounds from a webinar, apply another software, SoundFlower. Or go to Part 2.
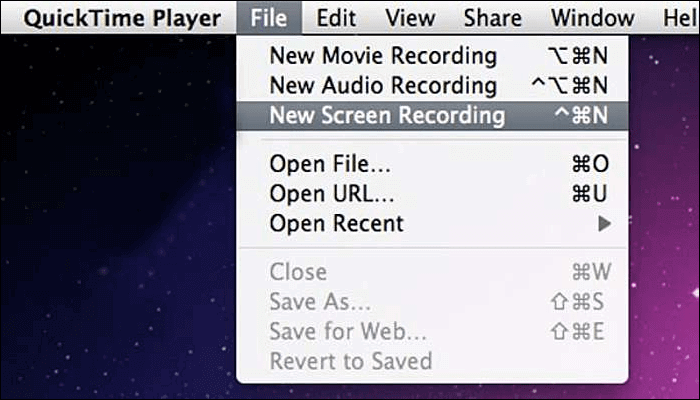
Step 1. Open QuickTime Player on Mac. On the top toolbar, click "File" > "New Screen Recording".
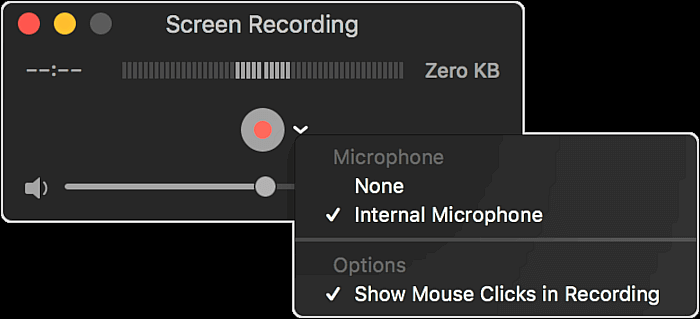
Step 2. Adjust the audio settings by clicking the small down-side button. During this step, you should attend a webinar and prepare for capturing the live meeting on Mac.
Step 3. When the webinar begins, you click the red button "Record" to start capturing what you are watching in that webinar. It's optional to capture the entire display or customized zone of it.
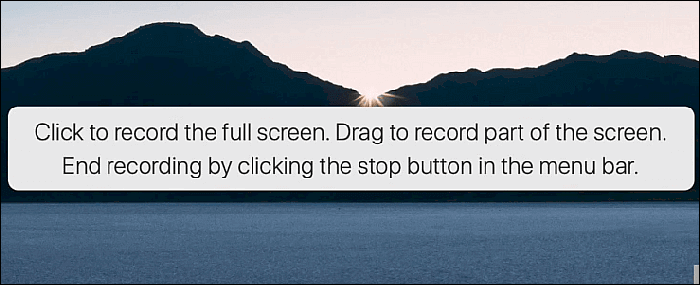
Step 4. To finish it, click the "Stop" button on the menu bar, and you'll have a saving webinar video file.

How to Record a Webinar on Zoom
As the communicating software, Zoom allows only paid plans for webinar organizing (a monthly or an annual subscription), and each plan enables the host to invite different numbers of participants.
By default, only the host can initiate a local recording of the online conference. If the participant wants to record, the host needs to provide the participant's permission during the meeting. If you are the host, the recording process in Zoom will be easy.
Capturing a webinar on Zoom if you are a host:
Step 1. Open Zoom and start your live-streamed meeting as a host.
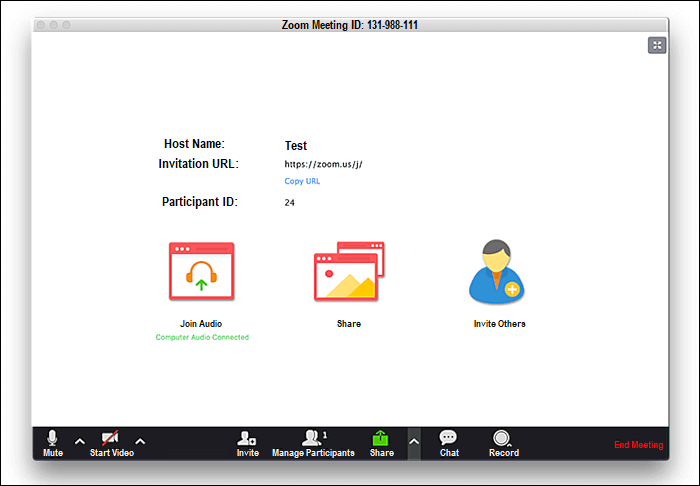
Step 2. From the bottom toolbar, you click the Record button to start your mission.

Step 3. Choose from two recording options - "Record on this Computer" (locally) or "Record to the Cloud". Saving to the Cloud is a better option if many people are involved in the process.

Step 4. To finish capturing your online discussion, click "Stop" or click the red button "End Meeting". Then the video file will be converted and stored in the destination you set.

Conclusion
The most reliable webinar recording software is introduced in this post with the details on how to record with it. To capture your online webinar, pick one of them based on your needs.
Both Windows and Mac users enjoy recording the essential live meetings with the comprehensive, multipurpose screen recording software, EaseUS RecExperts. Have a try now!
FAQs About Webinar Recording
If you have more questions about capturing webinars on Windows 10 and Mac, below are related answers.
1. How to record a webinar I am watching?
You have to download the screen recording software capable of capturing both video and audio. Choose an appropriate application if you want more advanced editing and exporting features. Launch the webinar recorder while you are watching a live meeting, then you can use it to record what you want to save to your computer.
2. How can I record a webinar for free?
There is the free webinar recording software, EaseUS RecExperts. After you download and install it, use it to capture a video when having a webinar. And this recorder supports various video and audio formats so that you can export the recordings as you like.
3. How to record GoToWebinar?
To record a GoToWebinar meeting, there are some available screen recording programs. One is EaseUS RecExperts, which offers enough tools that you may need in recording online conferences. You can use the task scheduler to arrange the recording duration freely and trim the webinar videos with a built-in editing tool.
4. Is it possible to record a webinar?
Usually, webinar platforms provide recording functions, but the webinar organizer holds control of this recording. The webinar attendees should rely on third-party recording software.
5. How to save a webinar to my computer?
Find the beneficial screen recording software and launch it to capture the webinar you want to save. There are many optional recorders, such as OBS Studio. This open-source recording tool can record things you need on your computer screen. After recording, the webinar video will be exported in a suitable format, and you can save it to your computer.
EaseUS RecExperts

One-click to capture anything on screen!
No Time Limit, No watermark
Start Recording