-
![]()
Daisy
Daisy is the Senior editor of the writing team for EaseUS. She has been working in EaseUS for over ten years, starting from a technical writer to a team leader of the content group. As a professional author for over 10 years, she writes a lot to help people overcome their tech troubles.…Read full bio -
Jane is an experienced editor for EaseUS focused on tech blog writing. Familiar with all kinds of video editing and screen recording software on the market, she specializes in composing posts about recording and editing videos. All the topics she chooses …Read full bio
-
![]()
Alin
Alin is an experienced technical blog writing editor. She knows the information about screen recording software on the market, and is also familiar with data cloning and data backup software. She is expert in writing posts about these products, aiming at providing users with effective solutions.…Read full bio -
Jean is recognized as one of the most professional writers in EaseUS. She has kept improving her writing skills over the past 10 years and helped millions of her readers solve their tech problems on PC, Mac, and iOS devices.…Read full bio
-
![]()
Jerry
Jerry is a fan of science and technology, aiming to make readers' tech life easy and enjoyable. He loves exploring new technologies and writing technical how-to tips. All the topics he chooses aim to offer users more instructive information.…Read full bio -
![]()
Rel
Rel has always maintained a strong curiosity about the computer field and is committed to the research of the most efficient and practical computer problem solutions.…Read full bio -
![]()
Gemma
Gemma is member of EaseUS team and has been committed to creating valuable content in fields about file recovery, partition management, and data backup etc. for many years. She loves to help users solve various types of computer related issues.…Read full bio -
![]()
Shelly
"I hope my articles can help solve your technical problems. If you are interested in other articles, you can check the articles at the bottom of this page. Similarly, you can also check my Twitter to get additional help."…Read full bio
Page Table of Contents
0 Views |
0 min read
Crunchyroll is a popular anime streaming service for anime fans, but when trying to take screenshots of your favorite anime to save, you'll run into a black screen issue. It's frustrating.
Don't worry. This guide shows you the best ways how to take a screenshot on Crunchyroll without encountering the black screen issue. Let's delve into these methods.
- Disclaimer
- This article about Screenshot Crunchyroll is for general reference only. Please note that Crunchyroll's videos are copyrighted, and unauthorized screenshots or distribution may violate the platform's terms and copyright laws. Users should comply with local laws and regulations and use the screenshots only for fair use (such as personal viewing, commentary and analysis). We do not encourage or support any infringement and recommend supporting genuine content through official subscriptions.
Share this guide for taking Crunchyroll screenshots without black screen with others.
Why I Can't Screenshot Crunchyroll
Crunchyroll, as a streaming platform, employs DRM protection mechanism to protect its content by blocking screenshots or screen recordings. This measure is crucial to safeguard the rights and interests of creators and copyright owners. As a result, when users attempt to capture screenshots on Crunchyroll, they often encounter a black screen issue due to these protective mechanisms.
However, if you want to screenshot Crunchyroll to save precious moments, you can use the methods below:
1️⃣Using Specific Screenshot Software on Desktop: The most recommended is EaseUS RecExperts, designed for capturing screenshots and recordings of content that may be protected by DRM, while respecting copyright and usage rights.
2️⃣Disabling Hardware Acceleration in Browser: Sometimes, disabling hardware acceleration in the browser can allow you to take screenshots of Crunchyroll without a black screen.
3️⃣Screenshot Crunchyroll on Android/iPhone: Visit Crunchyroll in a web browser and use the phone's built-in screenshot feature.
How to Screenshot Crunchyroll on PC/Mac
👉Use a Professional Screen Capture Tool
The direct way to take Crunchyroll screenshots is by using a screen capture tool like EaseUS RecExperts. With it, you can easily take full-screen or area screenshots on Windows and Mac. Its enhanced mode can address any restrictions on screenshots or recordings. You can take high-resolution screenshots or screen recordings on Crunchyroll hassle-free.
Besides, you can also use its screen capture feature to take screenshots in Telegram private channel or screenshot WhatsApp views once without notifying. Note that all screenshots should be taken with permission. Always comply with the relevant platform and legal regulations.
Meanwhile, as a powerful screen recorder, it helps users screen record protected video without black screen from Amazon Prime, Netflix, Disney+, etc. Once you've finished recording, use the built-in advanced editing features to enrich your recording.
Here are the detailed steps on how to take screenshots of Crunchyroll:
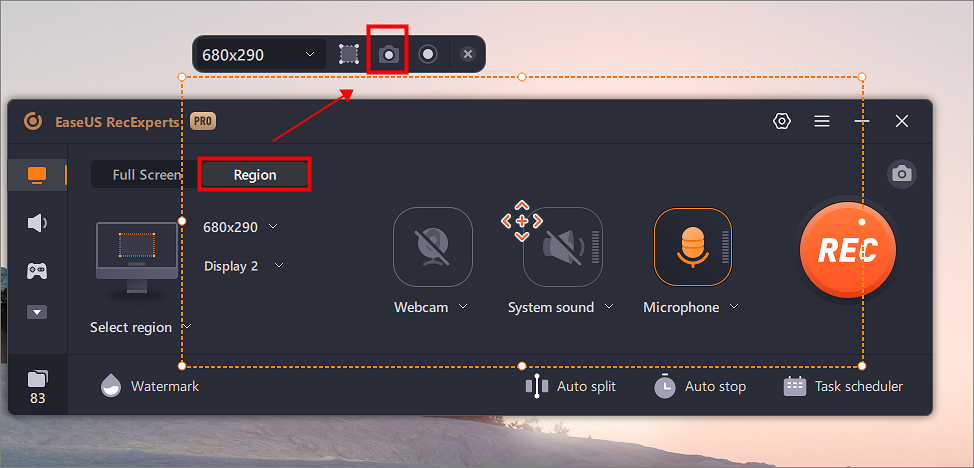
1Step 1. Launch this tool and choose your desired area to take a screenshot on your screen. If you want to take a full-screen snapshot, click "Full Screen" and choose Display (if there is more than one monitor). Then, click the camera icon in the upper right to start your task.
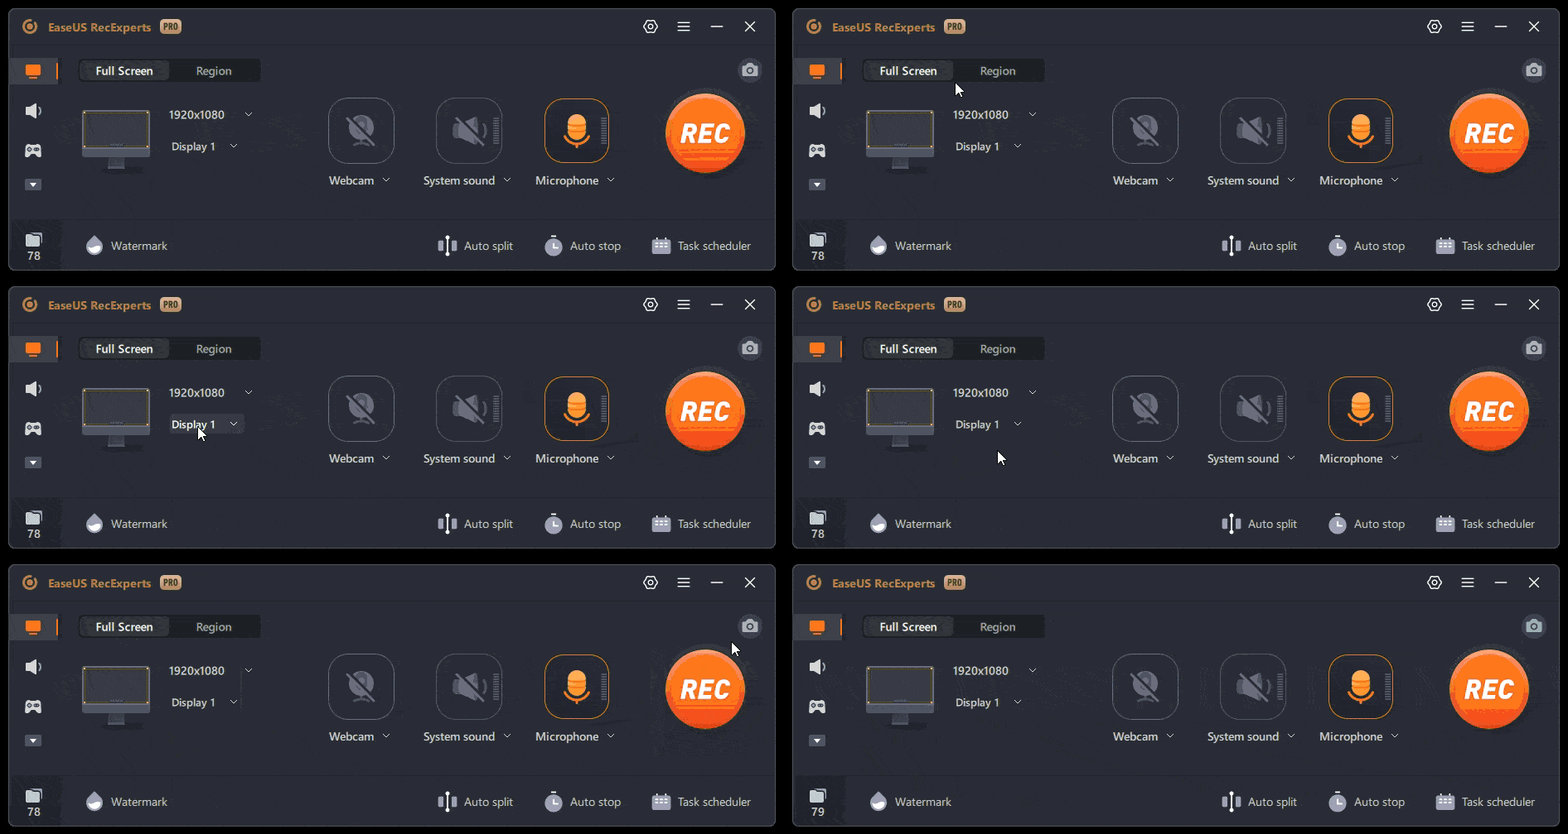
2Step 2. (Optional) If you are going to take a partial screen, choose the Region option. Next, left-click and hold your mouse to select the target region. Once selected, choose the camera icon to snapshot your screen.
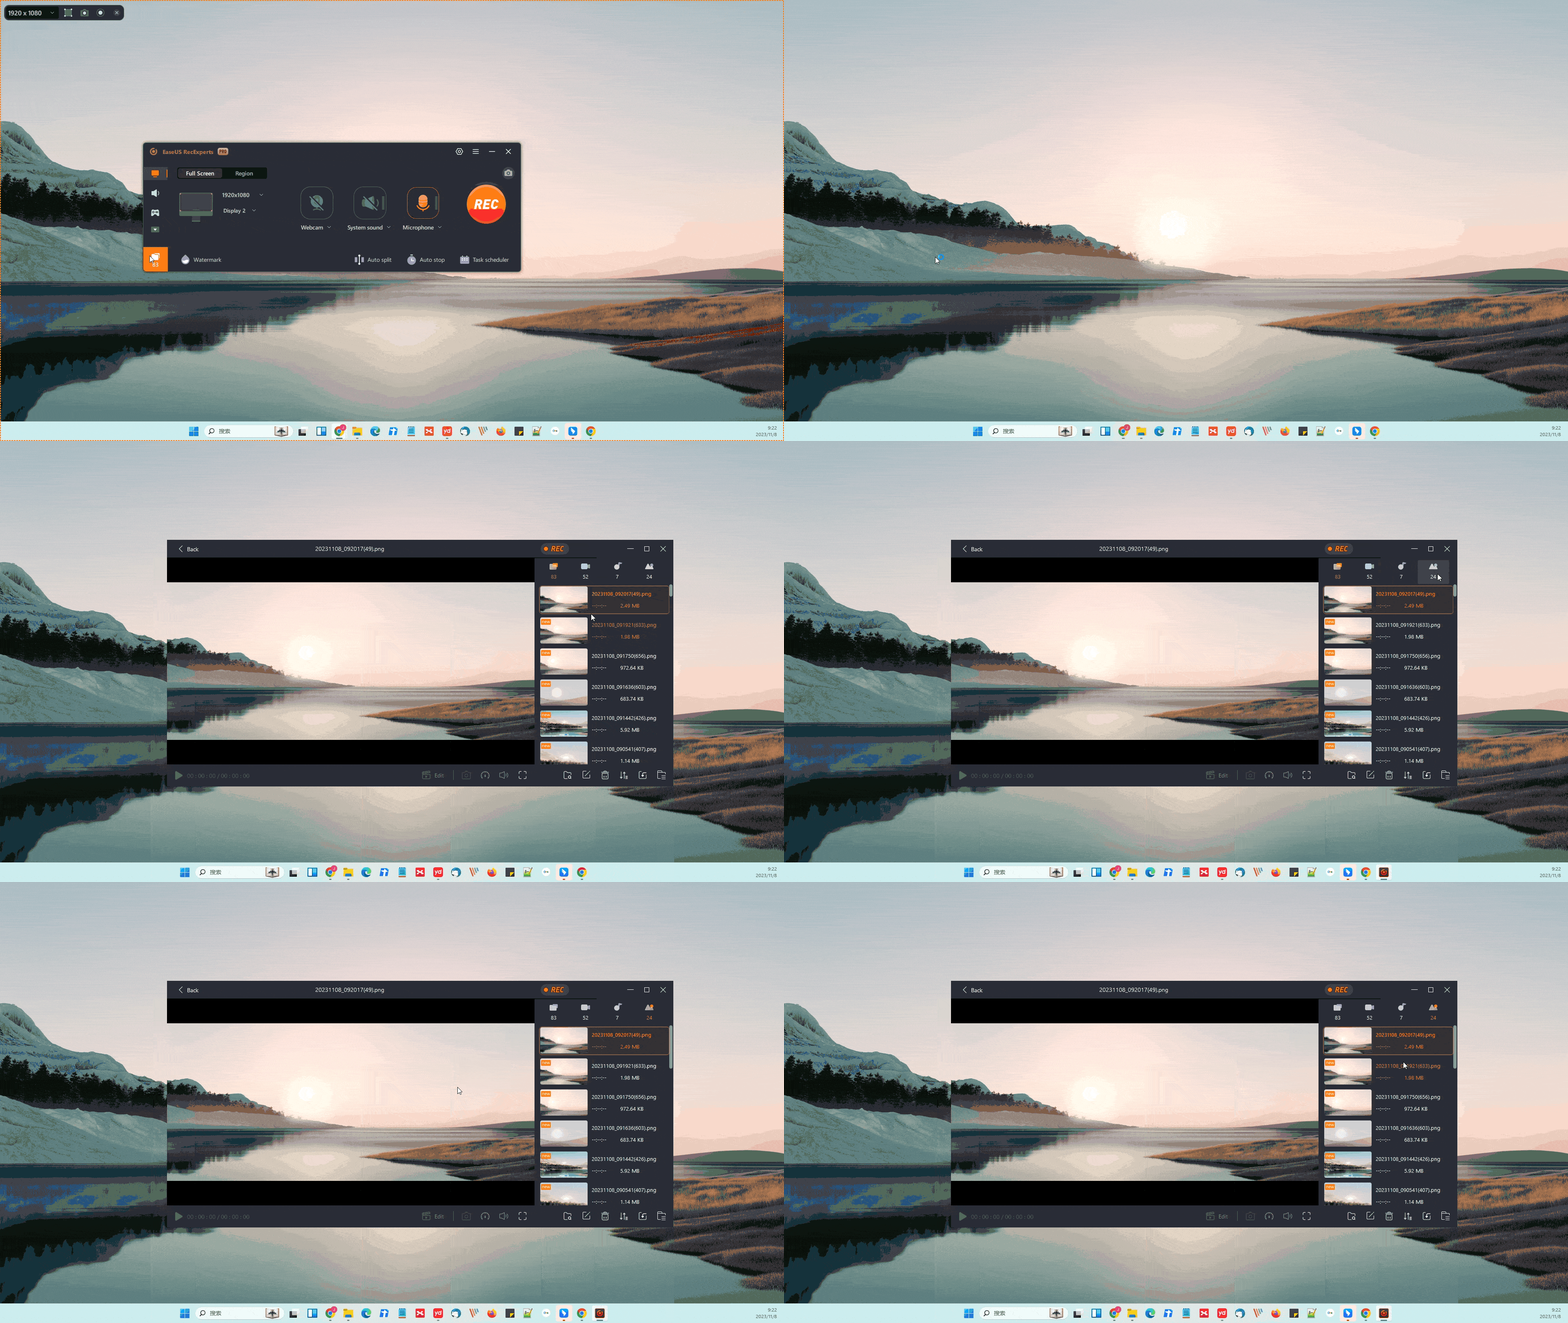
3Step 3. Finally, you can click Recordings >Pictures to find and view your screenshots.
Share this guide for taking Crunchyroll screenshots without black screen with others.
👉Disable Hardware Acceleration and Use Built-in Screenshot Tool
If you use Crunchyroll on a browser like Google Chrome, you can try turning off hardware acceleration to take a screenshot in Crunchyroll. Sometimes, hardware acceleration will block you from taking snapshots of your screen. Take Google Chrome as an example:
Step 1. Open Google Chrome and click on the three vertical points in the upper right corner. Then, choose the Settings option.
Step 2. Click on the System and turn off the Use graphics acceleration when available.
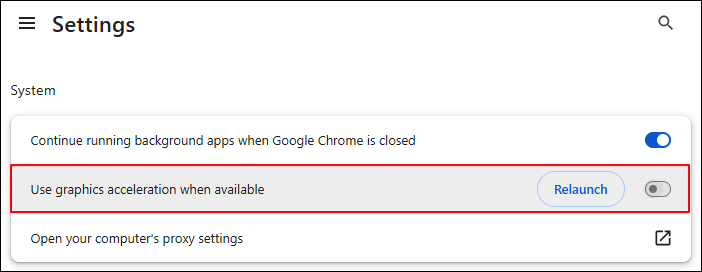
Step 3. Restart your Google Chrome.
After you disable hardware acceleration, you can log into Crunchyroll and play the video you want to capture. Then, please take screenshots using the built-in screenshot tool on Windows or Mac.
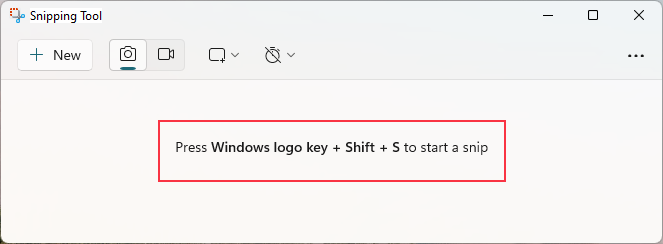
For Windows users, you can use the Snipping Tool's shortcut Win+Shift+S to snip Crunchyroll in full-screen or specific areas.
For Mac users, please press Command + Shift + 3 to capture the whole screen or Command + Shift + 4 to save a specific area.

How to Screenshot on Crunchyroll Mobile
To screen capture Crunchyroll on your Android, iPhone, or iPad, you can visit Crunchyroll in a browser and use the phone's screenshot shortcuts. It's the direct way.
👉Android: Press the Volume down key + Power button.
👉iPhone/iPad: Press the Home button + Power button or the Volume up key + Power button to take screenshots.
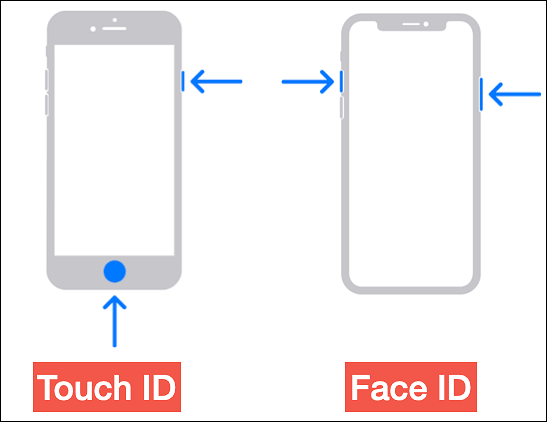
All the screenshots will be saved in your phone's gallery, and you can go to the gallery to check or edit these images as needed.
Share this guide for taking Crunchyroll screenshots without black screen with others.
Legal and Ethical Considerations for Screenshotting Content from Crunchyroll
It's crucial to understand the legal and ethical boundaries when taking screenshots or recording Crunchyroll content.
- Comply with Copyright Laws: The anime and other content on Crunchyroll are protected by copyright. Unauthorized mass screenshotting or using screenshots for commercial purposes may constitute infringement.
- Fair Use Principle: If you take screenshots for personal study, commentary, or news reporting (in line with the "fair use" principle), you must credit the source and avoid distorting the original content.
- Avoid Unauthorized Sources: Do not use cracked versions, plugins, or other illegal tools to access content. Only use the functions allowed by the platform (such as screenshotting in certain permitted areas).
- Support Official Content: Support creators by subscribing, purchasing official merchandise, and other means.
- Important Note: This article is for informational purposes only and does not encourage any illegal activities. Users must bear the legal risks associated with screenshotting or distributing content.
Conclusion
This comprehensive guide shows you how to screenshot Crunchyroll on Windows, Mac, and mobile devices. The best recommend one is using EaseUS RecExperts to capture your Crunchyroll videos or images. This screen recorder has a powerful enhanced mode to bypass Crunchyroll's screenshot restrictions. You can easily capture any streaming videos without black screen problem.
How to Screenshot on Crunchyroll FAQs
1. Why Crunchyroll screenshot black?
Crunchyroll uses DRM restriction technology to protect copyrights from illegal dissemination, so when users try to take screenshots, they only get a black screen image.
2. Does Crunchyroll allow screenshots or screen recording?
Crunchyroll doesn't allow screenshots or screen recording. Crunchyroll has taken anti-screenshot measures to protect copyrights, resulting in users often only getting a black screen when trying to screenshot.
3. How to bypass black screen on Crunchyroll?
You can use a professional screen capture program like EaseUS RecExperts to bypass the black screen on Crunchyroll. This screen recorder allows you to screenshot or record videos without a black screen on Crunchyroll.
4. How to capture video from Crunchyroll?
To capture videos from Crunchyroll without black screen issues, you can use a reliable screen recorder like EaseUS RecExperts to record protected videos. It helps you record videos from any streaming service platform without restrictions.
5. Does Crunchyroll let you stream on Discord?
Yes, you can stream Crunchyroll on Discord via screen sharing or Crunchyroll SharePlay feature. You can coonect your Crunchyroll account to Discord to share the anime you are watching.
EaseUS RecExperts

One-click to capture anything on screen!
No Time Limit, No watermark
Start Recording
