-
![]()
Daisy
Daisy is the Senior editor of the writing team for EaseUS. She has been working in EaseUS for over ten years, starting from a technical writer to a team leader of the content group. As a professional author for over 10 years, she writes a lot to help people overcome their tech troubles.…Read full bio -
Jane is an experienced editor for EaseUS focused on tech blog writing. Familiar with all kinds of video editing and screen recording software on the market, she specializes in composing posts about recording and editing videos. All the topics she chooses …Read full bio
-
![]()
Melissa Lee
Melissa Lee is an experienced technical blog writing editor. She knows the information about screen recording software on the market, and is also familiar with data cloning and data backup software. She is expert in writing posts about these products, aiming at providing users with effective solutions.…Read full bio -
Jean is recognized as one of the most professional writers in EaseUS. She has kept improving her writing skills over the past 10 years and helped millions of her readers solve their tech problems on PC, Mac, and iOS devices.…Read full bio
-
![]()
Jerry
Jerry is a fan of science and technology, aiming to make readers' tech life easy and enjoyable. He loves exploring new technologies and writing technical how-to tips. All the topics he chooses aim to offer users more instructive information.…Read full bio -
Larissa has rich experience in writing technical articles. After joining EaseUS, she frantically learned about data recovery, disk partitioning, data backup, screen recorder, disk clone, and other related knowledge. Now she is able to master the relevant content proficiently and write effective step-by-step guides on various computer issues.…Read full bio
-
![]()
Rel
Rel has always maintained a strong curiosity about the computer field and is committed to the research of the most efficient and practical computer problem solutions.…Read full bio -
![]()
Gemma
Gemma is member of EaseUS team and has been committed to creating valuable content in fields about file recovery, partition management, and data backup etc. for many years. She loves to help users solve various types of computer related issues.…Read full bio
Page Table of Contents
Jane Zhou
Updated on Sep 19, 2024
0 Views |
0 min read
Recently, Apple released a macOS 13 called macOS Ventura, which includes various new productivity features, refinements, and capabilities. If you are using a macOS Ventura or if you are new to this operating system, you might want to learn some tips for macOS Ventura screenshots or capturing the screen and editing your screenshots. If you are one of them, you have come to the right place. Here, we will walk you through how to screenshot on macOS Ventura with its built-in snipping tool as well as a great Mac screen capture software. Now, let's get started!
Use An Excellent Mac Snipping Tool to Take Screenshots in macOS Ventura - Recommend
Whether you are going to take a full screenshot on Mac or capture a portion of the Mac screen, you can always rely on a fantastic Mac snipping tool called EaseUS RecExperts. Coming with a simple user interface, this software is easy to use and friendly to all levels of users. You are able to create a screenshot on your Mac screen in 2 simple steps, and export it in PNG format. If needed, you can make your own GIFs with this software.
Apart from that, it also can act as a Mac screen recorder. With its help, you can record almost on-screen activities, including recording video conferences, creating video tutorials, capturing high-quality gameplay, etc. Overall, it is worth trying for screen recording and screenshots on Mac!
Stunning features:
- Take screenshots on Mac with simple clicks
- Let you take a screenshot during screen recording
- Supporting customizing hotkeys for screen capture
- Screen and webcam recording feature is available
Download EaseUS Screen Recorder
Download EaseUS Screen Recorder
Trustpilot Rating 4.7
Here's how to screenshot in macOS Ventura:
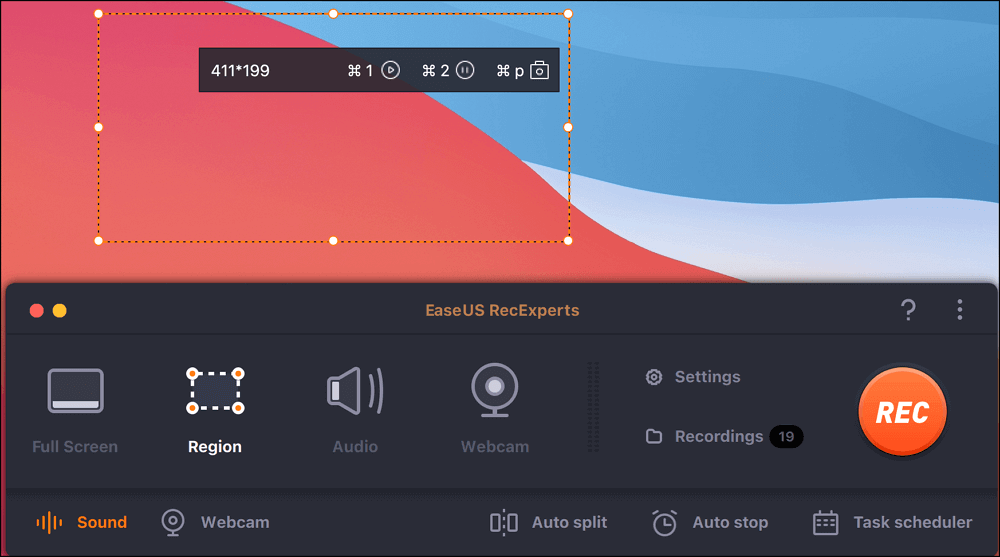
Step 1. Open this program on your Mac, and select the "Region" option on the panel.

Step 2. Drag your mouse to cover the area that you want to take a snapshot. Next, press the ⌘ + P keys on the keyboard to take screenshots. Also, you can click the camera icon directly.
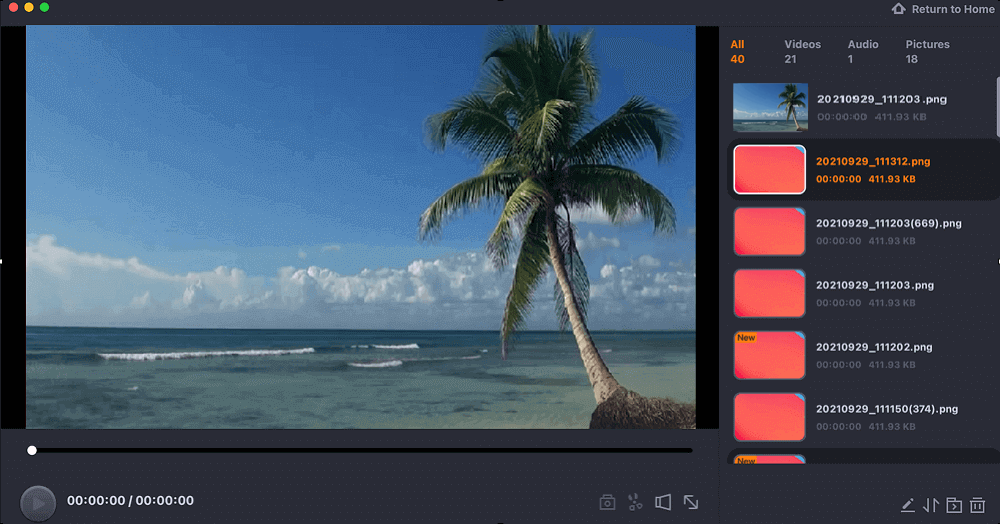
Step 3. Go back to the main interface, click "Recordings" > "Pictures", and you can find all the screenshots you need.
Screenshot on macOS Ventura with the Built-in Feature
Like other macOS versions, macOS Ventura also offers you an in-built feature to take screenshots on your Macs. Whether you want to take a full-screenshot, partial screenshot, or screenshot a specific window, you can also get the task done with some keyboard combinations. Now, let's dive into it!
#Take Full-Screen Screenshots in macOS Ventura
Step 1. First, ensure you are on the screen where you want to take an entire screenshot in macOS Ventura.
Step 2. Hit and hold Shift + Command + 3 at the same time. Next, you will hear a camera-click sound. Then, release the keys and wait until you see a thumbnail in the corner of your screen.
Step 3. At last, you can click the thumbnail to edit the screenshot as you like, or wait for the screenshot to be saved on your desktop.
#Take a Portion of Your Mac screen
Sometimes, you might only want to save a small portion of your Mac screen and leave out the rest. In this case, you can check out the following steps:
Step 1. Similar to taking a full screenshot, you need to make sure you are on the screen that you want to take a portion of your Mac screen.
Step 2. Press and hold: Shift + Command + 4, then you will see a crosshair on your screen for your mouse, and you can drag to select a portion of your screen to capture.
Step 3. To take the screenshot, release the mouse button or trackpad. Once done, you will see the image on your desktop as a Screenshot*.png with the timestamp that you take the screenshot.
#Screenshot a Specific Window in macOS Ventura
For some reasons, you might need to screenshot a specific window in your macOS Ventura. If you are, check out the following method:
Step 1. To screenshot a single window, press and hold Shift + Command + 4 + Space bar.
Step 2. Next, release the keys and move the camera icon over the window you want to capture, and click.
Step 3. When you see a thumbnail on your screen, click on it to edit for later sharing.
macOS Ventura Screenshots FAQs
1. Does Macos have a snipping tool?
Yes. Mac devices also feature their own snipping tool. This versatile and user-friendly snipping tool lets Mac users capture a variety of screenshots and screen recordings. Using the snipping tool for Mac is easy as pressing and holding the following combination of keys: Shift+Command+5.
2. Where are the screenshots saved on MacOS Bigsur?
By default, the images are saved on your Mac desktop automatically with the name "Screen Shot [date] at [time].png."
3. How do you snip without a key on Mac?
Preview lets you snip without a key on Mac.
- Launch the app
- Click the File menu and select Take Screenshot.
Final Words
If you're a Mac user and you need to take screenshots, there are several options available to you. However, our favorite tool is EaseUS RecExperts. It's easy to use, and it has a wide range of features that make it the best option for capturing images on your screen. So if you're looking for the best way to take screenshots on your Mac, be sure to give EaseUS RecExperts a try.
Download EaseUS Screen Recorder
Download EaseUS Screen Recorder
Trustpilot Rating 4.7
EaseUS RecExperts

One-click to capture anything on screen!
No Time Limit, No watermark
Start Recording