-
![]()
Daisy
Daisy is the Senior editor of the writing team for EaseUS. She has been working in EaseUS for over ten years, starting from a technical writer to a team leader of the content group. As a professional author for over 10 years, she writes a lot to help people overcome their tech troubles.…Read full bio -
Jane is an experienced editor for EaseUS focused on tech blog writing. Familiar with all kinds of video editing and screen recording software on the market, she specializes in composing posts about recording and editing videos. All the topics she chooses …Read full bio
-
![]()
Alin
Alin is an experienced technical blog writing editor. She knows the information about screen recording software on the market, and is also familiar with data cloning and data backup software. She is expert in writing posts about these products, aiming at providing users with effective solutions.…Read full bio -
Jean is recognized as one of the most professional writers in EaseUS. She has kept improving her writing skills over the past 10 years and helped millions of her readers solve their tech problems on PC, Mac, and iOS devices.…Read full bio
-
![]()
Jerry
Jerry is a fan of science and technology, aiming to make readers' tech life easy and enjoyable. He loves exploring new technologies and writing technical how-to tips. All the topics he chooses aim to offer users more instructive information.…Read full bio -
![]()
Rel
Rel has always maintained a strong curiosity about the computer field and is committed to the research of the most efficient and practical computer problem solutions.…Read full bio -
![]()
Gemma
Gemma is member of EaseUS team and has been committed to creating valuable content in fields about file recovery, partition management, and data backup etc. for many years. She loves to help users solve various types of computer related issues.…Read full bio -
![]()
Shelly
"I hope my articles can help solve your technical problems. If you are interested in other articles, you can check the articles at the bottom of this page. Similarly, you can also check my Twitter to get additional help."…Read full bio
Page Table of Contents
Jane Zhou
Updated on Jun 09, 2026
0 Views |
0 min read
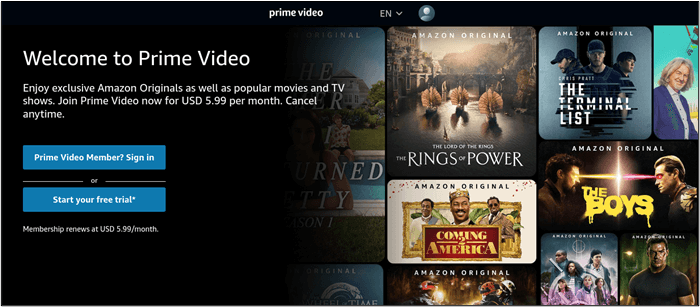
Amazon Prime Video is one of the most popular streaming platforms, offering a vast library of movies, TV shows, and original content across various genres. While watching, many users want to screenshot streaming services for reference or to save a memory. However, the Prime Video app blocks screenshots due to DRM restrictions, which can be frustrating.
Fortunately, there are reliable tools and workarounds to help you capture high-quality screenshots on Prime Video without encountering the dreaded black screen. In this guide, we'll walk you through the best methods and tools to screenshot Amazon Prime Video.
Can You Screenshot Amazon Prime Video?
No, by default, you cannot screenshot Prime Video or other streaming services, like Netflix. When you try, you'll likely get a black screen instead of the actual video content. This is due to Digital Rights Management protections that streaming services use to prevent unauthorized copying and distribution of their content.
However, technically, yes! It's possible to screenshot Amazon Prime without a black screen by following the methods below:
- Use a professional streaming video screenshot tool, like EaseUS RecExperts
- Disable the hardware acceleration in your browser
- Screenshot Prime Video on Android and iPhone with another device
Share this helpful guide on your social platforms to help more users!
Directly Screenshot Amazon Prime Video in High Quality
The easiest way to screen record or take screenshots from streaming services without a black screen is by using EaseUS RecExperts, as this screen recorder offers an Enhanced mode that is specially designed to screen record Amazon Prime Video or other similar streaming services.
It allows you to take high-quality screenshots and record Prime Video at 1080p or higher. It makes it easy to screenshot Netflix, Disney+, or Hulu without blank screen issue. Plus, you can also choose whether to include system sound, microphone input, and whether the mouse cursor appears, making it flexible for different needs. It's beginner-friendly and doesn't require complicated settings.
Detailed steps on how to take a screenshot on Prime Video:
Step 1. Open EaseUS RecExperts, choose Custom recording mode, and select the area you want to capture.

Step 2. In the recording toolbar, enable Black Screen Fix, then click the purple REC button to start recording.
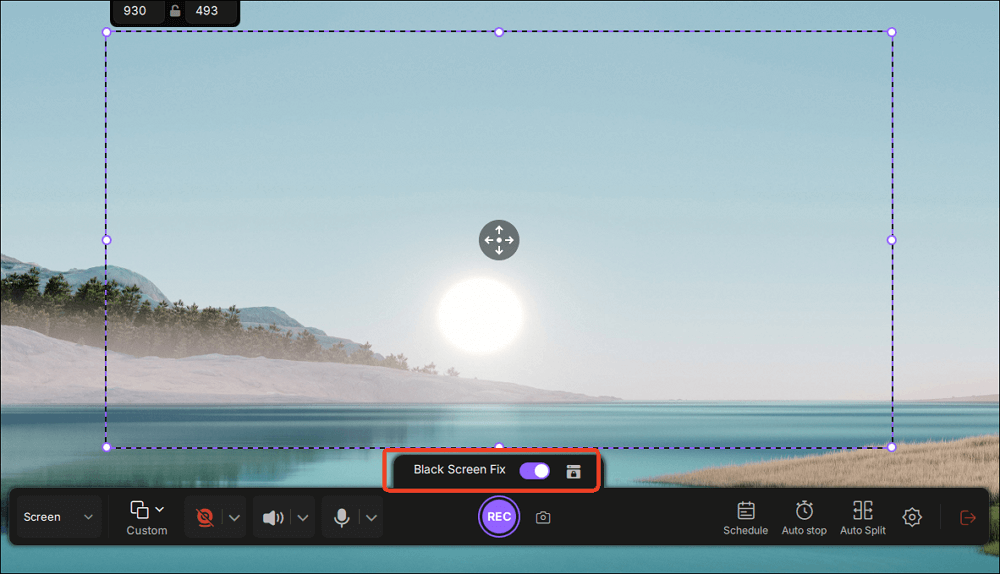
Step 3. While recording, click the Screenshot button (camera icon) on the toolbar to capture the current screen.

Don't forget to share this post with others in need!

Screenshot Prime Video in Browser by Disabling Hardware Acceleration
Another quick way is to disable hardware acceleration in your web browser. Hardware acceleration can offload certain tasks from the CPU to the GPU, improving performance and efficiency when rendering graphics-intensive content like videos. It can also prevent traditional screenshot methods from capturing the video stream.
⚠️Note: Some users reported that even after disabling hardware acceleration in Firefox or Chrome, screenshots were limited to 720p quality. Also, turning off acceleration may cause higher CPU usage and less smooth video playback, so this method comes with performance trade-offs and does not guarantee success in capturing screenshots of streaming videos.
Steps on how to screenshot on Prime Video:
Step 1. Turn off hardware acceleration in a web browser:
- For Chrome: Open Settings > System > disable Use graphics acceleration when available > restart.
- For Firefox: Open Settings > General > Performance > uncheck Use Recommended Performance > uncheck Use hardware acceleration > restart.
- For Edge: Open Settings > System and Performance > stop Use hardware acceleration > restart.
Note: To increase the chance of success, we suggest using Firefox instead.
Step 2. Restart your web browser, then go to the Amazon Prime Video website.
Step 3. Log in to your account and play a movie or TV show on Amazon Prime Video.
Step 4. Capture the screenshot using built-in tools, such as Print Screen (Windows) or Shift + Command + 4 (Mac).
Spread out this helpful guide now!
Screenshot Amazon Prime Video with Video Screenshot
Video Screenshot is a useful Chrome extension that facilitates the capture of full-frame screenshots. It offers a solution for users who wish to capture images from their favorite videos. Users can easily activate Video Screenshot using the extension button. The extension is initially pre-configured to work with popular video streaming sites.
However, through our tests, we found that it is only effective for non-DRM protected video content on Prime Video. So, if you just need to take a screenshot on normal Prime Video, it is still a good choice.
Follow these steps to screenshot Amazon Prime Video using the Video Screenshot browser extension:
Step 1. Go to the Chrome Web Store.
Step 2. Search for "Video Screenshot."
Step 3. Select "Add to Chrome" to install the extension.
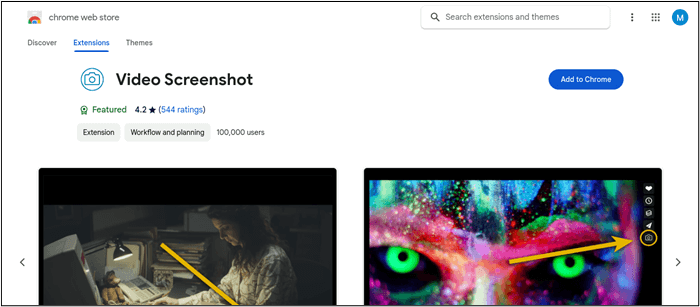
Step 4. Click on the Video Screenshot extension button in the top-right corner of Chrome and choose the sites where it will appear.
Step 5. Go to the Amazon Prime Video website and play the video content you wish to capture.
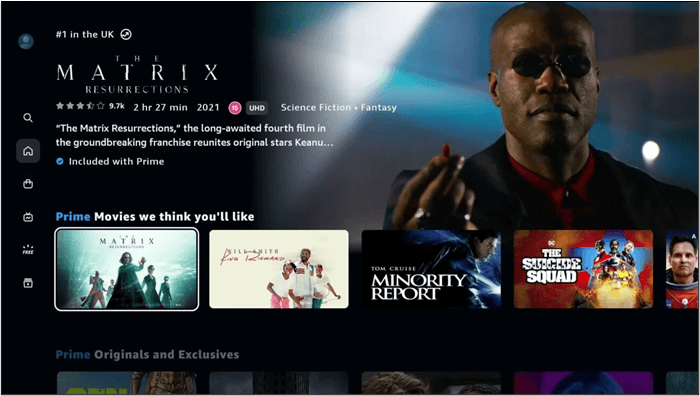
Step 6. Take the screenshot. The screenshot will be saved in full resolution.
Screenshot Prime Video iPhone/Android
It is almost a consensus that streaming apps have stricter restrictions on mobile devices, so if you want to successfully save Amazon Prime screenshots, the easiest way is to use another device.
While using another device to take screenshots from Amazon Prime Video can be a quick and effective method to bypass DRM restrictions, it comes with several technical drawbacks, including potential glare, motion artifacts, reflections, and compromised image quality.
This method is ideal for those who need a simple, no-software solution, but it might not be the best option if high-quality, precise screenshots are required. Be mindful of the potential limitations of this approach, especially when working with devices that have lower-quality cameras or when dealing with challenging lighting conditions.
💡 Quick Tips for taking screenshot in Amazon Prime Video on Android/iPhone
- ➡️Reduce glare: Dim room lights, close curtains, or slightly adjust screen angle.
- ➡️Use a tripod/stand: Keeps the device steady and avoids blurry images.
- ➡️Low-light setup: Darker surroundings make the video stand out more.
- ➡️Adjust camera settings: Focus manually, use high resolution, and disable flash.
- ➡️Edit afterward: Crop and tweak brightness/contrast for a cleaner screenshot.
Compliance and Usage Reminder
Before attempting to record or take screenshots of Amazon Prime Video, it is important to clarify one thing: All actions should only be carried out for personal entertainment, study, note-taking, or discussion under Fair Use. They must not be used for piracy, commercial distribution, or any unauthorized sharing of content.
Amazon Prime Video, along with other major streaming platforms such as Netflix and Disney+, uses Digital Rights Management (DRM) technology to protect the intellectual property of copyright holders and creators. This means:
🔒No Piracy or Illegal Distribution: Sharing screenshots or recorded content on unauthorized download sites or piracy platforms constitutes copyright infringement.
📚Fair Use Scope: Activities such as research, analysis, or personal media reviews are generally considered Fair Use.
⚖️Legal Risk Notice: Recording or distributing content for profit, commercial promotion, or large-scale sharing may violate copyright laws and even lead to legal consequences.
The Bottom Line
Amazon Prime Video is a premier streaming platform. It offers a variety of content to its global audience. Its lack of support for screenshots limits users seeking to capture and share memorable moments. This article explored multiple methods and tools to take screenshots of Amazon Prime videos. There are viable solutions available, from browser extensions like Video Screenshot to powerful screen recording software like EaseUS RecExperts.
This streaming video recorder and screenshot tool provides flexibility and dependability when it comes to capturing high-quality screenshots and recordings from Amazon Prime Video. Users can save and share their cherished moments from Prime Video with ease.
How to Screenshot Amazon Prime Video FAQs
While looking for ways to screenshot Amazon Prime Video, you might be confused. Here are some insights to help you.
1. Does Amazon allow screenshots?
No. Amazon Prime Video does not allow screenshots to be taken from its platform. The restriction protects the copyright of the content and prevents unauthorized distribution. However, you can use alternative methods and tools to capture screenshots.
2. How can you record an Amazon Prime video without a black screen?
Recording an Amazon Prime Video without encountering a black screen can be challenging due to the platform's built-in security measures. Some screen recording software and methods can bypass this limitation. You can disable hardware acceleration or use specific browser extensions. EaseUS RecExperts can record high-quality Amazon Prime videos.
Follow these steps to record Amazon Prime Video:
Step 1. Download and install EaseUS RecExperts on your computer.
Step 2. Open EaseUS RecExperts on your computer.
Step 3. Choose the recording area by selecting the specific window where Amazon Prime Video is playing or by selecting a custom region on your screen.
Step 4. Customize recording settings.
Step 5. Click on "Record" to start recording Amazon Prime Video.
Step 6. Click on the "Stop" to end the recording.
3. How do you capture an Amazon Prime video?
Capturing Amazon Prime Video can be achieved using various methods. One such browser extension is Video Screenshot. It allows users to capture screenshots of streaming videos without black screens.
Follow these steps to Capture Amazon Prime Video:
Step 1. Go to the Chrome Web Store
Step 2. Search "Video Screenshot."
Step 3. Select "Add to Chrome" to install the extension.
Step 4. Play the Amazon Prime Video content you want to capture.
Step 5. Click on the camera button or use a keyboard shortcut to capture screenshots without encountering a black screen.
4. Why can't I screenshot on Prime Video?
Due to Digital Rights Management (DRM) technology, which is designed to safeguard copyrighted content from unauthorized copying and piracy. That's why you are unable to take screenshots on Prime Video. Typically, when you attempt to do so, you will see a black or blank screen instead of the actual video.
5. Why don't streaming services let you screenshot?
Streaming services prohibit users from taking screenshots. These protect the copyright and integrity of the content. Screenshots can facilitate unauthorized distribution and infringement of intellectual property rights. You can implement measures to prevent screenshots. streaming services can safeguard the interests of content creators. These also maintain control over how their content is consumed and shared.
6. Is it legal to screenshot Amazon Prime Video?
Screenshotting Amazon Prime Video content is generally against its terms of service due to DRM protections. While tools exist to achieve this for personal use, it's legal. It's important to respect copyright laws. No screenshots can be used or distributed for commercial purposes.