-
![]()
Daisy
Daisy is the Senior editor of the writing team for EaseUS. She has been working in EaseUS for over ten years, starting from a technical writer to a team leader of the content group. As a professional author for over 10 years, she writes a lot to help people overcome their tech troubles.…Read full bio -
Jane is an experienced editor for EaseUS focused on tech blog writing. Familiar with all kinds of video editing and screen recording software on the market, she specializes in composing posts about recording and editing videos. All the topics she chooses …Read full bio
-
![]()
Melissa Lee
Melissa Lee is an experienced technical blog writing editor. She knows the information about screen recording software on the market, and is also familiar with data cloning and data backup software. She is expert in writing posts about these products, aiming at providing users with effective solutions.…Read full bio -
Jean is recognized as one of the most professional writers in EaseUS. She has kept improving her writing skills over the past 10 years and helped millions of her readers solve their tech problems on PC, Mac, and iOS devices.…Read full bio
-
![]()
Jerry
Jerry is a fan of science and technology, aiming to make readers' tech life easy and enjoyable. He loves exploring new technologies and writing technical how-to tips. All the topics he chooses aim to offer users more instructive information.…Read full bio -
Larissa has rich experience in writing technical articles. After joining EaseUS, she frantically learned about data recovery, disk partitioning, data backup, screen recorder, disk clone, and other related knowledge. Now she is able to master the relevant content proficiently and write effective step-by-step guides on various computer issues.…Read full bio
-
![]()
Rel
Rel has always maintained a strong curiosity about the computer field and is committed to the research of the most efficient and practical computer problem solutions.…Read full bio -
![]()
Gemma
Gemma is member of EaseUS team and has been committed to creating valuable content in fields about file recovery, partition management, and data backup etc. for many years. She loves to help users solve various types of computer related issues.…Read full bio
Page Table of Contents
Jane Zhou
Updated on Apr 19, 2024
0 Views |
0 min read
Because of the Covid-19, remote working has become more and more popular all over the world. While speaking of working at home, you surely know some video conference software like Zoom, which is one of the most popular programs. It helps you stay connected wherever you work.
If you are a leader, you may often need to gather your staff to exchange ideas. Sometimes, you might want to group particular people into teams to concentrate on different topics. At that time, you can try the Breakout Rooms in Zoom, which lets you separate participants into small groups. If you don't know how to do breakout rooms in Zoom, stick around here to find the solution!

What is Zoom Breakout Room
As its name indicates, the Breakout room is the way to break a large meeting into small meetings to concentrate on different topics in Zoom.
Zoom allows you to split the large meeting into up to 50 small sessions automatically or manually if you are the host. Besides, you can flexibly switch participants between sessions.
The good:
- Every participant has full video, audio, and screen share capabilities
- You can move around participants freely
- spur participants discourse
- Notice:
- The Breakout room function is only available in the Zoom desktop version. That's to say, you cannot create and manage breakout rooms on your iPhone or Android.
How to Create Breakout Rooms in Zoom on Windows/Mac
Actually, it is straightforward to make a breakout room in Zoom. All you need to do is to enable the function and follow the below tutorial to get it down. But before that, you need to make sure that:
- Use the desktop version
- You are the host
Stage 1. Enable the Breakout Room
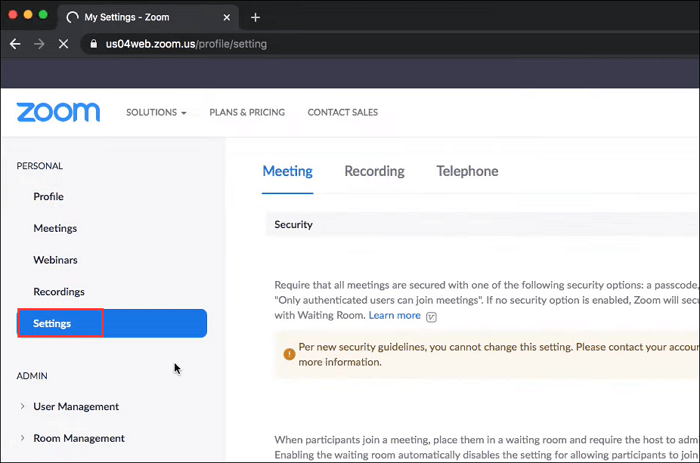
Step 1. Go to Zoom's official website, and sign in to your account.

Step 2. Once signed successfully, click "My Account" in the top-right corner. Next, select the "Settings" option under the Personal tab on the left pane.
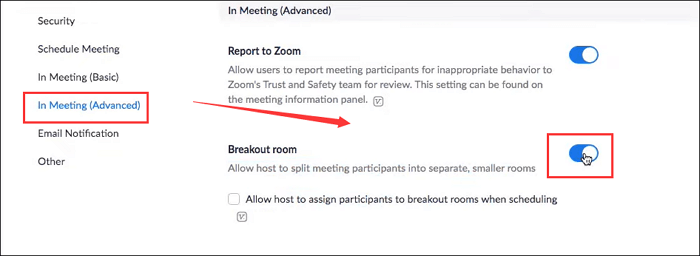
Step 3. In the Meeting tab, click "In Meeting (Advanced). Then find the Breakout Room icon, and toggle the switch to the right to turn it on. Finally, the Breakout Room feature is enabled successfully, and you can create Zoom Breakout Rooms based on your needs.
Stage 2. Do Breakout Rooms in Zoom
Step 1. Launch the Zoom application on your PC or Mac.
Step 2. You can choose to start an instant or scheduled meeting by clicking "New Meeting" or "Schedule". Make sure that you are the host, or you cannot make breakout rooms.
Step 3. When the meeting begins, click "Breakout Rooms" on the lower right corner of the screen.
![]()
Step 4. Select the number of rooms you want to create, and the participants to the rooms. Here you can choose the way you like to assign the participants:
- Automatically: Zoom will split your participants up evenly into each of the rooms
- Manually: Choose which participants you would like in each room
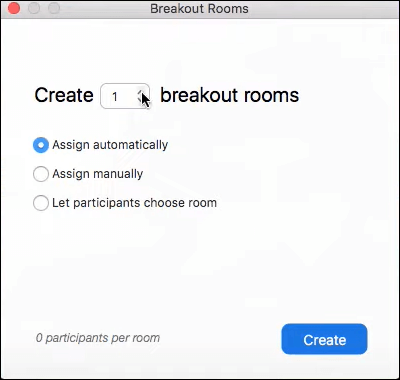
Step 5. Then click "Create Breakout Rooms". After you have created the rooms, you can still move around participants.
How to Manage Breakout Rooms in Zoom
Now, you have learned the way to make breakout rooms in Zoom; however, you may have some difficulty managing these Zoom breakout rooms. So, in the following, we will provide you with a detailed guide to managing the breakout room in Zoom:
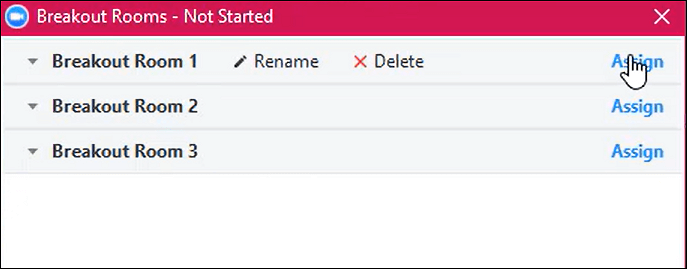
Step 1. You can see all the breakout rooms. Also, you can hover over to move, rename, reassign, and delete people from various rooms.
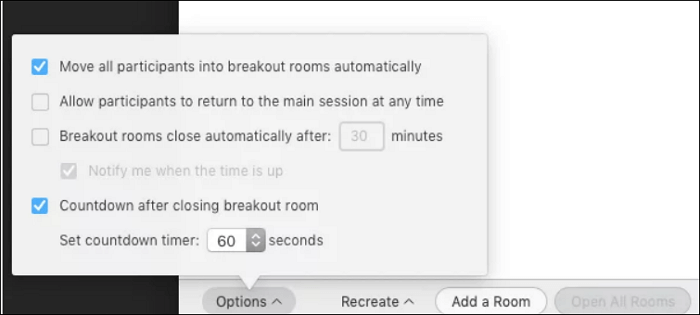
Step 2. For advanced settings, you can find them in the "Option" tab:
- Set breakout rooms to close after the time you set
- Decide how much control you want participants to have in these sessions
- Set a countdown timer
Bonus Tip: How to Record Zoom Meeting Without Permission
Whether you are in a Breakout Room meeting or a large Zoom meeting, you might want to record the meetings for later checking or viewing. If you don't have the host's permission, you can record with a third-party screen recorder - EaseUS RecExperts. Not just Zoom meetings, Microsoft Teams, Google Meet, Webex, etc. are all supported.
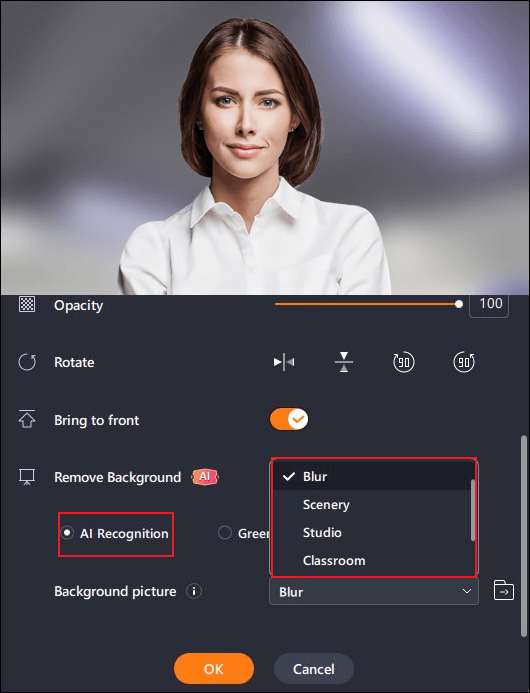
It records the Zoom meeting screen, internal audio, the microphone, and even the webcam together. What's better is that it can record videos with a virtual background. After recording, you can use it to generate a meeting transcript with one click. Download this conference recorder now!
Here's how to record a Zoom meeting without permission:
- Tip
- In order to get the best background replacement effect, please try to use a high-performance computer and record on a solid color background.
Step 1. Go to the video meeting that you want to record and launch EaseUS RecExperts on your devices. Choose the "Full Screen" recording mode to record the whole screen or the "Region" mode to record your customized area.

Step 2. Then, choose to record the system sound, microphone sound, webcam, or none by clicking on the according buttons. You can even record webcam with AI background. When all is done, click on the red "REC" button to begin.
Step 3. The recording process will start after a three-second countdown. If you want to pause the recording, click on the white double vertical bar ("F10"). To end the recording, click on the red square sign ("F9").
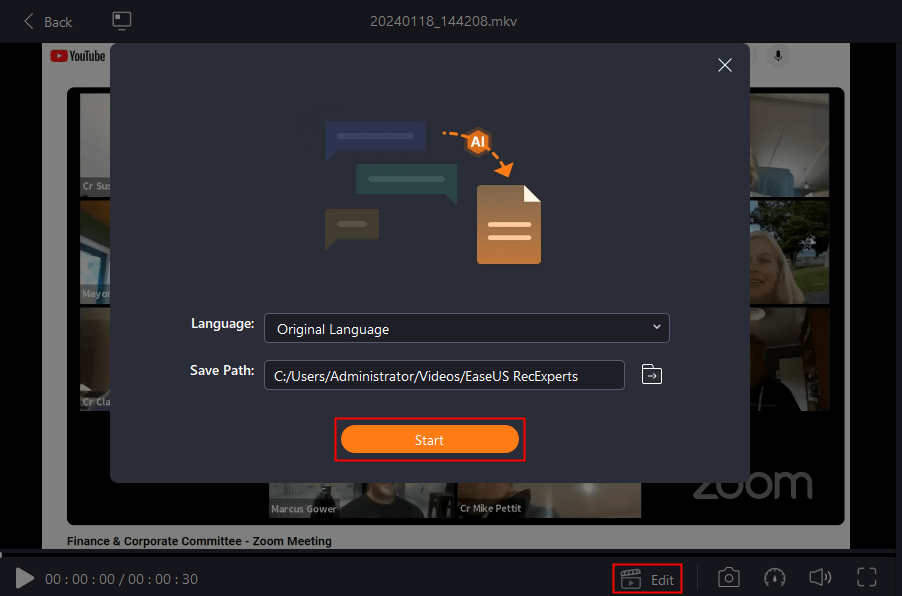
Step 4. It saves your recordings in MP4, GIF, AVI, and more. After recording, you will be led to the recording list interface. Here, you can even use the AI assistant to export meeting discussions to text files.
EaseUS RecExperts

One-click to capture anything on screen!
No Time Limit, No watermark
Start Recording