-
![]()
Daisy
Daisy is the Senior editor of the writing team for EaseUS. She has been working in EaseUS for over ten years, starting from a technical writer to a team leader of the content group. As a professional author for over 10 years, she writes a lot to help people overcome their tech troubles.…Read full bio -
Jane is an experienced editor for EaseUS focused on tech blog writing. Familiar with all kinds of video editing and screen recording software on the market, she specializes in composing posts about recording and editing videos. All the topics she chooses …Read full bio
-
![]()
Melissa Lee
Melissa Lee is an experienced technical blog writing editor. She knows the information about screen recording software on the market, and is also familiar with data cloning and data backup software. She is expert in writing posts about these products, aiming at providing users with effective solutions.…Read full bio -
Jean is recognized as one of the most professional writers in EaseUS. She has kept improving her writing skills over the past 10 years and helped millions of her readers solve their tech problems on PC, Mac, and iOS devices.…Read full bio
-
![]()
Jerry
Jerry is a fan of science and technology, aiming to make readers' tech life easy and enjoyable. He loves exploring new technologies and writing technical how-to tips. All the topics he chooses aim to offer users more instructive information.…Read full bio -
![]()
Rel
Rel has always maintained a strong curiosity about the computer field and is committed to the research of the most efficient and practical computer problem solutions.…Read full bio -
![]()
Gemma
Gemma is member of EaseUS team and has been committed to creating valuable content in fields about file recovery, partition management, and data backup etc. for many years. She loves to help users solve various types of computer related issues.…Read full bio -
![]()
Shelly
"I hope my articles can help solve your technical problems. If you are interested in other articles, you can check the articles at the bottom of this page. Similarly, you can also check my Twitter to get additional help."…Read full bio
Page Table of Contents
0 Views |
0 min read
Microsoft PowerPoint is an excellent utility. It is a slideshow of helpful information in the form of charts and visuals for presentations. An efficient way to enhance a Microsoft live PowerPoint presentation and increase audience engagement is to embed a video from a popular streaming platform like YouTube.
If you're seeking ways to embed YouTube video in PPT, you've come to the right place because the following three traditional ways and another easiest way depict how to embed a YouTube video in PowerPoint.
PAGE CONTENT:
#1. Put a Video in PPT from YouTube Online
Since PowerPoint is a Microsoft product, Microsoft 365 subscribers, PowerPoint 2021, or Microsoft 2019 users can insert online videos from YouTube or Vimeo on a slide. Besides, PowerPoint for Microsoft 365, version 1907 or later, allows users to include an online video from Microsoft Stream. This enterprise video service will enable users to publish, view, and share videos.
- Warning
- 1. To play video successfully, you need to ensure a good Internet connection because your embedded video is stored on a website instead of your PowerPoint presentation.
- 2. The video loads directly from the website and includes the site's controls for playing, pausing, volume, etc.
- 3. Please note that the PowerPoint playback tools (Fade, Bookmark, Trim, etc.) do not apply to web videos.
The following steps demonstrate how to embed an online YouTube video in PowerPoint.
Step 1. Locate your needed YouTube video in any web browser > copy the video URL.
Step 2. Open your Microsoft PowerPoint > locate the PowerPoint slide where you want to insert an online YouTube video > click Insert > select Video > choose Online Video.

Step 3. Paste your copied video URL in the Online Video dialog box.
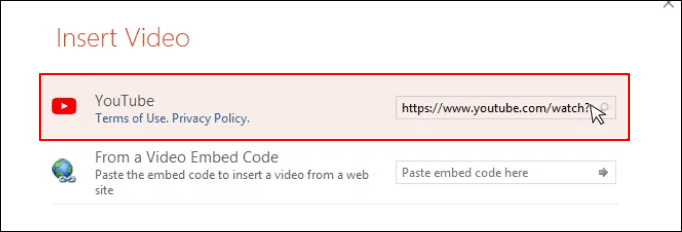
Step 4. Click on the thumbnail of the web video > select the Insert tab.
Please share this post to help more users!
#2. Add a YouTube Video to PowerPoint Presentations via an Embed Code
How to embed a YouTube video in PowerPoint? The second method to embed YouTube video in PowerPoint is using the embed code from the Share button. With the help of YouTube API parameters, you can alter the properties of a YouTube video. Let's show how it works.
Step 1. Find the YouTube video you want to insert > click Share under the YouTube video> select Embed to generate an HTML code.
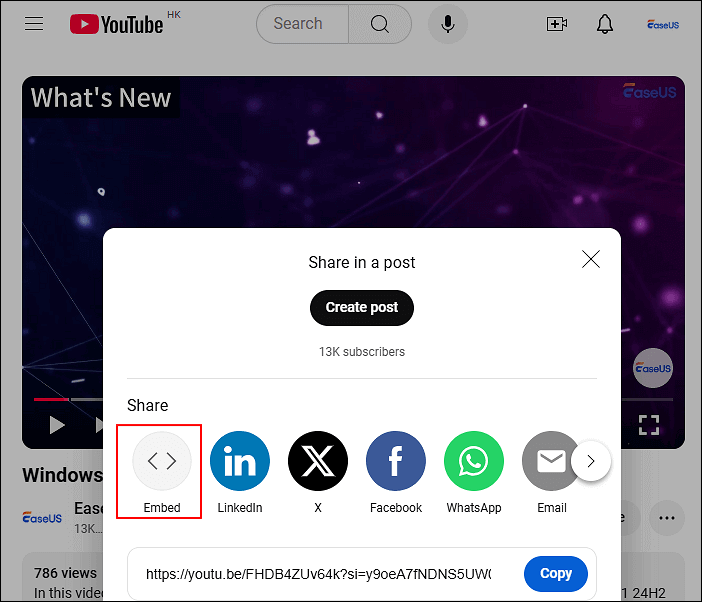
Step 2. COPY the entire HTML YouTube video code.
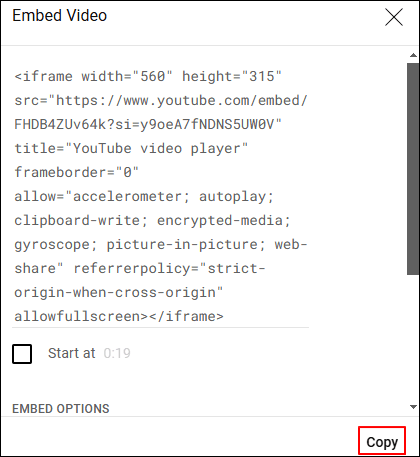
Step 3. Open your MS PowerPoint > locate your targeted PowerPoint presentation slide > click Insert > select Video > choose Online Video.

Step 4. Paste code in the From a Video Embed Code box.
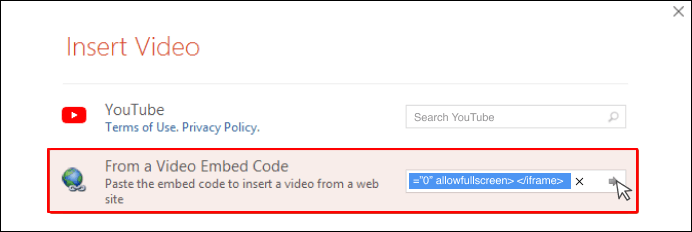
Step 5. Click Insert or press Enter to add YouTube video to PPT.
#3. Embed YouTube Videos in PowerPoint via PowerPoint's Screen Recording
How to embed and trim a YouTube video in PowerPoint directly? This way is to make good use of PowerPoint presentation's Screen Recording. More precisely, this feature permits you to record your computer screen and relevant audio, then embed it in your PowerPoint slide or save it as a separate file. Similarly, you can utilize this feature to record a presentation on Zoom.
The following steps describe how to put a video in PPT from YouTube using MS PowerPoint's Screen Recording feature.
Step 1. Locate the PPT slide that you want to include your YouTube video > click Screen Recording on the Insert tab of the ribbon.
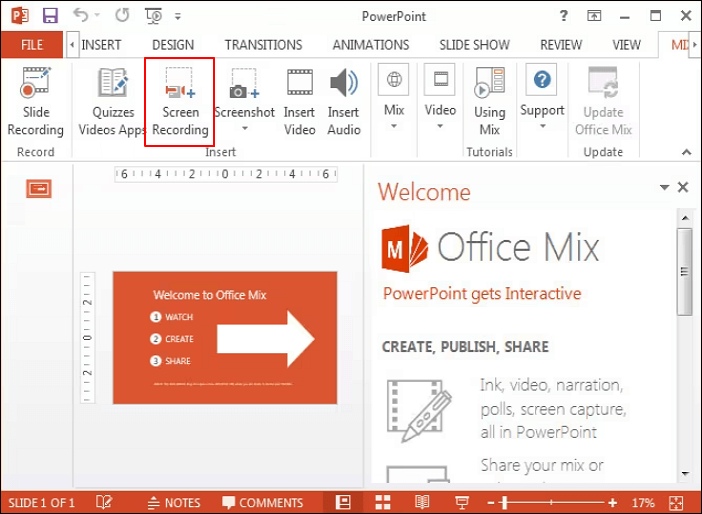
Step 2. Click Select Area for PowerPoint screen recording (or press Win + Shift + F to locate the entire screen), and the minimum recording size area is 64*64 pixels.
- By default, PowerPoint's audio and mouse pointer are pre-selected on the control dock. To turn them off, please uncheck Audio and Record Pointer.
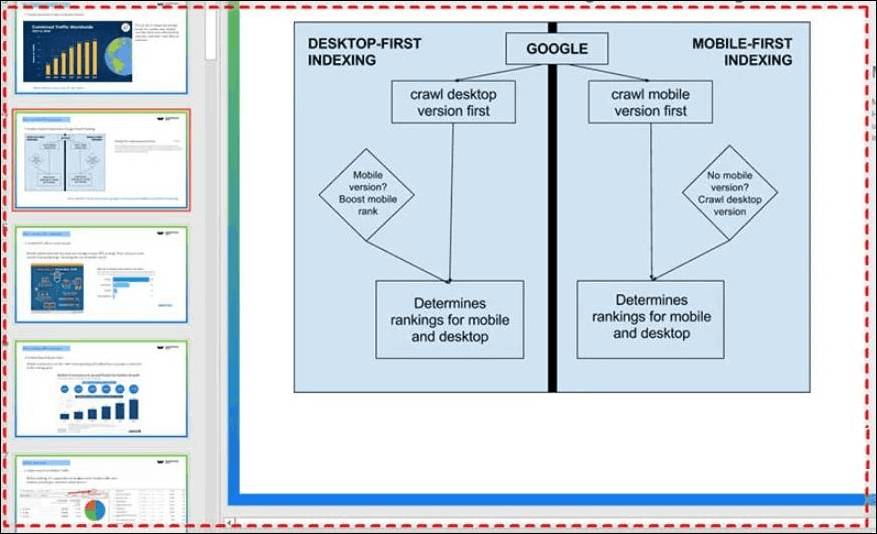
Step 3. Select Record > after 3s of automatic countdown, PowerPoint screen recording automatically begins > click Stop or press Win + Shift + Q to end this recording > your YouTube video is added to your chosen PPT slide.
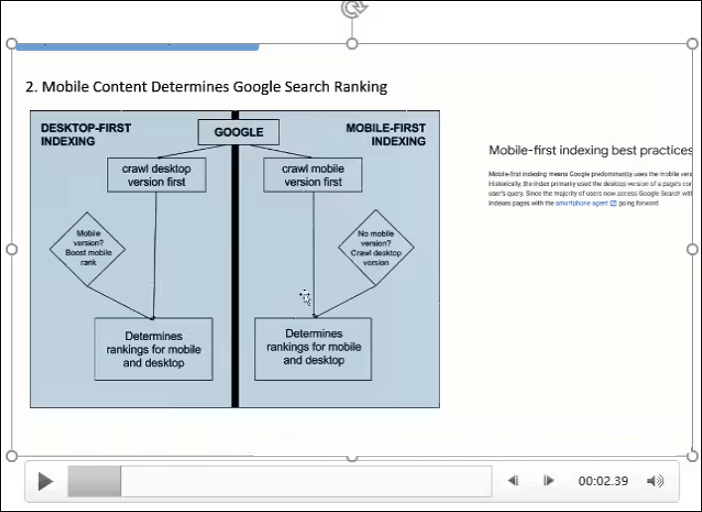
Step 4. Right-click the video frame > select Start > choose how you want your video to start: in a Click Sequence, Automatically, or When Clicked On.
If necessary, you can do the following operations:
- Change the outlook of your inserted YouTube video: right-click on the video frame > select the Style icon > pick up another shape.
- Save your PowerPoint screen recording as a separate file: Right-click the captured video frame > select Save Media as > after seeing the Save Media as box, enter a name in the File name box > select Save.
- Trim your captured PowerPoint screen recording: Right-click the video frame > select Trim > select Play in the Trim Video box to identify where you want to trim your video footage > locate the start point and end point of the clip > select OK.
Please share this post to help more users!
How to Paste a YouTube Video on PowerPoint via Screen Recorders (Easiest)🔥
Suppose you intend to render a better experience by showing your audience a YouTube video during your PowerPoint presentation. In that case, EaseUS RecExperts is an easy and efficient way to record PowerPoint with your chosen YouTube video via a webcam and micro. In a word, this powerful screen recorder can help you paste a YouTube video on PowerPoint easily.
Key features:
- Record PowerPoint presentations with audio and video using system sound, micro, and cameras.
- Enable full-screen recording, selected region recording, schedule recording, auto-split & auto-stop like stopping screen recording on PowerPoint.
- Offer video/audio import, video/audio editing, video/audio to text transcription, audio extraction from videos, microphone noise reduction, etc.
- Export the video in high-quality MP4, MOV, FLV, MKV, AVI, or GIF format.
Please refer to the following steps to screen record PowerPoint presentations with audio and video on Windows via EaseUS RecExperts.
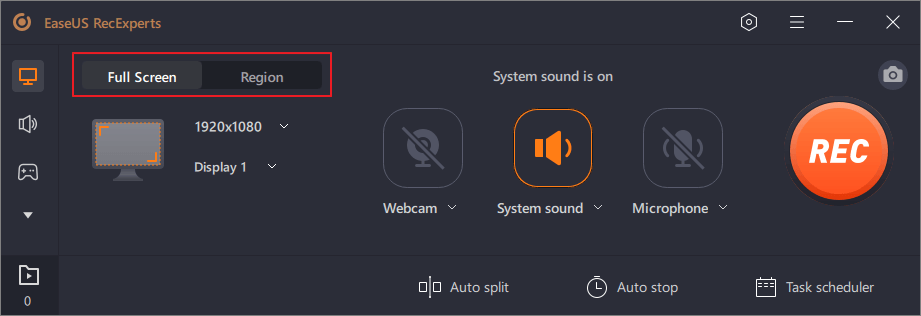
Step 1. Launch EaseUS RecExperts. There are two modes for screen recording. Choose "Full Screen", this tool will capture the whole screen; choose "Region", you will need to select the recording area manually.
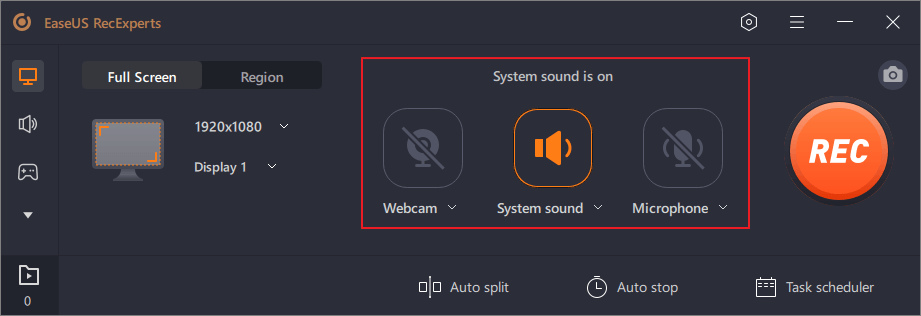
Step 2. After that, you can choose to record the webcam, system sound, or microphone as you like. Of course, you can turn them off if you only need to record the silent screen.
Step 3. Then, you can click the red "REC" button to start recording. Now you will see a menu bar on your screen. If you want to pause the recording, click on the white "Pause" button; to end the recording, click on the red "Stop" button.
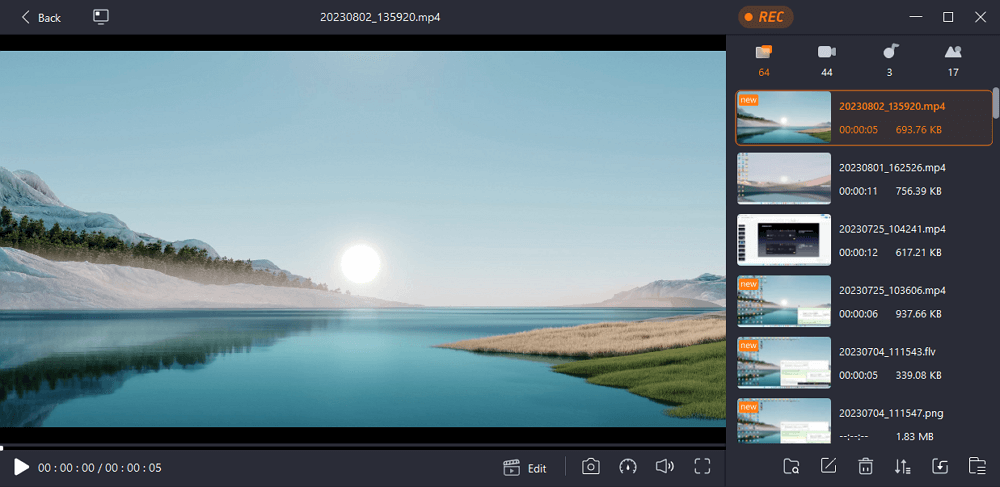
Step 4. After recording, you will be led to the recording list interface. Here you can view or edit your recordings easily.
Similarly, Mac users who want to embed video in PowerPoint can utilize EaseUS RecExperts for Mac. Here are the steps below.
Step 1. Download and launch EaseUS RecExperts on your Mac. To capture the whole screen, click on the "Full Screen" button from the main interface. If you want to customize the recording area, choose the "Region" button.
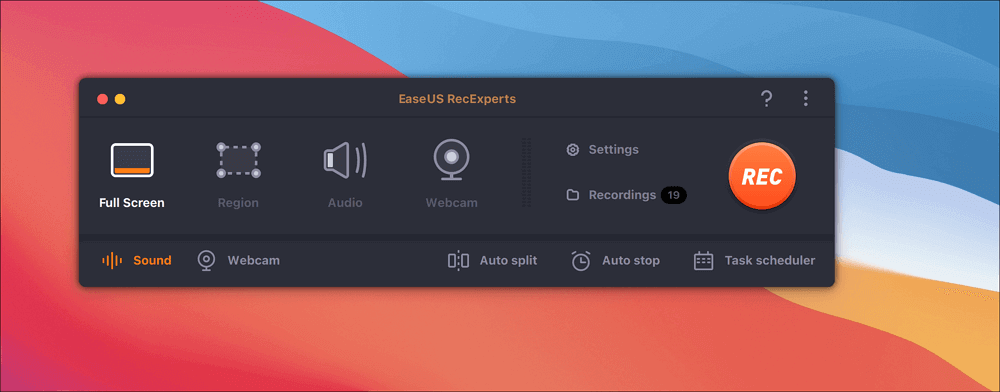
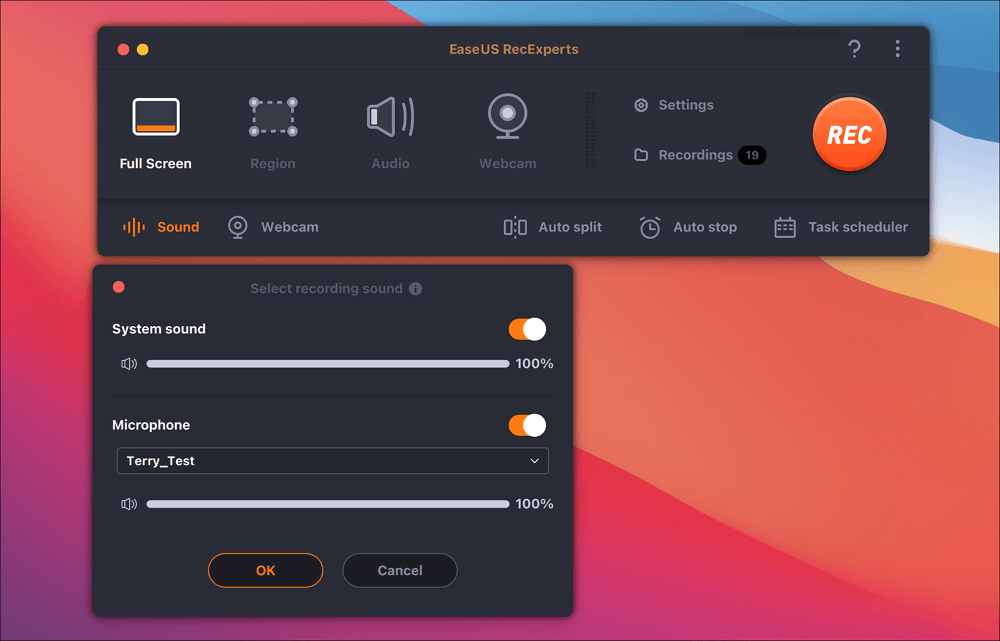
Step 2. To record the screen with audio, hit the Sound icon from the bottom left side of the toolbar. The audio resources can be your external sound or system audio. Based on your needs, enable the target option.
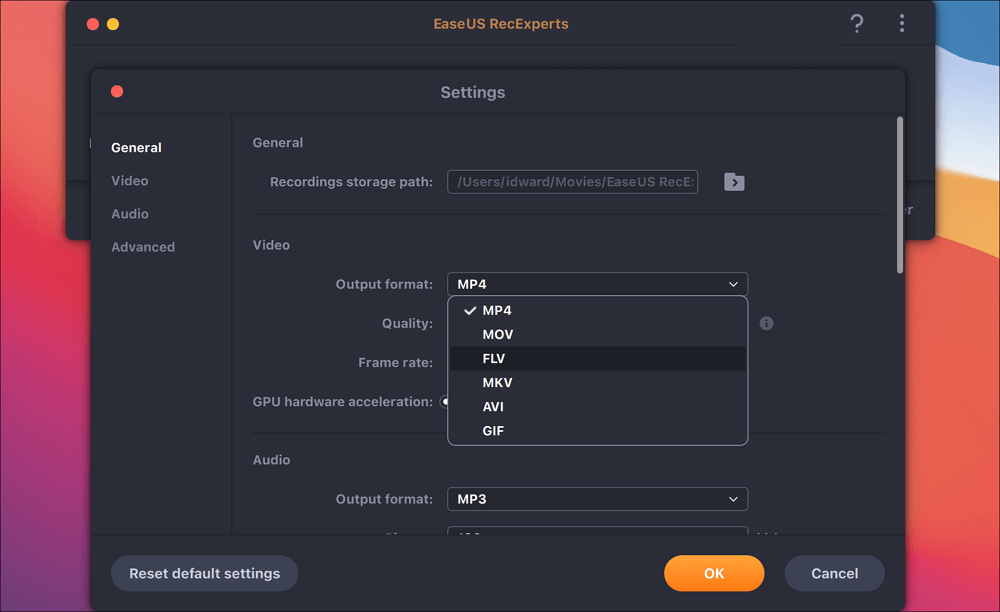
Step 3. Before capturing, you can change the output format of the recorded video by clicking "Settings" from the main interface. Then, scroll down the menu of Output format for Video. Choose the output type as you like.
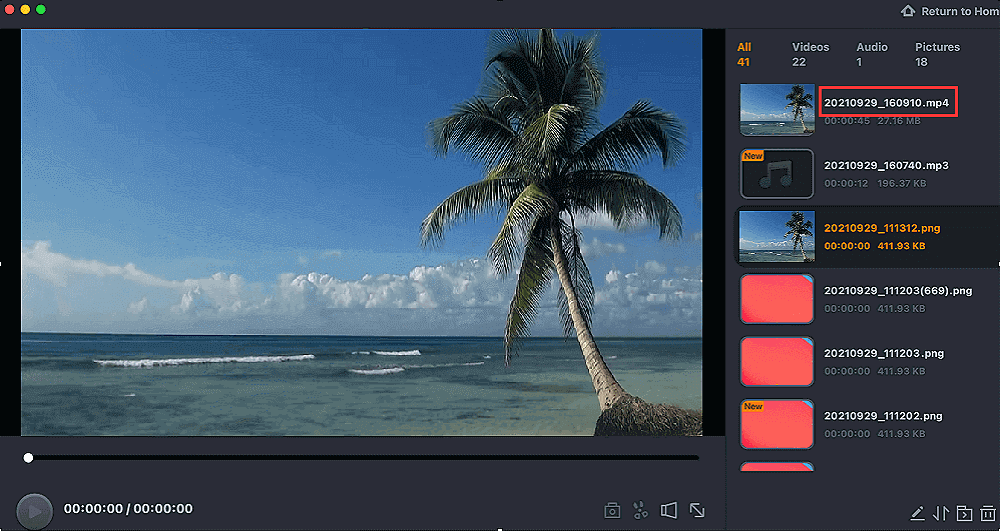
Step 4. Once done, click the REC button to begin recording. It captures anything displayed on your Mac screen. When you are done, click the Stop button. Then you can watch the recorded video from "Recordings".
Conclusion
How to embed a YouTube video in PowerPoint? Traditionally, you can put a YouTube video in PPT using the YouTube video's URL or embed code. If you're familiar with MS PowerPoint's screen recording feature, you can use it to record your screen and related audio and embed it into your PowerPoint slide. More conveniently, EaseUS RecExperts is the most efficient way to screen record PowerPoint presentations with YouTube videos if you prefer a better visual effect.
FAQs about How to Embed a YouTube Video in PowerPoint
This section lists several topics about how to embed a YouTube video in PowerPoint and PowerPoint screen recording.
1. How to embed a YouTube video in PowerPoint to use offline?
Please refer to the following steps.
Step 1. YouTube Premium subscribers can download the video from YouTube (both in the app and using third-party tools) as an MP4.
Step 2. Find your targeted slide in PowerPoint > insert the video from your files > adjust your files.
2. Why can't I insert a video into my PowerPoint?
Unsupported file formats, outdated PowerPoint, incorrect embed code, older PowerPoint limitations (Windows only) and Internet Explorer issues (Windows only) are responsible for this issue.
3. Can you trim an embedded YouTube video in PowerPoint?
Of course, you can trim a video, music clip, or sound clip in PowerPoint. Nevertheless, you can only cut videos you've imported from your computer because this feature is unavailable for videos inserted from the web.
Step 1. In Normal view, select the video border on the slide > find Video Tools > choose Playback > click Trim Video.
Step 2. To determine where you intend to trim your YouTube video footage, click Play in the Trim Video dialog box.
Step 3. Press Pause as you reach the point where you want to cut (you can use the Next Frame and Previous Frame buttons to fine-tune the location for a marker).
Step 4. To trim the beginning of the clip, click the start point > drag the two-headed arrow to change the video's starting point.
Step 5. To trim the end of the clip, click the end point > drag the two-headed arrow to change the video's starting point.
4. How to record a slide show with narration and slide timings?
MS PowerPoint has another built-in screen recording feature called Record Slide Show that can record your PowerPoint presentation or a single slide.
Please confirm the Record Slide Show feature is activated before using it: open your Microsoft PowerPoint file > click Options > select Customize Ribbon > click OK.
Let's show how it works.
Step 1. Open the Microsoft PowerPoint you want to record > click Slide Show > select Record Slide Show > select Record from Beginning or Record from Current Slide
Step 2. PowerPoint automatically records video and audio together > click RECORD > click STOP recording.
Step 3. Click Play to preview your captured video > remove your unwanted narration or timings after previewing. For example, if you're in record mode, click Clear > select Clear Recording on Current Slide or Clear Recording on All Slides.
Step 4. To export your recording as a video, click File > select Export > choose Create a Video > save your recording as an MPEG-4 or Windows Media Video > click Save.
Please share this post to help more users!
EaseUS RecExperts

One-click to capture anything on screen!
No Time Limit, No watermark
Start Recording
