-
![]()
Daisy
Daisy is the Senior editor of the writing team for EaseUS. She has been working in EaseUS for over ten years, starting from a technical writer to a team leader of the content group. As a professional author for over 10 years, she writes a lot to help people overcome their tech troubles.…Read full bio -
Jane is an experienced editor for EaseUS focused on tech blog writing. Familiar with all kinds of video editing and screen recording software on the market, she specializes in composing posts about recording and editing videos. All the topics she chooses …Read full bio
-
![]()
Alin
Alin is an experienced technical blog writing editor. She knows the information about screen recording software on the market, and is also familiar with data cloning and data backup software. She is expert in writing posts about these products, aiming at providing users with effective solutions.…Read full bio -
Jean is recognized as one of the most professional writers in EaseUS. She has kept improving her writing skills over the past 10 years and helped millions of her readers solve their tech problems on PC, Mac, and iOS devices.…Read full bio
-
![]()
Jerry
Jerry is a fan of science and technology, aiming to make readers' tech life easy and enjoyable. He loves exploring new technologies and writing technical how-to tips. All the topics he chooses aim to offer users more instructive information.…Read full bio -
![]()
Rel
Rel has always maintained a strong curiosity about the computer field and is committed to the research of the most efficient and practical computer problem solutions.…Read full bio -
![]()
Gemma
Gemma is member of EaseUS team and has been committed to creating valuable content in fields about file recovery, partition management, and data backup etc. for many years. She loves to help users solve various types of computer related issues.…Read full bio -
![]()
Shelly
"I hope my articles can help solve your technical problems. If you are interested in other articles, you can check the articles at the bottom of this page. Similarly, you can also check my Twitter to get additional help."…Read full bio
Page Table of Contents
Alin
Updated on Jun 09, 2026
0 Views |
0 min read
PAGE CONTENT:
Just like any other operating system, Chromebook also provides a built-in screen recording feature to take screenshots and screen recordings. It is a very handy feature if you want to save or record anything on your screen. You may know how to screen record on Chromebook with audio. But do you know how to stop screen record on Chromebook?
We are here to help. Just follow the simple guide below to learn how to stop screen recording on Chromebook. It's important to know how to stop screen recording tool because it will record until you stop it.
Shortcut to Stop Screen Recording on Chromebook
You can stop screen recording on Chromebook with just a click. Follow the steps below to learn the shortcut to stop recording on Chromebook.
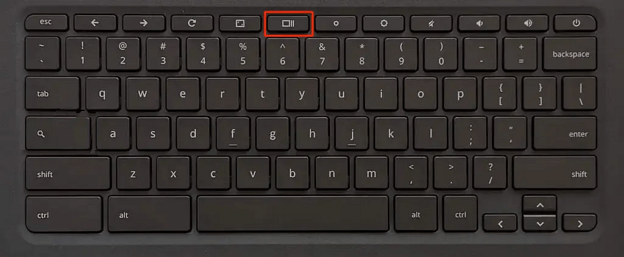
Step 1. If you want to record your screen on Chromebook. One is to use the Show Windows key, and the other is via the Screen Capture button in Quick Settings.
Step 2. If you want to stop recording on your Chromebook, bring your cursor to the bottom right corner. Here, you will find a red dot. Click on it to stop the screen recording on a Chromebook. You will receive a notification above the status tray with the message screen recording taken.

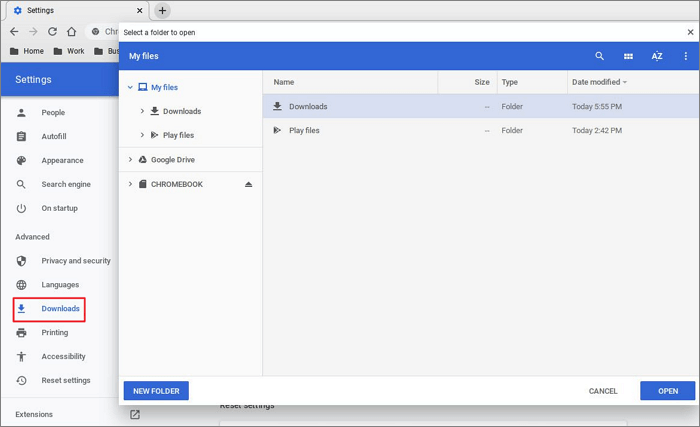
Step 3. To access the screen recording, navigate to Launcher on Chromebook > Files > Downloads folder. And to manage the type of screen recording and audio, click on Settings (gear icon) on the Screen Capture toolbar.
🔥Here is a video tutorial on how to stop screen record on Chromebook in detail:
- 00:15- Start recording on Chromebook
- 00:32- Stop recording on Chromebook
Bonus: How to Disable Screen Recording on Chromebook
Well, you cannot anyhow disable Screen Recording on your Chromebook, but you can restrict or permit its usage. You can access the built-in features to manage the screen recordings.
1️⃣Enable the Lock Screen on Chromebook
This feature is turned on by default, but in case you want to check. This feature will disable Screen Capture, as it requires a screen lock to access the screen. Follow the instructions below:
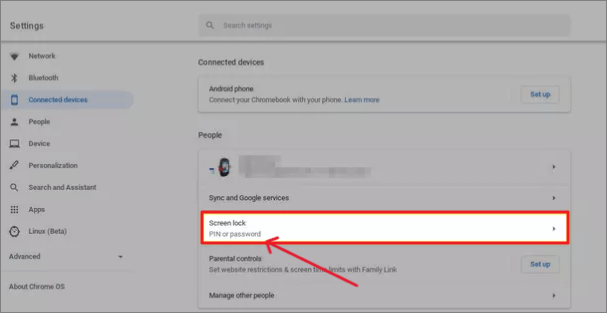
Step 1. Open Settings on your Chromebook.
Step 2. Navigate to Connected Devices > Screen Lock.
Step 3. Enter the Lock Screen password, and toggle the button beside the Show lock screen when waking from sleep.
2️⃣Restrict Apps on Chromebook
If you want to restrict apps from screen recording, the best thing is to turn off its permissions, so the app cannot access your screen. Follow the steps to do it.
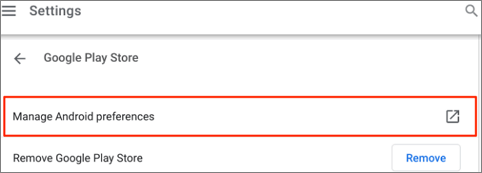
Step 1. Open Settings and navigate to Google Play Store > Manage Android Preferences.
Step 2. Select Apps in the Device section. Here, you can turn off the required permissions.
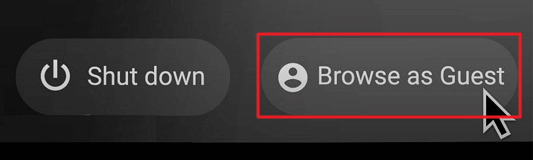
3️⃣Use a Guest Account
If you want to maintain your privacy on Chromebook, rather than adding your Google account, you can sign in as a guest user. You can log in directly with a guest account since you cannot download any app/browser with it. You are safe from external threats.
How to Stop Screen Recording on Chromebook FAQs
Here are some of the most frequent FAQs asked on how to stop screen record on Chromebook. If you have similar queries hope this will help you.
1. How do I stop screen recording?
After the screen recording on your Chromebook starts, you can see a red dot at the bottom right corner of your screen. Tap on it to stop recording. This will save the recording in the downloads section.
2. How long can you screen record on Chromebook?
As of now, you can screen record on Chromebook for unlimited time. The Chromebook will continue recording until the user stops the recording or if the device runs out of storage.
3. How do I stop my Lenovo from recording?
If you are recording the Lenovo screen with the Xbox Game Bar, you need to press Windows + Alt + R to start and stop the recording. If you are using any third-party apps, the process to stop the recording may vary depending on the software.
Conclusion
It is very important to know how to stop screen record on Chromebook. If you are not stopping the recording, the device will keep on recording. This post details how to stop screen record on Chromebook and manage screen recording on Chromebook. In the end, it's up to you to decide what restrictions and privacy you want on your Chromebook.
If you like the content, please share it with your friends. I hope they find it useful too.