-
![]()
Daisy
Daisy is the Senior editor of the writing team for EaseUS. She has been working in EaseUS for over ten years, starting from a technical writer to a team leader of the content group. As a professional author for over 10 years, she writes a lot to help people overcome their tech troubles.…Read full bio -
Jane is an experienced editor for EaseUS focused on tech blog writing. Familiar with all kinds of video editing and screen recording software on the market, she specializes in composing posts about recording and editing videos. All the topics she chooses …Read full bio
-
![]()
Alin
Alin is an experienced technical blog writing editor. She knows the information about screen recording software on the market, and is also familiar with data cloning and data backup software. She is expert in writing posts about these products, aiming at providing users with effective solutions.…Read full bio -
Jean is recognized as one of the most professional writers in EaseUS. She has kept improving her writing skills over the past 10 years and helped millions of her readers solve their tech problems on PC, Mac, and iOS devices.…Read full bio
-
![]()
Jerry
Jerry is a fan of science and technology, aiming to make readers' tech life easy and enjoyable. He loves exploring new technologies and writing technical how-to tips. All the topics he chooses aim to offer users more instructive information.…Read full bio -
![]()
Rel
Rel has always maintained a strong curiosity about the computer field and is committed to the research of the most efficient and practical computer problem solutions.…Read full bio -
![]()
Gemma
Gemma is member of EaseUS team and has been committed to creating valuable content in fields about file recovery, partition management, and data backup etc. for many years. She loves to help users solve various types of computer related issues.…Read full bio -
![]()
Shelly
"I hope my articles can help solve your technical problems. If you are interested in other articles, you can check the articles at the bottom of this page. Similarly, you can also check my Twitter to get additional help."…Read full bio
Page Table of Contents
0 Views |
0 min read
Discord is a great tool that allows people worldwide to communicate together while playing gameplay. And gamers can use it to do some real-time communications easily and quickly. Sometimes, you need to record Discord audio to keep it on your device for different reasons. In this case, you may first think of OBS Studio for recording audio, as it is entirely free and multifunctional.
But if you are new to OBS Studio, you'd better check some audio-recording tutorials first because of its complicated UI. To save your time and effort, we are going to teach you how to record Discord audio with OBS on this page. More than that, we also provide an OBS alternative to help you capture almost anything. Let's get started!
How to Record Discord Audio with OBS (Step-by-Step Guide)
|
Difficulty Level: ⭐⭐⭐⭐ Duration: At least 5 Mins |
What to Prepare:
|
OBS Studio is a free, open source screen recorder compatible with Windows, macOS, and Linux operating systems. This freeware provides a wide range of functions for video and audio recording, even live streaming.
As for audio recording, OBS provides many sophisticated features, including changing output formats and quality, applying sound, etc. And recording Discord audio is just a piece of cake for it. Now, let's take a look at how to capture Discord audio in OBS below:
Step 1. Download and install OBS Studio on your PC or Mac, then launch it. At the same time, open Discord and start your audio all.
Step 2. On the OBS main interface, find the "Source" tab next to "Scenes" and click the little "+" icon on the bottom. Next, click "Audio Output Capture" to open the "Create/Select Source" window.
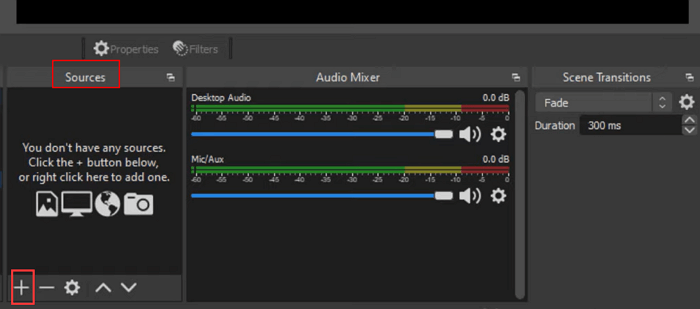
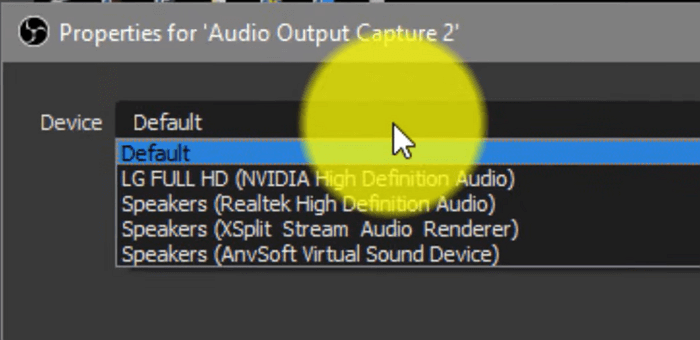
Step 3. Enter a file name for your recording and click on "OK". Afterward, you must select the audio output device, like the default, speakers, headphones, and more. Once selected, click OK.
Step 4. Click "Settings" on the lower right to adjust output settings. Here you can change the output format, encoder, saving path, etc.
Step 5. Then go back to the main interface, and click on the "Start Recording" option at the bottom-right corner to begin your Discord audio recording.
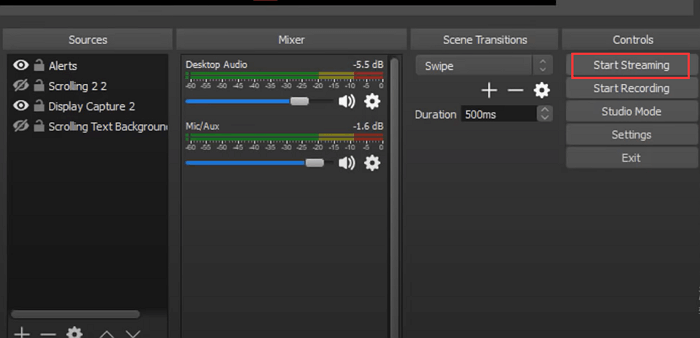
Step 6. During recording, you can choose to enable or disable your microphone according to your needs.
Step 7. When you stop the Discord audio recording, click "File" > "Show recordings" to preview the recorded audio file on your computer.
Read also: How to record screen with OBS
OBS Alternatives to Capture Discord Audio
|
Difficulty Level: ⭐⭐ Duration: 3 Mins |
What to Prepare:
|
Although OBS Studio offers tons of brilliant features for audio and screen recording, it is a little complicated to use for most users, especially beginners. So, to record Discord audio easily and quickly, you can try other easy and free screen recorder, like EaseUS RecExperts.
This software has a neat UI and intuitive workflow, making it easy to operate. With its aid, you can easily capture Discord audio calls with simple clicks. Before recording, you can apply other advanced settings, such as microphone boosting, noise reduction, and so on, which will enhance your audio recording automatically. Another highlight is that this program lets you record as long as you want. When you stop the recording, you can edit the audio file by trimming, cutting, etc.
- Provide the schedule recording feature to start/stop recording automatically
- Export audio recordings in various formats
- Embed with a built-in video editor and media player
- Help complete almost all screen and audio recording tasks
Here's how to capture Discord audio using EaseUS RecExperts:
Step 1. Launch EaseUS RecExperts and choose Audio mode (looks like a speaker) from the main interface.
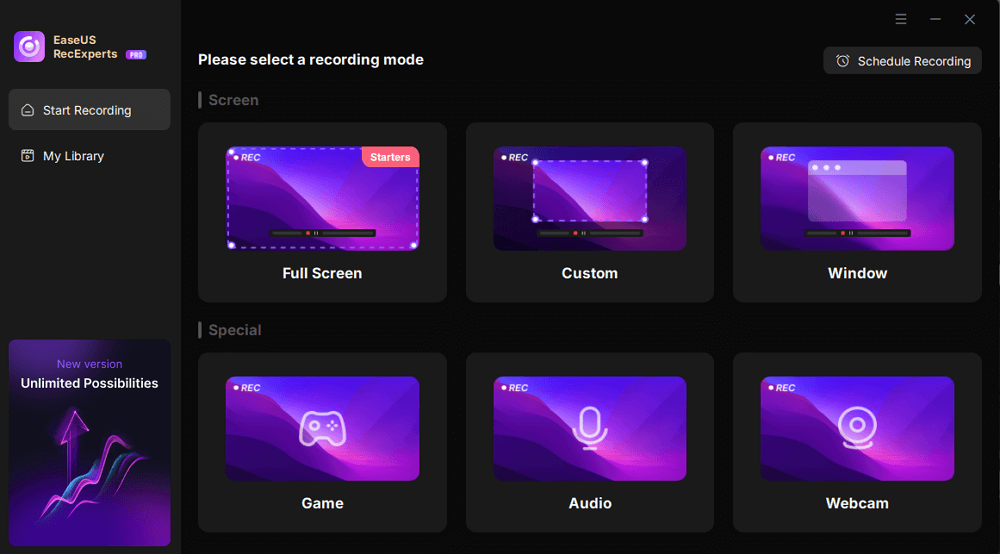
Step 2. Select the sound source by clicking on the speaker sign (the system sound) or the mic sign (the microphone). Or, you can record them both at the same time.
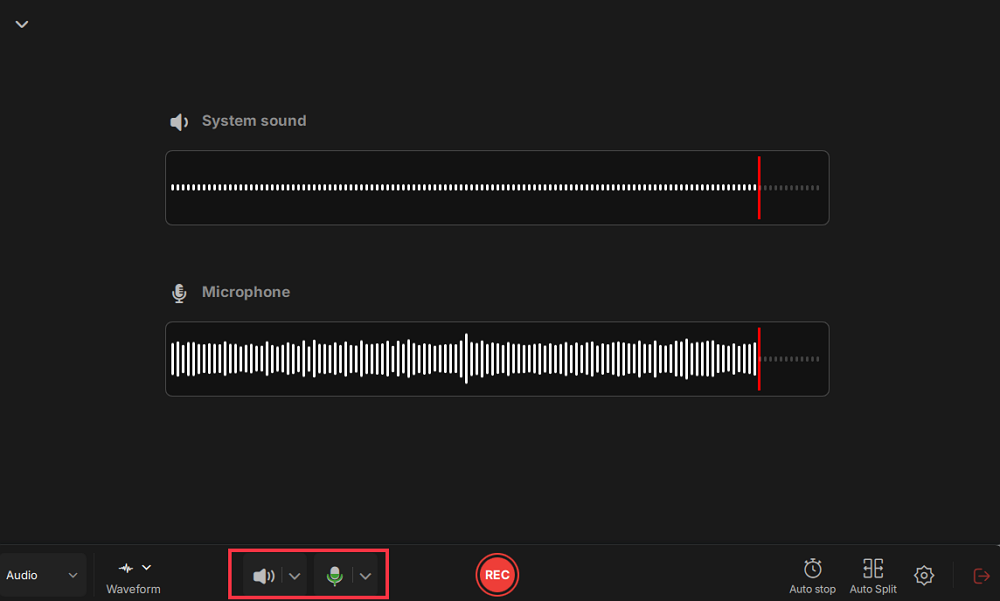
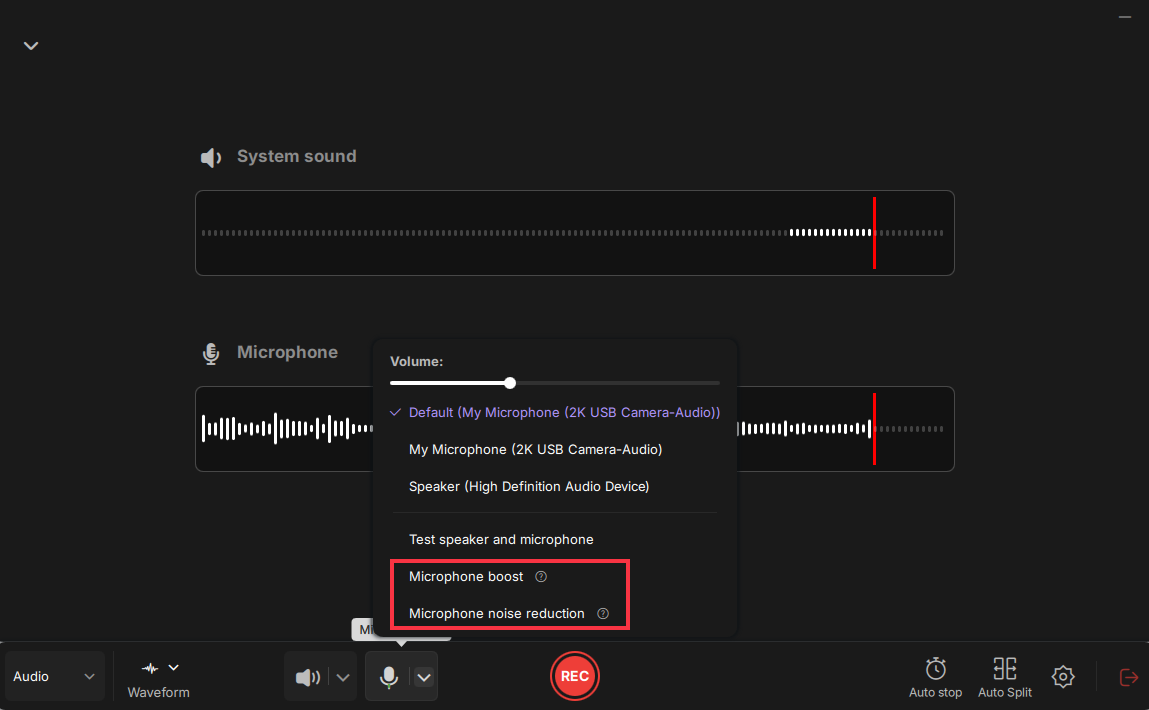
Step 3. Click the drop-down buttons next to the Speaker and Microphone to adjust the audio source settings.
- In the Speaker tab, you can adjust the volume, test the speaker and microphone, record silently, or open the volume mixer.
- In the Microphone tab, you can also enable Microphone boost and Microphone noise reduction features.
Step 4. To change the output format, bitrate, or sampling rate, you can click the Settings button in the lower right corner of the page. Of course, you can also set the automatic stop audio recording and automatic audio segmentation as needed.
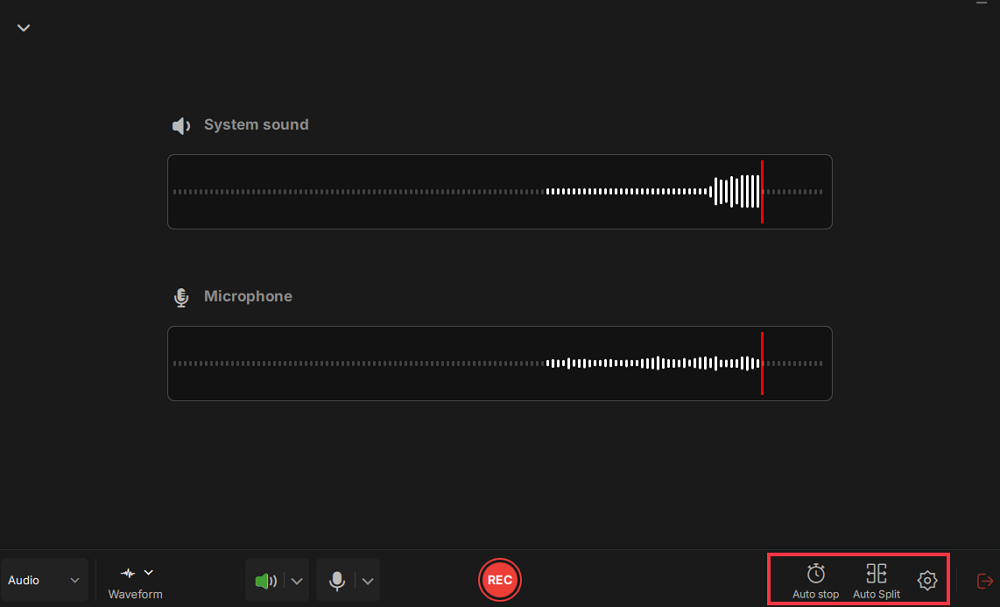
Step 5. Hit the REC button to start recording audio. To finish it, just click on the red square icon to stop the recording.
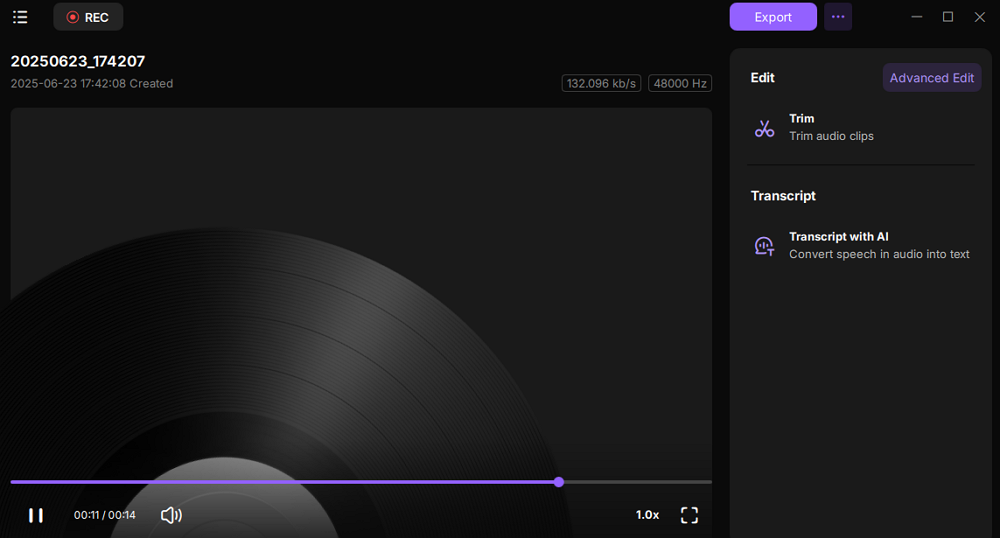
Step 6. Once finished, the audio recording will be saved automatically. You can listen to or edit the recording with built-in tools.
The Bottom Line
This post walks you through the detailed steps to capture Discord audio in OBS Studio, and you can start your recording now! If you feel it's complicated to use OBS for Discord audio recording, you can opt for its alternative - EaseUS RecExperts. This software combines audio recording, screen recording, media playing, and editing features, making all related tasks done easily.
How to Capture Discord Audio in OBS FAQs
1. Can OBS stream audio Discord?
Yes, OBS can help stream Discord audio. To complete the task, you can check out the following steps:
Step 1. Launch OBS Studio, and it will configure itself automatically. For streaming, click "Optimize for streaming, " click next, and choose a resolution.
Step 2. Download and install OBS Virtualcam Plugin. Make sure to install it to the folder where you installed OBS Studio. After that, restart your OBS.
Step 3. Click Tools > VirtualCam in the main OBS Studio window, then click "Start".
Step 4. Open Discord, click "Settings >Voice and Video > and select OBS - Camera as your webcam". Once done, you can start streaming Discord via OBS.
2. Why is OBS not picking up Discord audio?
If OBS Studio doesn't pick up Discord audio, this might be caused by some improper sound settings. For example, the OBS application is muted in the Volume Mixer. Therefore, you can go to Settings and unmute OBS, then check if the OBS audio is back on your Discord recording.
3. How do I hear audio on OBS?
First, you need to go to Audio Mixer to open the Setting window. Then, click Desktop Audio > Settings > Properties, and choose your audio interface as the device. That's it!
4. Can OBS just record audio?
Yes. OBS can only record audio from any application on your PC or Mac. Here's how to use OBS to record audio only:
Step 1. Launch OBS Studio on your device.
Step 2. Choose the Settings button on the lower right. Next, click Output Mode > Audio only > Apply to save your changes.
Step 3. At last, you will find that your OBS can just record audio.
EaseUS RecExperts

One-click to capture anything on screen!
No Time Limit, No watermark
Start Recording