-
![]()
Daisy
Daisy is the Senior editor of the writing team for EaseUS. She has been working in EaseUS for over ten years, starting from a technical writer to a team leader of the content group. As a professional author for over 10 years, she writes a lot to help people overcome their tech troubles.…Read full bio -
Jane is an experienced editor for EaseUS focused on tech blog writing. Familiar with all kinds of video editing and screen recording software on the market, she specializes in composing posts about recording and editing videos. All the topics she chooses …Read full bio
-
![]()
Melissa Lee
Melissa Lee is an experienced technical blog writing editor. She knows the information about screen recording software on the market, and is also familiar with data cloning and data backup software. She is expert in writing posts about these products, aiming at providing users with effective solutions.…Read full bio -
Jean is recognized as one of the most professional writers in EaseUS. She has kept improving her writing skills over the past 10 years and helped millions of her readers solve their tech problems on PC, Mac, and iOS devices.…Read full bio
-
![]()
Jerry
Jerry is a fan of science and technology, aiming to make readers' tech life easy and enjoyable. He loves exploring new technologies and writing technical how-to tips. All the topics he chooses aim to offer users more instructive information.…Read full bio -
Larissa has rich experience in writing technical articles. After joining EaseUS, she frantically learned about data recovery, disk partitioning, data backup, screen recorder, disk clone, and other related knowledge. Now she is able to master the relevant content proficiently and write effective step-by-step guides on various computer issues.…Read full bio
-
![]()
Rel
Rel has always maintained a strong curiosity about the computer field and is committed to the research of the most efficient and practical computer problem solutions.…Read full bio -
![]()
Gemma
Gemma is member of EaseUS team and has been committed to creating valuable content in fields about file recovery, partition management, and data backup etc. for many years. She loves to help users solve various types of computer related issues.…Read full bio
Page Table of Contents
0 Views |
0 min read
You can find a common feature in your console these days; it includes sharing your gameplay live by letting you stream to Twitch services. You can find the right live-streaming tools on Xbox One and PS4. With the use of these tools, you can stream Switch to Discord or Twitch to share your gameplay. However, if you are an old-school lover, you can get the stuff done by using a Nintendo switch and fetching a capture card. It is so because there are no capabilities for live streaming on the Nintendo switch.
If you want to know how to stream Switch to twitch effectively on Nintendo, you need the right equipment and some sorted steps to complete the job. If you want to show your skills in playing Switch, you can also rely on a screen recorder to record Switch gameplay. Now, let's get started!
What You Need for Streaming Switch to Twitch
Since Nintendo Switch is not equipped with a live streaming facility, before starting with streaming Switch to Twitch, there are specific preparations you need to make. These are:
- A PC along with a capture card for streaming live a Nintendo Switch.
- You can turn your Xbox One into a capture card and use it if needed.
How to Stream Switch to Twitch (Step-by-Step Guide)
Here is a detailed step-by-step tutorial on how to stream Switch to Twitch for your reference.
Stage 1. Making a Capture Card Work on Your PC
Step 1. Purchasing a Capture Card
Nintendo does not have built-in streaming capabilities, so you will require a capture card. However, it would help if you noticed that the resolution for Nintendo could extend up to 1080p, so there is no need for a capture card of the high-end like 4K.
You can make use of the following capture cards:
- Elgato Game Capture HD60 Pro: It is an internal card that will be inserted into the PCI slot of your PC. However, it is not suitable for Mac or laptop.
- Elgato HD60 S+: Owing to its small size, portability, and capability to stream videos of 1080p at 60fps, this is the most recommended capture card.
Stage 2. Download and Install OBS
You can use the most popular app for broadcasting, which is available in the form of OBS. It helps stream to Facebook Live and YouTube, along with facilitating with Twitch. As it is open-source, it is known as a free download and can be used on multiple devices like Linux, PC, or Mac. Similarly, as an alternative, you can also make use of Streamlabs.
If you want to complete downloading and installation of OBS, follow the steps:
Step 1. Start by opening a web browser and tapping on the link: https://obsproject.com/download
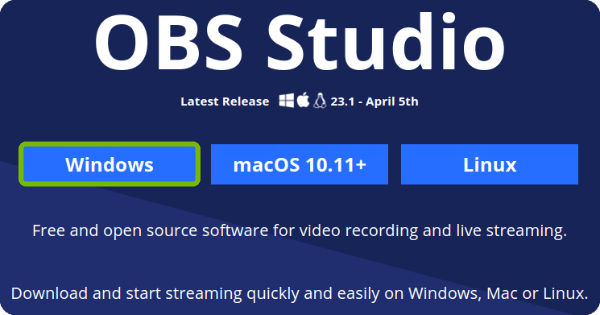
Step 2. Now tap on the icon for your OS. Then tap on the Download installer.
Step 3. Start using the web browser to open the installer file. You can also use the Downloads folder for this purpose.
Step 4. Then follow the instructions and complete the installation process.
Stage 3. Signing Up for a Twitch Account
If you are not done signing up for a Twitch account, you can do so by typing https://www.twitch.tv/ and then signing up with the report.
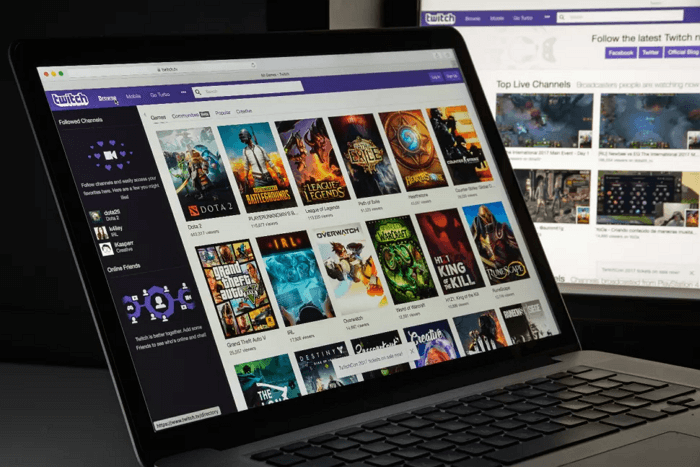
Stage 4. Link OBS to Twitch Account
Then it would be best if you did link your OBS and Twitch accounts by following the given steps;
Step 1. Start by opening OBS and locating the menu bar. Then tap on the 'File.'
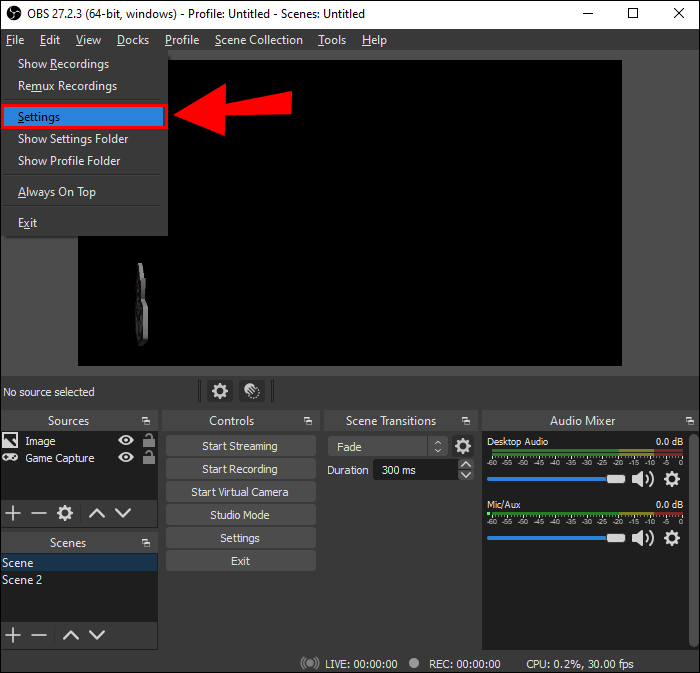
Step 2. Now tap on 'Settings.' Look at the menu on the left side and tap 'Stream.'
Step 3. Now, using the drop-down menu mentioned near 'Service,' select 'Twitch.'
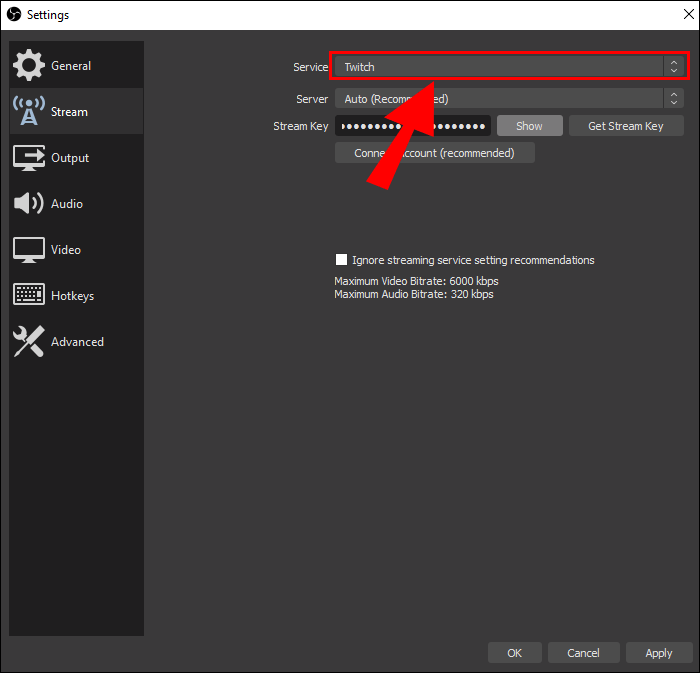
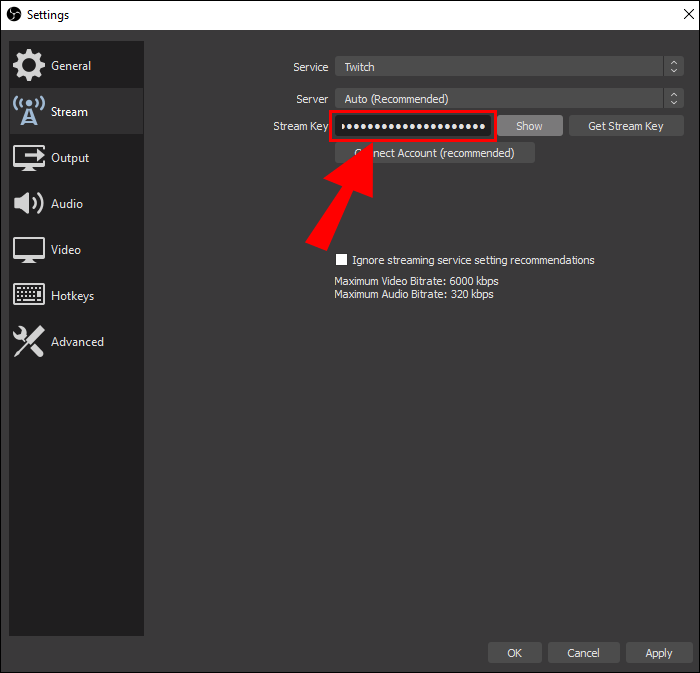
Step 4. Then tap on 'Connect account.' After that, make an entry for your username on Twitch along with your password. Now tap on the option of 'Login.'
Stage 5. Mak Connection of Your Capture Card to Your PC
You can do this differently, relying on the capture card you have. For example, if you have an external card, you can connect it via a USB cable to your PC. In the case of an internal card, you need to go ahead with opening the computer tower and then proceed with the installation of the card in the available PCI slot.
Stage 6. Connect the Capture Card and the Nintendo Switch along with a Monitor
It would be best to use docked mode to play your Nintendo Switch. Then, connect the Nintendo Switch dock's HDMI port to the capture card's HDMI port using an HDMI cable. After that, by using a different HDMI cable, make a connection on the capture card from the HDMI Out Port, and this will extend to your monitor through an HDMI In port.
Stage 7. Add the Capture Card as a Source in OBS
Now you can use any additional sources, like a mic or a webcam, and follow the steps for adding the capture card in OBS.
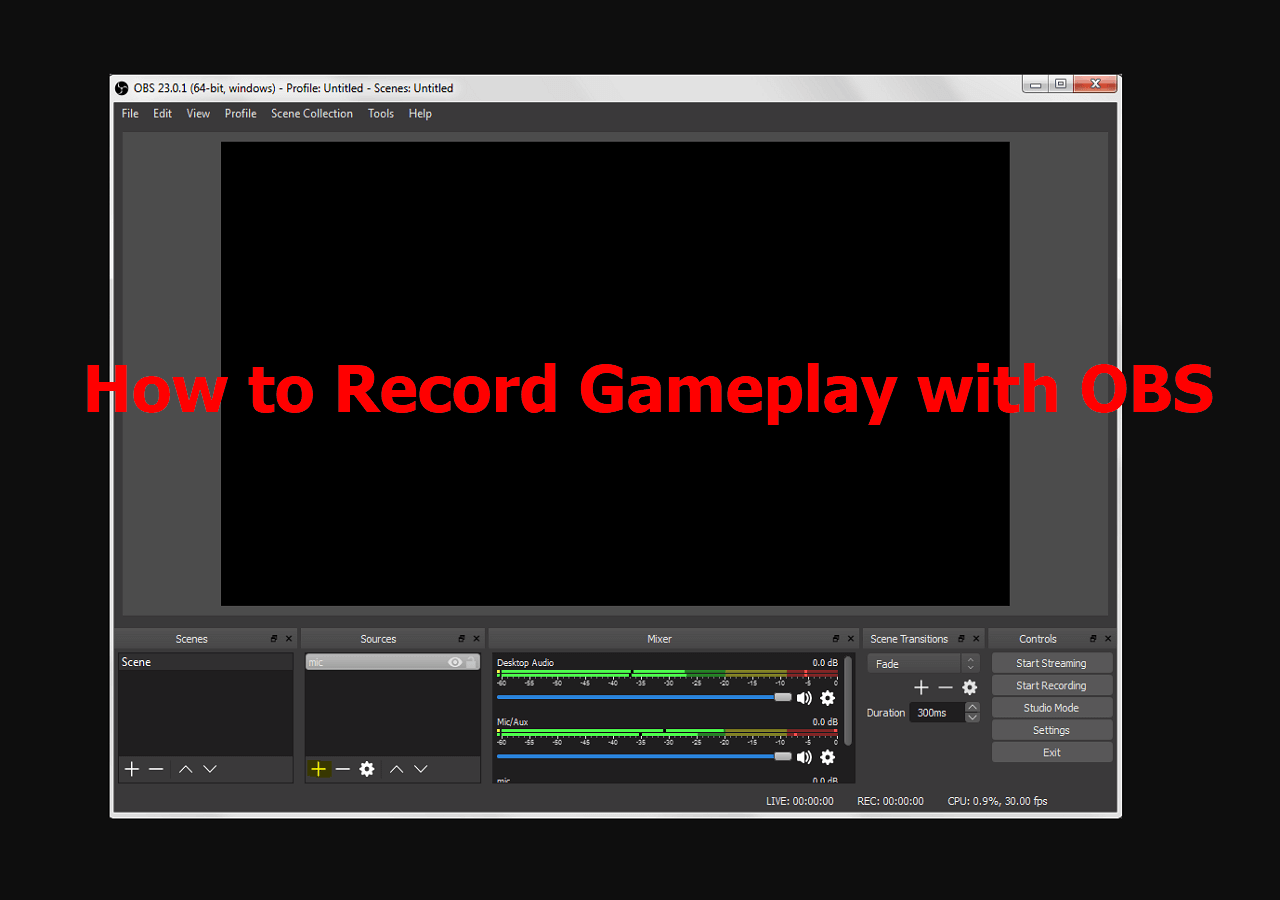
Step 1. Tap on the '+' sign in the Sources panel's bottom section in OBS.
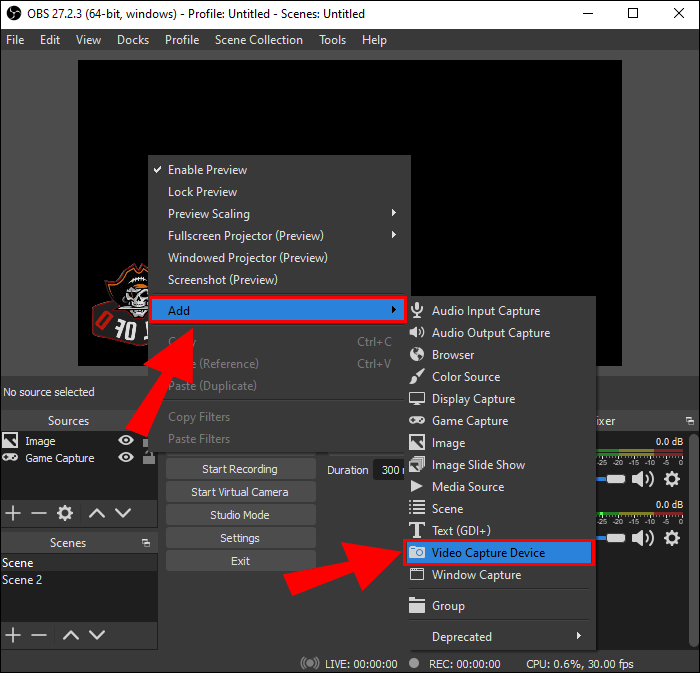
Step 2. Now, in the drop-down menu, tap 'Video Capture Device.'
Step 3. Then give a name to this source, like 'Capture card' or any other name as per your preference, and tap on the 'OK' button.
Step 4. After that, besides the 'Device,' locate the drop-down menu and select the capture card for the video. Once done, tap on 'Ok.'
Stage 8. Adjust Windows along with Sources Related to Your Stream
Switch on your Nintendo Switch and verify whether you can see a capture from the Switch by using the preview window in OBS. After that, adjust the source in every window by tapping and dragging them.
Alternatively, you can tap and do dragging of edges of every source in the window for preview and make adjustments in the size.
Stage 9. Make an Entry of Information Related to Your Stream
To enter the information related to your stream, use the window for stream information. Then enter the stream title and a customized live notification in the top section. After that, select the categories and tags you intend to use. Then tap on 'Done' in the bottom area.
In case you cannot see the window for stream information, from the menu bar, tap on the 'Docks.' Then tap on 'System Information.'
Stage 10. Start Streaming
Once you have set up everything, you can start the streaming. From the Control panel, tap on 'Start Streaming.' As a default feature, you can find it in the right corner in the lower section. Within the OBS, you can monitor your chat along with the stream.
The Bottom Line
We would like to enlighten you with the steps to stream Switch to Twitch. Using these steps carefully, you can go live even using the old-fashioned Nintendo Switch. Of course, you will only need to settle for the modern versions to avail of this feature. So go ahead and try these steps and go live with your games at once.
Stream Switch to Twitch FAQs
We are here to provide you with some extra information so you get all the information related to how to stream Switch to Twitch. Check out the related FAQs.
1. How do I stream my Nintendo Switch on Twitch without a capture card?
Streaming your Nintendo Switch on Twitch without using a capture card is done by using Xbox One.
- Start by connecting your Switch to the Dock.
- Now click the port to Xbox and Dock using the HDMI cable.
- Now make a connection to the Xbox with a monitor.
- Then on your Xbox, boot OneGuide and switch on the Switch to find the Switch appearing on the monitor.
- Now connect the PC and Xbox via an ethernet cable.
- Go ahead with downloading an app for Xbox on your PC. You will see Nintendo Switch in the app.
- Then opt for booting OBS/Streamlabs and configure your software for streaming. You will be able to go live now.
2. How do you stream Nintendo Switch on Twitch 2022?
For streaming Nintendo Switch on Twitch 2022, use the following steps;
- Start by connecting Nintendo Switch to your TV.
- Now use OBS Studio for Twitch Stream Nintendo Switch.
- Then optimize the Nintendo Switch stream on Twitch by adding a webcam or a microphone.
3. Can you stream from Nintendo Switch?
Nintendo Switch does not have capabilities for live streaming, so for that, you need a PC and a capture card. Additionally, you can use an Xbox and a capture card if you have an Xbox one.
EaseUS RecExperts

One-click to capture anything on screen!
No Time Limit, No watermark
Start Recording