-
![]()
Daisy
Daisy is the Senior editor of the writing team for EaseUS. She has been working in EaseUS for over ten years, starting from a technical writer to a team leader of the content group. As a professional author for over 10 years, she writes a lot to help people overcome their tech troubles.…Read full bio -
Jane is an experienced editor for EaseUS focused on tech blog writing. Familiar with all kinds of video editing and screen recording software on the market, she specializes in composing posts about recording and editing videos. All the topics she chooses …Read full bio
-
![]()
Alin
Alin is an experienced technical blog writing editor. She knows the information about screen recording software on the market, and is also familiar with data cloning and data backup software. She is expert in writing posts about these products, aiming at providing users with effective solutions.…Read full bio -
Jean is recognized as one of the most professional writers in EaseUS. She has kept improving her writing skills over the past 10 years and helped millions of her readers solve their tech problems on PC, Mac, and iOS devices.…Read full bio
-
![]()
Jerry
Jerry is a fan of science and technology, aiming to make readers' tech life easy and enjoyable. He loves exploring new technologies and writing technical how-to tips. All the topics he chooses aim to offer users more instructive information.…Read full bio -
![]()
Rel
Rel has always maintained a strong curiosity about the computer field and is committed to the research of the most efficient and practical computer problem solutions.…Read full bio -
![]()
Gemma
Gemma is member of EaseUS team and has been committed to creating valuable content in fields about file recovery, partition management, and data backup etc. for many years. She loves to help users solve various types of computer related issues.…Read full bio -
![]()
Shelly
"I hope my articles can help solve your technical problems. If you are interested in other articles, you can check the articles at the bottom of this page. Similarly, you can also check my Twitter to get additional help."…Read full bio
Page Table of Contents
0 Views |
0 min read
Nintendo Switch is an excellent console for hardcore gamers all over the world. If you are a gamer who wants to screen-share Nintendo Switch with others over the Internet, you might choose to stream Switch on Discord, a popular online communication platform. However, streaming Switch to Discord is a little bit difficult, and you may encounter Discord screen share black screen issues sometimes.
So, if you are new to doing the task, you might have no idea about it. If so, don't fret. You can get help on this post. Here we are going to share with you some tips about streaming Switch to Discord so that you can complete the task without hassle. Without further ado, let's go dive in!
PAGE CONTENT:
You may also want:
Preparation for Streaming Switch to Discord
As we know, there is no Discord app you can find on the Nintendo Switch, so you cannot directly stream the Switch gameplay to Discord. To do it successfully, you need to rely on a computer or laptop to connect your Switch. In addition to that, you also need to prepare the following items:
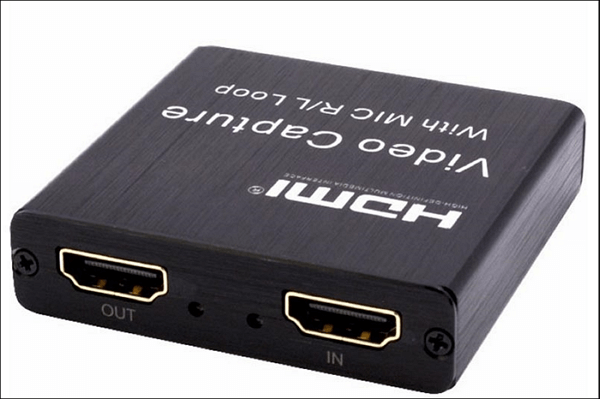
1. A video capture card
Most computers and laptops don't have an HDMI port, so you must prepare a video capture card to connect your Switch and computer. But if there is an HDMI port on your computer, you can directly plug the Switch into your computer.
As for the video capture card, you'd better prepare the one that supports online streaming. Usually, you can buy such capture cards from electronics stores.
2. A streaming software
It is also necessary to choose a great streaming software. According to the service, VLC Media Player and OBS Studio are the classic programs helping you to stream online. Both of them are open source and completely free, but they also have some differences.
- If you are a beginner, we recommend VLC Media Player, as it has an intuitive and friendly UI
- If not, try OBS Studio. It allows you to do other activities more than streaming, like screen-recording
Here, we will take VLC Media Player as an example.
3. Other necessities
To stream Switch on Discord, you need to get the Discord app on your computer and HDMI cables.
When you have four things on your hands, you are ready to start streaming Nintendo Switch on Discord. Now, let's check the tutorial below.
How to Stream Nintendo Switch on Discord - Simple Steps
This part will walk you through the detailed steps to stream Nintendo Switch on Discord. Check and follow each step now.
Stage 1. Connect Switch to Capture Device
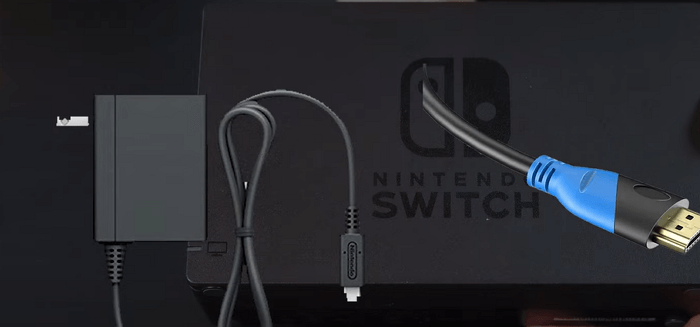
Step 1. Connect the USB-C ports on the Switch to the Dock to make a solid connection.
Step 2. The Dock offers an HDMI Out port, and you need to plug the other end of the HDMI cable into the "In" port on the capture card. Then you can successfully connect the HDMI from your Dock to the capture card.
Step 3. Next, connect the capture card's USB cable to your computer or laptop.
Step 4. Once connected, press the power button in the top left corner to turn on your Switch. Then you will view the Nintendo's display screen on your computer.
Stage 2. Set Up VLC Media Player
Step 1. Open your Notepad on your computer, and copy and paste the following code:
C:\Program Files\VideoLAN\VLC\vlc.exe" dshow:// :dshow-vdev="Game Capture HD60 S (Video) (#01)" :dshow-adev="Game Capture HD60 S (Audio) (#01)" :dshow-aspect-ratio="16:9″ :dshow-audio-samplerate=48000 :dshow-audio-channels=2 :live-caching=0 :dshow-fps=60 to the Notepad
Step 2. Launch the VLC Media Player, then click "Media" > "Open Capture Device..." to open the Media window.
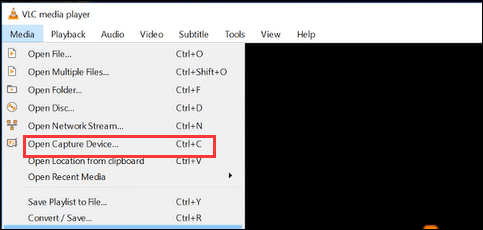
Step 3. In the Open Media window, set the Capture Mode to be DirectShow. Next, set the Video & Audio Device name to be the same as the name of the capture card in the Device Selection.
Step 4. Click the "Show More Options" button at the left, and paste the copied code in the Edit Options box.
Step 5. When all settings are done, close this streaming program.
Step 6. Find the VLC shortcut on your desktop and right-click on it. Next, select the "Properties" option, go to "Target", and paste the copied code to the Target box.
Stage 3. Set Up Discord for Streaming
Step 1. Open Discord on your computer and join a server. Once joined, you will see a list of channels in the column on the left side of the window.
Step 2. Next, click the Speaker icon to join a voice channel.
Step 3. At the bottom of the channel list, click on the "Screen" option.
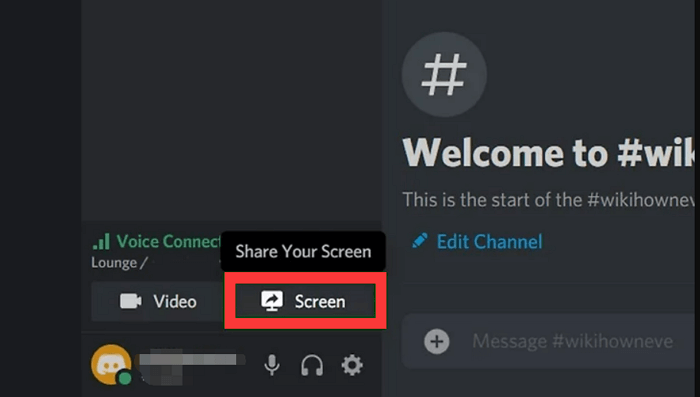
Step 4. Click "Application" and select the VLC display.
Step 5. At last, click "Go Live" to share your Nintendo Switch screen. If you want to end the streaming, click the monitor with the X inside the thumbnail preview.
Now, you have learned how to stream Switch on Discord. But sometimes, you may want to capture the Switch gameplay and share it with your friends, or record your favorite streaming videos for offline viewing; then how to get the task done? If you have needs in this area, continue reading to find the solution.
Best Screen Recorder to Capture Live Streaming
Streaming Switch on Discord allows you to share the content with friends in real-time. But recording the content and sharing it afterward is even safer in case the internet connection is not stable enough. Given that, we are gonna introduce you how to screen record Switch gameplay with EaseUS RecExperts.
EaseUS RecExperts is a lightweight Mac and Windows screen recorder that helps you save anything on your screen with simple clicks. The operation of recording everything from Switch with this tool is simpler than streaming.
It lets you freely record full screen, or part of the screen. Also, you can choose to capture the screen with or with audio (microphone, system sound, or both). Moreover, recording webcam is also available here. You can use it to capture gameplays and your reaction at the same time.
No matter what gameplay you want to record, EaseUS RecExperts can meet your requirements. For example, you can record on PS5 when playing Black Myth: Wukong.
Once your recording is done, you can preview the recorded file in this program, as there is an inbuilt player. It is also worth mentioning that you are able to edit your recording by cutting and adding Intros or Outros without downloading other third-party video editors.
EaseUS RecExperts
- No Watermark & No Time limit
- Start, stop, and even split your recordings automatically
- Export the recorded files in more than ten formats
- Allow taking screenshots easily
- 24/7 technical support
How to use this screen recorder:
Step 1. Launch EaseUS RecExperts and select your preferred mode: Full Screen, Custom, Window, Game, Audio, or Webcam, depending on what you want to capture. For example, if you're recording a tutorial or walkthrough, the Full Screen or Window mode may work best.
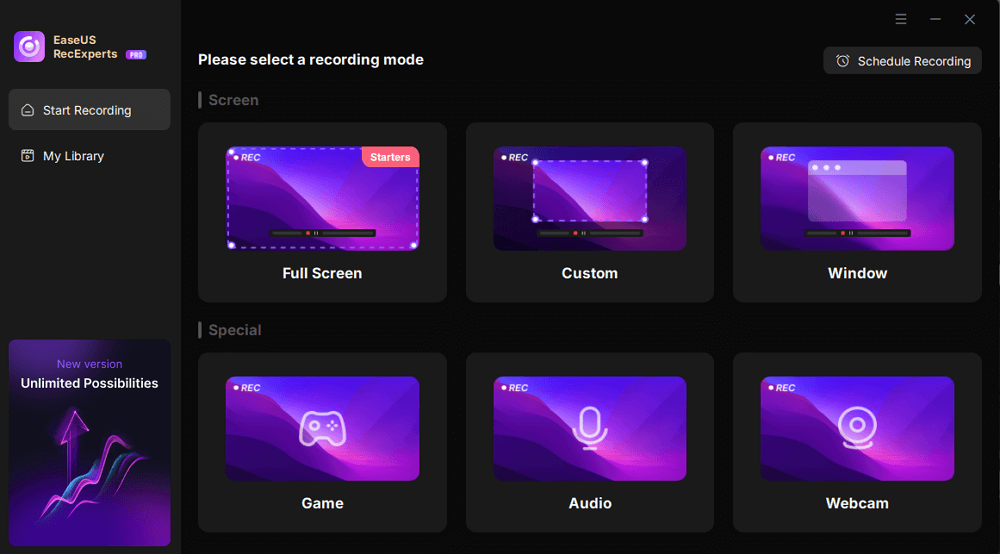
Step 2. Use the toolbar to toggle on the Speaker, Microphone, or Webcam. This is useful if you're explaining something and want your voiceover or facecam included in the recording. You can also turn them off for a clean, silent screen capture.

Step 3. Click the red REC button to begin. While recording, you'll see a floating control bar on your screen. Click the pencil icon to activate annotation features. These tools allow you to highlight areas, draw arrows, underline key content, or write directly on the screen.

Step 4. You can click the Pause button to temporarily stop recording if you need to adjust your content, or click the Stop button to finish. If you want to remove annotations while recording, use the clear option in the drawing toolbar.
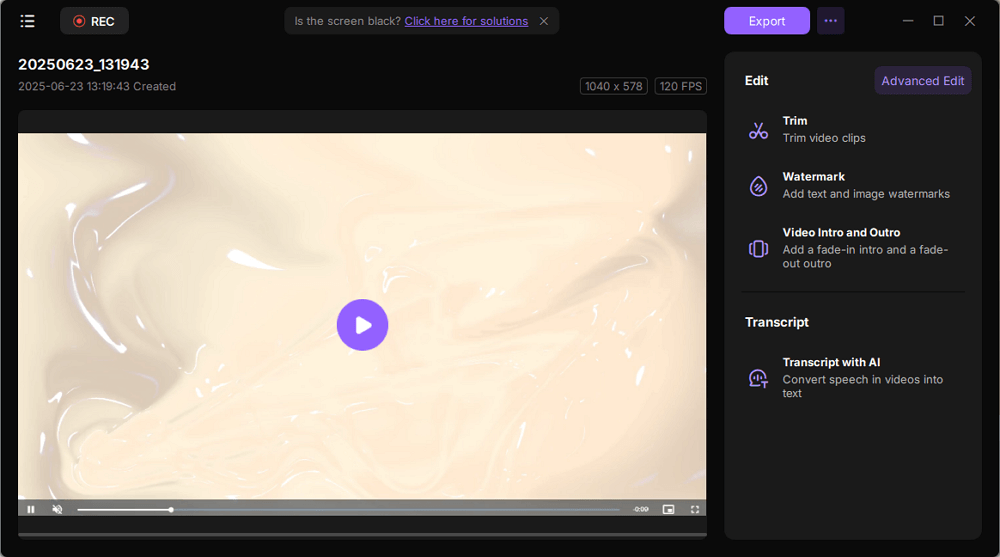
Step 5. Once the recording ends, you'll be taken to the preview window where you can edit or manage your files. The annotations you made will be preserved in the final video.
Final Words
After reading this comprehensive instruction, do you still feel it is hard to stream Nintendo Switch on Discord? I guess the answer is NO. As you can see, this post breaks a complex task into small detailed steps, so that you can follow every step until you get it done.
Most importantly, you can learn a fantastic screen recorder - EaseUS RecExperts here. This software will help you record your screen while you stream, and save the recordings in your desired format. All in all, we hope this guide helped you learn how to stream Switch on Discord!
EaseUS RecExperts

One-click to capture anything on screen!
No Time Limit, No watermark
Start Recording
