-
![]()
Daisy
Daisy is the Senior editor of the writing team for EaseUS. She has been working in EaseUS for over ten years, starting from a technical writer to a team leader of the content group. As a professional author for over 10 years, she writes a lot to help people overcome their tech troubles.…Read full bio -
Jane is an experienced editor for EaseUS focused on tech blog writing. Familiar with all kinds of video editing and screen recording software on the market, she specializes in composing posts about recording and editing videos. All the topics she chooses …Read full bio
-
![]()
Melissa Lee
Melissa Lee is an experienced technical blog writing editor. She knows the information about screen recording software on the market, and is also familiar with data cloning and data backup software. She is expert in writing posts about these products, aiming at providing users with effective solutions.…Read full bio -
Jean is recognized as one of the most professional writers in EaseUS. She has kept improving her writing skills over the past 10 years and helped millions of her readers solve their tech problems on PC, Mac, and iOS devices.…Read full bio
-
![]()
Jerry
Jerry is a fan of science and technology, aiming to make readers' tech life easy and enjoyable. He loves exploring new technologies and writing technical how-to tips. All the topics he chooses aim to offer users more instructive information.…Read full bio -
Larissa has rich experience in writing technical articles. After joining EaseUS, she frantically learned about data recovery, disk partitioning, data backup, screen recorder, disk clone, and other related knowledge. Now she is able to master the relevant content proficiently and write effective step-by-step guides on various computer issues.…Read full bio
-
![]()
Rel
Rel has always maintained a strong curiosity about the computer field and is committed to the research of the most efficient and practical computer problem solutions.…Read full bio -
![]()
Gemma
Gemma is member of EaseUS team and has been committed to creating valuable content in fields about file recovery, partition management, and data backup etc. for many years. She loves to help users solve various types of computer related issues.…Read full bio
Page Table of Contents
Larissa
Updated on Apr 19, 2024
0 Views |
0 min read
In the professional context, preparing a presentation on specific topics is an important task many employees must handle. While you can add data and graphs to PowerPoint slides, technological advancements in the software configurations also allow screen recording functionality here.
In fact, if you want to record yourself presenting the presentation for personal reference or to send it to others digitally, you can do so as well. This blog will walk you through the steps to complete the task effortlessly.
Preparations Before Video Recording Yourself Presenting A PowerPoint
While speaking of video recording yourself presenting a PowerPoint on Zoom, Google Slides, or other programs, you always need to capture your PowerPoint with the webcam simultaneously. Before that, you should take certain steps to set up this process better. Here are the things you should prioritize for proper preparation.
- Set up your microphone as the input audio source.
- Configure the webcam camera you install as the input video source from the camera settings.
- Make frame rate and resolution-based settings.
- Prepare the presenting PPT well, and make sure it can be played smoothly.
Spread out this post with others in need!
Method 1. Record Myself Presenting a PowerPoint on Windows/Mac Free
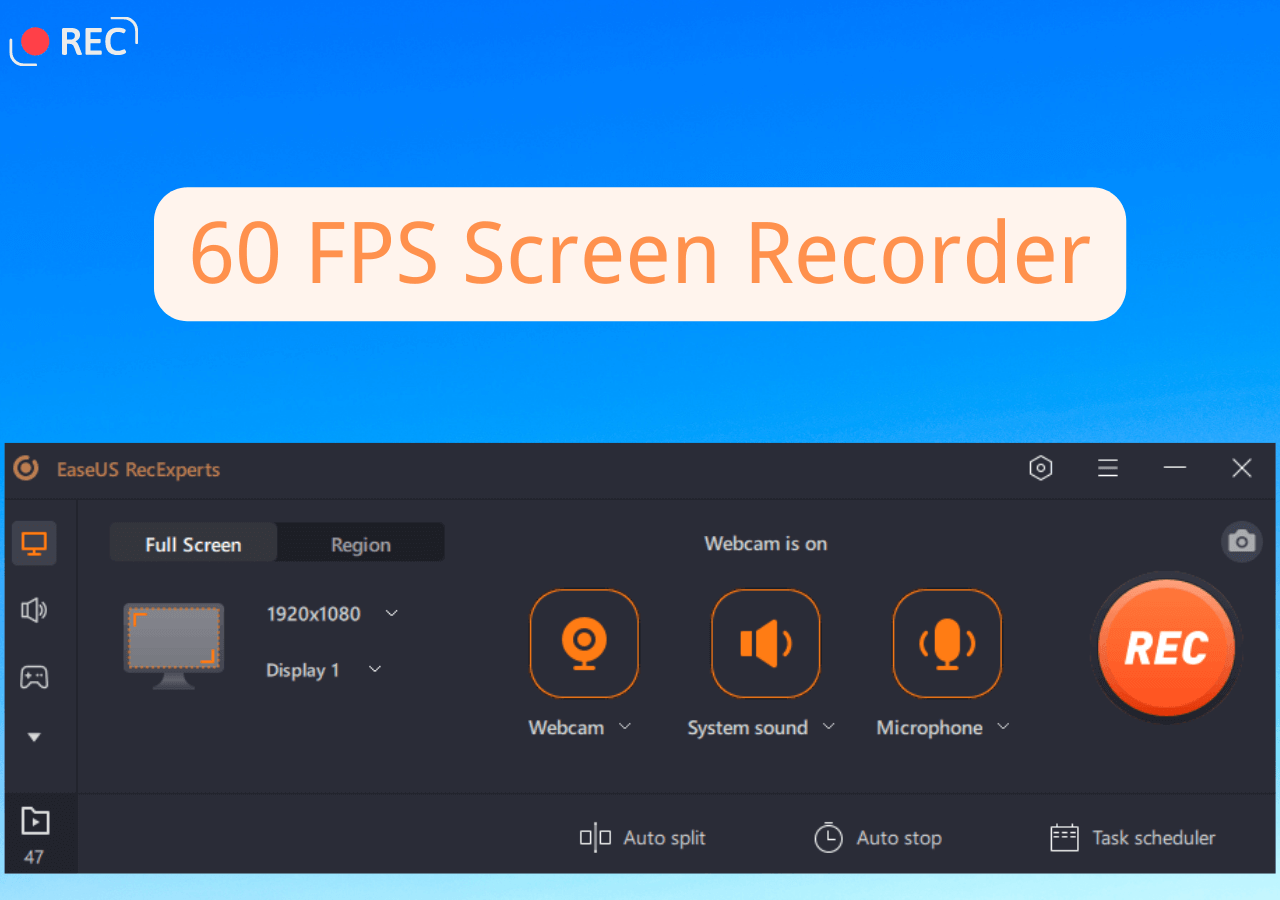
In terms of the best way to record yourself while presenting your PowerPoint presentation, EaseUS RecExperts is the best screen recorder to try.
This software is capable of capturing both your screen and webcam at the same time. Besides, it provides many fantastic features for webcam recording. For instance, you can change your video background with the images you like when you record yourself presenting PowerPoint presentations with the help of the Green Screen effect. In addition to that, you can also eliminate background noise when you capture your laptop screen, webcam, and microphone with a straightforward click. Now, you can hit the button below to try it!
Stepwise Guide:
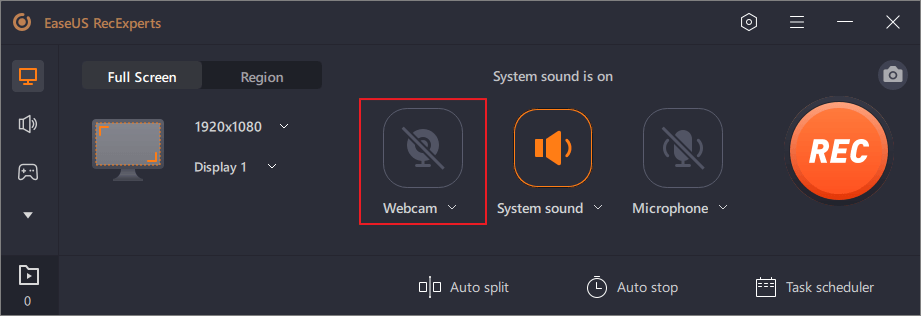
Step 1. Launch EaseUS RecExperts on your computer. Choose a recording mode from "Full Screen" or "Region". To record a part of the screen, select the recording area manually.

Step 2. After selecting the recording mode, click on the camera sign on the interface. This will let the tool record your screen and the webcam at the same time.
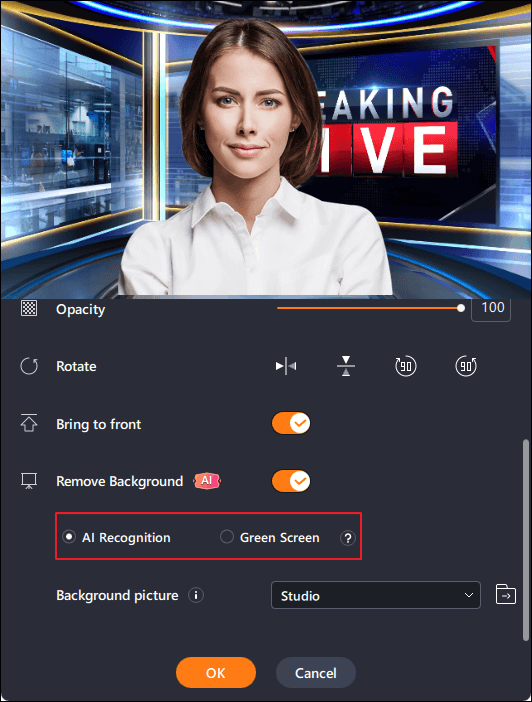
Step 3. You can also change the background with the AI Recognition ot green screen feature. Classroom, blur, studio, or your local images are supported. Just click "Webcam" > "Settings" > "Remove Background" to download and use these modules. Then, click the "REC" button to start recording.
Step 4. After recording, the recording list window will open. Here you can view, split, delete, manage your recordings easily.

Method 2. Video Record Myself Presenting a PowerPoint on PC/ Laptop via Bandicam
If you want to record your PowerPoint window while also saving your facial expressions through the camera view, Bandicam allows that functionality. Press the red button to begin the recording process and make further edits before the final release.
Stepwise Guide:
Step 1: Access Bandicam > Full-screen mode.
Step 2: Go to Settings and choose the microphone device you are using as the Microphone option.
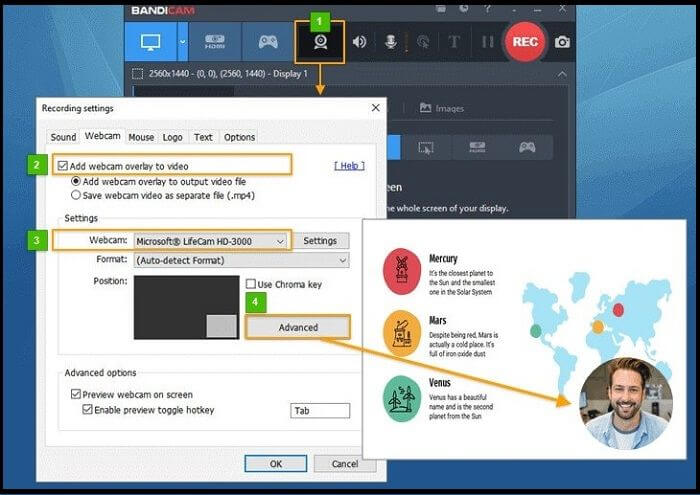
Step 3: Use Advanced Settings to select the "Add webcam overlay to video" option to insert your webcam-based view while recording the PowerPoint presentation.
Step 4: Tap the REC button to begin recording after starting the presentation. Tap the end button when it is done.
Step 5: To see the final file, go to Home > Video. Save or edit the video file from here.
Method 3. Video Myself Presenting a PowerPoint with Movavi Perfectly
It is possible to record slide shows on PowerPoint presentations with the Movavi Screen Recorder. Plus, you can make drawings on the video you record, making it simple to create a usable tutorial video.
With both the desktop and online versions, you can record your screen and webcam view.
Stepwise Guide:
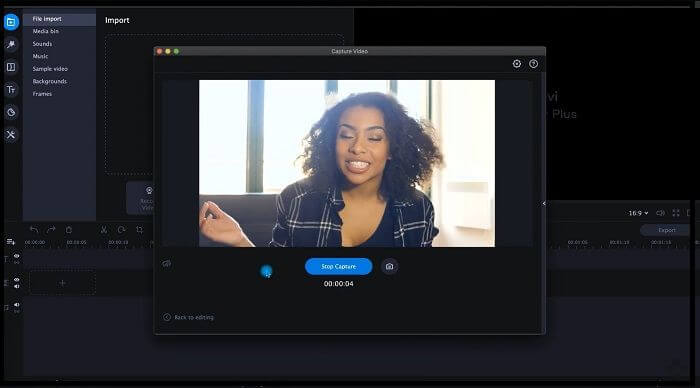
Step 1: Access the Movavi software and press Record Video > Start Capture. Press the Stop Capture button when done.
Step 2: Tap the cogwheel icon to open program settings and choose Webcam. Then, parameters like resolution, position, and other settings are set.
Step 3: Hit the Record button to begin this process and then the Stop button to finish. Make further edits to it after adding the file to Movavi Video Editor.
Method 4. Record Myself Presenting a PowerPoint with CamStudio
CamStudio is one of the best apps for recording a PowerPoint with both webcam and screen views. You can depend on the Video Annotation feature here to personalize the video project with the recorded slides on the screen.
Stepwise Guide:
Step 1: Open the PowerPoint presentation and CamStudio software side by side.
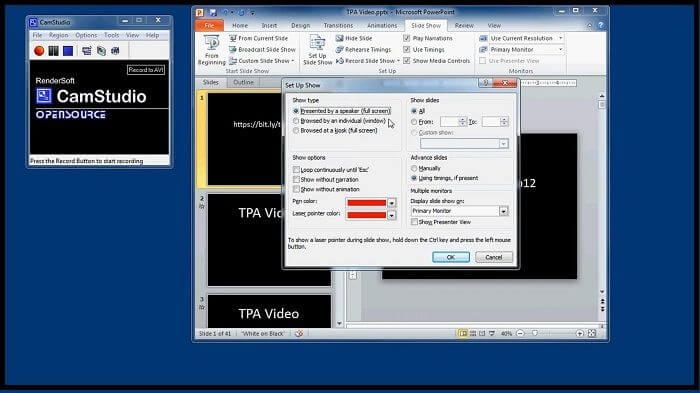
Step 2: On the PowerPoint, click on Set up Slide Show > presented by the speaker. Make other configurations and press OK.
Step 3: On CamStudio, set the recording region and set the parameters. Then, hit the red record button.
Step 4: Choose Options to change the Video Options settings. Set up the webcam and webcam feature for recording and play the recorded video on screen to record it with CamStudio.
A Thorough Comparison: Which One to Choose?
Indeed, multiple applications are available that you will find with this function when you search how to record myself presenting a PowerPoint online. Not to mention, they all provide high-quality performance in the processes they handle. However, which one is the best option?
Read this comparison-based table to get an idea.
| Comparison | EaseUS RecExperts | Bandicam | Movavi | CamStudio | Best Choice |
|---|---|---|---|---|---|
| Performance | High | Medium-High | Medium-High | Medium-High | ALL |
| Supported OS | Win, Mac | Win | Win, Mac, web-based | Win | RecExperts |
| Price |
|
|
|
Free | CamStudio (as cost amount); EaseUS RecExperts (as per option variety) |
| Difficulty | Easy | Easy- Medium | Easy- Medium | Easy- Medium | EaseUS RecExperts |
As per this comparison, EaseUS RecExperts is a premium selection for recording yourself and screen with the PowerPoint presentation. So, the recommendation you will get here to this software. Download it and give the software a try.
Yet, check out the different apps mentioned for a clearer understanding of how they work. Finally, you can decide on the recording software to use long-term.
Record Myself Presenting a PowerPoint FAQs
In the context of how to record myself presenting a PowerPoint, certain questions are also common. Here are the main ones to take note of.
1. How do I record a PowerPoint presentation as a video?
You can record the PowerPoint presentation as a video using a secondary screen recorder tool like Movavi, CamStudio, etc. Even the in-built Game Bar feature allows Windows users to make this recording and save it as an MP4 video file.
2. How do I record myself presenting a PowerPoint in Zoom?
You can utilize the EaseUS RecExperts software to record yourself while presenting the PowerPoint presentation on Zoom. It is because the app supports multi-screen recording support. Directly, you can choose the Share Screen option on Zoom for live viewing.
3. How can I record a video on my desktop and voice over it in PowerPoint?
At the top right part of the PowerPoint window, you will see a Record icon after you open it. You can choose the Record button to begin the process and set the microphone option for audio connection to record your voiceover.
EaseUS RecExperts

One-click to capture anything on screen!
No Time Limit, No watermark
Start Recording