-
![]()
Daisy
Daisy is the Senior editor of the writing team for EaseUS. She has been working in EaseUS for over ten years, starting from a technical writer to a team leader of the content group. As a professional author for over 10 years, she writes a lot to help people overcome their tech troubles.…Read full bio -
Jane is an experienced editor for EaseUS focused on tech blog writing. Familiar with all kinds of video editing and screen recording software on the market, she specializes in composing posts about recording and editing videos. All the topics she chooses …Read full bio
-
![]()
Melissa Lee
Alin is an experienced technical blog writing editor. She knows the information about screen recording software on the market, and is also familiar with data cloning and data backup software. She is expert in writing posts about these products, aiming at providing users with effective solutions.…Read full bio -
Jean is recognized as one of the most professional writers in EaseUS. She has kept improving her writing skills over the past 10 years and helped millions of her readers solve their tech problems on PC, Mac, and iOS devices.…Read full bio
-
![]()
Jerry
Jerry is a fan of science and technology, aiming to make readers' tech life easy and enjoyable. He loves exploring new technologies and writing technical how-to tips. All the topics he chooses aim to offer users more instructive information.…Read full bio -
Larissa has rich experience in writing technical articles. After joining EaseUS, she frantically learned about data recovery, disk partitioning, data backup, screen recorder, disk clone, and other related knowledge. Now she is able to master the relevant content proficiently and write effective step-by-step guides on various computer issues.…Read full bio
-
![]()
Rel
Rel has always maintained a strong curiosity about the computer field and is committed to the research of the most efficient and practical computer problem solutions.…Read full bio -
![]()
Gemma
Gemma is member of EaseUS team and has been committed to creating valuable content in fields about file recovery, partition management, and data backup etc. for many years. She loves to help users solve various types of computer related issues.…Read full bio
Page Table of Contents
Jane Zhou
Updated on Jun 14, 2024
0 Views |
0 min read
It is a fact that a PowerPoint presentation is the most effective way to convey your message. Whether you are a student, professional, entrepreneur, or an established businessman, you will always need to make or record presentations for one thing or the other.
Sometimes, it is required to record PowerPoint with webcam to make it more interactive. Even you can record the real-time presentation video to keep it available on demand. Though it is not difficult to record the presentation videos with an audio or facial explanation, knowing the proper procedure is a must. Let's explore this write-up that introduces you to the top video recording software to record PowerPoint and your face, thus resulting in the best presentation video.
PAGE CONTENT:
- Record PowerPoint with Webcam (Audio) using RecExperts
- Capture Webcam and PowerPoint using PPT Recording Function
- Record PowerPoint Presentation with Face using QuickTime Player
- Record Slideshow PowerPoint with Camera using Panapto
- FAQs About Recording PowerPoint with Webcam
Record PowerPoint with Webcam (Audio) using RecExperts
EaseUS RecExperts is a comprehensive software that aids you in recording videos, with or without audio. You can effortlessly choose the screen size and the audio or video recording sources. It does not only let you capture your face by using a webcam and selecting the desired camera but also the system or microphone sound. It also supports a recording screen with audio on Windows 11/10/8/7.
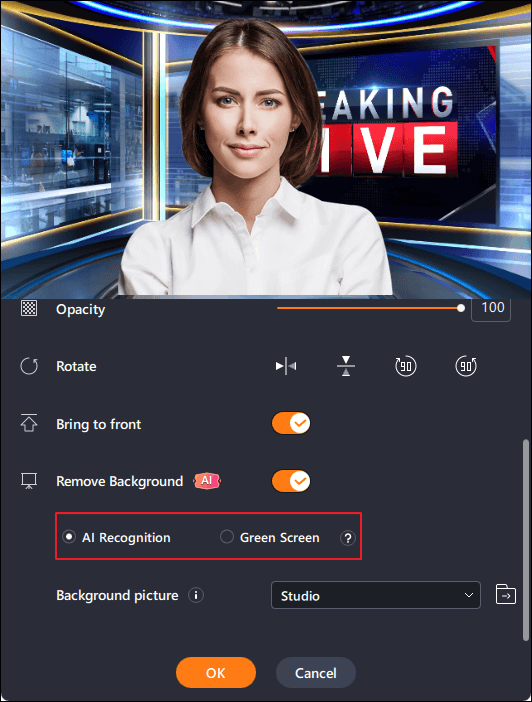
Furthermore, changing the output format, quality, frame rate, bit rate, and sampling rate is all in your control. When recording the webcam, you can change your real background into a virtual one, such as a classroom, studio, scenery, or blur, as this screen recorder has an AI background removal feature. In addition, you can choose to upload the picture as the virtual background.
Features
- Support formats like MKV, WMA, MOV, etc.
- Work as an advanced media player
- Easily extract audio from video files
- Offer the task scheduler function
- Let you capture the video into a GIF
Let's follow the procedural steps to record PowerPoint with a webcam:
Step 1. Launch EaseUS RecExperts on your computer. Choose a recording mode from "Full Screen" or "Region". To record a part of the screen, select the recording area manually.

Step 2. After selecting the recording mode, click on the camera sign on the interface. This will let the tool record your screen and the webcam at the same time.
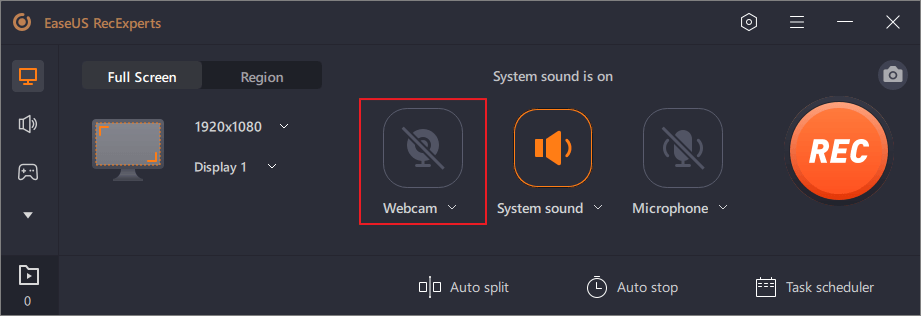
Step 3. You can also change the background with the AI Recognition ot green screen feature. Classroom, blur, studio, or your local images are supported. Just click "Webcam" > "Settings" > "Remove Background" to download and use these modules. Then, click the "REC" button to start recording.
Step 4. After recording, the recording list window will open. Here you can view, split, delete, manage your recordings easily.

Read also: How to record PowerPoint with audio
Capture Webcam and PowerPoint using the PPT Recording Function
Since Microsoft PowerPoint offers the in-built recording function, you can use it to record a presentation with webcam. It lets you use narration and choose the camera input. You can even customize the mouse pointer to set the desired color scheme.
A fantastic feature offered by this program is the Rehearse with Coach option to get feedback. In addition, the output file is smaller in size and can be exported in a wide range of formats.
Here is the step-by-step guide to recording PowerPoint with Webcam:
Step 1. The first step involves the opening of the updated version of PowerPoint. Now, expand the "Slide Show" tab and then "Record Slide Show." You have to select from the two choices, i.e., "Start Recording from Current Slide" and "Start Recording from Beginning."
Step 2. Let's suppose you select the second option. But if you want to record the specific slide, open that slide. In the case of the recording screen, open the "Insert" category and choose "Screen Recording." Next, press the "Record" button and speak into the microphone.
Step 3. Also, expand the three-bar menu to click "Webcam" under the "Camera" and sound source under the "Microphone" section. Finally, you can hit the "Pause," "Replay," or "Stop" button to control the recording. You are all done!

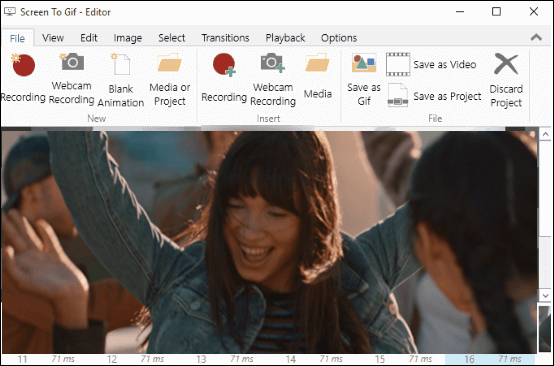
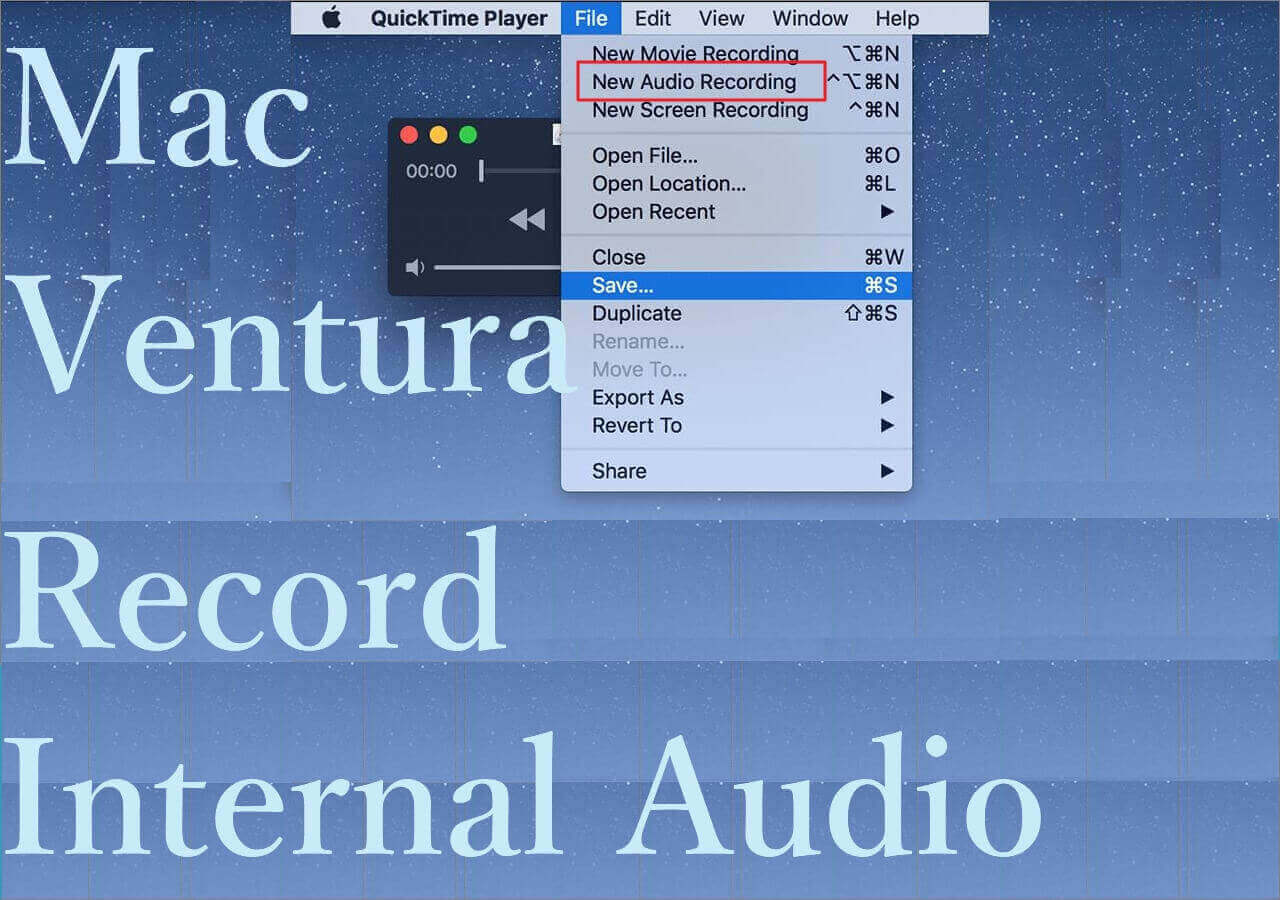
Record PowerPoint Presentation with Face using QuickTime Player
QuickTime Player is a default media manager for Mac users. You can quickly make it work as a tool to record a PowerPoint presentation and Face.
Besides changing screen size, editing the recordings later and trimming the unnecessary video parts is possible. Last but not least, you can export the file to the device or share it directly on other apps.
Let's move forward toward the steps to record PowerPoint with webcam:
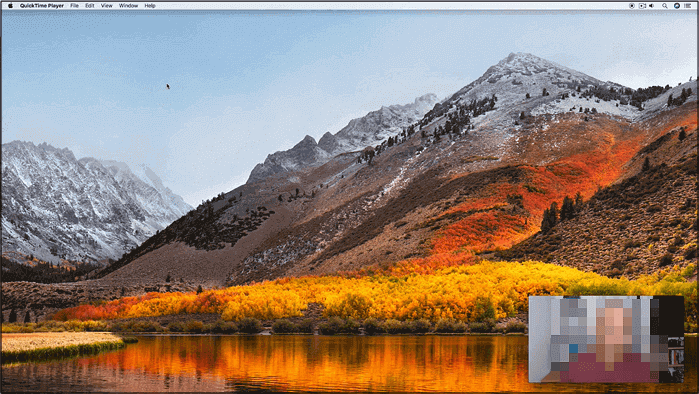
Step 1. Firstly, open the file and QuickTime Player on your system. Now, click "New Movie Recording." You can also select "New Screen Recording." You are open to resizing your recording screen.
Step 2. After that, press "View" to choose "Float on Top." It will keep your camera on top of every application. Secondly, move the camera Window to wherever you want.
Step 3. Lastly, click the "Red" recording button to record your screen and face. Later you can stop the recording with the Command-Control Esc keys.
Record Slideshow PowerPoint with Camera using Panapto
Panapto Express is a free and advanced video and screen recorder that helps you to record PowerPoint slides and your face via a built-in microphone and Webcam. Also, you can add multiple screens and multiple video sources. What makes it unique is its offering to enjoy up to 4K UHD recordings.
Plus, you can change the video stream arrangement from side-by-side to picture-in-picture. It provides a Smart camera to control your position in the recording frame. You are even allowed to blur or replace the background easily.
Here is a tutorial on how to record a slideshow PowerPoint with a Camera:
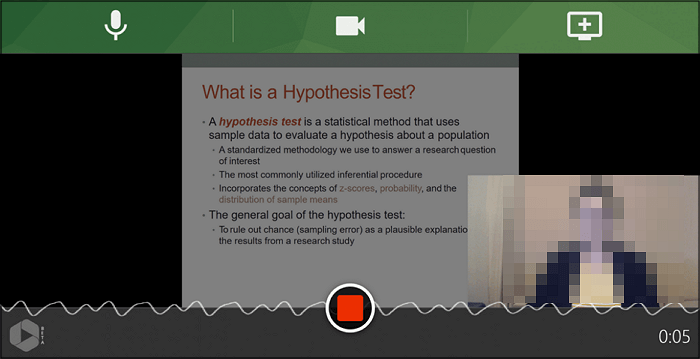
Step 1. You need to open Panopto Express in your browser. Now, you can either use the built-in recording sources or attach the Webcam and microphone to the system, which this tool will automatically detect.
Step 2. Next, open the PowerPoint slides, click on the "Slide Show" tab, and put it in this mode. Since Panopto offers two options: recording slides with Screen Recording or within PowerPoint. Click the "Screen Capture" icon to open the popup window to choose one and press the "Share" button.
Step 3. In the final step, hit the large red "Recording" tab and press it again to stop recording when you are done.
Conclusion
Undoubtedly, a good presentation is crucial for effective communication. Since PowerPoint offers basic recording features, you must use advanced tools to help record PowerPoint presentations with Webcam.
So after exploring the above article, you can choose the tool according to your requirements. The step-by-step tutorials for each recommendation are enough to carry out your PowerPoint presentation recording.
In addition, don't forget to try EaseUS RecExperts to get the best and fast results. Besides recording, it also offers post-editing, playing, and multiple other features.
FAQs About Recording PowerPoint with Webcam
1. Can you video record yourself on PowerPoint?
PowerPoint comes with an in-built video recorder, so it is possible to record your presentation with narration, a camera input, or only your screen. You will need Microsoft Office, Webcam, and a microphone if the Webcam doesn't offer it.
2. How do I record a PowerPoint 2016 with a webcam?
To record a PowerPoint 2016 with a Webcam, you need to expand the Recording tab and click on the Record Slide Show. Now, choose Record from Beginning from the drop-down menu, which will open the dashboard to offer two options. First is Screen Recording, where you can record the screen with audio. While the other is the Record Slide Show, with which it is possible to record Webcam audio/video over the presentation. All done!
3. Why my PowerPoint can't record my face?
The main reason behind not getting your face recorded is to forget about enabling the recording tab in PowerPoint. For this purpose, you need to click File > Options and then Customize Ribbon. Now, checkmark the Recording tab under the primary tabs from the right side. That's all!
EaseUS RecExperts

One-click to capture anything on screen!
No Time Limit, No watermark
Start Recording