-
![]()
Daisy
Daisy is the Senior editor of the writing team for EaseUS. She has been working in EaseUS for over ten years, starting from a technical writer to a team leader of the content group. As a professional author for over 10 years, she writes a lot to help people overcome their tech troubles.…Read full bio -
Jane is an experienced editor for EaseUS focused on tech blog writing. Familiar with all kinds of video editing and screen recording software on the market, she specializes in composing posts about recording and editing videos. All the topics she chooses …Read full bio
-
![]()
Alin
Alin is an experienced technical blog writing editor. She knows the information about screen recording software on the market, and is also familiar with data cloning and data backup software. She is expert in writing posts about these products, aiming at providing users with effective solutions.…Read full bio -
Jean is recognized as one of the most professional writers in EaseUS. She has kept improving her writing skills over the past 10 years and helped millions of her readers solve their tech problems on PC, Mac, and iOS devices.…Read full bio
-
![]()
Jerry
Jerry is a fan of science and technology, aiming to make readers' tech life easy and enjoyable. He loves exploring new technologies and writing technical how-to tips. All the topics he chooses aim to offer users more instructive information.…Read full bio -
![]()
Rel
Rel has always maintained a strong curiosity about the computer field and is committed to the research of the most efficient and practical computer problem solutions.…Read full bio -
![]()
Gemma
Gemma is member of EaseUS team and has been committed to creating valuable content in fields about file recovery, partition management, and data backup etc. for many years. She loves to help users solve various types of computer related issues.…Read full bio -
![]()
Shelly
"I hope my articles can help solve your technical problems. If you are interested in other articles, you can check the articles at the bottom of this page. Similarly, you can also check my Twitter to get additional help."…Read full bio
Page Table of Contents
0 Views |
0 min read
PAGE CONTENT:
Want to screen capture on Amazon Prime, Netflix, or Hulu to save the highlight moments in movies, but get a blank or black screen? This post will show you the reasons why you can't screenshot streaming services. Importantly, it provides 4 practical methods to screenshot streaming services on your Windows, Mac, or mobile phones.
Why Don't Streaming Services Let You Screenshot?
Streaming services like Netflix, Amazon Prime, Disney Plus, Hulu, Crunchyroll, and HBO Max often block screenshots to protect copyright, prevent distribution, and keep content unique.
Streaming media platforms usually adopt DRM technology to prevent users from taking screenshots. Therefore, users only get a black screen when trying to screenshot Netflix or others. Despite this, there are still some ways to screen capture from streaming services.
- Tips
- When using streaming services (such as Netflix, Hulu, Disney+, etc.), please take screenshots only with authorization and permission.
Please note that all content on streaming services is copyrighted. Screenshots may only be taken for fair use purposes such as personal study, research, or enjoyment.
Users should ensure that screenshots are not used for any commercial purposes, including but not limited to advertising, sales or unauthorized distribution.
Unauthorized commercial use may result in legal liability. Users are solely responsible for all risks arising from taking screenshots and using the screenshots.
Next, let's learn how to screenshot on streaming services using a professional screenshot tool, a third-party streaming service app, and other methods to screen capture on your desktop or mobile devices.
Screenshot Streaming Services via EaseUS Screen Recorder
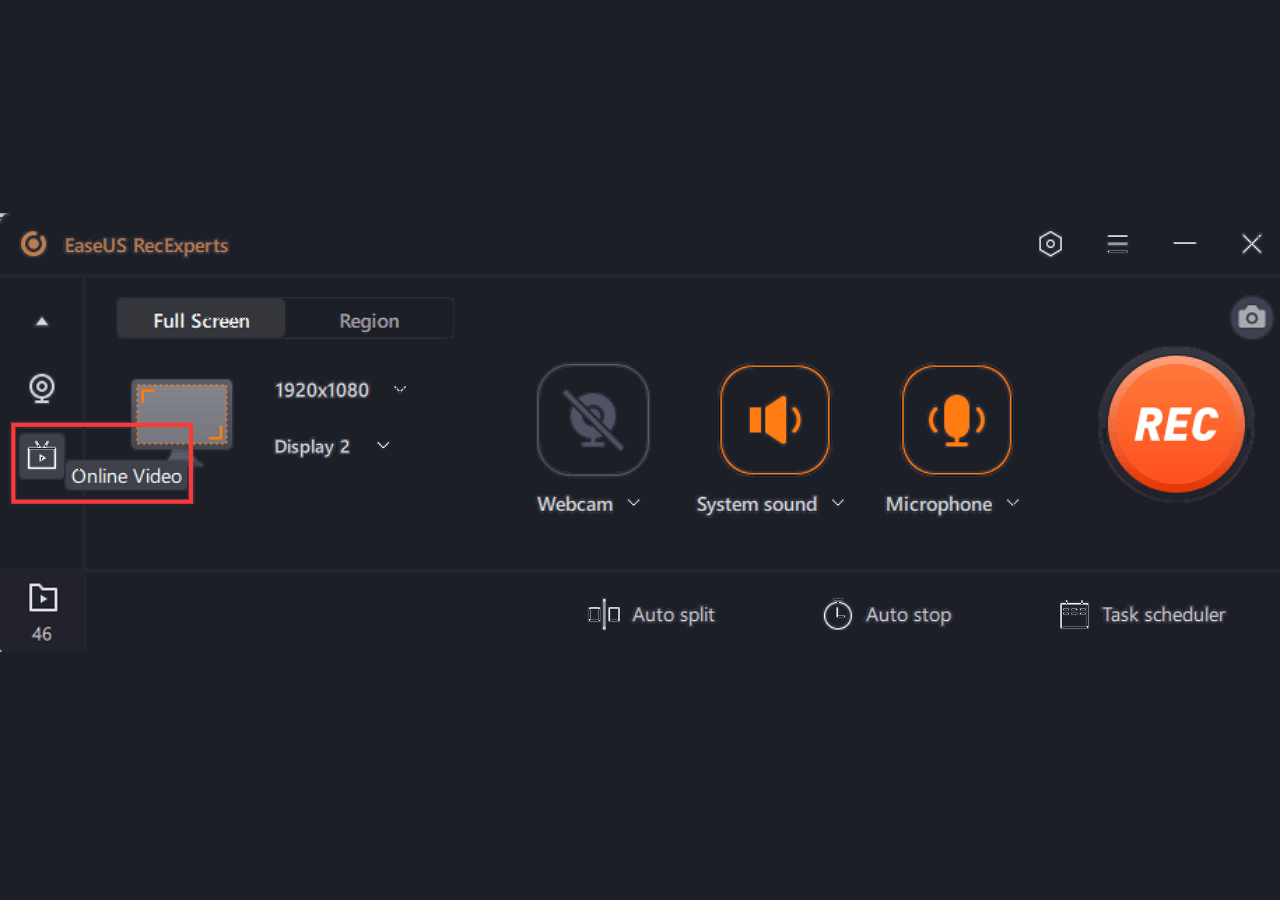
The straightforward way to screenshot on streaming platforms without a black screen is by using a professional screen capture tool like EaseUS RecExperts. Thanks to its fix black screen feature, this tool stands out for taking screenshots of Amazon Prime, Hulu, Disney+, Vimeo, Netflix, etc.
Users can capture full or partial streaming screens in PNG or GIF format. It also supports taking screenshots with hotkeys like F2. It can also record audio from YouTube, TikTok, or other platforms and export text files from recordings.
Step 1. Launch EaseUS RecExperts and get the screen ready that you want to capture. Click Custom.
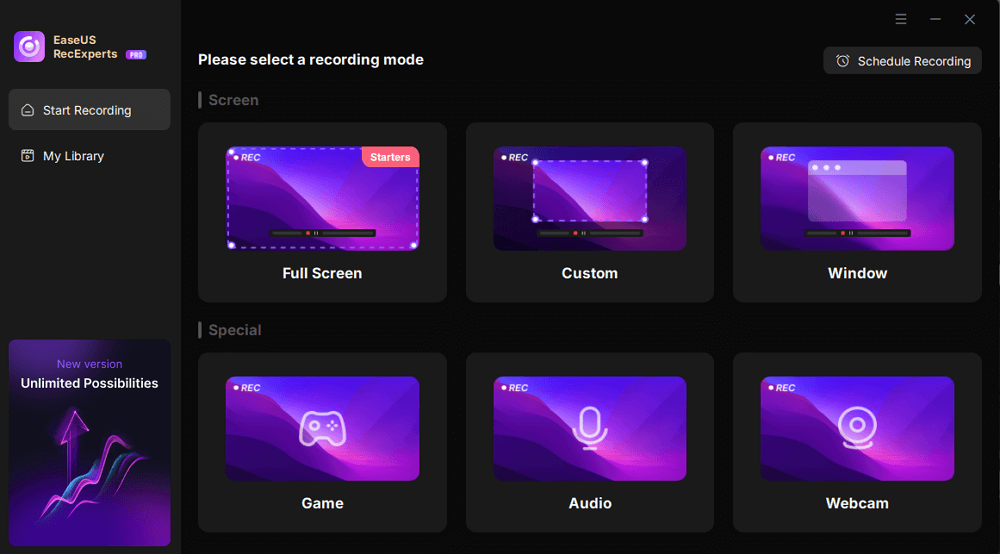
Step 2. Then drag your mouse to select the area you want to capture. After that, click the Screenshot button (camera icon) on the main toolbar.
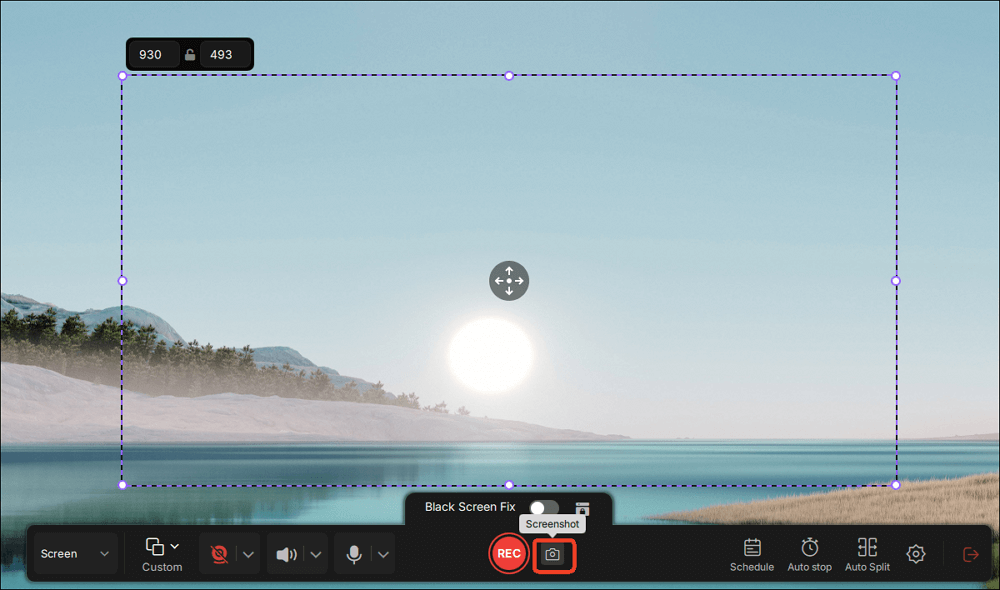
Step 3. The screenshot will be captured instantly and saved to the default folder. You can view or manage it later in My Library.
Share this screenshot streaming services without black screen post with others.
Disable Hardware Acceleration in Browser
Disabling hardware acceleration is another effective way to solve the black screen problem when taking screenshots. The browser's hardware acceleration function works with DRM technology to prevent users from taking screenshots. It's possible to screenshot restricted content for personal use by disabling hardware acceleration.
Here are detailed steps on how to turn off hardware acceleration Chrome:
Step 1. Click the three vertical dots in the upper right corner of Chrome and select Settings.
Step 2. Choose the System option. Then, turn off the Use graphics acceleration when available.
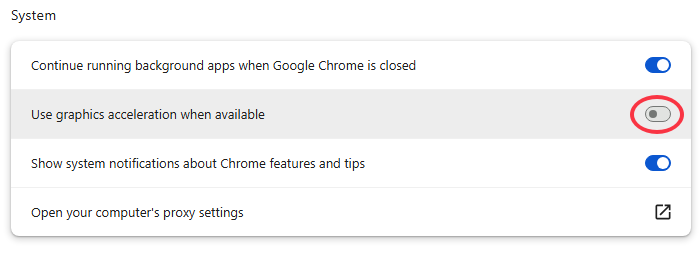
Step 3. Restart Chrome, log into your Netflix, Hulu, or other streaming account, and search for the movie or show you want to screenshot.
Step 4. Use computer screenshot shortcut keys, screenshot extensions, or EaseUS RecExperts to screenshot streaming video.
Live Stream Recorder [Top 10 in 2025]
Discover our top 10 recorders for seamless live stream capture and choose the perfect tool for your recording needs.
Enable Browser's Request Desktop Site on Mobile Device
Opening the desktop version of a page on a mobile device gives you more control over web content, especially when using streaming services. To screenshot streaming services on your Android or iOS devices, you can visit Netflix or Disney+ on your browser. Then, please enable the request desktop site to avoid being redirected to the mobile app.
Steps on how to open Request Desktop Site in the browser and screenshot streaming services on mobile phones:
Step 1. Open your browser and visit a streaming webpage you want to capture.
Step 2. Click on the three dots icon at the bottom right corner of the page and find and click on the Request desktop site option.
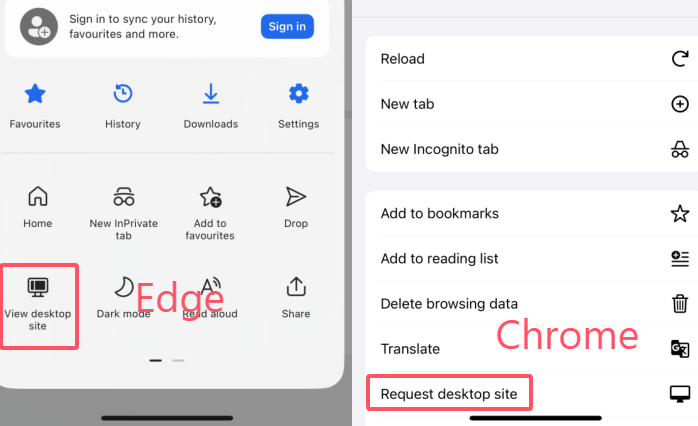
Step 3. Then, take screenshots using your phone's built-in screenshot function.
Share this screenshot streaming services without black screen post with others.
Use a Third-Party App for Streaming Services
Rave is a third-party streaming app that can play movies or shows from Netflix, HBO Max, Vimeo, etc. It helps you screenshot streaming content without black screen on your Android or iOS devices.
Steps on how to screenshot Disney+, Amazon Prime, and Netflix without black screen on your mobile devices by using the Rave app:
Step 1. Download and launch Rave on your mobile device and choose the streaming service you want to capture images.
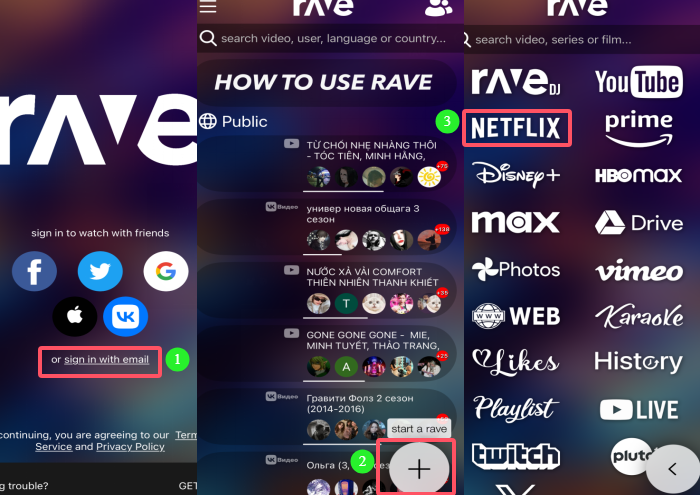
Step 2. Log into the account and play the movie or show you want to record.
Step 3. Press the Power button + Volume up or down button to screenshot.
Tip: The screenshot methods of different mobile devices may be slightly different.
Step 4. The screenshots will be saved in your phone's album.
Share this screenshot streaming services without black screen post with others.
Screenshot Streaming Services Legal Considerations
It's crucial to note that screenshots of copyrighted content should be taken for personal use only, for non-commercial purposes. Unauthorized distribution of copyrighted material is illegal and may give rise to legal liability. Please be sure to comply with the terms of service of the relevant streaming services and relevant copyright laws.
Conclusion
In this article, we have learned how to screenshot on streaming services via 4 methods: using a professional capture tool like EaseUS RecExperts or disabling hardware acceleration on desktop, requesting desktop site, or utilizing a streaming service third-party app like Rave on iOS and Android.
EaseUS RecExperts is an easy-to-use screen recording and screenshot tool that can easily capture streaming service screenshots without any complicated settings and without black screen and watermark issues.
How to Screenshot Streaming Services FAQs
1. Why can't I screenshot Amazon Prime video?
As a popular video streaming service, Amazon Prime Video has adopted measures such as DRM technology to prevent users from taking screenshots to protect copyright and prevent unauthorized distribution.
2. Is it possible to take a screenshot on Netflix?
Yes, it's possible to take screenshots on Netflix by using EaseUS RecExperts, a professional screen capture tool, to take screenshots on Netflix, Hulu, or other platforms without a black screen.
3. Can you screen record streaming services?
You can use a powerful desktop screen recorder like EaseUS RecExperts or an online tool like EaseUS online screen recorder to record streaming videos.
EaseUS RecExperts

One-click to capture anything on screen!
No Time Limit, No watermark
Start Recording
