-
![]()
Daisy
Daisy is the Senior editor of the writing team for EaseUS. She has been working in EaseUS for over ten years, starting from a technical writer to a team leader of the content group. As a professional author for over 10 years, she writes a lot to help people overcome their tech troubles.…Read full bio -
Jane is an experienced editor for EaseUS focused on tech blog writing. Familiar with all kinds of video editing and screen recording software on the market, she specializes in composing posts about recording and editing videos. All the topics she chooses …Read full bio
-
![]()
Alin
Alin is an experienced technical blog writing editor. She knows the information about screen recording software on the market, and is also familiar with data cloning and data backup software. She is expert in writing posts about these products, aiming at providing users with effective solutions.…Read full bio -
Jean is recognized as one of the most professional writers in EaseUS. She has kept improving her writing skills over the past 10 years and helped millions of her readers solve their tech problems on PC, Mac, and iOS devices.…Read full bio
-
![]()
Jerry
Jerry is a fan of science and technology, aiming to make readers' tech life easy and enjoyable. He loves exploring new technologies and writing technical how-to tips. All the topics he chooses aim to offer users more instructive information.…Read full bio -
![]()
Rel
Rel has always maintained a strong curiosity about the computer field and is committed to the research of the most efficient and practical computer problem solutions.…Read full bio -
![]()
Gemma
Gemma is member of EaseUS team and has been committed to creating valuable content in fields about file recovery, partition management, and data backup etc. for many years. She loves to help users solve various types of computer related issues.…Read full bio -
![]()
Shelly
"I hope my articles can help solve your technical problems. If you are interested in other articles, you can check the articles at the bottom of this page. Similarly, you can also check my Twitter to get additional help."…Read full bio
Page Table of Contents
Rel
Updated on Jun 09, 2026
0 Views |
0 min read
Digital video recorders help capture video in a digital format to a disk drive, but the recording process is complex. To capture TV shows without a DVR, you can choose the best free screen recorder for live TV shows or a USB stick for capturing. In this article, you learn several effective ways about how to record TV shows without a DVR.
You can quickly get comparative information about the four methods in the table below.
| Methods | Effectiveness | Difficulty |
| EaseUS RecExperts ❤ | High - Record TV shows on any sites (Netflix, Amazon, etc.) up to 8K quality | Super easy |
| USB Stick | Medium - Requires USB preparation and has many restrictions | Medium |
| Windows Media Center | Medium - Requires TV tuner card | Medium |
| MediaPortal | High - Open-source software to capture TV shows efficiently | Easy |
Also read:
Record Live TV Shows using Professional Video Recorder (Efficient)
Compatibility: Windows 11/10/8.1/8/7, macOS 10.13 or later
Best for: Novices and professionals who want to record TV shows on the computer screen automatically without a time limit.
Many people want to find a way to record TV shows for later viewing, especially for those streaming TV shows. A Reddit user tells his/her situation and demands below.
I want to watch shows that are on local channels, but I am not home when they are on. The shows aren't available to watch on Netflix or any other streaming device. Is there a way where I can get my TV to record the show when I am not home so I can watch it when I get home? Would I need to leave the TV on?
The best way to record TV shows, even from Netflix, without doing it manually is to use the automatic recording function on EaseUS RecExperts. This software supports capturing any live TV shows/dramas on any available site. You can screen record on YouTube TV, Netflix, Amazon Prime, Apple TV, etc.
Unlike other video capture software, it will record and save the shows in the original quality, ensuring a good offline viewing experience. It's also worth mentioning that you can use the schedule recording feature to record some further episodes at a specific time.
Now, get this excellent TV show video recorder to start recording.
Here's how to use EaseUS RecExperts to capture TV shows directly:
Step 1. Launch EaseUS RecExperts and select Full Screen as your recording mode. This ensures smooth capture of streaming movies, online shows, or live video content without missing any detail.

Step 2. Choose whether to record the Webcam, System Sound, or Microphone based on your needs. Then, open the major video sites or platforms you want to record from.

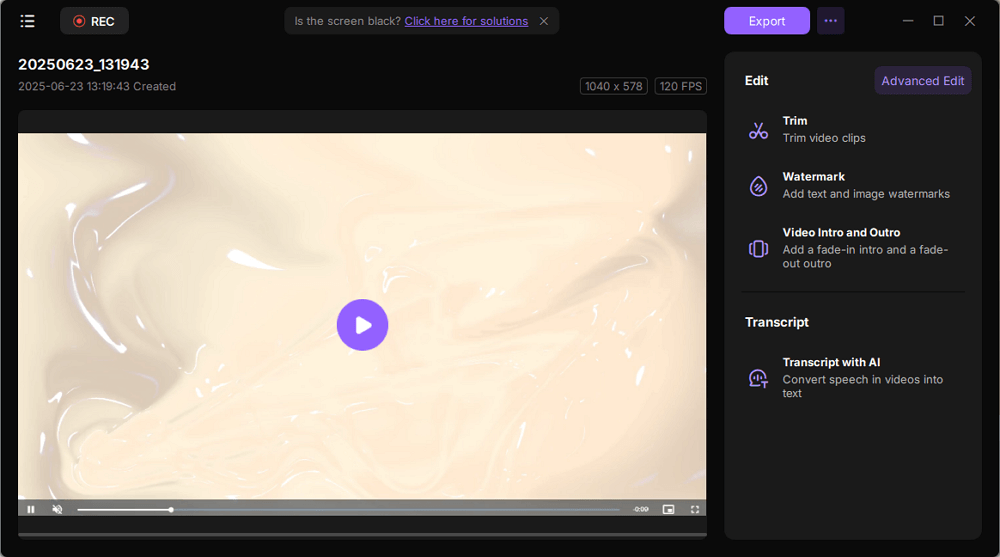
Step 3. If you experience a black screen when recording playback, enable the Black Screen Fix feature to ensure smooth video capture. Once it's turned on, the REC button will change to purple. Navigate back to your streaming video, then click the purple REC button to start capturing.

Step 4. After a 3-second countdown, the recording will begin. A floating taskbar will appear on your screen. Use the toolbar to Pause or Stop the recording anytime during playback.
Step 5. Once the recording ends, you'll be taken to the preview window. Here, you can watch, trim, or edit your captured video, ideal for reviewing recorded sessions, saving study notes, or creating commentary-based content.
📺Check a YouTube video tutorial to get more information!
Don't forget to share this post with others who are suffering from the same problem!
Capture TV Programs Without a DVR via USB Stick
Compatibility: TVs come with a PVR function
Best for: Users who don't want to record through extra software or programs.
For how to record TV shows without a DVR, you can apply the USB storage device. As most TV devices have the default PVR software, you can connect the TV to DVR to capture TV programs easily. USB recording can help capture TV shows to the external device which is connected to the TV.
However, this method has limitations as it only requires you to deal with the TV's Freeview. Therefore, it's hard to capture video from some platforms like Amazon Fire TV stick.
Before referring to the guide below, please make sure you have completed the following preparations. Then, follow the guide below.
- 📝What to prepare
- A USB Stick
- TV with USB slot
- Ensure your TV comes with a PVR function
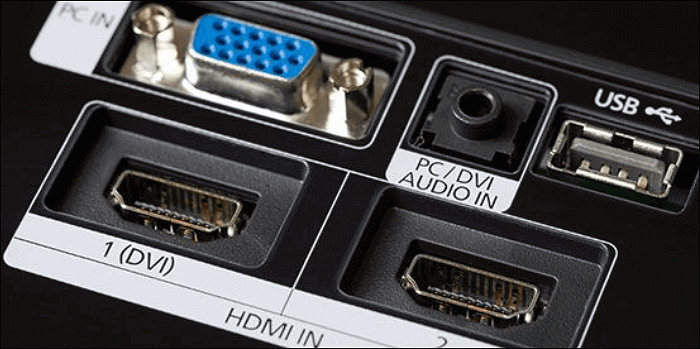
Step 1. Find the USB slot on the back of the TV to know whether you can connect it via a USB. If it has, then you can move to the next step.
Step 2. Connect your USB HDD to the TV. Then, check the TV to see if the PVR function is accessible.
Step 3. Based on your TV settings, you ensure the format HDD and other options for PVR.
Step 4. Now, with the built-in PVR function, you can start the TV recording mission.
👀You may be interested in: what is a DVR?
Record TV Shows Without a DVR through Windows Media Center
Compatibility: Windows XP
Best for: People using a Windows XP computer and have a TV tuner card installed on their computer.
To record TV shows without a DVR, Windows Media Center is a good choice for Windows 7. This tool allows you to watch and capture live TV. Also, it helps view slide shows of photos and plays songs or CDs in its library.
Before watching the TV shows in Windows Media Center, the PC should be equipped with a TV tuner card. You can look for detailed information on the Windows 7 live TV setting process for Windows Media Center.
- 📝What to prepare
- A PC equipped with a TV tuner card
- Download and install Windows Media Center
- The TV show you want to record
Here is a list of steps to record online TV with Windows Media Center:
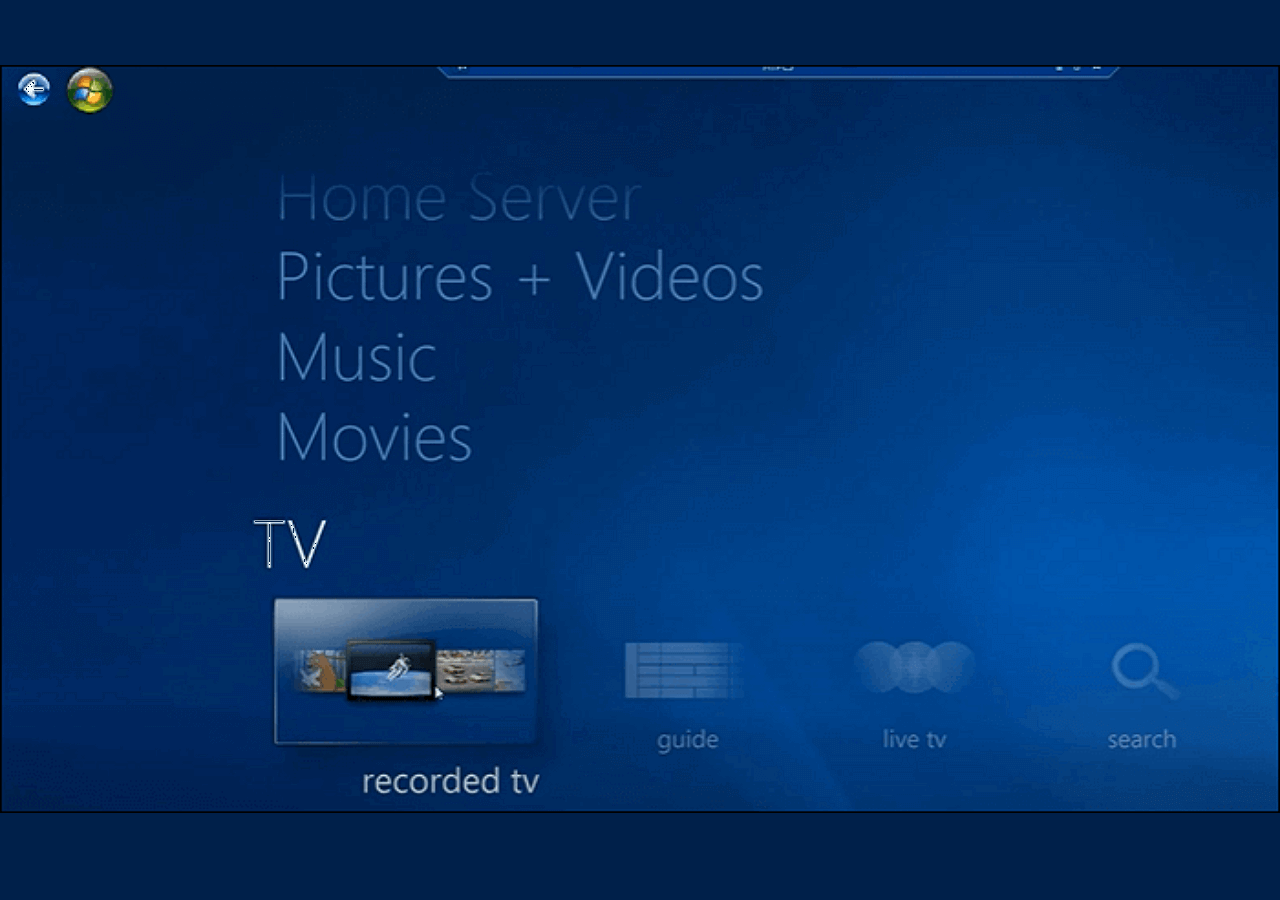
Step 1. Find Windows Media Center on your PC. In the main interface, choose "TV".
Step 2. Then, click "Guide" and then you can see the TV menu. There are TV names, categories, and times.
Step 3. Once you have selected the TV show, click "Enter". Then, hit "Record" to start the mission. To stop it, you can click the "Do Not Record" button. Then, choose "Record Series" to save your TV programs.
Capture TV Programs Without a DVR via MediaPortal
Compatibility: Windows 7/Vista
Best for: People who are using a Windows 7/Vista computer and want to record TV shows on the computer.
MediaPortal is a free and open-source screen recorder that aims to make your PC a media solution. It can connect the PC to the TV and displays movies easily. Most importantly, it's one of the best ways to watch and record live TV. Also, you are allowed to apply the remote function to control the HTPC using this tool.
To enjoy video and audio in the TV shows, follow this simple guide, using MediaPortal.
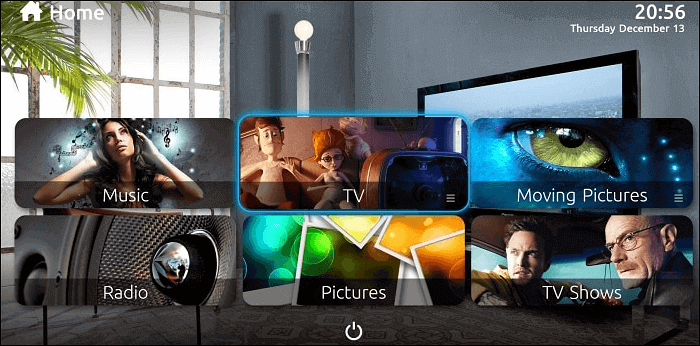
Step 1. Download this tool on PC. In the main interface, go to "TV".
Step 2. To capture the TV shows, click the Record button. Also, it allows capturing while watching the TV show.
Step 3. If you want to save time, find the schedule recording feature to start the mission automatically.
Conclusion
This article presents you with four effective ways to record TV shows without a DVR. Each method is suitable for different groups, and you can use the information shared in this article to determine exactly which method to use to record your favorite TV shows.
If you can't decide at the moment, it's a good idea to try EaseUS RecExperts, which is the easiest to use and has no limitations.
FAQs About How to Record TV Shows Without a DVR
To help you better capture TV programs, follow this part to find more useful solutions.
1. How do I record TV shows on my smart TV?
Here is a guide for capturing TV shows on the smart TV.
1. Make sure your TV has the built-in PVR option. Also, check if there is a USB slot at the back of your TV.
2. Prepare a USB and connect the USB HDD to your TV.
3. Adjust the format in your TV and click the Record button.
4. To stop the recording, you click the Stop button. The video is saved.
2. How can I record directly from my TV?
Prepare the USB storage device and plug it into the USB slot. To capture the TV show, you should tap the Record button with the remote control. This is the PVR feature, which is a default option on most TV devices.