-
![]()
Daisy
Daisy is the Senior editor of the writing team for EaseUS. She has been working in EaseUS for over ten years, starting from a technical writer to a team leader of the content group. As a professional author for over 10 years, she writes a lot to help people overcome their tech troubles.…Read full bio -
Jane is an experienced editor for EaseUS focused on tech blog writing. Familiar with all kinds of video editing and screen recording software on the market, she specializes in composing posts about recording and editing videos. All the topics she chooses …Read full bio
-
![]()
Alin
Alin is an experienced technical blog writing editor. She knows the information about screen recording software on the market, and is also familiar with data cloning and data backup software. She is expert in writing posts about these products, aiming at providing users with effective solutions.…Read full bio -
Jean is recognized as one of the most professional writers in EaseUS. She has kept improving her writing skills over the past 10 years and helped millions of her readers solve their tech problems on PC, Mac, and iOS devices.…Read full bio
-
![]()
Jerry
Jerry is a fan of science and technology, aiming to make readers' tech life easy and enjoyable. He loves exploring new technologies and writing technical how-to tips. All the topics he chooses aim to offer users more instructive information.…Read full bio -
![]()
Rel
Rel has always maintained a strong curiosity about the computer field and is committed to the research of the most efficient and practical computer problem solutions.…Read full bio -
![]()
Gemma
Gemma is member of EaseUS team and has been committed to creating valuable content in fields about file recovery, partition management, and data backup etc. for many years. She loves to help users solve various types of computer related issues.…Read full bio -
![]()
Shelly
"I hope my articles can help solve your technical problems. If you are interested in other articles, you can check the articles at the bottom of this page. Similarly, you can also check my Twitter to get additional help."…Read full bio
Page Table of Contents
Alin
Updated on Jan 21, 2026
0 Views |
0 min read
Google Earth gives you a 3D depiction of Earth with the ease of a map application. You can cite landscapes along with cities to explore the places near you or the ones you wish to study in the future. It takes you on a digital tour if you are a paid user of Google Earth.
Want to capture video from Google Earth for collection or other use? This guide will show you how to record Google Earth video in high quality with suitable software.
How to Record Video in Google Earth with a Pro Screen Recorder
EaseUS RecExperts is a Mac and Windows screen recorder that assists you record videos in Google Earth in lossless quality. You can expect a great recording of Google Earth video using its screen recording facilities. This VR video player and recorder allows you to capture Google Earth 3D videos and view them with a built-in player.
With it, you can also record Google Earth zoom in and zoom out effects. Besides, you can record multiple screens, make edits without disturbing the recording, or make recordings of selected regions seamlessly. It has many more functions to surprise its users.
Main features of EaseUS RecExperts:
- Screen capture Google Earth with one lick
- Schedule recording to start automatically
- Capture any area on your PC screen in high quality
- Provide an enhanced media player and video editor
- A voice recorder with cancellation to reduce noise
Steps on how to record Google Earth tour as video with EaseUS RecExperts:
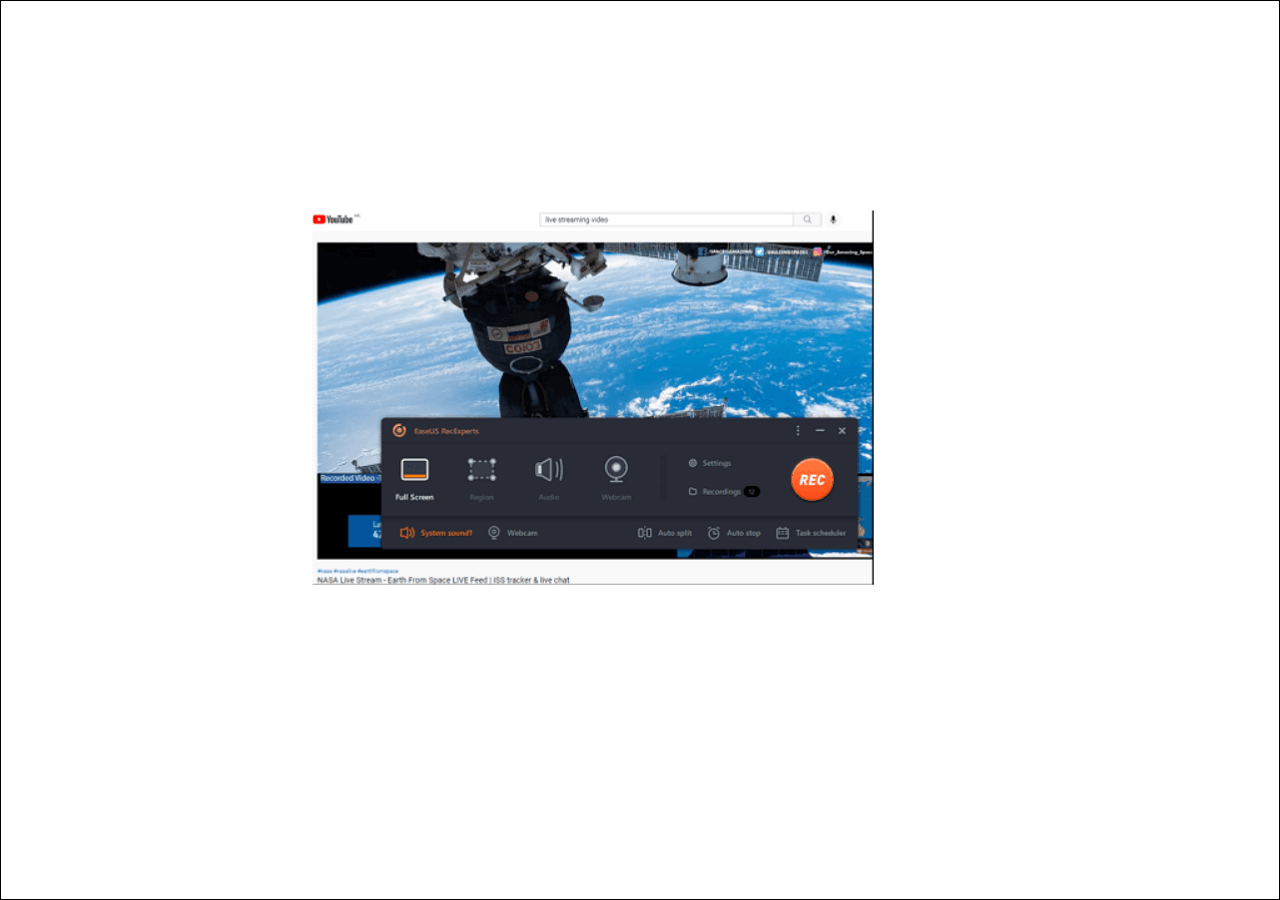
Step 1. Launch EaseUS RecExperts and select your preferred mode: Full Screen, Custom, Window, Game, Audio, or Webcam, depending on what you want to capture. For example, if you're recording a tutorial or walkthrough, the Full Screen or Window mode may work best.

Step 2. Use the toolbar to toggle on the Speaker, Microphone, or Webcam. This is useful if you're explaining something and want your voiceover or facecam included in the recording. You can also turn them off for a clean, silent screen capture.

Step 3. Click the red REC button to begin. While recording, you'll see a floating control bar on your screen. Click the pencil icon to activate annotation features. These tools allow you to highlight areas, draw arrows, underline key content, or write directly on the screen.

Step 4. You can click the Pause button to temporarily stop recording if you need to adjust your content, or click the Stop button to finish. If you want to remove annotations while recording, use the clear option in the drawing toolbar.
Step 5. Once the recording ends, you'll be taken to the preview window where you can edit or manage your files. The annotations you made will be preserved in the final video.
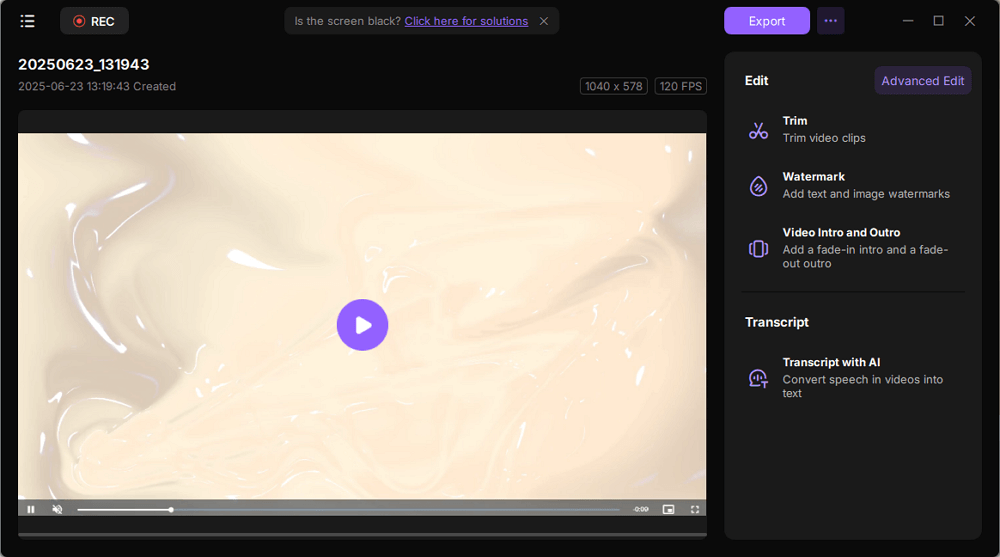
Share this guide on how to record in Google Earth on your social media platforms.

Capture Google Earth Video within the App
If you want to record video on PC in Windows 10 for the Google Earth app, then a 3D software named Google Earth Pro can help you in this regard. With its pro measuring and advanced drawing tools, you accurately get video and imagery.
The zoom-in and out functionality assists with a clear and closer view. You can record the inputs in sharp quality with an added audio input.

Steps to Record Video in Google Earth:
Step 1. Start by opening Google Earth and tapping the "Add Tour" option. Or tap on the ribbon near the globe and tap on the "Record" option.
Step 2. To start the recording, locate the corner in the lower left area and tap the "Record" or "Stop" option.
Step 3. For recording the audio, tap on Microphone "Record" or "Stop" option.
Step 4. Now, move around the place for a tour. Alternatively, you can locate the panel on the left side and then look for the "Places" option. Tap on the placemark for traveling to that area.
Step 5. As soon as you finish recording, tap on the "Record" or "Stop" option. From the right corner, your tour will start once you locate a media player option.
Step 6. For storing the tour, tap on the "Save" option and give a name to the video. You can add a description and wipe on the "View" tabs to add more info about the video. Now save the video by tapping on the "Ok" option.
How to Record Video on Google Earth with OBS
If you want to record video in Google Earth using an open-source screen recorder, then OBS Studio can be your ideal choice. You can make recordings using multiple sources like text, images, webcams, capture cards, and much more.
Moreover, you can set up many scenes using custom transitions seamlessly. For example, you can use noise suppression, gain, and noise gate facilities with audio mixer capability.
Share this guide on how to record in Google Earth on your social media platforms.
Steps to Record Video in Google Earth with OBS:
Step 1. Start by downloading and launching OBS Studio on your PC.
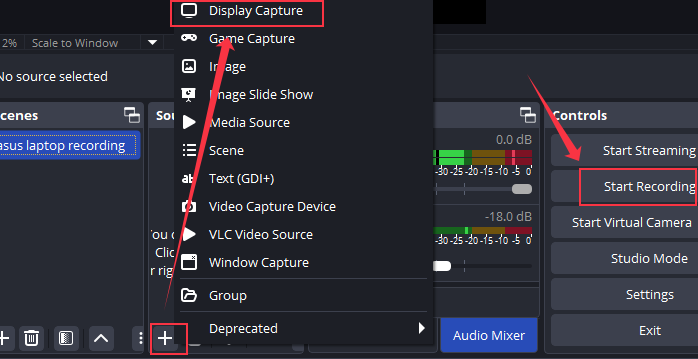
Step 2. Now, from the "Sources" bottom section of the PC, tap on the "+" tab. Then select "Display Capture" and tap the "Start Recording" option to begin capturing Google Earth video.
Step 3. Once done, tap on the "Stop Recording" option.
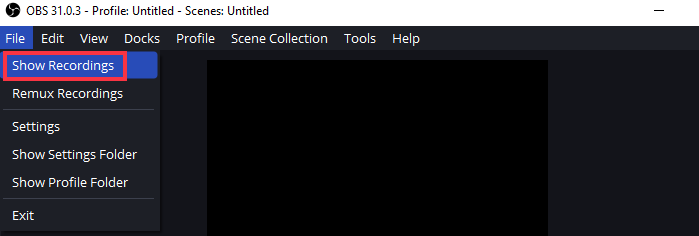
Step 4. Then, go to "File" > "Show Recordings" to view your recorded Google Earth tour video.
How to Screen Record Google Earth Oline
EaseUS Free Online Screen Recorder comes as an online option to record video in Google Earth. It also helps you record browsing activities along with your desktop screen without any software installation.
You can also record screen with microphone or webcam to make a video tutorial or a video presentation. That means you can easily make a video from Google Earth with this online tool.
Steps to Record Video in Google Earth with EaseUS online free recorder:
Step 1. Go to the official website of EaseUS Free Online Screen Recorder. Tap on the "Start Recording" button.

Step 2. Then, you can choose different resources you can capture, like a window of an app, a full screen, or even a page from Chrome. And hit the "Share" icon.
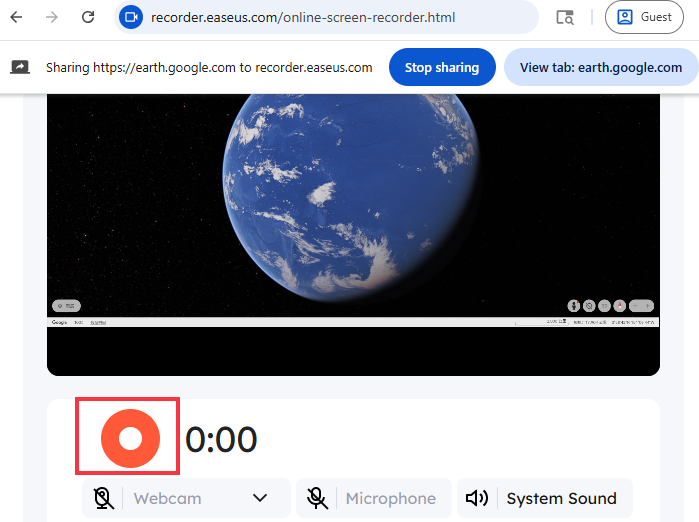
Step 3. Once you get ready, click the round record icon to start the Google Earth recording.
Step 4. Tap on "Done" button once finished. You can also go for a preview tour of Google Earth. And you can save the video by tapping the "Save Video" option. For re-recording, tap on the button for "Record Another".
Share this guide on how to record in Google Earth on your social media platforms.
Conclusion
To sum up, you can use a variety of ways to record videos in Google Earth. For example, you can use Google Earth Pro, a built-in method for recording your screen. If you want to use an open source, you can use OBS Studio. You can also use an online recorder if you do not wish to install software on your PC.
However, EaseUS RecExperts will give you a seamless screen recording experience, whether it is your gameplay or capturing Google Earth images or recording.
Google Earth Video Recording FAQs
Let us find answers to some popular FAQS that will help you gather useful additional information.
1. How do I record a Google Earth view?
The easiest and pro way to record a Google Earth view is by using EaseUS RecExperts.
- 1. Launch the software and opt for the "Full Screen" option.
- 2. Tap on "Region." Choose options for recording and tap on the "REC" button.
- 3. Make any required edits to your video or save it to your device.
2. Where is the Google Earth video saved?
Once you import a KMZ or KML file into your Google Earth project is stored in Google Drive. You can find it in a particular folder and access it by looking for a file reference.
3. How to record Google Earth zoom in?
To record Google Earth zoom in effect, you can use a pro screen recorder like EaseUS RecExperts. This tool can capture any activity on your screen in high quality. Steps on how to record Google Earth zoom in:
Step 1. Download and open EaseUS RecExperts on your PC.
Step 2. Select Full Screen or Custom mode to choose the area that you want to capture.
Step 3. Open the Google Earth map app or open the webpage. Click the REC button to start recording.
4. Can you export video from Google Earth?
To export video from Google Earth, you can use the Google Earth Pro app's Movie Maker function. This feature can help you record a tour as a video. Alternatively, you need to use a professional screen recorder like EaseUS RecExperts to record video from Google Earth.
5. How to take a screenshot of Google Maps Street View?
You can use built-in screenshot tool like Game Bar(Win+Alt+PrtScn) or Snipping Tool(Win+Shift+S) to take screenshots on Google Maps Street View.
EaseUS RecExperts

One-click to capture anything on screen!
No Time Limit, No watermark
Start Recording