-
![]()
Daisy
Daisy is the Senior editor of the writing team for EaseUS. She has been working in EaseUS for over ten years, starting from a technical writer to a team leader of the content group. As a professional author for over 10 years, she writes a lot to help people overcome their tech troubles.…Read full bio -
Jane is an experienced editor for EaseUS focused on tech blog writing. Familiar with all kinds of video editing and screen recording software on the market, she specializes in composing posts about recording and editing videos. All the topics she chooses …Read full bio
-
![]()
Melissa Lee
Alin is an experienced technical blog writing editor. She knows the information about screen recording software on the market, and is also familiar with data cloning and data backup software. She is expert in writing posts about these products, aiming at providing users with effective solutions.…Read full bio -
Jean is recognized as one of the most professional writers in EaseUS. She has kept improving her writing skills over the past 10 years and helped millions of her readers solve their tech problems on PC, Mac, and iOS devices.…Read full bio
-
![]()
Jerry
Jerry is a fan of science and technology, aiming to make readers' tech life easy and enjoyable. He loves exploring new technologies and writing technical how-to tips. All the topics he chooses aim to offer users more instructive information.…Read full bio -
Larissa has rich experience in writing technical articles. After joining EaseUS, she frantically learned about data recovery, disk partitioning, data backup, screen recorder, disk clone, and other related knowledge. Now she is able to master the relevant content proficiently and write effective step-by-step guides on various computer issues.…Read full bio
-
![]()
Rel
Rel has always maintained a strong curiosity about the computer field and is committed to the research of the most efficient and practical computer problem solutions.…Read full bio -
![]()
Gemma
Gemma is member of EaseUS team and has been committed to creating valuable content in fields about file recovery, partition management, and data backup etc. for many years. She loves to help users solve various types of computer related issues.…Read full bio
Page Table of Contents
Jane Zhou
Updated on Apr 19, 2024
0 Views |
0 min read
MacBooks are one of the go-to devices for users of all types. But they are widely known for being the main choice for people in productivity and academic use. This is one of the reasons you will see these devices in numbers in professional settings or among students.
Now, being able to use it as a productivity device also means users want to capture their screen alongside the microphone for later viewing. This means classes for students or meetings for professionals. Now, recording a screen with sound can be a bit tricky, but it's not impossible to do. On this page, we're going to talk about some of the best methods people can use on Mac devices to record their screens and include the microphone in those recordings.
| 🛠️Method | 👍User Experience |
| EaseUS RecExperts | It is quite an effective way of recording screens with the microphone on Mac, as it also offers great in-built editing and trimming options. |
| QuickTime Player | It is convenient as it doesn't require installation but is still devoid of a few key features. |
| Screenshot Toolbar | Perhaps it's a better alternative to QuickTime Player, but still not as convenient as RecExperts. |
Use a Professional Mac Screen Audio Recorder
The first thing the user can do is use a professional Mac screen and audio recorder. There's no need to go on, and Google such tools, as the best option in this case is EaseUS RecExperts. It's one of the top Mac screen recorder software for recording the screen alongside a microphone or webcam.
Besides, you are able to capture your MacBook screen and system sound at the same time without installing any extra plugins. Once your recording is complete, you can directly edit it in the way you like effortlessly.
Download EaseUS Screen Recorder
Download EaseUS Screen Recorder
Trustpilot Rating 4.7
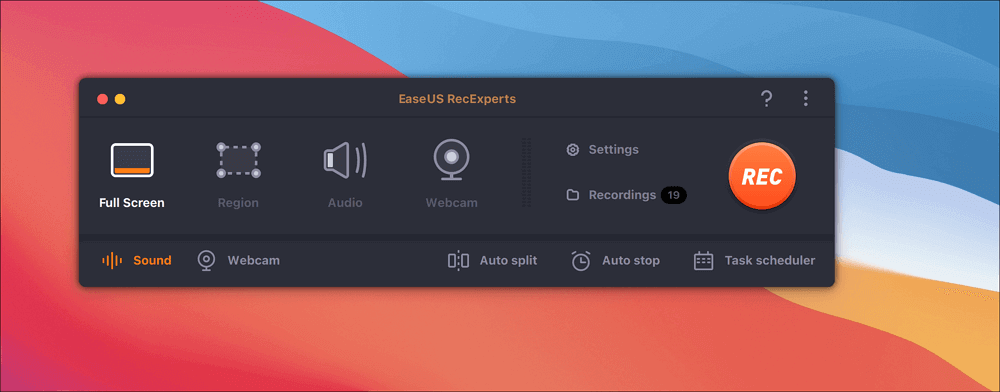
Step 1. Download and launch EaseUS RecExperts on your Mac. To capture the whole screen, click on the "Full Screen" button from the main interface. If you want to customize the recording area, choose the "Region" button.
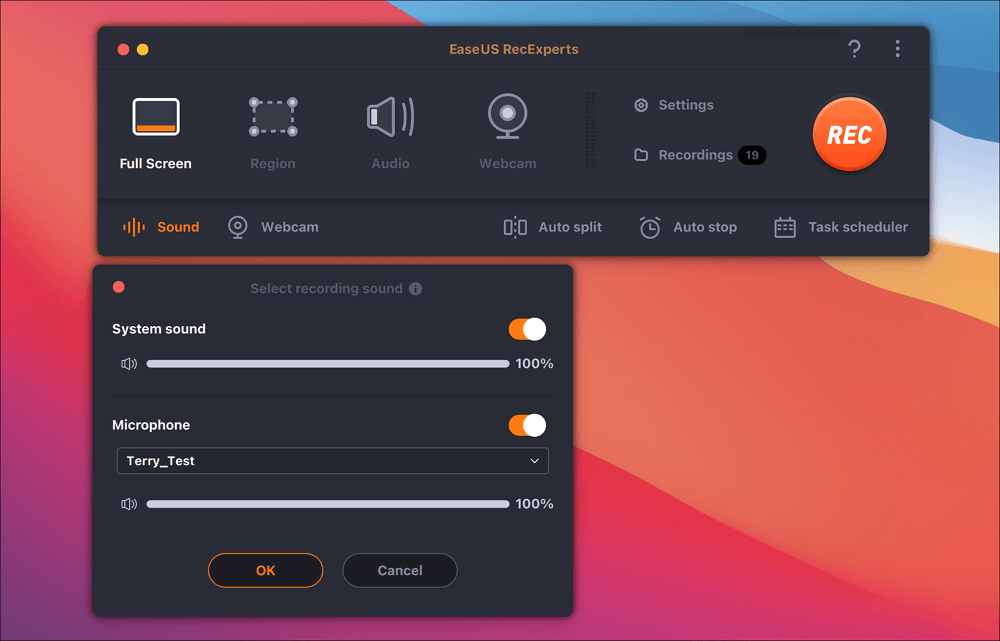
Step 2. To record the screen with audio, hit the Sound icon from the bottom left side of the toolbar. The audio resources can be your external sound or system audio. Based on your needs, enable the target option.
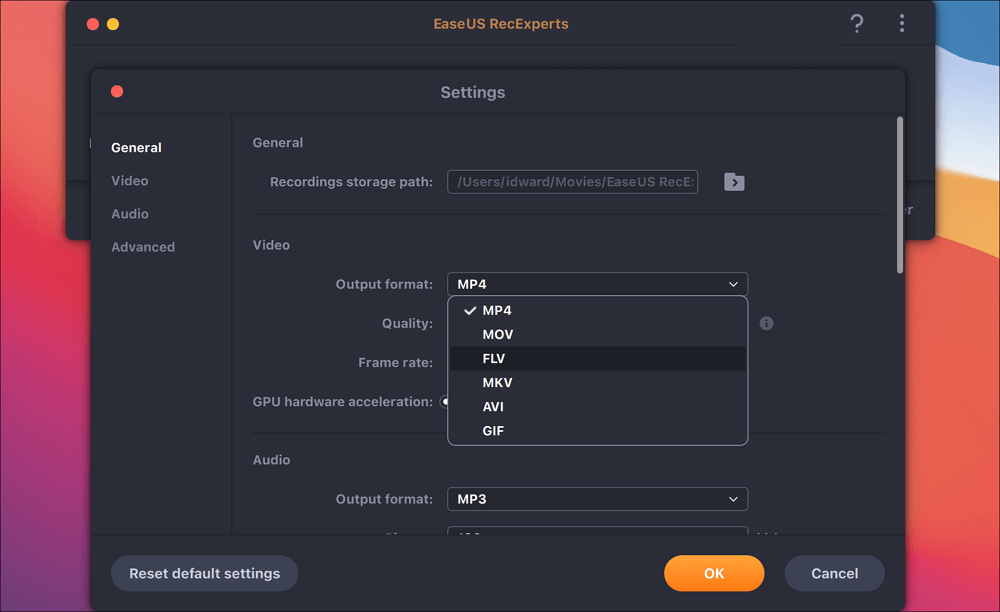
Step 3. Before capturing, you can change the output format of the recorded video by clicking "Settings" from the main interface. Then, scroll down the menu of Output format for Video. Choose the output type as you like.
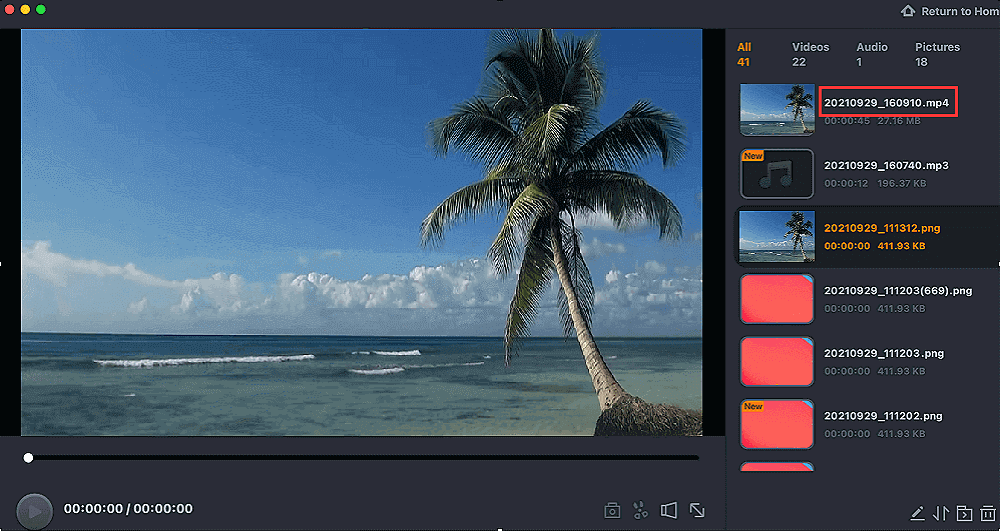
Step 4. Once done, click the REC button to begin recording. It captures anything displayed on your Mac screen. When you are done, click the Stop button. Then you can watch the recorded video from "Recordings".
Have you already solved your problem? If yes, spread out this post with others!
Use QuickTime Player
QuickTime Player is another great option to screen record on Mac with audio. One of the best things about using this tool is that it doesn't require one to download or install it. The player already exists within Apple's MacOS ecosystem, and that's why it's another good option.
But there are a few drawbacks as it doesn't have as many options as our number one choice. That's because it's mainly aimed at being a video and audio player. So, the recording features in this software are secondary.
But here are the steps for QuickTime Screen recording with audio:
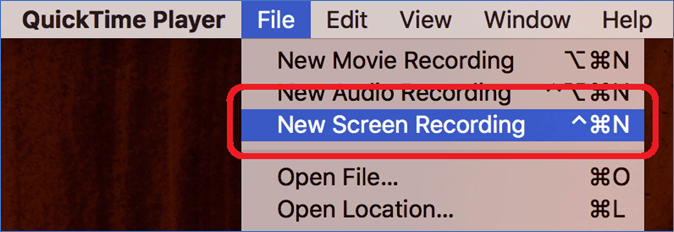
Step 1. Run "QuickTime Player" on a Mac.
Step 2. Tap on "File" > "New Screen Recording".
Step 3. Tap the downwards arrow next to the "Record" button, and select your desired audio source, like a microphone.
Step 4. Now tap the "Record" button to begin recording.
That's why it's one of the best choices to record the screen on MacOS. Now, it's important to note that the same menu with the microphone gives users the choice to save their recordings. It's set on the desktop by default, but the user can change it to any location on their Mac device.
Use Screenshot Toolbar
The Screenshot Toolbar is one of the built-in accessibility tools within macOS. And that's exactly why it's on this list, as it offers a convenient way of recording audio and video. Now, it's important to configure this tool properly to be able to use the microphone alongside common recording.
It's an easy tool that pops up with a simple keyboard shortcut that makes it appear. Most Mac users will also be able to access it using the built-in toolbar strip above their keyboards on MacBook, but it's vital to note that it's mainly available for macOS Mojave and above.
So, here's how a Mac user can use the Screenshot Toolbar to screen record with a Microphone:
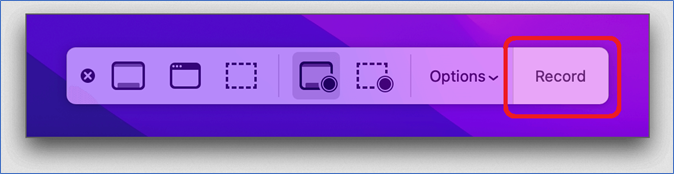
Step 1. Press "Shift + Command + 5" to toggle the screenshot bar.
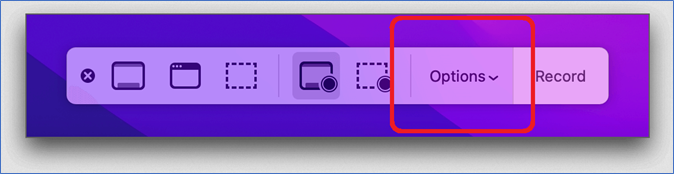
Step 2. Now tap "Options", and then choose your target audio source.
Step 3. Once done, tap on the "Record" button to begin recording.
It's important to remember that the user can change the location of this recording from the same menu where the Microphone option was. So, that's how a user can easily screen record with the microphone on Mac using the Screenshot Toolbar.
Final Words
Screen recording on Mac with a microphone can be a straightforward process if one knows how to do it. The aforementioned three methods are the best way to screen record MacOS screen using the microphone.
Each of the methods is effective in its own way, but EaseUS RecExperts stands out as the best option. That's because the tool has many great options, like built-in editing and trimming facilities. That's why it's the best out of all the three ways that we discussed in this article to screen record with the mic on a Mac.
Download EaseUS Screen Recorder
Download EaseUS Screen Recorder
Trustpilot Rating 4.7
Screen Record with Microphone on Mac FAQs
Here are some of the FAQs related to screen recording with the microphone on a Mac:
1. Can you screen record with a microphone?
Yes, Mac users can screen record with a microphone using the Screenshot Toolbar. The toolbar has an options menu where the user can enable microphone recording before they begin. This allows them to record their screen using the microphone simultaneously.
2. How do I record audio and microphone at the same time on a Mac?
Mac has a convenient accessibility toolbar called Screenshot Toolbar that lets users record internal audio as well as microphone audio. But the better option would be to use a reliable third-party tool like EaseUS RecExperts for Mac to ensure high-quality capture of both microphone and internal audio.
3. How do I record my Mac screen with audio and camera?
There are various options that a user can try, and one of them is using the internal recorder in MacOS. Or they can use EaseUS RecExperts if the user is looking for a detailed recorder for webcam and audio.
EaseUS RecExperts

One-click to capture anything on screen!
No Time Limit, No watermark
Start Recording