-
![]()
Daisy
Daisy is the Senior editor of the writing team for EaseUS. She has been working in EaseUS for over ten years, starting from a technical writer to a team leader of the content group. As a professional author for over 10 years, she writes a lot to help people overcome their tech troubles.…Read full bio -
Jane is an experienced editor for EaseUS focused on tech blog writing. Familiar with all kinds of video editing and screen recording software on the market, she specializes in composing posts about recording and editing videos. All the topics she chooses …Read full bio
-
![]()
Alin
Alin is an experienced technical blog writing editor. She knows the information about screen recording software on the market, and is also familiar with data cloning and data backup software. She is expert in writing posts about these products, aiming at providing users with effective solutions.…Read full bio -
Jean is recognized as one of the most professional writers in EaseUS. She has kept improving her writing skills over the past 10 years and helped millions of her readers solve their tech problems on PC, Mac, and iOS devices.…Read full bio
-
![]()
Jerry
Jerry is a fan of science and technology, aiming to make readers' tech life easy and enjoyable. He loves exploring new technologies and writing technical how-to tips. All the topics he chooses aim to offer users more instructive information.…Read full bio -
![]()
Rel
Rel has always maintained a strong curiosity about the computer field and is committed to the research of the most efficient and practical computer problem solutions.…Read full bio -
![]()
Gemma
Gemma is member of EaseUS team and has been committed to creating valuable content in fields about file recovery, partition management, and data backup etc. for many years. She loves to help users solve various types of computer related issues.…Read full bio -
![]()
Shelly
"I hope my articles can help solve your technical problems. If you are interested in other articles, you can check the articles at the bottom of this page. Similarly, you can also check my Twitter to get additional help."…Read full bio
Page Table of Contents
Jean
Updated on Jun 09, 2026
0 Views |
0 min read
🚩Quick steps for how to stream on Twitch with OBS:
Step 1. Set up your Twitch account and enable two-factor authentication (2FA).
Step 2. Download and install OBS Studio for your PC or Mac.
Step 3. Connect OBS to Twitch: connect account or use Twitch Stream Key.
Step 4. Configure OBS: create scenes, add sources, and set your video/audio output.
Step 5. Go live, monitor your stream, and engage with your viewers.
OBS Studio is free, open-source, and supports Windows, Mac, and Linux. It gives streamers full control over scenes, overlays, and sources, making it perfect for both beginners and professional creators. Twitch, on the other hand, is the largest live streaming platform for gaming and creative content, with millions of viewers daily. Read this post from EaseUS to learn how to combine OBS with Twitch and deliver high-quality, interactive streams without the need for expensive software.
Step 1. Prepare Your Twitch Account
Sign Up or Log In:
- Go to Twitch (https://www.twitch.tv/) and create an account if you haven't already.
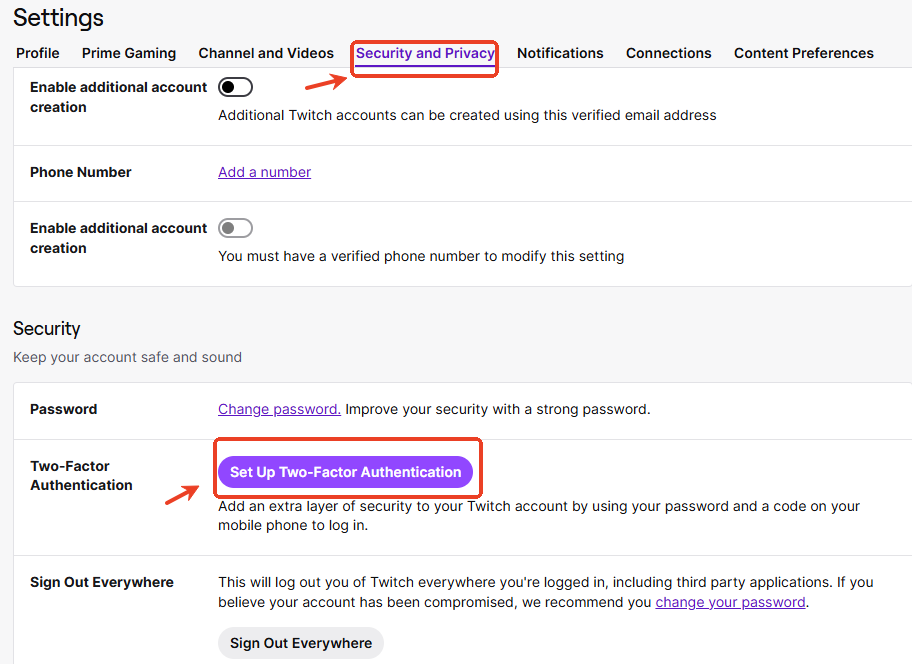
- Enable Two-Factor Authentication (2FA)
- This is required to stream. Go to Settings → Security and Privacy → Two-Factor Authentication and follow the steps.
Don't forget to share this guide to help more streamers!

Step 2. Install OBS Studio
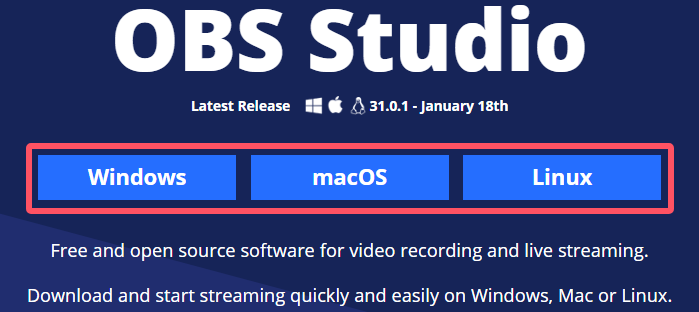
- Download OBS Studio from obsproject.com.
- Install it for your system (Windows, Mac, or Linux).
- Launch OBS and run the Auto-Configuration Wizard if you want OBS to suggest optimal settings based on your PC and internet speed.
Step 3. Connect OBS to Twitch
Before you can go live, you need to link OBS with your Twitch account. There are two ways to do this:
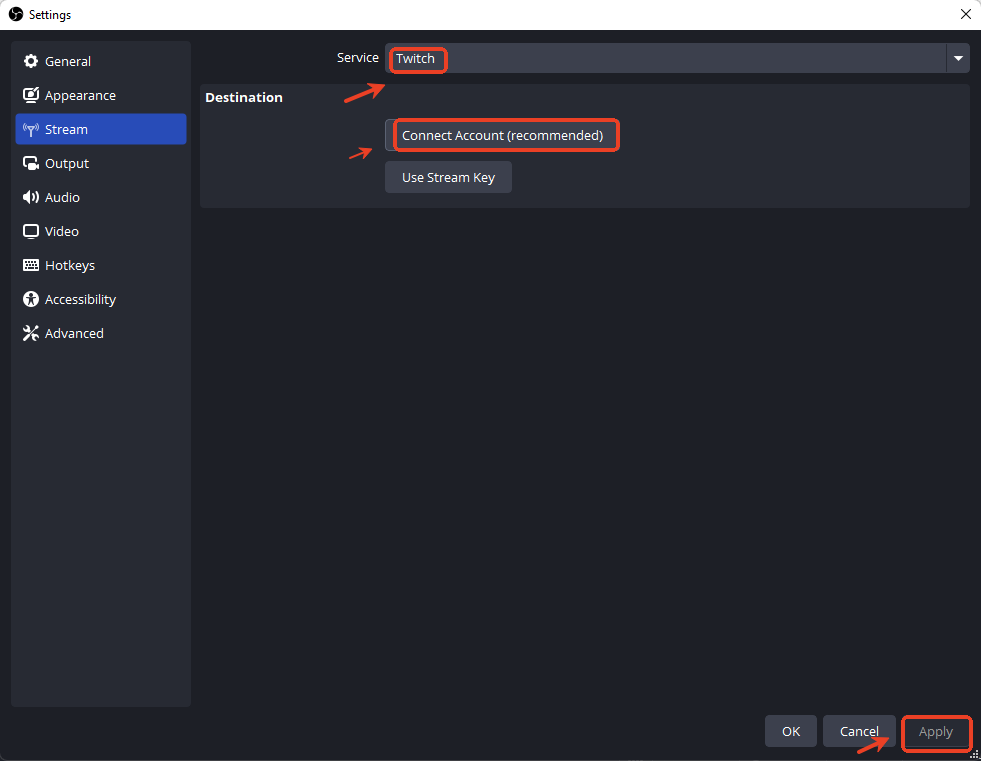
Option 1: Connect Your Twitch Account
- In OBS, go to Settings → Stream.
- Under Service, select Twitch.
- Click Connect Account (recommended).
- Log in with your Twitch username and password, then authorize OBS.
💡Benefit: This method is easier and more secure. OBS will automatically handle your stream key, so you don't have to copy and paste it manually.
Option 2: Use Your Twitch Stream Key
- Go to your Twitch Creator Dashboard → Settings → Stream.
- Copy the Primary Stream Key.
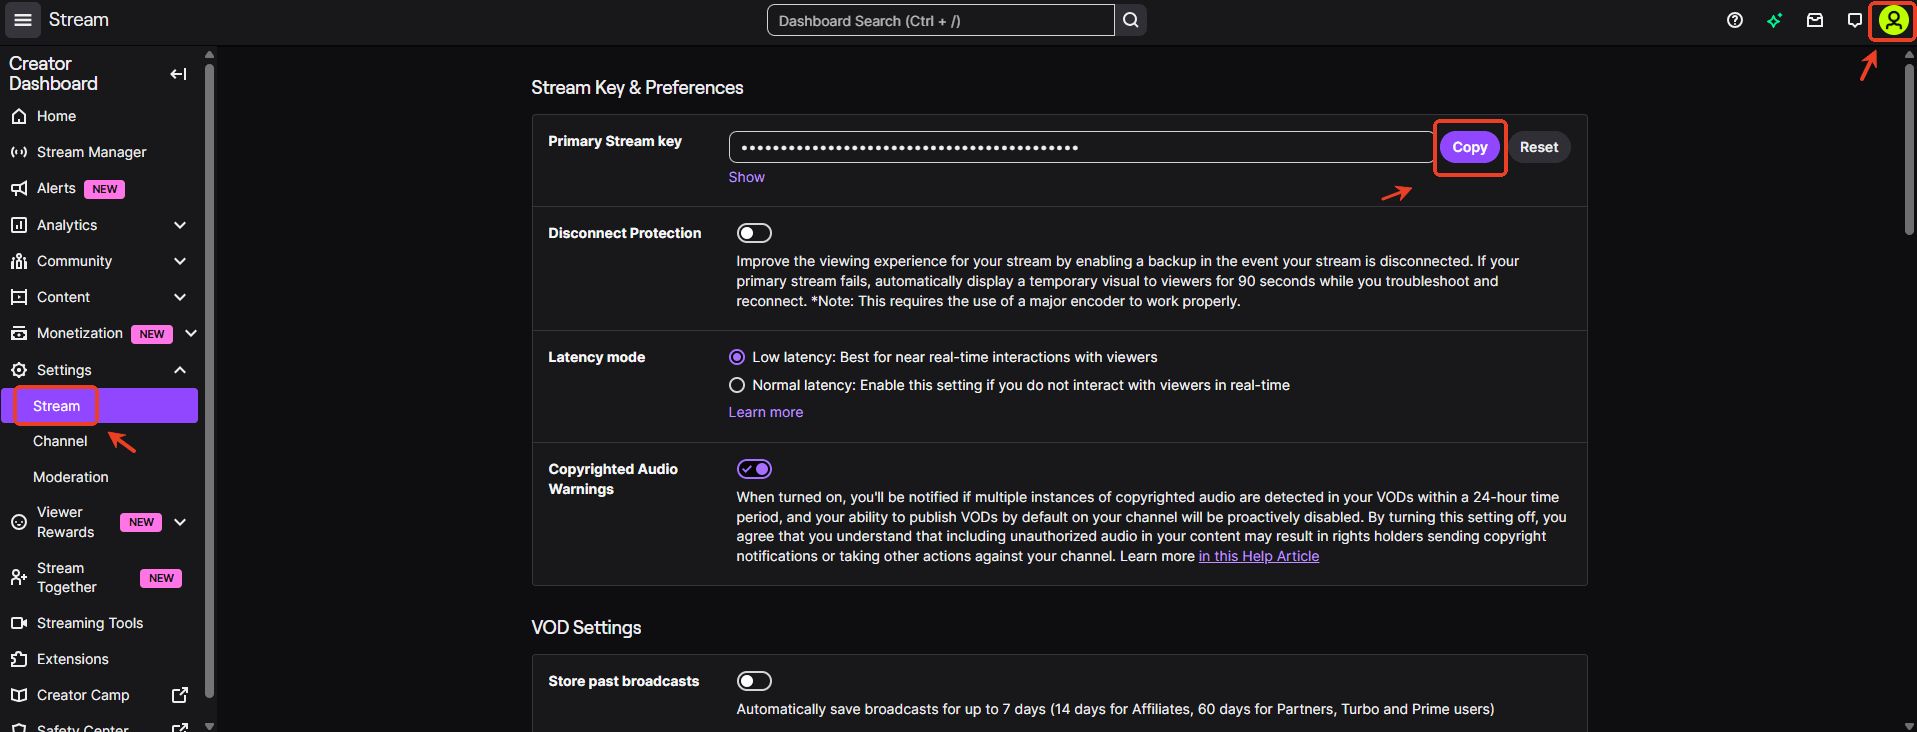
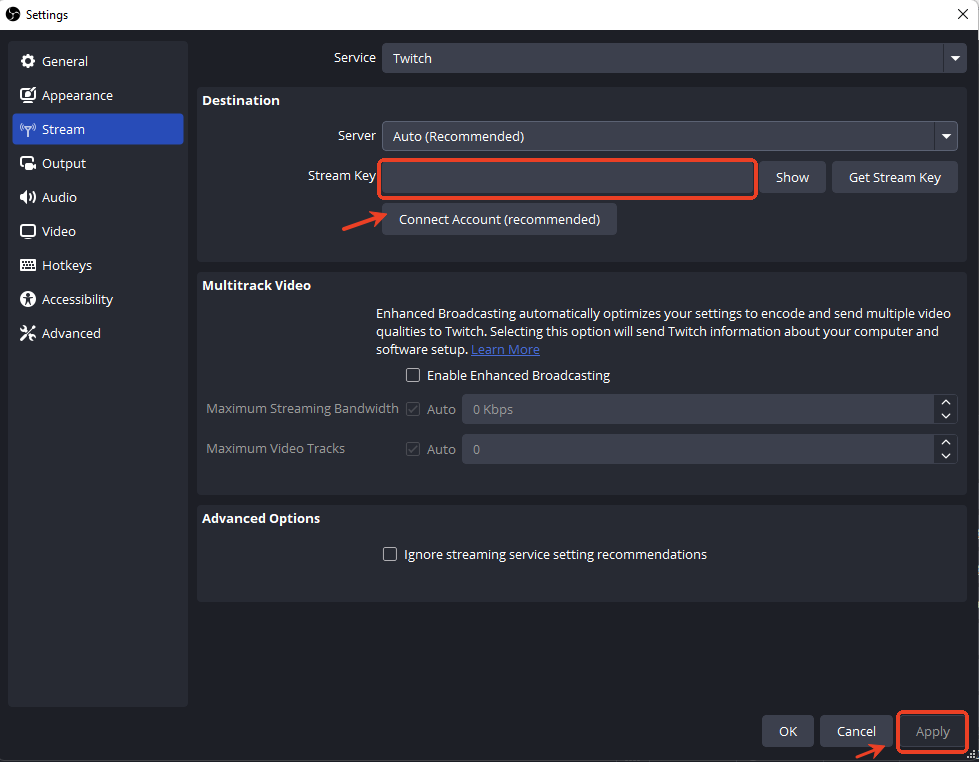
- In OBS, go to Settings → Stream.
- Select Twitch as the Service, then paste your key into the Stream Key box.
💡Benefit: Useful if you prefer not to connect your account directly or if you're streaming from multiple computers.
Step 4. Configure OBS Scenes and Sources
Scenes are like separate layouts for your stream. Each scene can include multiple sources, such as your webcam, game capture, or overlay graphics.
Common Sources of OBS Studio:
- Display Capture: Shows your entire screen.
- Window Capture: Focuses on a specific program or game.
- Video Capture Device: Your webcam feed.
- Audio Input Capture: Your microphone.
- Audio Output Capture: Desktop sound or in-game audio.

💡Tip: Name your scenes and sources clearly to make switching during the stream easier.
Step 5. Set Up Output and Video Settings
Output Settings
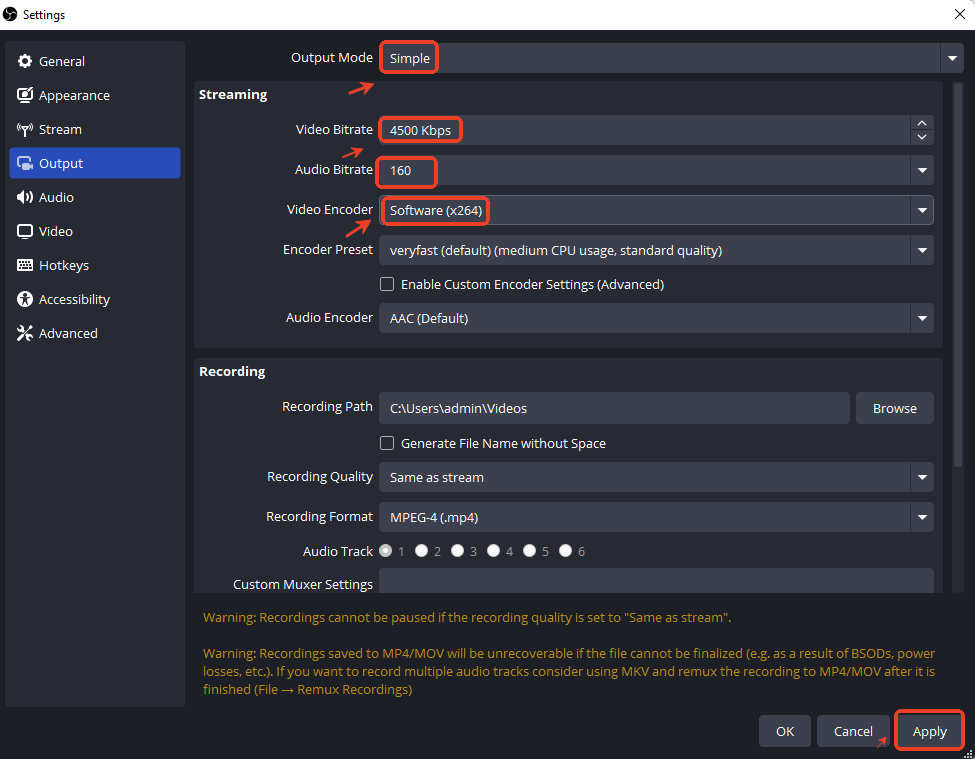
1. Go to Settings → Output.
2. Use Simple Mode if you're a beginner.
3. Recommended values for 1080p/60fps streaming:
- Video Bitrate: 4500–6000 kbps. Twitch caps the maximum at 6000 kbps. Staying within this range ensures your stream is sharp and clear at 1080p/60fps without overloading your internet upload speed.
- Audio Bitrate: 160 kbps. This is more than enough for crisp commentary and game audio. It balances good sound quality with efficient bandwidth usage.
- Encoder: x264 (CPU) or NVENC (NVIDIA GPU). x264 (CPU) delivers excellent quality, especially at lower bitrates, but it's CPU-intensive. NVENC (GPU) uses a dedicated encoder on NVIDIA graphics cards, freeing up your CPU and keeping your game performance smooth.
Video Settings
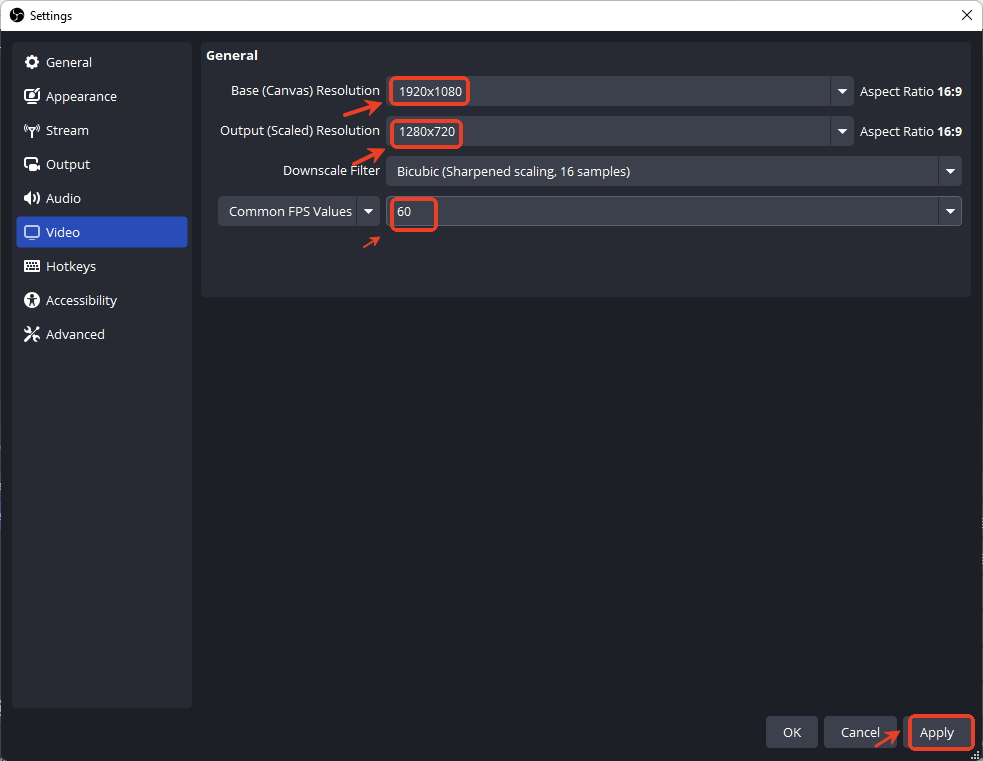
1. Go to Settings → Video.
2. Base (Canvas) Resolution: 1920×1080.
3. Output (Scaled) Resolution: 1920×1080 or 1280×720
- 1080p gives the sharpest picture, ideal if your internet and PC can handle it.
- 720p is lighter on your system and makes streams more accessible to viewers with slower connections.
4. Common FPS: 30 or 60, depending on your hardware and internet speed
- 60 FPS makes fast-paced gameplay smoother and more enjoyable to watch.
- 30 FPS is easier on your system and upload speed, perfect for slower games or just chatting streams.
Step 6. Test Your Stream
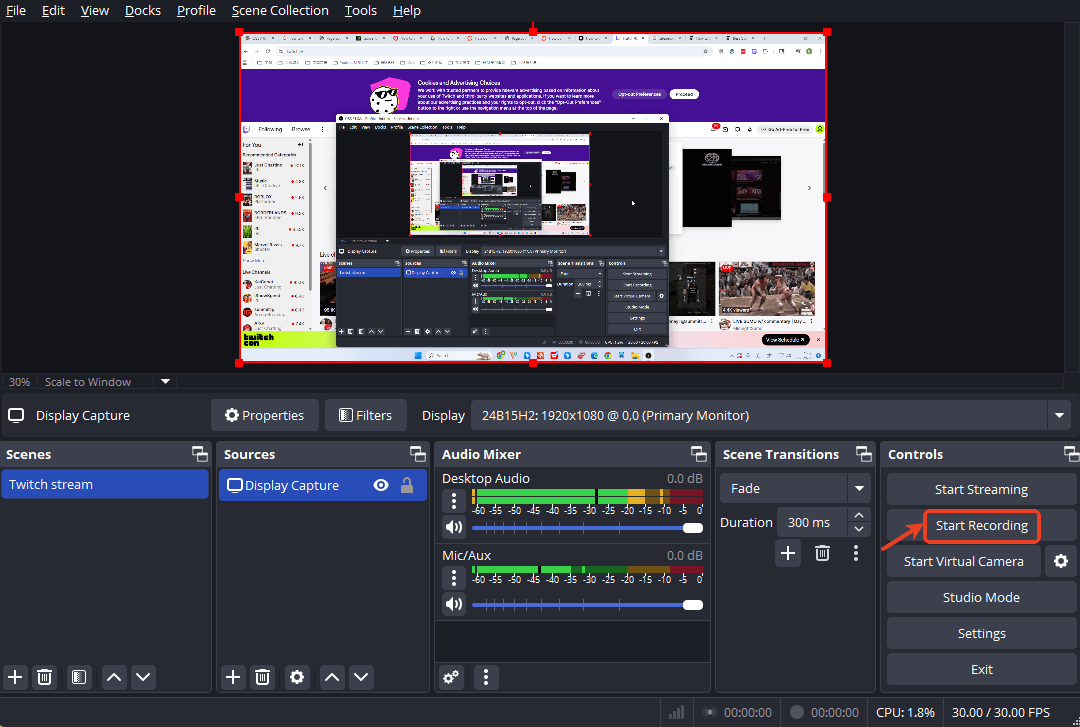
Before going live:
- Click Start Recording in OBS to make a short test video.
- Play it back to check audio levels, webcam placement, and screen capture quality.
- Make adjustments to scenes, sources, or audio as needed.
Step 7. Start Streaming
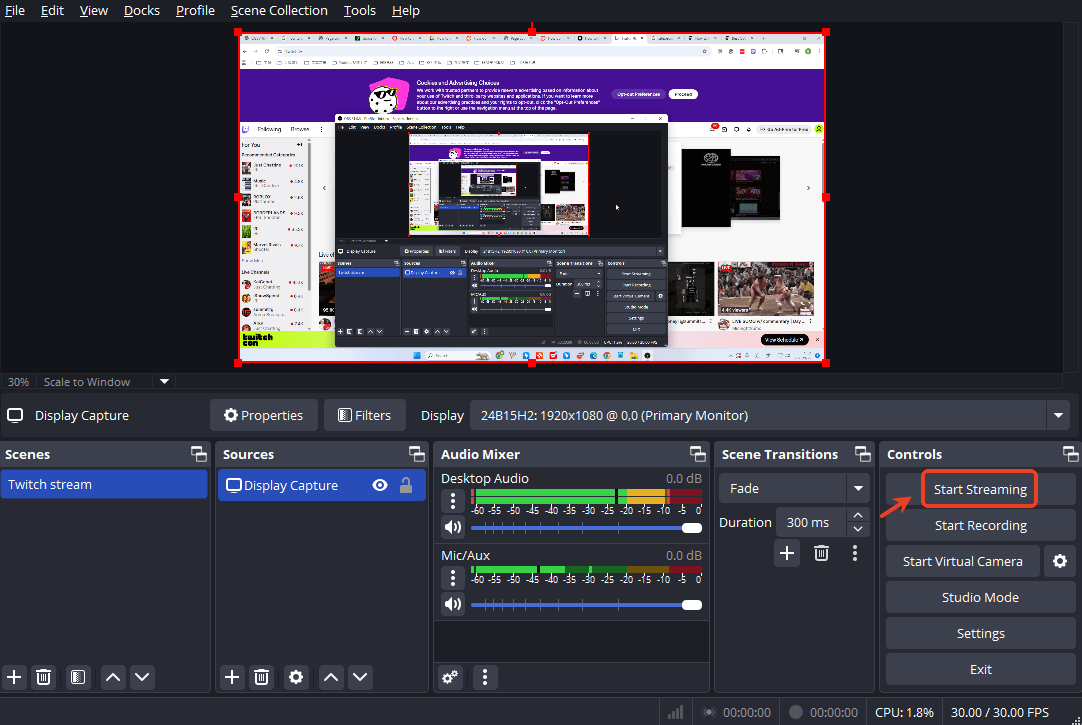
- Click Start Streaming in OBS.
- Open your Twitch channel in a browser or mobile device to confirm the stream is live.
- Monitor the Twitch Dashboard for chat interaction, viewers, and stream health.
- Switch between scenes during your stream to make your content dynamic.
Tips for a Smooth Twitch Stream
1. Use a wired internet connection for stable streaming.
2. Test audio levels to avoid echo or distortion.
3. Add overlays and alerts for followers, subscribers, or donations.
4. Engage with your audience via chat, polls, or live reactions.
5. Record Twitch stream for highlights or YouTube clips.
Conclusion
Learning how to stream on Twitch with OBS might feel overwhelming at first, but once you break it down into steps, it becomes straightforward.
The key is to start simple: use recommended settings, test your stream, and improve over time. As you get more comfortable, you can add overlays, alerts, and advanced features to make your stream stand out. With OBS and Twitch working together, you're well on your way to creating engaging content and building your audience.
FAQs
1. Can I stream Twitch without OBS?
Yes, you can stream directly from Twitch Studio, Streamlabs, or even mobile apps, but OBS gives more control and flexibility.
2. What bitrate should I use for Twitch?
For 1080p/60fps, 4500–6000 kbps is recommended. Lower resolutions can use 2500–4000 kbps.
3. How do I fix lag or audio issues?
Check CPU usage, reduce output resolution, lower FPS, or use a dedicated audio interface.
4. Can I stream on Mac or Linux?
Yes, OBS supports Windows, Mac, and Linux. Make sure your hardware meets minimum requirements.