-
![]()
Daisy
Daisy is the Senior editor of the writing team for EaseUS. She has been working in EaseUS for over ten years, starting from a technical writer to a team leader of the content group. As a professional author for over 10 years, she writes a lot to help people overcome their tech troubles.…Read full bio -
Jane is an experienced editor for EaseUS focused on tech blog writing. Familiar with all kinds of video editing and screen recording software on the market, she specializes in composing posts about recording and editing videos. All the topics she chooses …Read full bio
-
![]()
Alin
Alin is an experienced technical blog writing editor. She knows the information about screen recording software on the market, and is also familiar with data cloning and data backup software. She is expert in writing posts about these products, aiming at providing users with effective solutions.…Read full bio -
Jean is recognized as one of the most professional writers in EaseUS. She has kept improving her writing skills over the past 10 years and helped millions of her readers solve their tech problems on PC, Mac, and iOS devices.…Read full bio
-
![]()
Jerry
Jerry is a fan of science and technology, aiming to make readers' tech life easy and enjoyable. He loves exploring new technologies and writing technical how-to tips. All the topics he chooses aim to offer users more instructive information.…Read full bio -
![]()
Rel
Rel has always maintained a strong curiosity about the computer field and is committed to the research of the most efficient and practical computer problem solutions.…Read full bio -
![]()
Gemma
Gemma is member of EaseUS team and has been committed to creating valuable content in fields about file recovery, partition management, and data backup etc. for many years. She loves to help users solve various types of computer related issues.…Read full bio
Page Table of Contents

Jean
Updated on Aug 27, 2026
0 Views |
0 min read
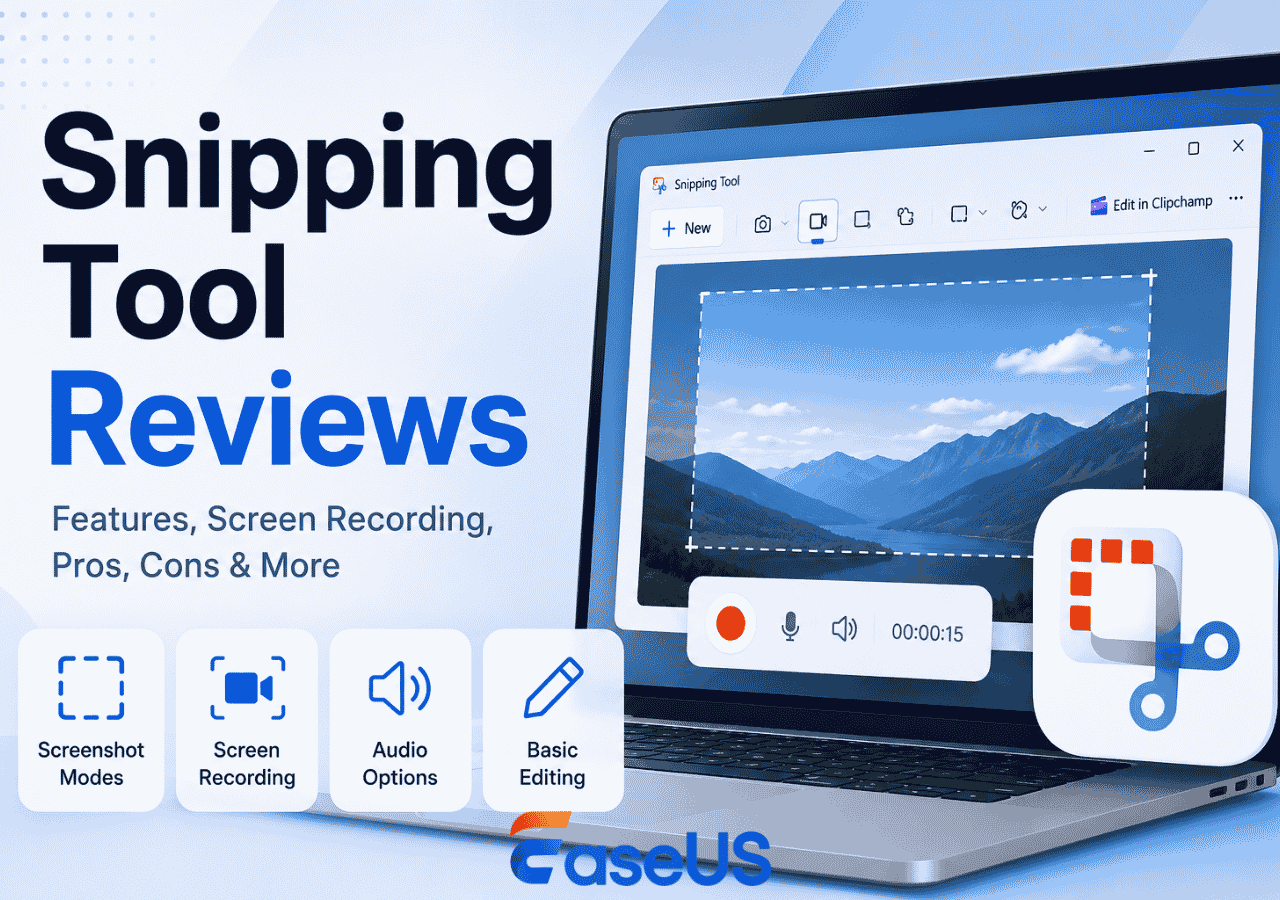
If you're using Windows, you probably don't need to install a separate screenshot tool just to capture what's on your screen. Microsoft's Snipping Tool can take screenshots, record your screen, capture audio, and handle basic editing, all from a built-in Windows app.
But being built into Windows doesn't necessarily make it the best screen recorder.
After using Snipping Tool for both screenshots and screen recording, I found that it works very well for quick, simple captures. It's fast, free, and easy to use. However, some limitations become obvious when you try to use it for longer recordings, webcam videos, more advanced audio setups, or anything that requires more control.
So, is Snipping Tool good enough?
For quick screenshots and short screen recordings, yes. For more demanding recording tasks, you'll probably want a dedicated screen recorder.
Snipping Tool at a Glance
|
Feature |
Snipping Tool |
|
Screenshot |
Yes |
|
Screen recording |
Yes |
|
System/app audio |
Yes |
|
Microphone |
Yes |
|
Webcam recording |
No |
|
Screenshot modes |
Full screen, window, rectangular, freeform |
|
Screenshot delay |
0, 3, 5, or 10 seconds |
|
Recording frame rate |
30 FPS |
|
Video format |
MP4 |
|
Screenshot format |
JPG, PNG, GIF |
|
Basic video editing |
Trim |
|
Advanced video editing |
Clipchamp |
|
Scrolling screenshot |
No |
|
Price |
Free |
Snipping Tool is available on Windows, but the screenshot and screen recording features don't have identical system requirements. Microsoft currently lists Snipping Tool for both Windows 10 and Windows 11, while screen recording is a Windows 11 feature.
Share this post if you find it helpful!

What Can You Do With Snipping Tool?
Snipping Tool started as a simple screenshot utility, but it has grown into a more capable capture tool. For everyday use, its two main jobs are still straightforward: taking screenshots and recording your screen.
Take Screenshots
Press Windows + Shift + S, and the Snipping Tool overlay appears. You can then choose from four capture modes:
- Rectangular snip
- Freeform snip
- Window snip
- Full-screen snip
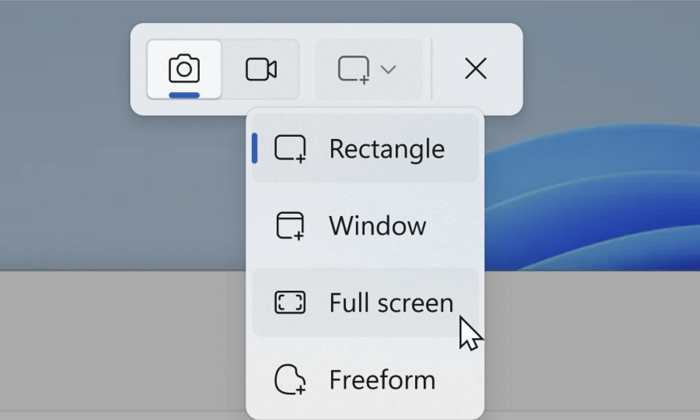
The screenshot is copied to the clipboard, so you can immediately paste it into an email, document, chat, or image editor. You can also open it in Snipping Tool and save it wherever you want. Microsoft also supports text extraction from screenshots and several annotation tools.
For something like reporting a software bug or showing a coworker exactly where to click, this workflow is hard to beat. You press a shortcut, select the area, and you're done.
Edit and Annotate Screenshots
Snipping Tool includes enough editing tools for basic screenshot work. You can:
- Draw with a pen
- Highlight content
- Erase annotations
- Add shapes
- Crop an image
- Extract text from an image
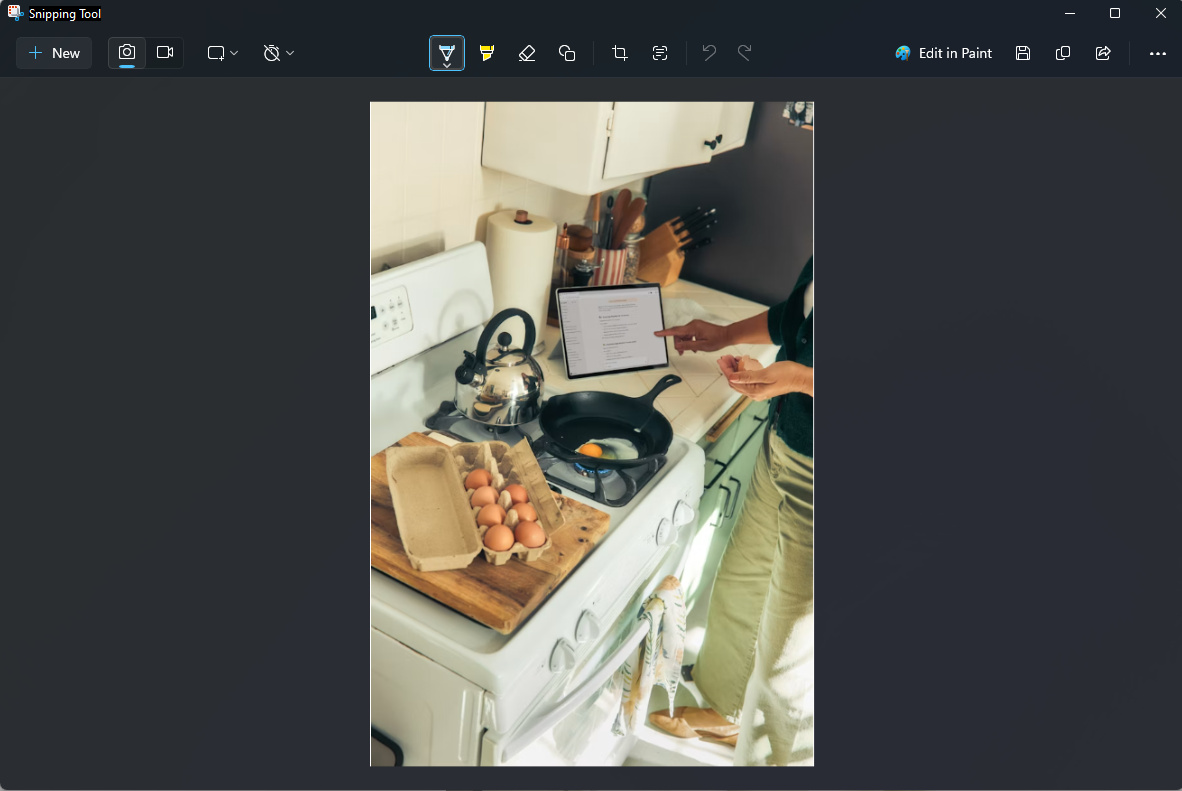
For example, if you want to send someone a screenshot with an arrow pointing to a specific button, there's no real reason to open a separate image editor.
Some newer Windows 11 devices also get features such as Perfect Screenshot and Color Picker, although availability depends on the Windows device.
Record Your Screen
As a complement to Xbox Game Bar, which supports full-screen recording only, Snipping Tool can also record a selected area of your screen. Press Windows + Shift + R, choose the area you want to capture, and start recording. Microsoft also provides a Record option directly inside the app.
This is useful when you need to quickly record:
- A short software tutorial
- A bug or error
- A website interaction
- A presentation or demonstration
- Something you want to show to a coworker

The recording workflow is simple, but this is also where some of Snipping Tool's limitations start to show.
Snipping Tool Screen Recording: Our Hands-on Experience
For this review, I paid more attention to the recording experience than simply checking whether the Record button was available.
The short version: Snipping Tool works well as a quick screen recorder, but it doesn't offer the level of control you'd expect from dedicated recording software.
You Have to Select the Recording Area
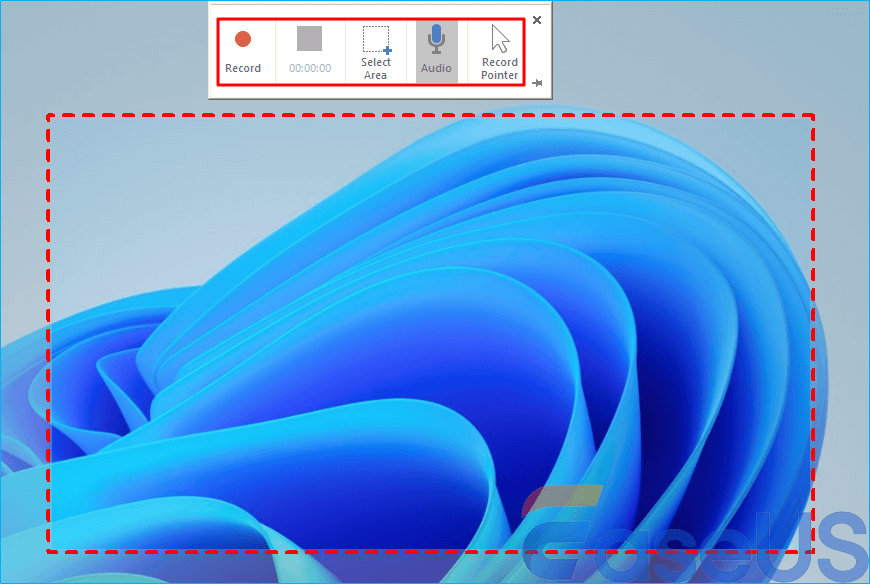
Before recording, you need to manually select a rectangular area of the screen.
That's fine if you're recording a specific application or part of your desktop. But if you frequently record your entire screen, that extra selection step can feel repetitive.
There's also a three-second countdown before recording starts. I didn't find an option to change the countdown length.
For a tutorial where you have everything prepared beforehand, three seconds isn't a problem. But if you're trying to capture something that is happening right now, having to select the area and wait for the countdown can be inconvenient.
Audio Recording Is Better Than You Might Expect
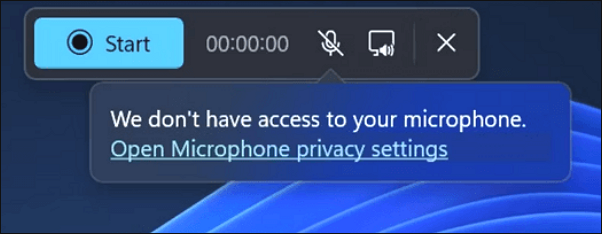
One of Snipping Tool's more useful features is audio recording.
- You can record:
- System audio
- App audio
- Microphone audio
- System audio and microphone together
- Screen without audio
That makes Snipping Tool suitable for many basic tutorials and demonstrations.
There is, however, an important limitation: system and app audio aren't treated as separate recording sources that you can independently control inside Snipping Tool.
You also don't get detailed volume controls for the microphone and system audio within the recorder itself.
So if you simply want to record a software demonstration with the computer's audio and your voice, Snipping Tool can handle it. If you need more precise audio mixing or control, it starts to feel restrictive.
No Webcam Recording
This is one of the clearest limitations.
Snipping Tool can record your screen and audio, but it doesn't provide a built-in webcam overlay.
That means it isn't a good fit for:
- Reaction videos
- Video presentations with a facecam
- Online courses with webcam footage
- Gameplay with facecam
- Tutorials where you want your face on screen
If you only need the screen, this doesn't matter. If you want screen + webcam, you'll need another solution.
30 FPS and MP4 Only
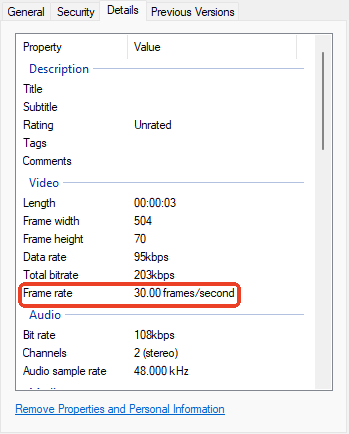
In my testing, Snipping Tool screen recordings are captured at 30 FPS and saved as MP4.
For software tutorials, presentations, and everyday demonstrations, 30 FPS is generally fine. You don't need 60 FPS just to show someone how to use an application.
But the limitation becomes more noticeable for:
- Gameplay
- Fast-moving content
- Motion-heavy demonstrations
- High-frame-rate video
If you need more control over frame rate, resolution, codecs, or output formats, Snipping Tool isn't designed for that.
Basic Editing Is Fine, but That's About It
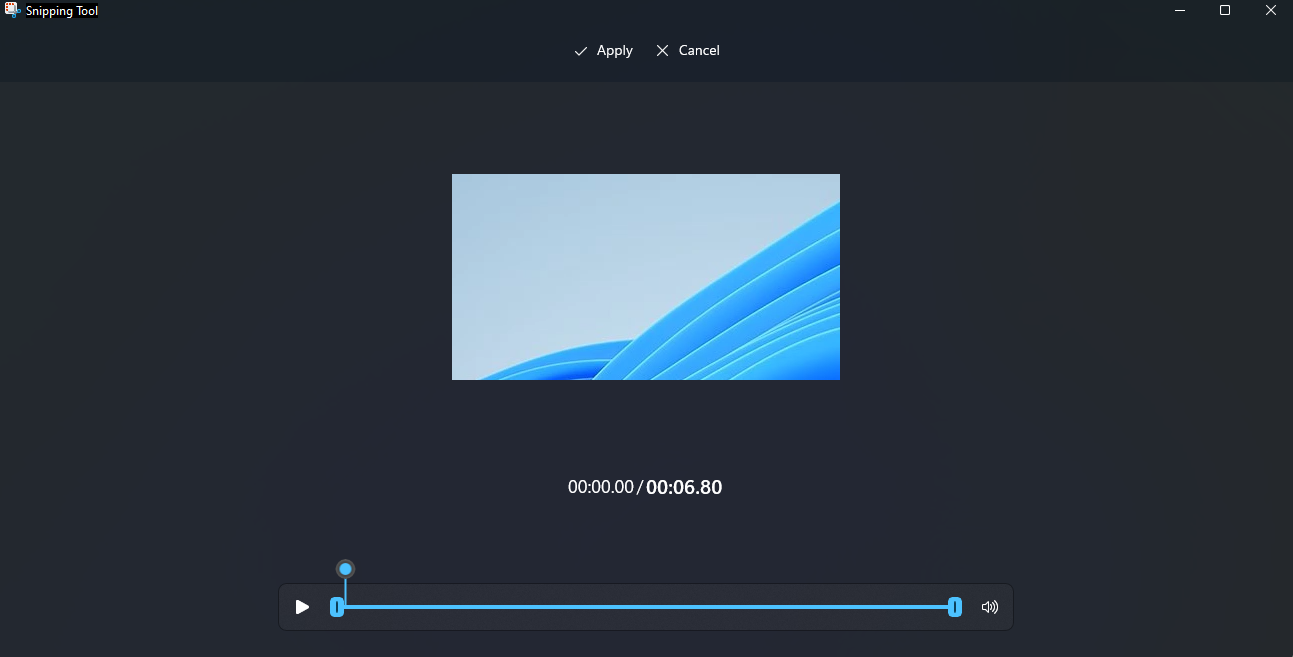
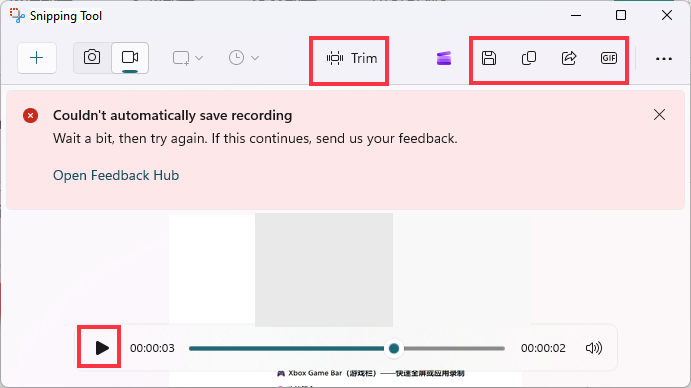
After recording, Snipping Tool gives you a basic way to trim the video.
That's useful if you accidentally leave a few seconds at the beginning or end of a recording. For anything more complicated, Microsoft directs users to Clipchamp for additional editing.
This creates a fairly clear dividing line:
Snipping Tool is a capture tool with basic editing, not a complete video editor.
If you need captions, more detailed cuts, transitions, audio editing, or a proper video timeline, you'll need another application.
You Can Create a GIF, but It's a Small Utility
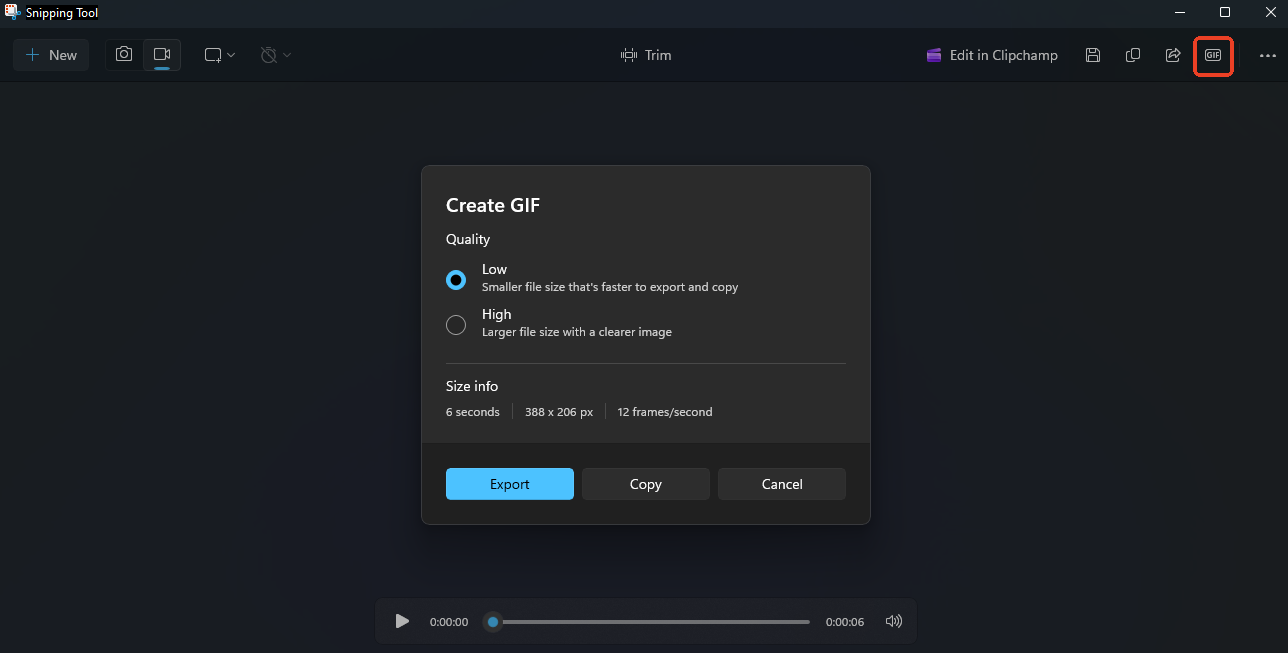
Snipping Tool can also turn a short screen recording into a GIF.
This is handy for something like showing a short UI interaction or creating a quick visual for a chat message. However, the feature is intentionally simple and isn't a replacement for a dedicated GIF or video creation tool.
Saving Recordings Can Be Unforgiving
This is one area where the actual workflow matters more than the feature list.
If automatic saving is disabled, you need to manually save the recording and choose where to put it. If you close the recording without saving, you may lose it instead of getting a strong reminder that you have unsaved content.
I also found that automatic saving didn't always behave as expected during testing.
That's not necessarily a problem you'll encounter every time, but it's worth keeping in mind if you're recording something that would be difficult to reproduce.
For important or long recordings, I wouldn't rely on Snipping Tool without checking that the file has actually been saved.
Share this post if you find it helpful!
What Snipping Tool Does Well and Where It Falls Short
Pros
- Free and built into Windows
- Very quick for screenshots
- Useful screenshot shortcuts
- Multiple screenshot modes
- Supports screen recording
- Can record system audio and microphone
- No separate recorder is required for basic tasks
- Simple interface
- Basic trimming is available
Cons
- No webcam recording
- No scrolling screenshots
- Recording area must be selected manually
- Fixed three-second countdown
- 30 FPS screen recording
- MP4 is the main video output
- Limited audio controls
- Advanced video editing requires Clipchamp
- Saving can be less forgiving than expected
- Not designed for demanding or professional recording workflows
Snipping Tool Shortcuts
The main shortcuts are easy to remember:
|
Shortcut |
What It Does |
|
Windows + Shift + S |
Capture a screenshot |
|
Windows + Shift + R |
Start a screen recording |
|
PrtSc |
Capture the screen |
Microsoft currently documents Windows + Shift + S for screenshots and Windows + Shift + R for screen recording.
For quick captures, these shortcuts are probably one of Snipping Tool's biggest advantages.
Does Snipping Tool Work on Mac, Chromebook, or Mobile?
No. Snipping Tool is Microsoft's Windows capture utility, so you won't find the same app on macOS, ChromeOS, Android, or iOS.
|
Platform |
Snipping Tool |
Built-in Alternative |
|
Windows 11 |
Yes |
Snipping Tool |
|
Windows 10 |
Screenshot support |
Snipping Tool |
|
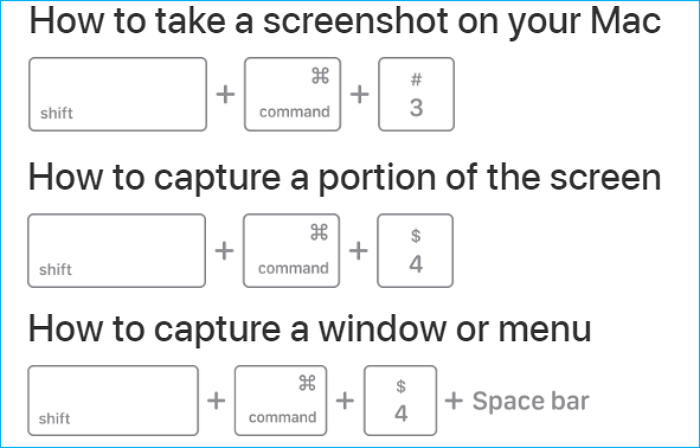
Mac |
No |
Screenshot / Shift + Command + 5 |
|
Chromebook |
No |
ChromeOS Screen Capture |
|
Android |
No |
Built-in screenshot/recorder |
|
iPhone/iPad |
No |
Built-in Screen Recording |
If you're searching for "Snipping Tool for Mac," you probably don't need Microsoft's app; you need a Mac equivalent that can capture screenshots or record the screen.
Common Snipping Tool Problems
Snipping Tool is simple, but that doesn't mean every Windows user has a trouble-free experience.
Snipping Tool Is Not Working
If Snipping Tool won't open or crashes, first check whether Windows and the app are up to date. Repairing or resetting the app can also help with app-specific problems.
Snipping Tool Screen Recording Is Missing
Screen recording isn't available on every Windows configuration. If you don't see the Record option, check your Windows version/build and make sure Snipping Tool is up to date.
Microsoft introduced the built-in Snipping Tool screen recorder for Windows 11.
Windows + Shift + R Isn't Working
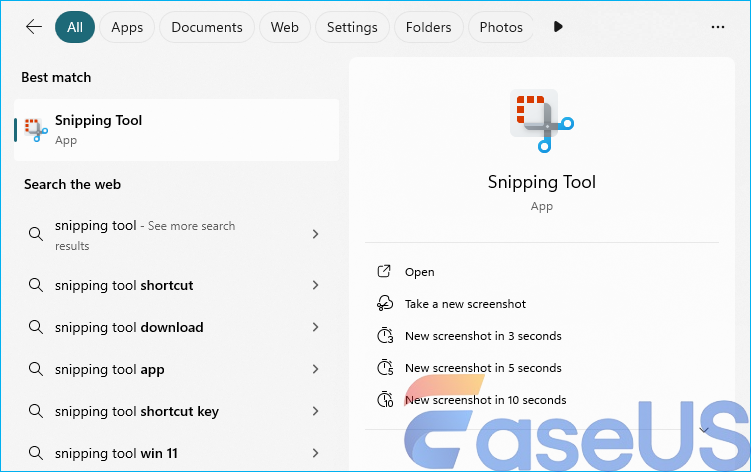
If the shortcut doesn't open the recording overlay, open Snipping Tool manually and check whether the Record option is available.
If the recording feature itself is missing, the problem may be related to your Windows version or Snipping Tool installation rather than the keyboard shortcut.
Snipping Tool Has No Audio
Check the audio settings before starting a recording. If you need both system audio and your microphone, make sure both sources are enabled.
For more advanced audio routing or independent volume control, you'll need a recorder with more audio controls.
Snipping Tool Recording Won't Save
Check your available storage and the configured save location. If you manually save recordings, make sure the file has finished saving before closing the app.
For anything important, open the saved file before assuming the recording is safe.
Share this post if you find it helpful!
Snipping Tool vs. a Dedicated Screen Recorder
Snipping Tool makes sense when convenience is the priority.
If you're already on Windows and need to quickly capture a screenshot or record a short software demonstration, installing another program can feel unnecessary.
A dedicated screen recorder becomes more useful when your requirements grow.
|
Need |
Snipping Tool |
EaseUS RecExperts |
|
Quick screenshots |
Excellent |
Yes |
|
Short screen recordings |
Good |
Yes |
|
System audio |
Yes |
Yes |
|
Microphone |
Yes |
Yes |
|
Webcam |
No |
Yes |
|
Advanced audio control |
Limited |
Yes |
|
Long recordings |
Not ideal |
Better suited |
|
Advanced editing |
Requires Clipchamp |
Yes |
|
Recording controls |
Basic |
More options |
|
Gaming |
Limited |
Better suited |
The choice really depends on what you're recording.
Use Snipping Tool if you want something quick, free, and simple.
Consider a dedicated screen recorder if you need screen + webcam recording, longer sessions, more audio control, higher recording flexibility, or more editing options.
Final Verdict: Is Snipping Tool Good Enough?
For everyday screenshots, absolutely.
Snipping Tool is one of those Windows utilities that does its basic job very well. The shortcut is fast, screenshot modes are useful, and the built-in annotation tools cover most everyday needs.
For screen recording, the answer is a little more complicated.
It can record a selected area, capture system audio and microphone input, and handle basic trimming without requiring a separate recorder. That's enough for short tutorials, bug reports, software demonstrations, and other simple tasks.
But once you need webcam recording, detailed audio control, longer recording sessions, higher frame rates, or more advanced editing, its limitations become much more noticeable.
So my recommendation is simple:
Use Snipping Tool when you want to quickly capture something. Use a dedicated screen recorder when recording itself becomes the main task.
That's where Snipping Tool stops being a complete solution and starts being better viewed as a convenient Windows capture utility.
FAQs
1. Is Snipping Tool free?
Yes. Snipping Tool is a Windows app and is available as a built-in capture utility on supported Windows systems.
2. Can Snipping Tool record your screen?
Yes. Snipping Tool can record a selected area of your screen on supported Windows 11 systems. You can start recording with Windows + Shift + R.
3. Can Snipping Tool record audio?
Yes. It can record system/app audio and microphone input, including both together.
4. Can Snipping Tool record your webcam?
No. Snipping Tool doesn't provide built-in screen-and-webcam recording.
5. Can Snipping Tool take a scrolling screenshot?
No. It can capture rectangular, freeform, window, and full-screen screenshots, but it doesn't provide a built-in scrolling screenshot mode.
6. Why is my Snipping Tool recording missing?
Check your Windows version/build and make sure Snipping Tool is updated. Screen recording is a Windows 11 feature, so the Record option isn't available on every Windows configuration.
7. What is the shortcut for Snipping Tool?
Use Windows + Shift + S for screenshots and Windows + Shift + R for screen recording.
8. Where are Snipping Tool recordings saved?
The save location can depend on your Snipping Tool settings. Windows can automatically save screen recordings to the Screen Recordings folder under Videos when automatic saving is enabled.
9. How long can Snipping Tool record video?
Snipping Tool doesn't specify a fixed maximum recording time. In practice, it is better suited to short screen recordings than very long sessions. Some users have reported recordings stopping unexpectedly during longer captures, which can result in lost footage.
If you're recording an important meeting, lecture, gameplay session, or long tutorial, consider using a dedicated screen recorder designed for longer recordings and make sure your recordings are saved properly.