-
![]()
Daisy
Daisy is the Senior editor of the writing team for EaseUS. She has been working in EaseUS for over ten years, starting from a technical writer to a team leader of the content group. As a professional author for over 10 years, she writes a lot to help people overcome their tech troubles.…Read full bio -
Jane is an experienced editor for EaseUS focused on tech blog writing. Familiar with all kinds of video editing and screen recording software on the market, she specializes in composing posts about recording and editing videos. All the topics she chooses …Read full bio
-
![]()
Alin
Alin is an experienced technical blog writing editor. She knows the information about screen recording software on the market, and is also familiar with data cloning and data backup software. She is expert in writing posts about these products, aiming at providing users with effective solutions.…Read full bio -
Jean is recognized as one of the most professional writers in EaseUS. She has kept improving her writing skills over the past 10 years and helped millions of her readers solve their tech problems on PC, Mac, and iOS devices.…Read full bio
-
![]()
Jerry
Jerry is a fan of science and technology, aiming to make readers' tech life easy and enjoyable. He loves exploring new technologies and writing technical how-to tips. All the topics he chooses aim to offer users more instructive information.…Read full bio -
![]()
Rel
Rel has always maintained a strong curiosity about the computer field and is committed to the research of the most efficient and practical computer problem solutions.…Read full bio -
![]()
Gemma
Gemma is member of EaseUS team and has been committed to creating valuable content in fields about file recovery, partition management, and data backup etc. for many years. She loves to help users solve various types of computer related issues.…Read full bio -
![]()
Shelly
"I hope my articles can help solve your technical problems. If you are interested in other articles, you can check the articles at the bottom of this page. Similarly, you can also check my Twitter to get additional help."…Read full bio
Page Table of Contents
Alin
Updated on Jun 09, 2026
0 Views |
0 min read
It is not easy to record streaming audio on Mac because of Apple's internal restrictions. Fret not; this article covers 6 streaming audio recorders for MacBook Air, MacBook Pro, or other Mac devices. Whether you prefer a built-in or more advanced tool, you can find a solution here.
Record Streaming Audio on Mac Via Best Streaming Audio Recorder
If you're looking for a simple yet powerful streaming audio recorder for Mac, EaseUS RecExperts is an excellent choice. Unlike the built-in recording tools or open-source software on macOS, this program offers an easier way to record internal audio on Mac (system sound, app audio, or any voice playing from your computer) and capture microphone input (headset, external mic, etc.) with just a few clicks.
Download EaseUS Screen Recorder
Download EaseUS Screen Recorder
Trustpilot Rating 4.7
Whether you want to record Netflix audio, Spotify music, live streams, or any other sound source, EaseUS streaming video recorder can capture it in lossless quality and export it in multiple formats such as MP3, OGG, AAC, WAV, and FLAC.
🚩Steps on recording streaming audio on Mac with EaseUS RecExperts:
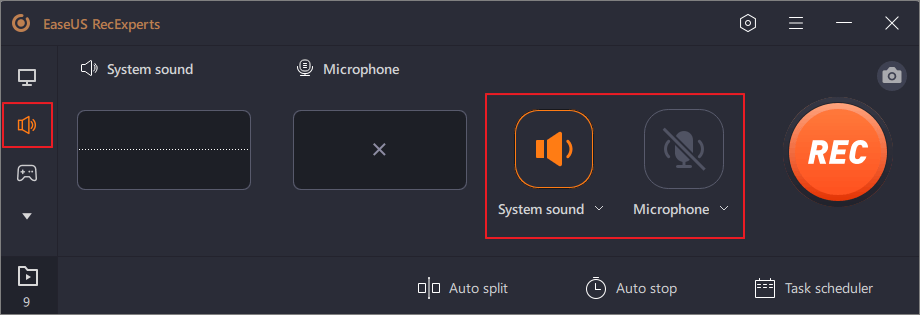
Step 1. Launch EaseUS RecExperts and choose "Audio" (looks like a speaker) from the left side of the interface. Select the sound source by clicking on the speaker sign (the system sound) or the mic sign (the microphone). Or, you can record them both at the same time.
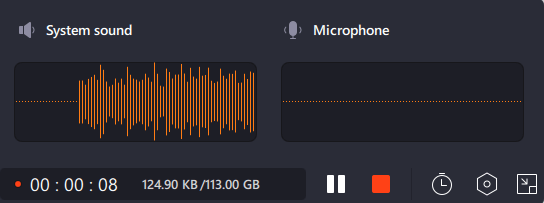
Step 2. Hit "REC" button to start recording audio. To finish it, you just click on the red square icon to stop the recording.
Step 3. After that, the recording list window will pop up automatically. You can listen to or edit the recording with built-in tools.

Download EaseUS Screen Recorder
Download EaseUS Screen Recorder
Trustpilot Rating 4.7
Share this guide on recording streaming audio on Mac with others.

How to Record Streaming Audio with Audacity on Mac
Audacity is a free, open-source audio recorder and editor available on macOS. It's a great option for users who want full control over their recording and editing process.
Generally speaking, you will need to configure a virtual audio driver like BlackHole or Soundflower with Audacity to capture the internal audio on Mac, or you can record the microphone sound only.
However, during the test (MacBook Air with Apple M1 Chip, and Sequoia 15.1), the editor found an easier way, which requires no additional plugin - create an Aggregate Device in Audio MIDI Setup and use it to capture the internal audio on Mac with Audacity directly.
🚩Check the step-by-step guide on Audacity captures streaming audio on Mac:
Step 1. Download and install Audacity on your Mac device.
Step 2. On your Mac, click Go > Applications > Utilities > Audio MIDI Setup. Or open Audio MIDI Setup from Launchpad directly.
Step 3. Click the + button at the bottom left, select Aggregate Device, check both Microphone and Speakers, and check Drift Correction next to each option.

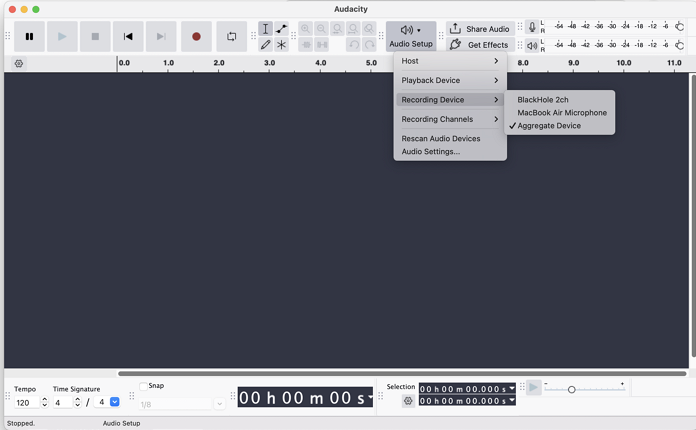
Step 4. On Audacity, click on Audio Setup: choose Aggregate Device under both Playback Device and Recording Device.
Step 5. Play the streaming audio and click the round red icon to capture it.
Step 4. To stop recording, click on the Stop button. Once done, you can preview, edit, add effects, or share your recording.
- Notice:
- If this way doesn't work, you can follow the official guide from Audacity to have a try. Or just use EaseUS RecExperts to record streamed audio on Mac directly.
Download EaseUS Screen Recorder
Download EaseUS Screen Recorder
Trustpilot Rating 4.7
Share this guide on recording streaming audio on Mac with others.
Capture Streaming Audio Mac with QuickTime Player
QuickTime Player is the pre-installed audio recording and playing software on Mac. You can use it to record streaming music in high-quality. However, it only supports capturing external sound, not internal sound. To record internal audio on Mac, you can install Soundflower and configure your audio settings.
You may also like: QuickTime Screen Recording No Audio on Mac
🚩Here are the steps on how to capture streaming audio on macOS:
Step 1. Press Command + Space hotkeys to launch QuickTime Player.
Step 2. Click the File option and choose New Audio Recording.
Step 3. Select the audio source and hit the REC button to capture.

How to Record Audio Stream on Mac with OBS
Even though it is an open-source screen recorder, OBS Studio can also be a free live-stream voice recorder that records and streams audio to other platforms like Facebook, Instagram, and Twitch.
Actually, once you have upgraded your macOS version to Ventura 13 or later and OBS version to 30 or above, you can use OBS Studio to record system audio on your macOS devices directly, without needing to configure any virtual audio driver, and you can record YouTube audio.
🚩Guide on how to use this OBS open-source audio stream recorder to capture streaming audio Mac:
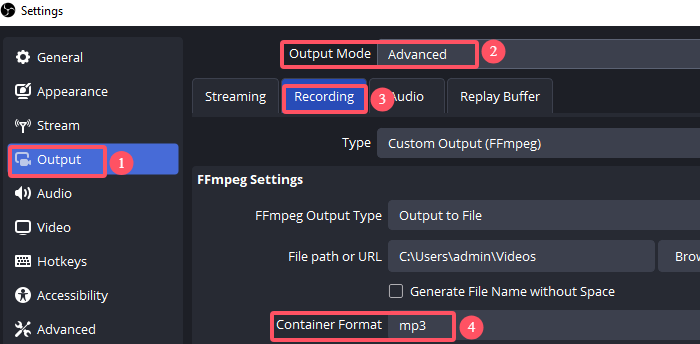
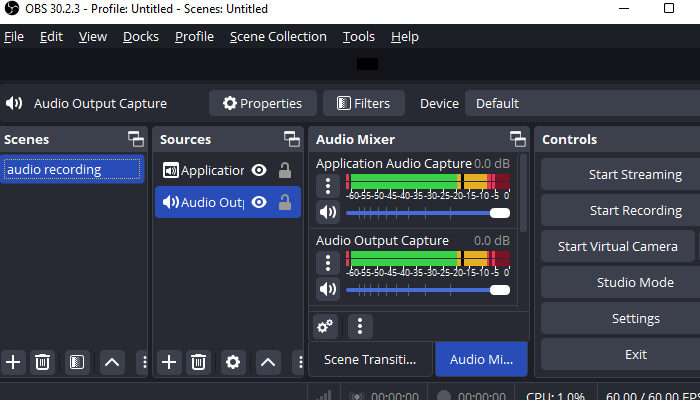
Step 1. Install OBS Studio on your Mac. To record audio only, you need to configure some settings. Go to Settings > Output > Output mode > Advanced. Click on Recording, and in the Type tab, select Custom output (FFmpeg).
Step 2. Then, choose MP3 or the format you want in the Container Format. Click on the OK and Apply button to save your settings.
Step 3. Click on the + icon in the Scene. Press + to choose the audio recording source in the Source tab.
Step 4. Adjust the Audio Mixer if you need it. Then, press the Start Recording button to capture audio now.
Share this guide on recording streaming audio on Mac with others.
Record Live Stream Audio with Apowersoft
Apowersoft Audio Recorder for Mac is also a powerful streaming music recorder that allows you to record all sorts of audio clips, such as streaming audio, radio, calls, and music. It will automatically generate an audio file and store it on your hard drive.
In addition, this streaming audio capture software provides audio editing functions such as cutting, copying, pasting, merging, etc. It also supports a built-in audio converter and batch conversion of multiple audio output formats, such as MP3, WMA, FLAC, OGG, etc.
Steps on how to save streaming audio with Apowersoft Audio Recorder for Mac:
Step 1. Install and launch Apowersoft Audio Recorder for Mac on your MacOS.

Step 2. Click on Settings to configure the recording setting or keyboard shortcuts. Then, click on OK button.
Step 3. Choose the Audio Source and click on the Recording icon to capture audio on Mac.
Step 4. Once down, you can preview and edit the audio file with its built-in features.
How to Record Streaming Music with Online Audio Recorder
A free online audio recorder like Apowersoft can help you capture streaming music from the internet or desktop on your Mac devices.
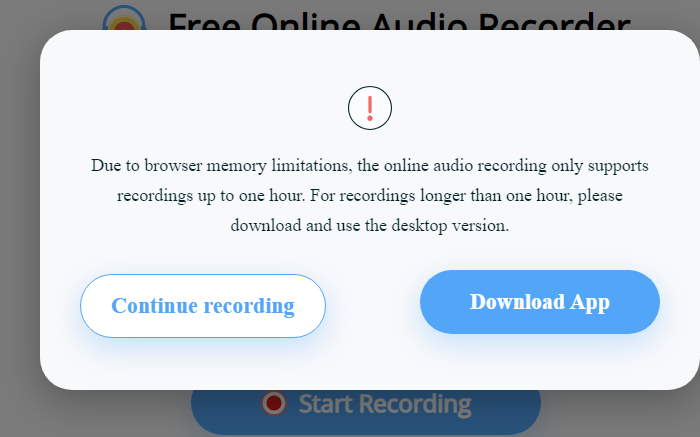
This easy-to-use audio streaming recorder can help you rip streaming audio in MP3 format from different platforms. However, browser limits restrict audio recording to one hour max. For longer recordings, you can download its desktop version.
Step-by-step guide on how to rip streaming audio on Mac with online audio recorder:
Step 1. Visit the official website of Apowersoft Free Online Audio Recorder.
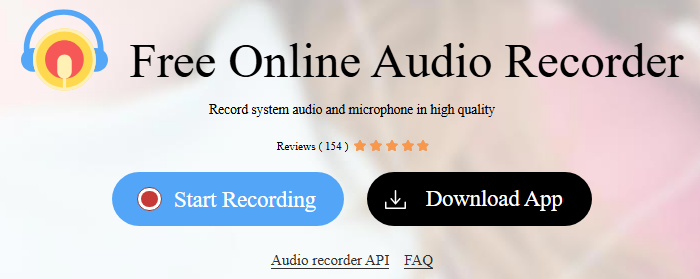
Step 2. Check the System Sound option to record audio hassle-free. If needed, you can also tick the Microphone option.
Step 3. Click the Start Recording button and click the Continue Recording button on the popup page to choose the audio source to begin recording.
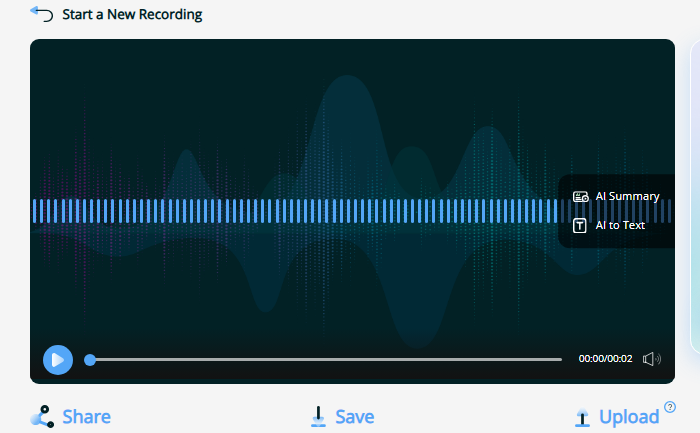
Step 4. Click the Stop icon to finish the task. Then, you can Share or Save the streaming audio file.
Record Streaming Audio on Mac Legally
When using streaming services, please obtain full authorization and permission to capture audio.
- Please note that all content on streaming services is copyrighted. Any recordings made on these services are for fair use purposes, such as personal study, research, or enjoyment.
- Users should ensure that audio recordings are not used for any commercial purpose, including but not limited to advertising, sales, or unauthorized distribution.
- Unauthorized commercial use may result in legal liability. Users must always comply with relevant laws, terms of service, and the privacy of others.
Share this guide on recording streaming audio on Mac with others.
Wrap Up
To record streaming audio on a Mac, you can use professional desktop applications such as EaseUS RecExperts, Audacity, OBS, or Apowersoft to capture it. Apowersoft online recording tool is also an option.
Among them, the most recommended is EaseUS RecExperts, which users deeply love because of its user-friendly interface, ease of use, and powerful editing functions. Whether a novice or a professional, you can use it to capture high-definition and noise-free streaming audio.
Download EaseUS Screen Recorder
Download EaseUS Screen Recorder
Trustpilot Rating 4.7
Streaming Audio Recorder Mac FAQs
1. How to record audio streaming on Mac?
You can use a live streaming audio recorder like EaseUS RecExperts to capture audio streaming on Mac. Its Record audio mode allows you recording audio from streaming platforms or other apps.
2. How to record audio on Mac from internet?
By using a desktop app like EaseUS RecExperts or Audacity, you can record audio from internet on Mac. Also, an online tool like Apowersoft can help you record sound from a browser.
3. How to record YouTube live stream on Mac?
The best option for recording a live YouTube stream on a Mac is to use the EaseUSS RecExperts screen recorder. This live streaming recorder can help you capture high-quality videos and audio from YouTube without a watermark and time limit.
✅Article update log (2025, October)
1. Updated the How to Record Streaming Audio with Audacity on Mac section based on hands-on testing to ensure accurate and practical recording steps.
2. Refined article details: refreshed visuals, streamlined wording, and added content more relevant to the current topic.
3. Performed regular on-page optimizations, including internal link updates, LSI keyword enhancements, and EEAT improvements.