-
![]()
Daisy
Daisy is the Senior editor of the writing team for EaseUS. She has been working in EaseUS for over ten years, starting from a technical writer to a team leader of the content group. As a professional author for over 10 years, she writes a lot to help people overcome their tech troubles.…Read full bio -
Jane is an experienced editor for EaseUS focused on tech blog writing. Familiar with all kinds of video editing and screen recording software on the market, she specializes in composing posts about recording and editing videos. All the topics she chooses …Read full bio
-
![]()
Alin
Alin is an experienced technical blog writing editor. She knows the information about screen recording software on the market, and is also familiar with data cloning and data backup software. She is expert in writing posts about these products, aiming at providing users with effective solutions.…Read full bio -
Jean is recognized as one of the most professional writers in EaseUS. She has kept improving her writing skills over the past 10 years and helped millions of her readers solve their tech problems on PC, Mac, and iOS devices.…Read full bio
-
![]()
Jerry
Jerry is a fan of science and technology, aiming to make readers' tech life easy and enjoyable. He loves exploring new technologies and writing technical how-to tips. All the topics he chooses aim to offer users more instructive information.…Read full bio -
![]()
Rel
Rel has always maintained a strong curiosity about the computer field and is committed to the research of the most efficient and practical computer problem solutions.…Read full bio -
![]()
Gemma
Gemma is member of EaseUS team and has been committed to creating valuable content in fields about file recovery, partition management, and data backup etc. for many years. She loves to help users solve various types of computer related issues.…Read full bio -
![]()
Shelly
"I hope my articles can help solve your technical problems. If you are interested in other articles, you can check the articles at the bottom of this page. Similarly, you can also check my Twitter to get additional help."…Read full bio
Page Table of Contents
Alin
Updated on Jan 21, 2026
0 Views |
0 min read
Key Takeaways
- If the area has been determined before recording, use EaseUS Mac Screen Reorder to record part of the screen with system sound to avoid post-cropping.
- After recording, if you only need to trim the time, use QuickTime Player.
- When you need to resize the screen, try the Photos app first, which is simple and fast.
- For complex cropping or professional editing, choose iMovie or VLC Media Player.
Whether you're creating tutorials, presentations, or personal videos, cropping your screen recordings can significantly retain the essentials. Can you or how to crop videos on QuickTime Player to focus on a specific area? This article explores how to crop screen recordings on Mac accurately, covering, Photos, iMovie, VLC, and specialized recording software.
Can You Crop a Video in QuickTime?
QuickTime Player is a versatile tool for screen recording on Mac, but many Mac users ask, can you crop a QuickTime video? The straightforward answer is No. QuickTime Player does not support cropping the video frame or changing the visible area of the screen recording. QuickTime Player just allows you to trim a video, cutting the start or end time.
To trim a video with QuickTime, you can open the video and select Edit > Trim. Then, adjust the yellow handles to shorten the video length. However, if you want to crop the video aspect ratio or remove sections from the sides, QuickTime alone cannot do this.
Share this post on cropping screen recording on Mac with more people.

How to Crop QuickTime Video via Photos App
While QuickTime lacks cropping tools, Mac's built-in Photos app offers a free and easy way to crop your screen recordings or any video. Photos app is a convenient way to crop QuickTime screen recordings without installing additional software. It also supports freeform cropping of video frames, not just trimming. While the Photos app is convenient for quick edits, it has some limitations like batch processing.
Steps to crop video in Photos app:
Step 1. Locate and open the Photos app on your Mac.
Step 2. Import or drag your QuickTime screen recording or other video into the Photos app.
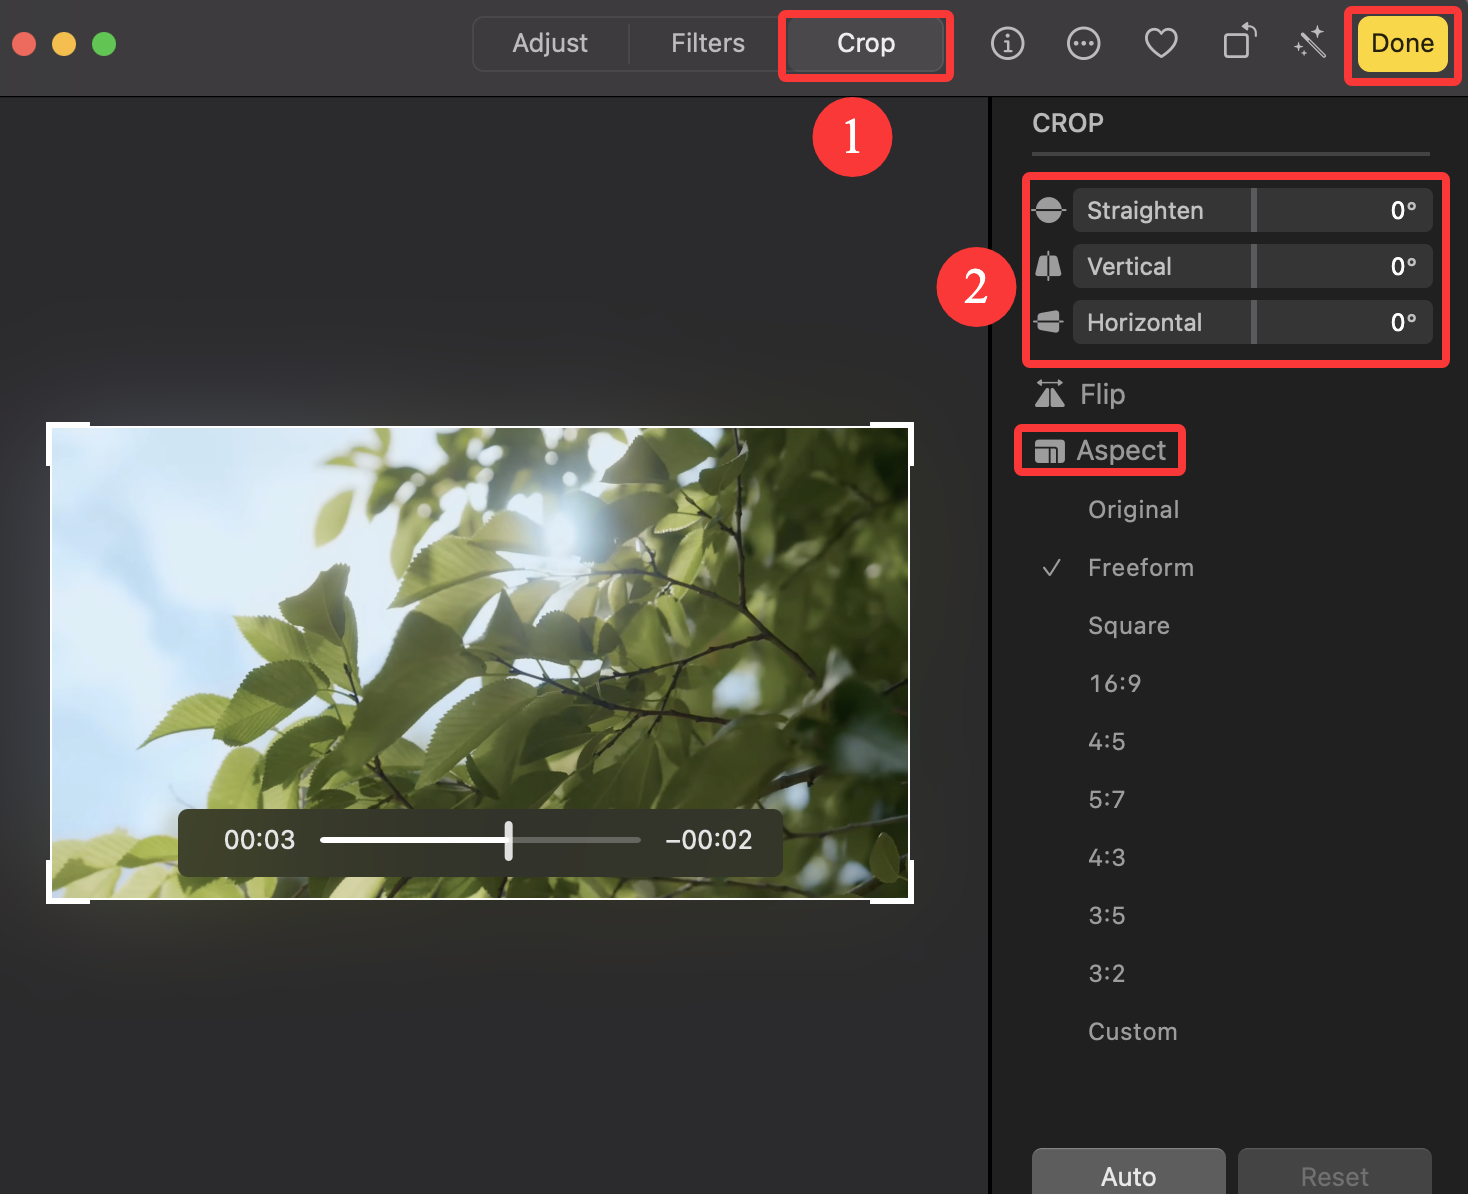
Step 3. Double-click it to open and click the Edit button in the upper right corner.

Step 4. Click the Crop tool and drag the rectangle frame to select the area you want to keep. You can also adjust the aspect ratio as needed.
Step 5. Click Done to save the cropped video.
You may also like: QuickTime Screen Recording Not Working
How to Crop QuickTime Screen Recording with iMovie
For users seeking more control, iMovie provides a native Mac video editor with cropping capabilities. iMovie allows you to crop your screen recording while maintaining standard aspect ratios like 16:9. iMovie also offers additional editing features like trimming, adding effects, and adjusting the video's aspect ratio, making it a versatile tool for video editing. Compared to the Photos app, it offers more advanced cropping features.
Note: iMovie enforces aspect ratio constraints (usually 16:9), limiting freeform cropping. However, it's ideal for standard video formats and basic editing needs.
How to crop a video in iMovie on Mac:
Step 1. Open iMovie and create a new project.
Step 2. Import your screen recording into the media library and drag it onto the timeline.
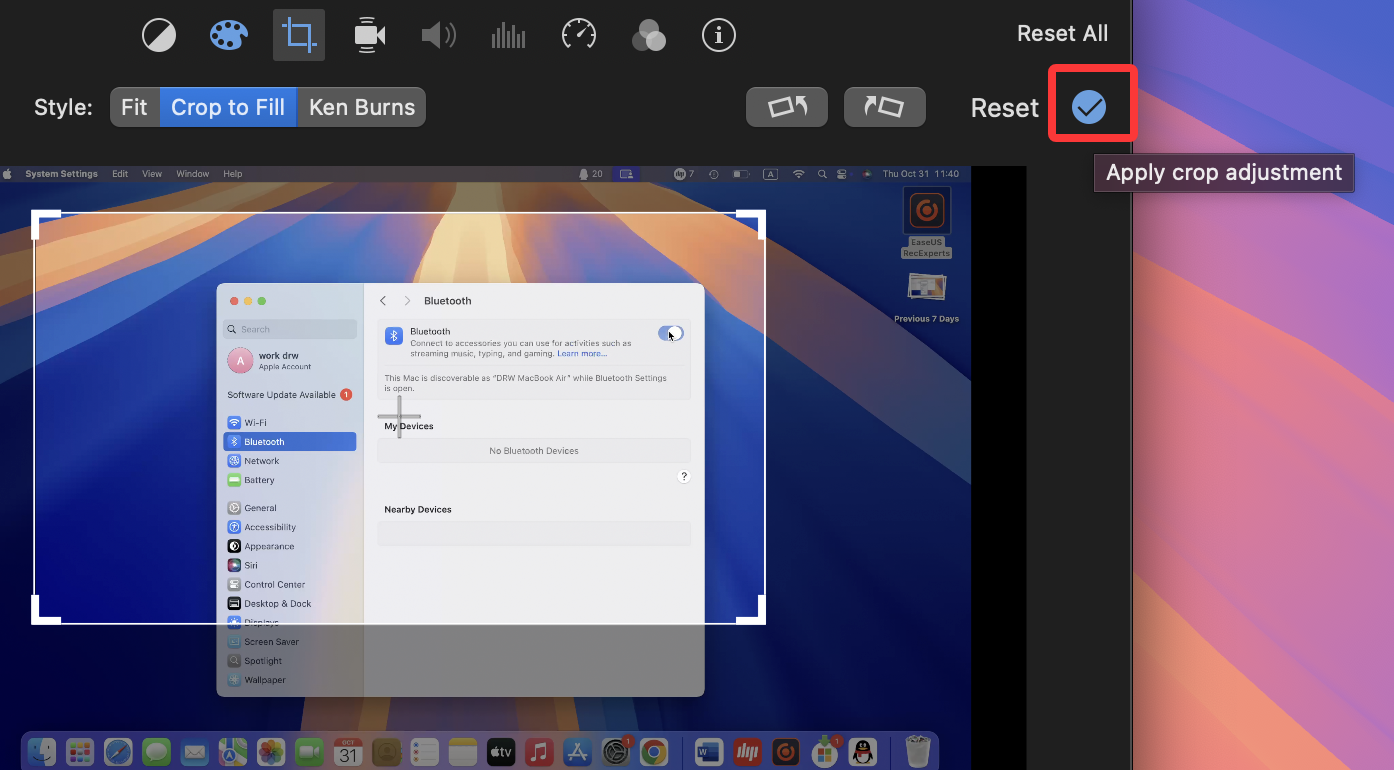
Step 3. Select the Crop button above the preview window.
Step 4. Choose Crop to Fill and adjust the frame to isolate the area you want.
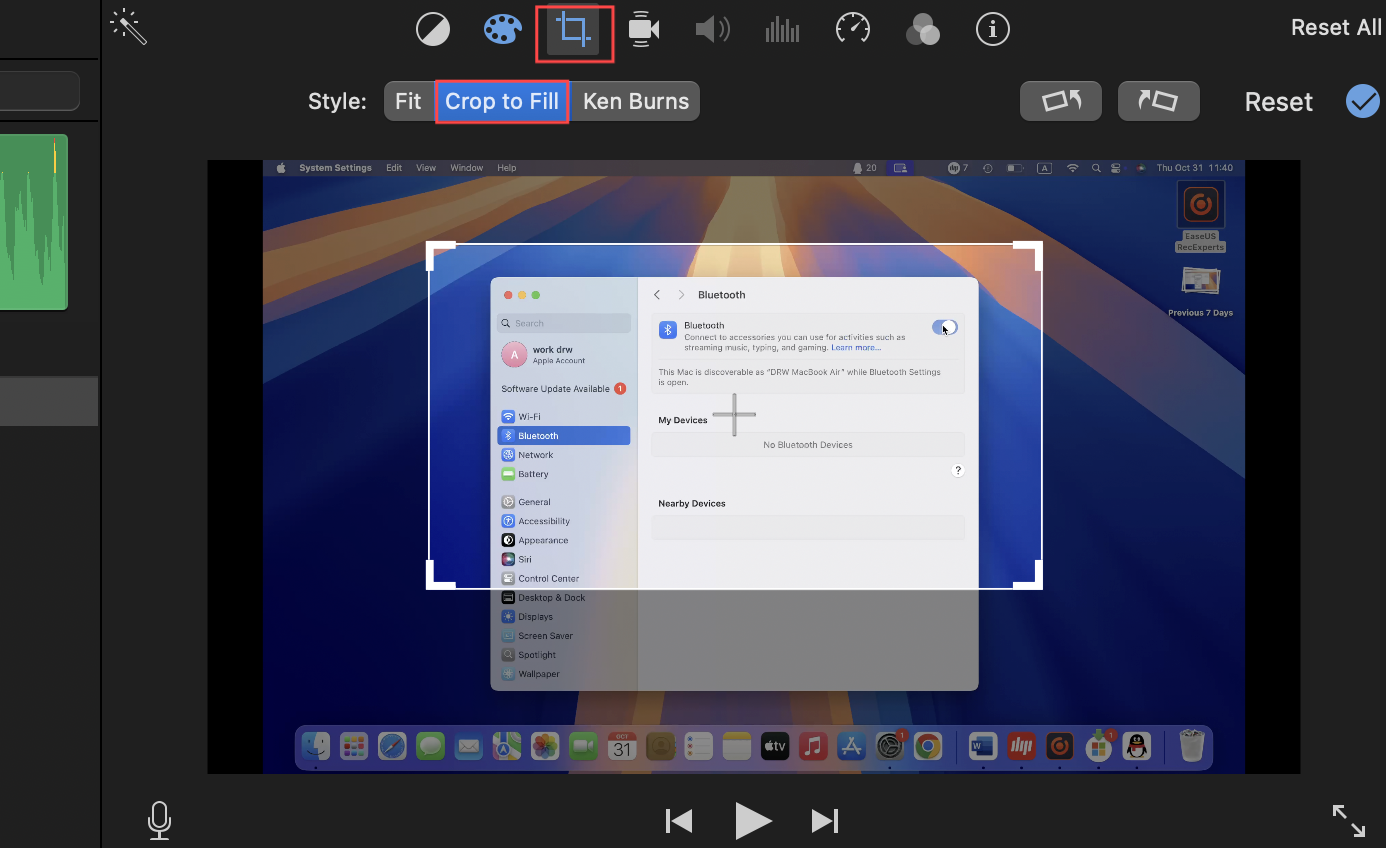
Step 5. Click Apply crop adjustment to crop the video.
Share this post on cropping screen recording on Mac with more people.
How to Crop a QuickTime Video with VLC
VLC Media Player is a free, cross-platform media player that also offers basic video editing capabilities, including cropping screen recordings, but the process is more technical. This method requires trial and error to get exact crop values and is less user-friendly than Photos or iMovie. It's suitable for users comfortable with technical settings.
Steps on how to crop a video in VLC media player:
Step 1. Open VLC and open the screen recording in it.
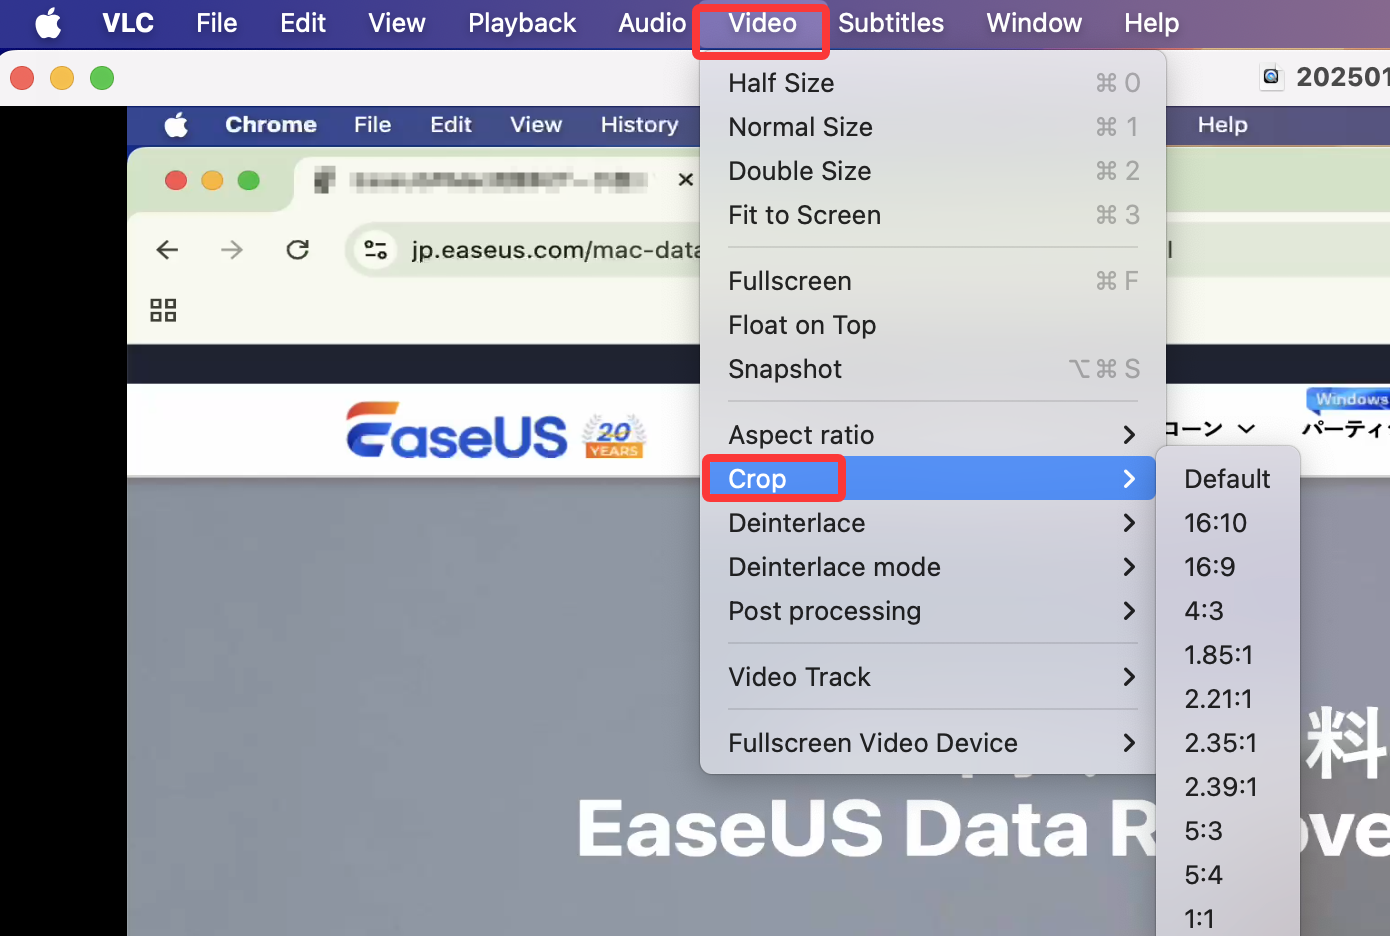
Step 2. Go to Video > Crop. Choose a suitable aspect ratio as desired.
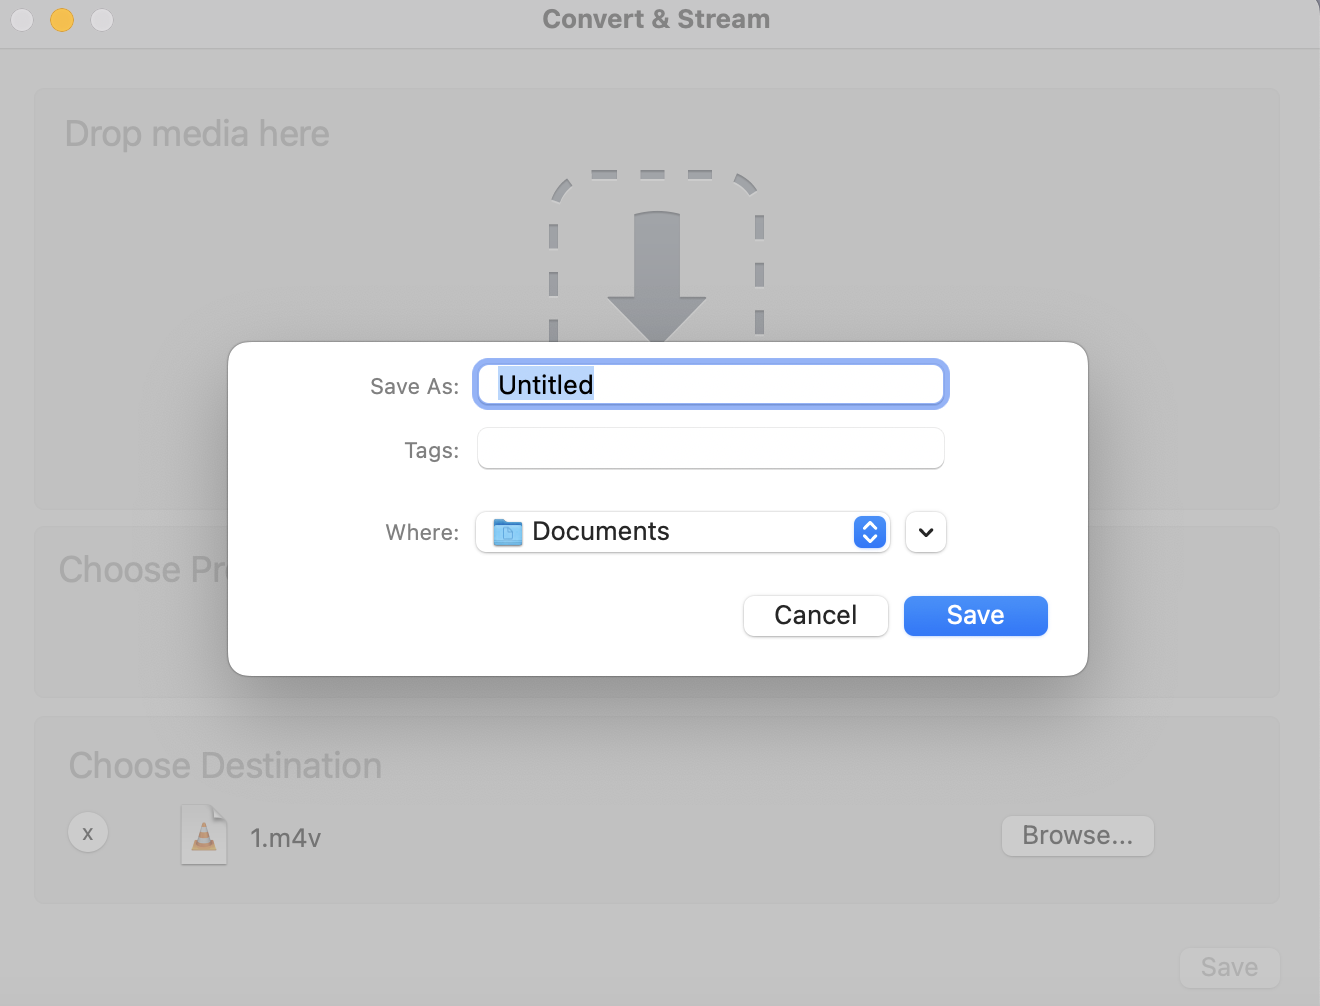
Step 3. To save the cropped video, go to File> Convert/Stream. Then, rename it and choose the destination folder.
Record Selected Portion with EaseUS Mac Screen Recorder
The best way to avoid cropping is to record only the portion of the screen you want. EaseUS Mac Screen Recorder is a third-party application that allows you to record only a specific portion of your screen. After recording, you are able to edit your recordings with its built-in basic and advanced editing functions. It can also record screen on Mac with internal audio without installing extra plugins.
Download EaseUS Screen Recorder
Download EaseUS Screen Recorder
Trustpilot Rating 4.7
Benefits of recording selected area:
- Supports recording system sound and microphone simultaneously
- Avoids quality loss from cropping and resizing
- Save time and avoid the need for cropping QuickTime screen recordings
How to record and crop videos on Mac with EaseUS Mac Screen Recorder:
Step 1. Launch EaseUS Mac Screen Recorder. There are two modes for screen recording. Choose "Full Screen", this tool will capture the whole screen; choose "Region", you will need to select the recording area manually.

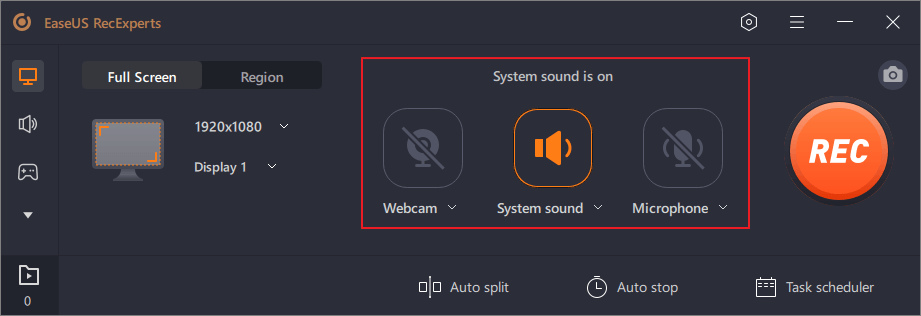
Step 2. After that, you can choose to record the webcam, system sound, or microphone as you like. Of course, you can turn them off if you only need to record the silent screen.
Step 3. Then, you can click the red "REC" button to start recording. Now you will see a menu bar on your screen. If you want to pause the recording, click on the white "Pause" button; to end the recording, click on the red "Stop" button.
![]()
Step 4. After recording, you will be led to the recording list interface. Here you can view or edit your recordings easily.

Share this post on cropping screen recording on Mac with more people.
Conclusion
This post shows you how to crop a screen recording on Mac. QuickTime Player only supports trimming, not cropping. To crop video frames, use the Mac Photos app for simple freeform cropping or iMovie for aspect-ratio-based cropping.
For advanced users, VLC offers cropping but with a technical setup. Alternatively, record only the desired screen area upfront using tools like EaseUS Mac Screen Recorder to avoid post-cropping. By understanding these options, you can efficiently crop screen recordings on Mac and create polished videos tailored to your needs.
Download EaseUS Screen Recorder
Download EaseUS Screen Recorder
Trustpilot Rating 4.7
How to Crop a Screen Recording on Mac FAQs
1. Where is the crop tool on a Mac?
The built-in Photos app on Mac includes a crop tool for videos and images. Open your video in Photos, click Edit, then select the Crop option.
2. Why am I unable to trim video in QuickTime Player?
If you're unable to trim a video in QuickTime Player, ensure that you have the latest version installed. Sometimes, updating the software can resolve issues. Additionally, ensure the video file is not locked and is fully downloaded.
3. Can QuickTimecrop video aspect ratio?
No, QuickTime Player does not offer cropping capabilities for video aspect ratios. It only allows you to trim the duration of the video. For more advanced cropping, consider using iMovie or other video editing tool.
4. How to crop a screenshot on Mac?
To crop a screenshot on Mac, you can use the built-in Preview app.
Step 1. Open the screenshot in Preview, and click the >> icon to choose Markup.
Step 2. Click Selection Tools in the upper-left corner and choose Rectangular Selection or Elliptical Selection as needed.
Step 3. Then, drag the mouse to select the target area and click the Crop to Selection icon in the upper-right corner to take a screenshot and save it.
EaseUS RecExperts

One-click to capture anything on screen!
No Time Limit, No watermark
Start Recording