-
![]()
Daisy
Daisy is the Senior editor of the writing team for EaseUS. She has been working in EaseUS for over ten years, starting from a technical writer to a team leader of the content group. As a professional author for over 10 years, she writes a lot to help people overcome their tech troubles.…Read full bio -
Jane is an experienced editor for EaseUS focused on tech blog writing. Familiar with all kinds of video editing and screen recording software on the market, she specializes in composing posts about recording and editing videos. All the topics she chooses …Read full bio
-
![]()
Melissa Lee
Alin is an experienced technical blog writing editor. She knows the information about screen recording software on the market, and is also familiar with data cloning and data backup software. She is expert in writing posts about these products, aiming at providing users with effective solutions.…Read full bio -
Jean is recognized as one of the most professional writers in EaseUS. She has kept improving her writing skills over the past 10 years and helped millions of her readers solve their tech problems on PC, Mac, and iOS devices.…Read full bio
-
![]()
Jerry
Jerry is a fan of science and technology, aiming to make readers' tech life easy and enjoyable. He loves exploring new technologies and writing technical how-to tips. All the topics he chooses aim to offer users more instructive information.…Read full bio -
Larissa has rich experience in writing technical articles. After joining EaseUS, she frantically learned about data recovery, disk partitioning, data backup, screen recorder, disk clone, and other related knowledge. Now she is able to master the relevant content proficiently and write effective step-by-step guides on various computer issues.…Read full bio
-
![]()
Rel
Rel has always maintained a strong curiosity about the computer field and is committed to the research of the most efficient and practical computer problem solutions.…Read full bio -
![]()
Gemma
Gemma is member of EaseUS team and has been committed to creating valuable content in fields about file recovery, partition management, and data backup etc. for many years. She loves to help users solve various types of computer related issues.…Read full bio
Page Table of Contents
Melissa Lee
Updated on Apr 22, 2024
0 Views |
0 min read
PAGE CONTENT:
Capturing what's happening on your screen is useful. You can take a snap of your game achievements and preserve moments of your video calls, notes, and many more.
The default shortcut method to screenshots on Chromebook is to press Ctrl + Show Windows Key for full-screen and Ctrl + Shift + Show Windows Key for partial screenshots. But what If your Show key is not working or you don't want to use the Windows keys? In that case, we will see how to screenshot on Chromebook without Windows key.
Feasible Ways to Screenshot on Chromebook
The default method includes using the Show Windows key to capture the full or partial screenshots. Many get confused due to the arrangement of the keys on the Chromebooks and look for alternate ways to take a snap of their screen. So, we will discuss how to screenshot on a Chromebook without a Windows key.
- 1. Use Quick Settings
- 2. Use Physical Buttons
- 3. Use Chrome Browser
- 4. Use the Stylus Pen
- 5. Use an External Keyboard
- 6. Using Google Assistant
- 7. Use an Extension
1. Use Quick Settings
Most manufacturers provide a Quick Settings menu to take a screenshot; this includes popular brands like ASUS, Dell, HP, Lenovo, etc. You can use this Screenshot button to capture your screenshot on your Chromebook with just a click.
Step 1. Click on the Chromebook's Shelf at the bottom of the screen.
Step 2. The Quick Settings window opens. Find the Screen Capture options from the window. Click on the upward arrow to access all Quick Settings if you didn't see the Screenshot options.
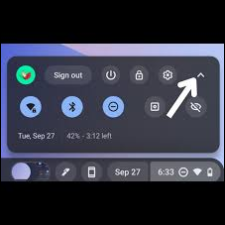
Step 3. The Screenshot toolbar appears in the window. Click on it to open the tool.

Step 4. The Screenshot key offers you three types of options to capture your screen.
- Full-screen screenshots to capture your entire screen.
- A partial screenshot feature to capture a part of your screen.
- A Winodow screenshot to take a snap of any active window.

Step 5. Now, you can choose what type of screenshot you want, and your Chromebook captures it and saves it on your computer.
2. Use Physical Buttons
With physical buttons, you can take a screenshot on Chromebook, just like how you take a screenshot on your smartphone. If you own a convertible, tablet-style, or 2-in-1 Chromebook, press the Power and Volume down buttons at once to take a screenshot.
But, with this method, you can only take a full-screen screenshot and can edit or crop it later. One thing to remember is that the Volume button is different from the Volume Key. You need to use the Volume Down button on the side like a mobile phone.
3. Use Chrome Browser
The Chrome browser has a built-in screenshot tool to take a screenshot of the web pages. The downside is you cannot use this feature to capture anything other than the browser, but it is useful when you want to save anything on your browser.
Steps to use this method:
Step 1. Open Chrome and click on the three dots at the top-right corner.
Step 2. Hover over More Tools, and click on Take Screenshot.
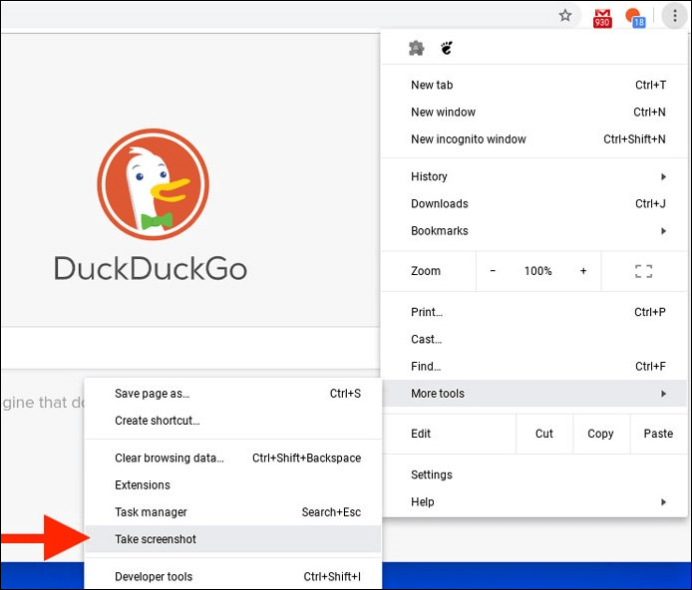
Step 3. The screen will darken for a screen as an indication and capture the screenshot in Chrome. You will receive the notification and can access the screenshot on the clipboard.
4. Use the Stylus Pen
If your Chromebook supports a stylus, you can use the Stylus pen to capture your screen without a Windows key.
On the Chromebook's taskbar, click on the pen icon to open the menu. Click on the Capture Screen option. This allows you to take a full-window screenshot or use the Stylus to select a region to take a practical screenshot.
5. Use an External Keyboard
The key arrangement on the Chromebook is a bit confusing with the new keys. And to take a screenshot on a Chromebook with the Windows Key, you need to know the Show key, which many fail to recognize. If you want to take a screenshot using an external keyboard, the following shortcuts with F5 keys will be helpful.
- Full Screenshot: Ctrl + F5
- Partial Screenshot: Ctrl + Shift + F5
6. Using Google Assistant
The Chromebooks are powered by Chrome OS, meaning we can use Google Assistant to take screenshots on the Chromebook. Just say, "Take a Screenshot", and the assistant will do the job for you. But the thing is, we have to enable Google Assistant on your device. You can enable Google Assistant on your Chromebook in two ways.
1. The first method is to enable using Chromebook settings. Navigate to Chromebook Settings menu> Search & Assistant > Google Assistant. Now, turn on the toggle next to OFF to turn the assistant on. To train the assistant with your voice, click on the dropdown beside "Hey Google" and select Always on.

Remember: The "Hey Google" feature will work only if your Chromebook is on charge.
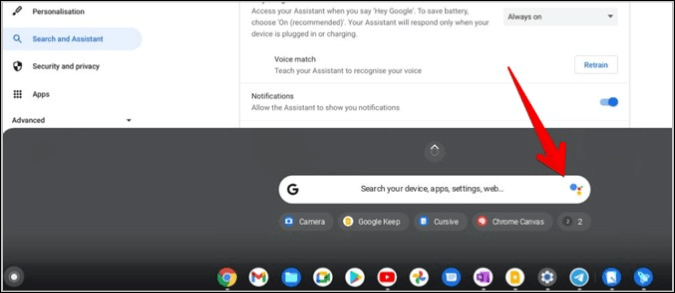
2. The second method is to click on the Google Assistant icon in the Chromebook's search bar. This will activate the Assistant, and you can type or ask the assistant to take a screenshot on your Chromebook.
7. Use an Extension
If the above methods don't meet your requirements of taking a screenshot on a Chromebook without a Windows key. The Chrome extensions might help you to do it. Here are some free easy-to-use screenshot extensions. Download them from the Chrome web store.
- LightShot
- FireShot
- Nimbus Capture
- Awesome Screenshot
- Flamory
A few of the support screenshots are outside the Chrome browser, but most are designed to take within the browser. Some extensions even let you take scrolling screenshots.
If you find it still confusing to screenshot on Chromebook, here's a video tutorial for you to better understand.
The important time nodes are listed below:
- For full-screen: 0.15
- For Partial screenshots: 0.30
- To access the screenshots: 0.46
Do remember to share this post on your social media!
Screenshot on Chromebook without Windows Key FAQs
Here are some of the most frequent FAQs asked on how to take a screenshot on a Chromebook. If you have similar queries, I hope this will help you.
1. How do you screenshot on Chromebook with keyboard?
Every OS lets you take screenshots with the keyboard. The default way to screenshot on Chromebook with a keyboard using the Show Windows Key (an Icon with a window and two parallel lines stacked beside it).
- Ctrl + Show: For full-screen snap
- Ctrl + Shift + Show: For partial screenshot
2. How do I take a screenshot in Chrome?
Google Chrome provides a built-in screenshot to capture a screenshot in Chrome. Click on the three dots in the top-right corner. Hover over More Tools and click on the Take Screenshot from the options.
3. Where is the Windows key on Chromebook?
The Show Windows key is on the top row of the Keyboard. It looks like a rectangle with two lines beside it. You can use this Show Windows key to take full-screen and partial-screen screenshots.
Conclusion
You may sometimes find the method to take screenshots on Chromebook to be a bit confusing due to the Show Windows key and keys arrangement on the Chromebook. This post tells you how to screenshot on Chromebook without Windows key. Go through the seven methods and select what suits your requirements. If you find this helpful, share it with your friends and leave a comment below.
EaseUS RecExperts

One-click to capture anything on screen!
No Time Limit, No watermark
Start Recording