-
![]()
Daisy
Daisy is the Senior editor of the writing team for EaseUS. She has been working in EaseUS for over ten years, starting from a technical writer to a team leader of the content group. As a professional author for over 10 years, she writes a lot to help people overcome their tech troubles.…Read full bio -
Jane is an experienced editor for EaseUS focused on tech blog writing. Familiar with all kinds of video editing and screen recording software on the market, she specializes in composing posts about recording and editing videos. All the topics she chooses …Read full bio
-
![]()
Melissa Lee
Melissa Lee is an experienced technical blog writing editor. She knows the information about screen recording software on the market, and is also familiar with data cloning and data backup software. She is expert in writing posts about these products, aiming at providing users with effective solutions.…Read full bio -
Jean is recognized as one of the most professional writers in EaseUS. She has kept improving her writing skills over the past 10 years and helped millions of her readers solve their tech problems on PC, Mac, and iOS devices.…Read full bio
-
![]()
Jerry
Jerry is a fan of science and technology, aiming to make readers' tech life easy and enjoyable. He loves exploring new technologies and writing technical how-to tips. All the topics he chooses aim to offer users more instructive information.…Read full bio -
![]()
Rel
Rel has always maintained a strong curiosity about the computer field and is committed to the research of the most efficient and practical computer problem solutions.…Read full bio -
![]()
Gemma
Gemma is member of EaseUS team and has been committed to creating valuable content in fields about file recovery, partition management, and data backup etc. for many years. She loves to help users solve various types of computer related issues.…Read full bio -
![]()
Shelly
"I hope my articles can help solve your technical problems. If you are interested in other articles, you can check the articles at the bottom of this page. Similarly, you can also check my Twitter to get additional help."…Read full bio
Page Table of Contents
Jane Zhou
Updated on Jan 06, 2025
0 Views |
0 min read
I use a MacBook Air (M1, macOS Ventura). I often need to record screens during study and work, such as recording online courses or meeting content, but the screen recording operation is inconvenient. I can use the shortcut key (Shift + Command + 5) to call up the screen recording tool, but the resolution and frame rate of the recorded video can't be adjusted, and the effect is sometimes unclear enough. What's worse, the system sound, only the picture, can't be recorded during recording. I checked and found I need to install additional plug-ins or set some complicated options. Has anyone used the Mac's screen recording function or other simple methods to screen record on MacBook Air with the screen and system sound together?
As shown in the case above, recording on a Macbook Air M1, M2, or M3 with the system sound is not easy. If you're also bothered by a similar issue, please learn how to screen record on a MacBook Air with sound via the following content.
PAGE CONTENT:
- Way 1. Screen Record Macbook Air with Sound via a Mac Screen Recorder🔥
- Way 2. Screen Record MacBook Air with Screenshot Toolbar
- Way 3. Screen Capture on MacBook Air with QuickTime Player
- Way 4. Screen Record MacBook Air with Audio using OBS Studio
- Way 5. Screen Record MacBook Air via the Loom Extension
- Way 6. Screen Record MacBook Air using Snagit
Before Screen Recordings on MacBook Air
"Can you screen record on a MacBook Air?" The answer is YES. If you've enabled the screen recording feature, you can screen record on MacBook Air with its built-in screen recording features or third-party screen recorders. More precisely, you have to allow control access to screen and system recordings on Mac before beginning a browser tab recording or an ordinary video recording.
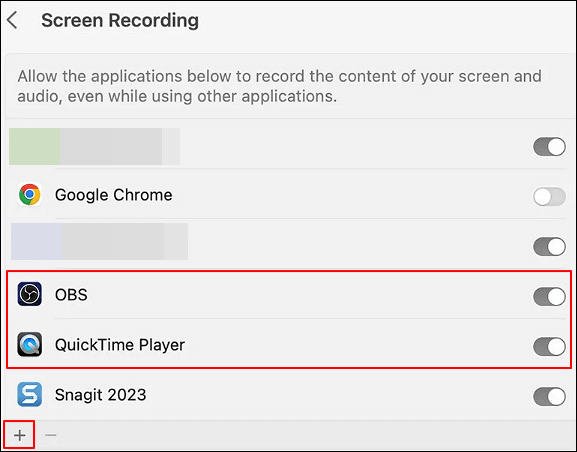
Step 1. Choose Apple menu > select System settings > scroll down to locate Privacy & Security > choose Screen Recording.
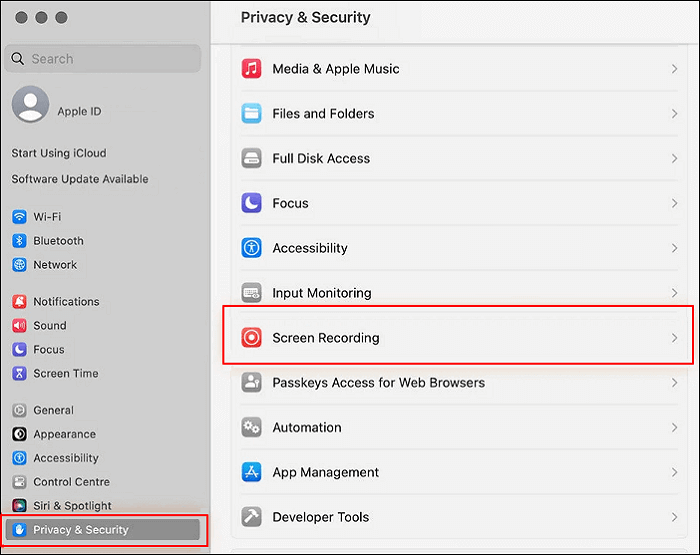
Step 2. Turn recording on or off for each listed app. You can allow the app to record your computer screen with audio or only the audio. If you cannot find your targeted app on the list, click the plus icon to add it.
Way 1. Screen Record Macbook Air with Sound via a Mac Screen Recorder🔥
👀This method suits pros and beginners who want to create high-quality recordings within simple steps.
Based on our assessment, this Mac screen recorder, EaseUS RecExperts for Mac, could be a top choice to screen record on MacBook Air M1, M2, or M3 with system sound and/or voices using a webcam and microphone. This MacBook screen recorder supports macOS 10.13 and later versions and runs perfectly on M1-based, M2-based, and M3-based Mac devices.
Key features:
- Screen record on Mac with internal audio and the microphone.
- Provide full-screen recording, selected region recording, schedule recording, and auto-stop and auto-split options.
- Enable video/audio-to-text transcription, video/audio file import, video/audio editing, audio extraction from videos, microphone noise reduction, etc.
The following steps depict how to screen record MacBook Air via EaseUS Experts for Mac.
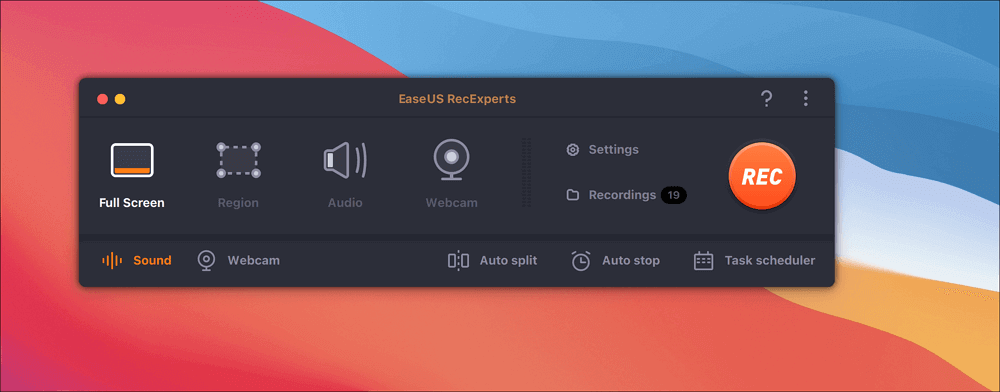
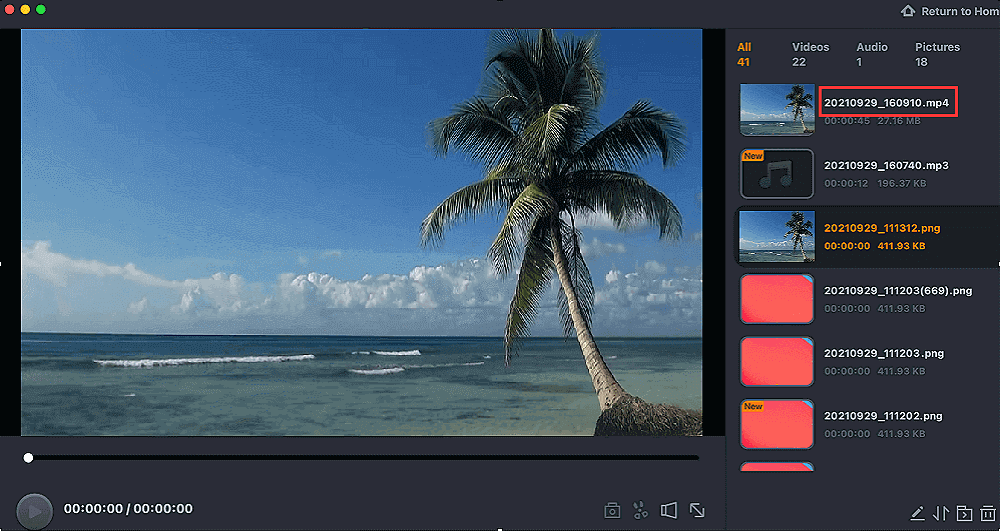
Step 1. Download and launch EaseUS RecExperts on your Mac. To capture the whole screen, click on the "Full Screen" button from the main interface. If you want to customize the recording area, choose the "Region" button.
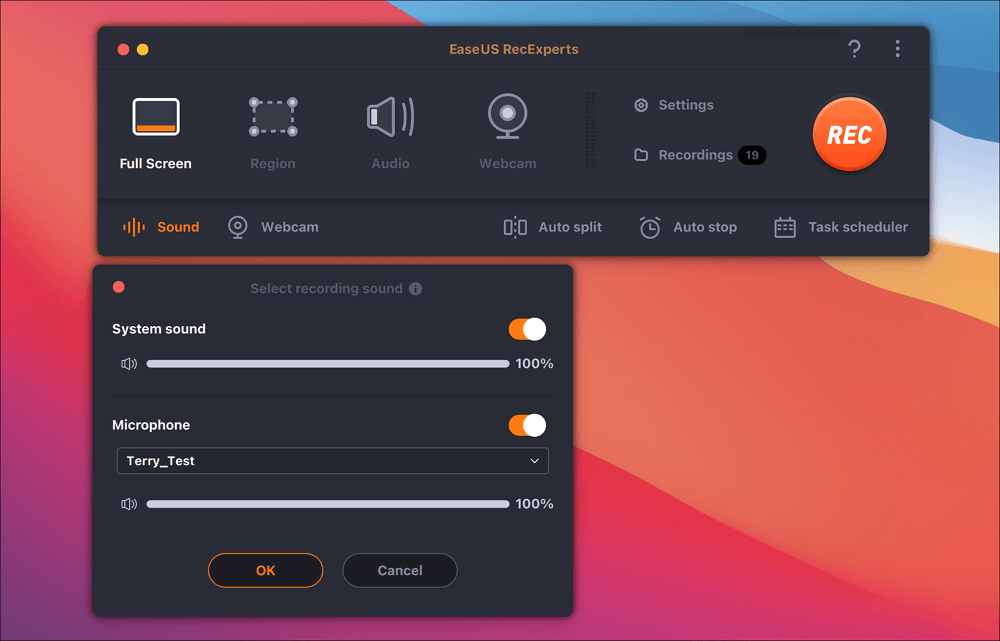
Step 2. To record the screen with audio, hit the Sound icon from the bottom left side of the toolbar. The audio resources can be your external sound or system audio. Based on your needs, enable the target option.
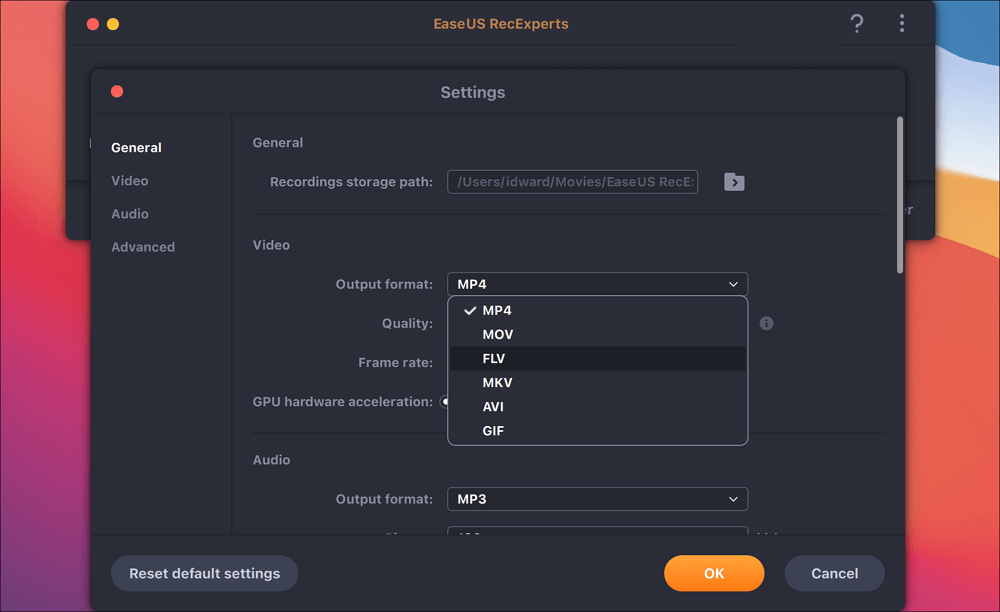
Step 3. Before capturing, you can change the output format of the recorded video by clicking "Settings" from the main interface. Then, scroll down the menu of Output format for Video. Choose the output type as you like.
Step 4. Once done, click the REC button to begin recording. It captures anything displayed on your Mac screen. When you are done, click the Stop button. Then you can watch the recorded video from "Recordings".
Please share this post to help more users!

Way 2. Screen Record MacBook Air with Screenshot Toolbar
👀Running the Screenshot Toolbar requires macOS Catalina 10.15 or newer. If your MacBook Air runs macOS 10.14 or earlier, you're supposed to update your operating system or refer to another way on this page.
As the title suggests, the Screenshot Toolbar can take screenshots and screen record on macOS. Thus, if you prefer built-in screen recording features and want to screen record MacBook Air M1, M2, or M3 with/without sound, this method is the most suitable because the Screenshot Toolbar enables users to turn on/off the sound property.
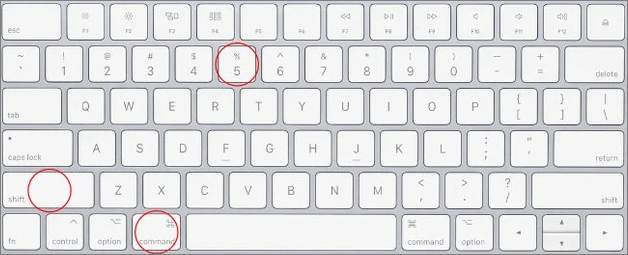
Step 1. Press Shift + Command + 5 keys together on your keyboard to launch the Screenshot Toolbar.
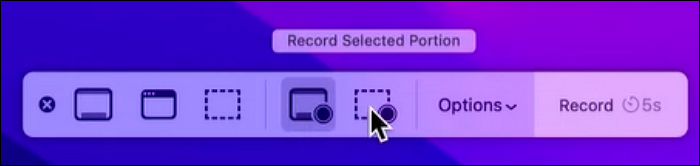
Step 2. In the pop-up window, select Record the entire screen or Record a portion of the screen.
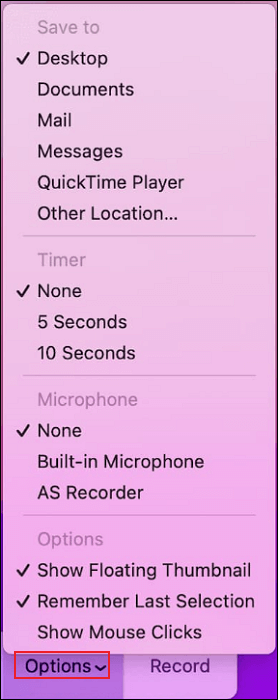
Step 3. Click Options > set a saved path and countdown timer, and select whether to enable the microphone.
Step 4. Once done, click Record to start your recording. To end this recording, simultaneously press the Command + Control + Esc shortcut.

Step 5. Your screen recordings will be automatically saved as .mov files in your designated saved path. These filenames begin with Screen Recording and include the date and time.
Way 3. Screen Capture on MacBook Air with QuickTime Player
👀QuickTime can record system audio and microphone at the same time. You can check if the built-in microphone is selected if you use QuickTime Player to screen record on a MacBook Air M1, M2, or M3 without sound. If not, please manually select the microphone to capture your voice and sound before starting your recording.
As you can see, QuickTime Player is another way to screen record MacBook Air with sound. Better than the Screenshot Toolbar, it supports almost all macOS operating systems. The steps below depict how to make a screen recording on MacBook Air via QuickTime Player.
Step 1. Download QuickTime Player on your MacBook Air > install and launch it.
Step 2. Click File > New Screen Recording to open the Screen Recording window.
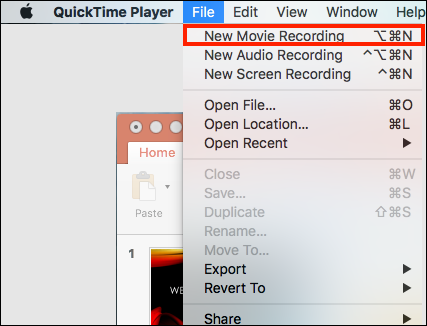
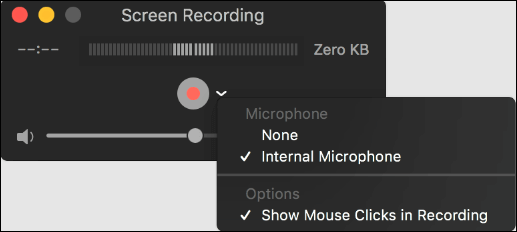
Step 3. Click the arrow beside the Record button to adjust the recording settings. Please ensure you've selected the microphone to record your voice or other audio with the screen recording.
Step 4. When ready, click the Record button to record the entire screen or a partial area. Click the Stop button or press Command + Control + Esc to finish this process.
Step 5. After recording, QuickTime Player will automatically open your video recording. Then, you can view, edit, or share it based on your needs.
Way 4. Screen Record MacBook Air with Audio using OBS Studio
👀OBS Studio aims for professionals because it provides many advanced features with a complicated UI and workflow.
Apart from the above, you can also use OBS Studio (Open Broadcaster Software) to screen record MacBook Air with audio. This open-source screen recorder is helpful for offline video recording and live streaming on Mac, Windows, and Linux operating systems. You can begin utilizing it by creating a source for your video feeds and selecting an output.
Moreover, if there are two or more monitors, you can even record multiple screens using it. Please note that OBS Studio is only compatible with MacOS 10.13 and later. If not, you need to upgrade your macOS.
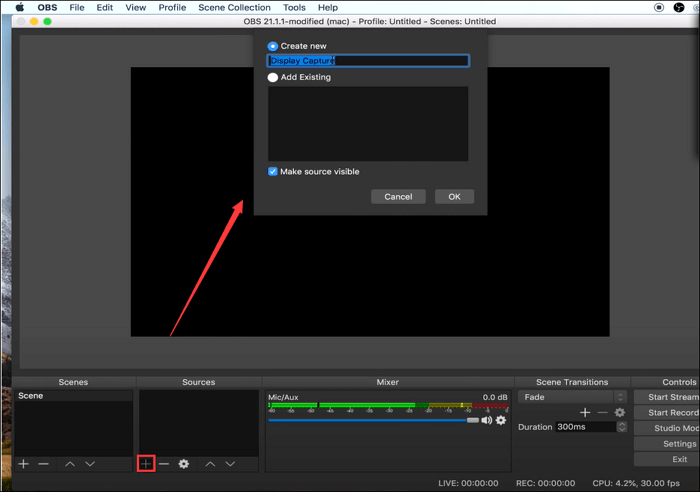
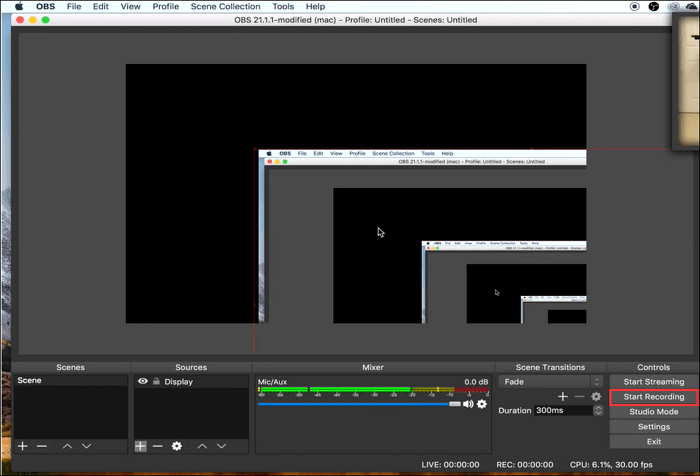
Step 1. Install and launch OBS Studio on your Mac > click + under the Sources tab > select Display Capture > set a new name > click OK.
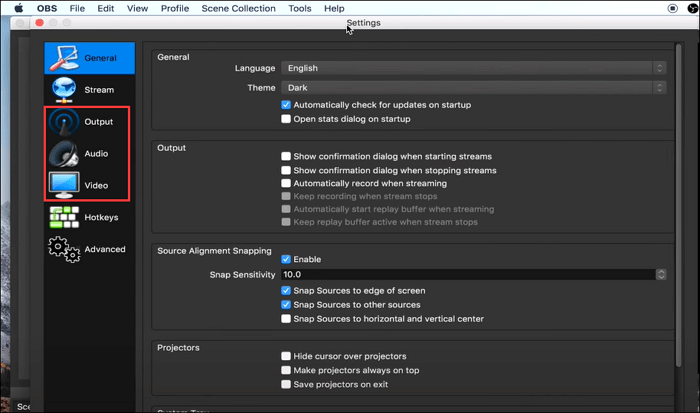
Step 2. Click Settings > adjust the Output, Audio, and Video settings for your video recording process.
Step 3. Click the plus icon > hit Display capture > click OK.
Step 4. Click Start Recording to screen record on MacBook Air with sound.
Way 5. Screen Record MacBook Air via the Loom Extension
If you're unwilling to download third-party tools, Loom is a good choice because this extension tool can help you record your screen, webcam, or both. Its free version supports recording to 720p quality, and you can easily share your recordings with your contacts. If you prefer sharp, clear HD or 4K resolution, please upgrade it. Let's show how it works!
Step 1. Go to Loom's website > download and install this free Mac screen recorder > log in or create an account > launch Loom.
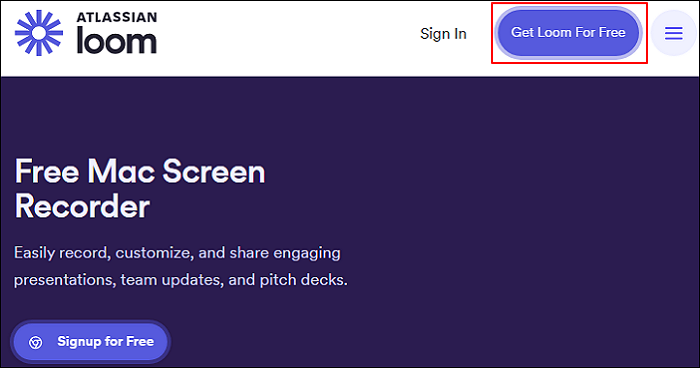
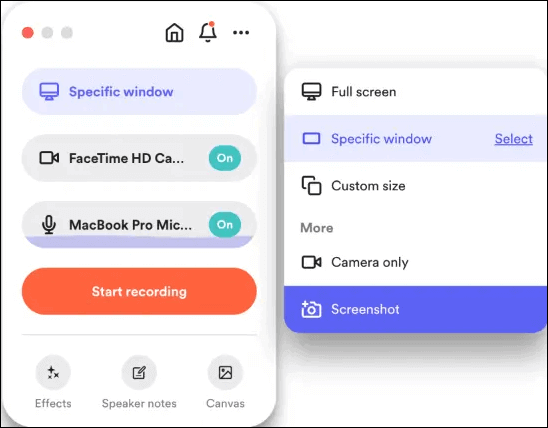
Step 2. Customize your recording preferences > click Start recording.
- Record your full screen, a partial screen, or a specific window.
- Record your system audio from your PC and apps with your internal or external camera.
- Select your desired effects or backgrounds to enhance your recording.
Step 3. Annote or edit your video > share your video with a shareable link if needed.
Please share this post to help more users!
Way 6. Screen Record MacBook Air using Snagit
TechSmith Snagit is a sophisticated screen capture and recording application that makes collecting and distributing data easier. To be more precise, Snagit allows you to record screen and camera, microphone audio, and system sounds simultaneously, as well as take screenshots to express processes and concepts effectively.
In this case, the steps below demonstrate recording a partial screen on a MacBook Air with sound via Snagit.
Step 1. Go to the official website of TechSmith > click Get Sngait to download it on your MacBook Air.
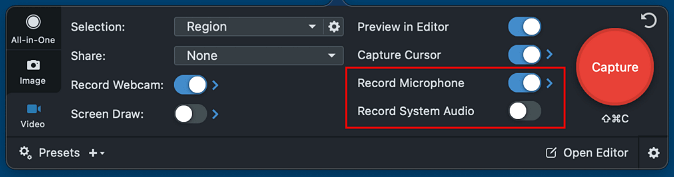
Step 2. Launch Snagit > select to record your Fullscreen or Region > click Capture > designate the area you want to record.
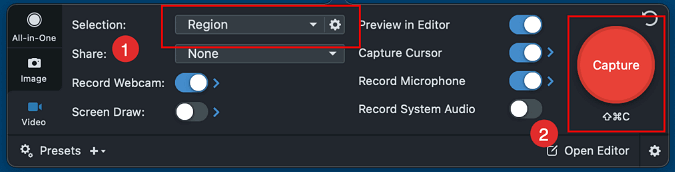
Step 3. Enable the Record Microphone option and/or the Record System Audio option if you want to screen record on Macbook Air with sound.
Step 4. Annotate and animate during recording. Please enable the Screen Draw option before using it.
- During drawing, you can select your desired tool from the Draw Toolbar and draw arrows or shapes by clicking and dragging your mouse. You can also Highlight Cursor or Click Animation to draw viewers' attention.

Step 5. Click the Record button or press Control + Shift + Space to start the recording> click the Pause button or press Control + Shift + Space to pause the recording > click the Stop button or press Control + Shift + V to end this recording.

Step 6. After recording, Snagit Editor will automatically open the video you've captured. Then, you can preview and edit the video, combine it with other videos, share it with a specific app, or save the mp4 file.
Bonus tips: How Do I Do a Screen Capture on My Mac
Besides screen recording, you can also do screen captures on your Mac, including MacBook Air M1, M2, or M3, via Screenshot or keyboard shortcuts. As stated earlier, the Screenshot tool is another good choice for screenshots. Let's show how it works!
Step 1. Press Shift + Command + 5 on your MacBook Air's keyboard to open the Screenshot tool and display tools.
Step 2. Click a tool to use to select what you want to capture. For example, you can select to Capture the entire screen, Snap window, or Capture a portion of the window.
![]()
Step 3. In the Options pop-up window, select your desired options.
Step 4. Please take screenshots using the following clicks: click Capture to screenshot your entire/partial screen or a window tab.
Please share this post to help more users!
Final Words
How to screen record on MacBook Air with or without sound? This post offers six feasible ways, including third-party tools like EaseUS RecExperts for Mac and Mac's built-in screen recording features (ScreenShot and QuickTime Player). You can select a suitable one that fits your situation. In conclusion, this versatile screen recorder, EaseUS RecExperts for Mac, might outperform the other five choices because of its powerful features and easy-to-follow operating steps.
FAQs About Mac Screen Recording
Finally, this section shares several tips about Mac screen recording with you. Please check them out below.
1. Why doesn't my screen recording have sound on Mac?
Because there is no sound to record, your microphone isn't selected as QuickTime's audio input device for recording. Thus, QuickTime Player doesn't have permission to use your microphone. Sometimes, a low microphone input level is also blamed for QuickTime Player's failure to capture audio.
2. How do I record my Mac screen with the keyboard?
Please press Shift + Command +5 to launch the Screenshot tool > select Record the entire screen or Record a portion of the screen to record your Mac screen.
3. How to screen record with audio in Windows 11/10?
If you prefer built-in screen recording features, you can use Xbox Game Bar to record screen Windows 11 with system audio and/or a microphone. Before using this feature, please ensure you've activated the Game mode in Gaming and downloaded the related software components on your Windows. Otherwise, you may fail to open the Xbox Game Bar.
Step 1. Press Win + G to open the Xbox Game Bar.
Step 2. Choose your audio inputs. If you want to narrate or add live commentary to your screen recording, select the Capture icon > enable your camera and microphone > click Start recording.
EaseUS RecExperts

One-click to capture anything on screen!
No Time Limit, No watermark
Start Recording