-
![]()
Daisy
Daisy is the Senior editor of the writing team for EaseUS. She has been working in EaseUS for over ten years, starting from a technical writer to a team leader of the content group. As a professional author for over 10 years, she writes a lot to help people overcome their tech troubles.…Read full bio -
Jane is an experienced editor for EaseUS focused on tech blog writing. Familiar with all kinds of video editing and screen recording software on the market, she specializes in composing posts about recording and editing videos. All the topics she chooses …Read full bio
-
![]()
Alin
Alin is an experienced technical blog writing editor. She knows the information about screen recording software on the market, and is also familiar with data cloning and data backup software. She is expert in writing posts about these products, aiming at providing users with effective solutions.…Read full bio -
Jean is recognized as one of the most professional writers in EaseUS. She has kept improving her writing skills over the past 10 years and helped millions of her readers solve their tech problems on PC, Mac, and iOS devices.…Read full bio
-
![]()
Jerry
Jerry is a fan of science and technology, aiming to make readers' tech life easy and enjoyable. He loves exploring new technologies and writing technical how-to tips. All the topics he chooses aim to offer users more instructive information.…Read full bio -
![]()
Rel
Rel has always maintained a strong curiosity about the computer field and is committed to the research of the most efficient and practical computer problem solutions.…Read full bio -
![]()
Gemma
Gemma is member of EaseUS team and has been committed to creating valuable content in fields about file recovery, partition management, and data backup etc. for many years. She loves to help users solve various types of computer related issues.…Read full bio -
![]()
Shelly
"I hope my articles can help solve your technical problems. If you are interested in other articles, you can check the articles at the bottom of this page. Similarly, you can also check my Twitter to get additional help."…Read full bio
Page Table of Contents
0 Views |
0 min read
On media platforms or chatting apps, GIF pictures are always popular since they can display the movements of animals or people in them. However, it is not easy to make your own GIF pics. If you are using a Mac computer and want to record your screen as a GIF, you've come to the right place.
In this article, we will show you how to record GIFs on Mac with EaseUS RecExperts and other screen recorders. All you need to do is choose one tool, download the recorder from the official website, and you can start recording your Mac screen as a GIF with it. Let's see what you can get from this essay.
PAGE CONTENT:
- Record GIF on Mac with EaseUS RecExperts
- Recorders That Can Record GIFs on Mac
- FAQs about Recording GIF on Mac
Part 1. Record GIF on Mac with EaseUS RecExperts
When it comes to EaseUS RecExperts, people will think this screen recording software can only record the screen as a video. But in fact, it can do more than that. With this recorder, you can record the Mac screen and save it as video files like MP4, MOV, FLV, MKV, AVI, and most importantly, GIF.
If you only want to record audio on PC, you can save it in MP3, AAC, WAV, OGG, WMA, and FLAC formats. The full screen, webcam, gameplay, microphone, and system audio can all be recorded. The operation is quite simple. Here we will show you how to record GIFs on Mac with this program.
Download EaseUS RecExperts by clicking the button below, and follow the steps to screen record on Mac as GIF.
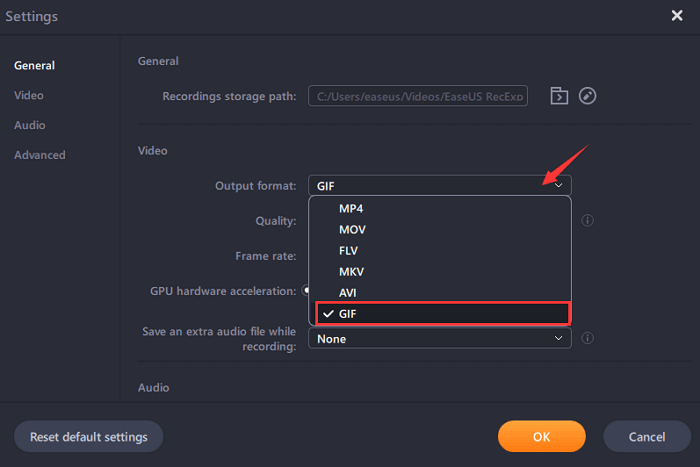
Step 1. Launch EaseUS RecExperts and click the "Settings" button on the main interface. Then choose the output folder and set the video format as GIF. Don't forget to select the appropriate frame rate and quality.
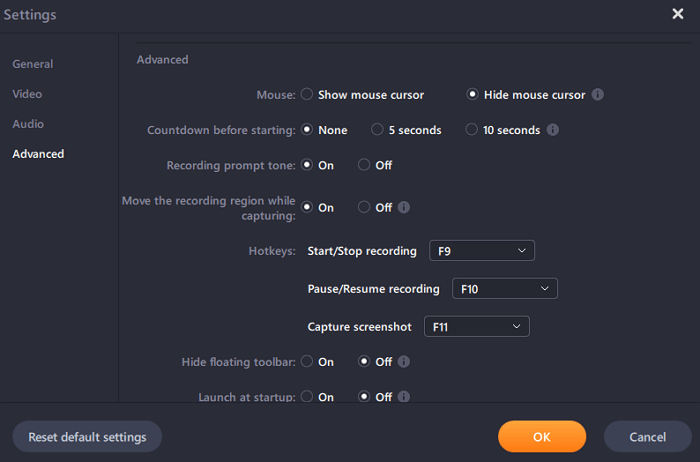
Step 2. There are more options on the "Advanced" tab. To get the GIFs easily, you can set hotkeys to start/stop recording, pause/resume recording, and capture screenshots. Finally, click on "OK" and go back to the main interface.
Step 3. Two options are available for you to customize the recording area, "Full Screen" is for full-screen recording, while "Region" is for capturing a part of the screen. After choosing an appropriate recording area, click on the big red button "REC" to start recording the GIF.

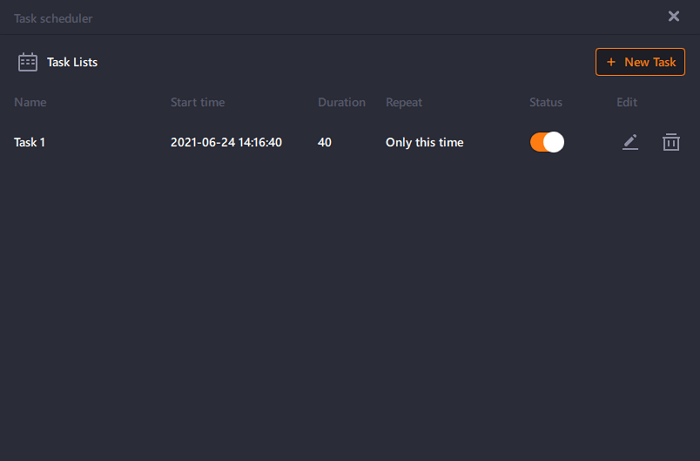
(Optional) If you want to repeat the recording task, "Task Scheduler" is exactly what you want. Select it on the main interface and tap on "+ New Task" to create a new task. It's possible for you to set the start time and duration of the recording freely.
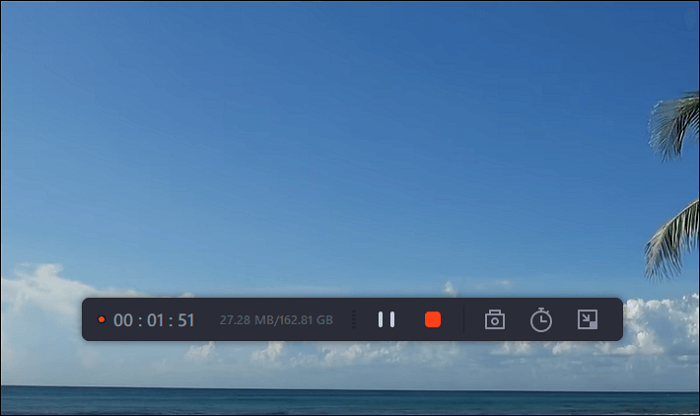
Step 4. Once the recording started, a floating toolbar will appear. Click on the red button to stop recording, and the captured GIFs will be stored on your PC.
Part 2. Recorders That Can Record GIFs on Mac
Now you know how to record GIFs on Mac with EaseUS RecExperts. Here in this part, we will show you some other best free screen recorders that can record the Mac screen as a GIF. Check them one by one, and see if you want to download and use them.
1. GIF Recorder - Gifox
Gifox is another GIF recorder we want to introduce to you. It allows you to make a GIF from anything on your screen. As long as you can access the thing you want to make a GIF from, Gifox can turn it into a GIF. You can choose to record full screen on Windows 10 or Mac, and save it as GIF.
Moreover, it can help you create a GIF out of a particular area of your screen by selecting it and simply hitting Record. Once you are done, just hit the Stop button, and Gifox will automatically create a GIF for you.

Pros
- Select any screen area to record
- Compress the GIF as you like
- Share recorded GIFs over the cloud
Cons
- Doesn't support cropping the GIF
- Can't remove the watermark in the free version
2. CleanShot X
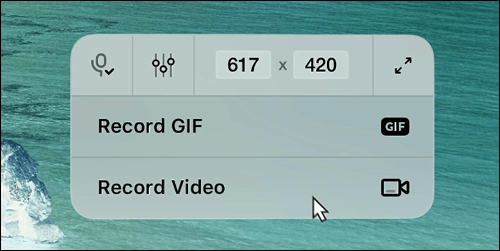
Another app for making GIFs is CleanShot X. It lets you record a video or record a GIF from a specific window, part of the screen, or fullscreen. While recording, it hides desktop icons so that you can capture your Mac's screen on the spot without wasting time doing cleanup.
Not only that, you can even set a custom wallpaper for your screenshots if you want. After creating your GIF, CleanShot X will display a thumbnail on the bottom left side of your Mac screen. So you can preview your GIF here.
Pros
- Annotate, highlight or blur the screenshot
- Record the full screen as a GIF
- Offer a quick access overlay to its users
Cons
- Not so easy to use for novices
- It may take a long time to create a GIF
3. GIF Brewery by Gfycat
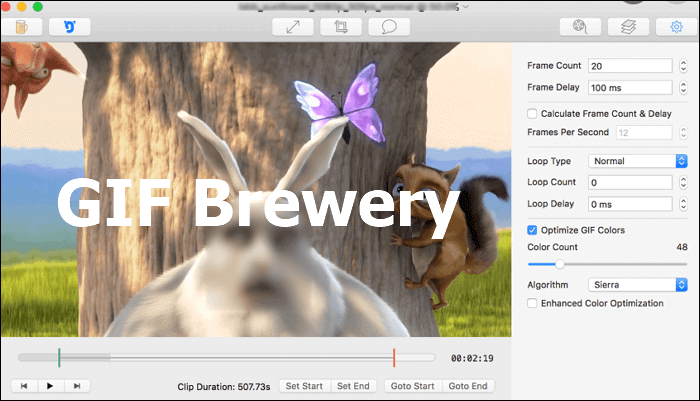
GIF Brewery, owned by Gfycat, is another popular way to create GIFs. It is particularly popular among Mac users since it allows users to create GIFs directly from video files, screen recordings, iOS videos, and even webcam recordings.
Moreover, it allows you to crop a video before saving them to GIFs. And you can apply colorization filters and common photo overall photo filters to your recordings. You can also overlay images and add captions to your GIFs. After that, you can share the GIFs with iMessage, Gfycat, or email.
Pros
- Support both image and photo filters
- Work as a GIF resizer to resize the GIF
- Relatively easy to use for most people
Cons
- Has no true video timeline
- Sharing options are limited
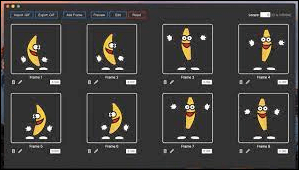
4. Smart GIF Maker
Smart GIF Maker is smart because it offers almost the best interface for making GIFs from screen captures on a Mac computer. It has a wide range of import options, and the easiest way is importing through drag-and-drop. Although there are not many edit options, it is capable of getting the job done.
However, since the company developed the app is now closed, there will be no updates. If you don't expect new functions or improvements, you may choose this tool. Let's check the pros and cons of it.
Pros
- Rotate GIFs with simple clicks
- Set all the frame duration easily at once
- A simple interface offers easy operation
Cons
- The program crashes sometimes
- The edit options are limited
FAQs about Recording GIF on Mac
In this part, we give you two questions related to recording the Mac screen as GIF. Let's check them one by one.
1. How do I record my Mac screen and save it as a GIF?
To record your Mac screen as a GIF, you will need EaseUS RecExperts. Read the description and check the steps to record Mac as GIF with it.
2. How do I record a GIF in QuickTime?
You will need to record the Mac screen with QuickTime and turn it into a GIF with a converter. Just run QuickTime recorder by clicking "command + shift + 5". Make sure to have the "Record Selected Portion" selected. After recording, convert it to GIF with a converter. Then you can save it to your device.
Conclusion
As you can see, you can record GIFs on Mac with many tools. We recommend you download and use EaseUS RecExperts, as it can record your Mac screen directly as a GIF and save it to your computer. What are you waiting for? Just click the button below to download it!
EaseUS RecExperts

One-click to capture anything on screen!
No Time Limit, No watermark
Start Recording
