-
![]()
Daisy
Daisy is the Senior editor of the writing team for EaseUS. She has been working in EaseUS for over ten years, starting from a technical writer to a team leader of the content group. As a professional author for over 10 years, she writes a lot to help people overcome their tech troubles.…Read full bio -
Jane is an experienced editor for EaseUS focused on tech blog writing. Familiar with all kinds of video editing and screen recording software on the market, she specializes in composing posts about recording and editing videos. All the topics she chooses …Read full bio
-
![]()
Alin
Alin is an experienced technical blog writing editor. She knows the information about screen recording software on the market, and is also familiar with data cloning and data backup software. She is expert in writing posts about these products, aiming at providing users with effective solutions.…Read full bio -
Jean is recognized as one of the most professional writers in EaseUS. She has kept improving her writing skills over the past 10 years and helped millions of her readers solve their tech problems on PC, Mac, and iOS devices.…Read full bio
-
![]()
Jerry
Jerry is a fan of science and technology, aiming to make readers' tech life easy and enjoyable. He loves exploring new technologies and writing technical how-to tips. All the topics he chooses aim to offer users more instructive information.…Read full bio -
![]()
Rel
Rel has always maintained a strong curiosity about the computer field and is committed to the research of the most efficient and practical computer problem solutions.…Read full bio -
![]()
Gemma
Gemma is member of EaseUS team and has been committed to creating valuable content in fields about file recovery, partition management, and data backup etc. for many years. She loves to help users solve various types of computer related issues.…Read full bio -
![]()
Shelly
"I hope my articles can help solve your technical problems. If you are interested in other articles, you can check the articles at the bottom of this page. Similarly, you can also check my Twitter to get additional help."…Read full bio
Page Table of Contents
Alin
Updated on Jun 09, 2026
0 Views |
0 min read
Many users who switch from Windows to macOS often find themselves unsure how to take screenshots and begin searching for a Snipping Tool for Mac. The truth is, Apple already offers several built-in screenshot utilities on Mac, each activated with different keyboard shortcuts and designed for different needs. Beyond Apple's native tools, there are also plenty of third-party Mac screenshot app - both free and paid - available on the market.
In this guide, we'll walk you through macOS's built-in Snipping Tool alternatives, review several popular third-party screenshot tools, and explain how to use snipping tool on Mac to improve your workflow.
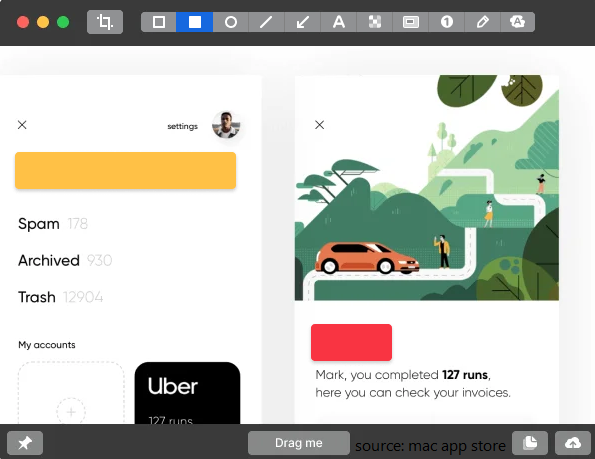
Top 1. EaseUS RecExperts Screenshot and Recorder
- Best for: Screenshot image while screen recording or capture streaming video
- Rating: 4.5 out of 5 - TechRadar
- Price: Free trial and paid
EaseUS RecExperts stands out as a comprehensive solution for both screenshotting and screen recording on Mac. This all-in-one tool offers a wide range of features that cater to various user needs, making it a versatile choice for both beginners and advanced users. With this Mac snipping tool, you can capture any area on your screen with ease, whether it's a specific window, a portion of the screen, or the entire display. This free snipping tool for MacBook Pro or other Mac versions can also screenshot Amazon Prime, Hulu, Disney+, or other streaming services without black screen.
Download EaseUS Screen Recorder
Download EaseUS Screen Recorder
Trustpilot Rating 4.7
Key Features
- Flexible capture modes to screenshot a region, window, app, or full screen
- Support screenshot and video capture with internal audio and microphone
- Automatically save screenshots to clipboard or folder
- Supports popular formats like PNG, BMP, and JPG
- Add annotation and edit screenshots with ease
- Screenshot restricted apss without black screen
Steps on how to use the snipping tool on Mac:
Step 1. Launch EaseUS RecExperts and get the screen ready that you want to capture. Click Custom.

Step 2. Then drag your mouse to select the area you want to capture. After that, click the Screenshot button (camera icon) on the main toolbar.
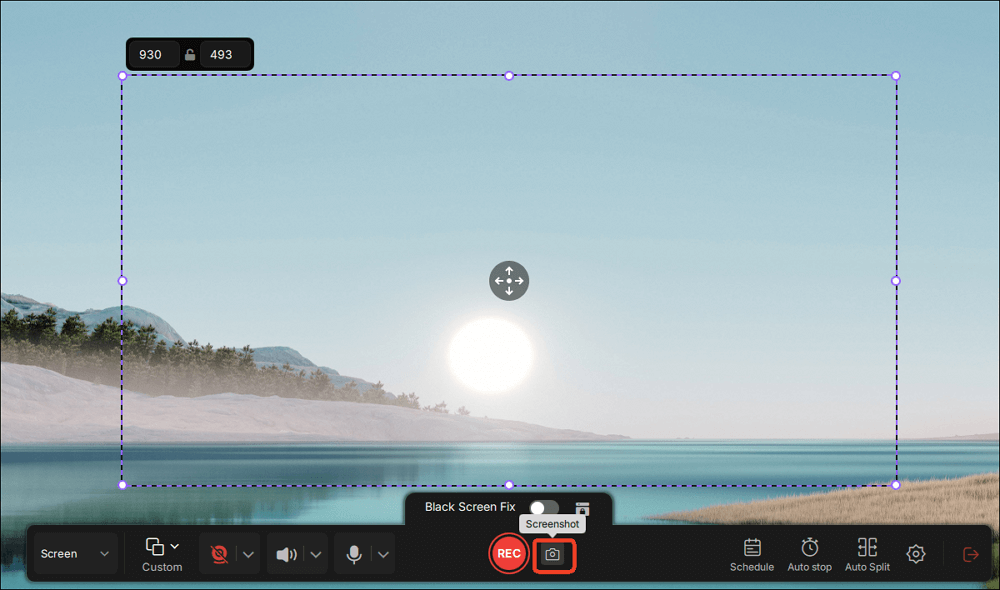
Step 3. The screenshot will be captured instantly and saved to the default folder. You can view or manage it later in My Library.
Download EaseUS Screen Recorder
Download EaseUS Screen Recorder
Trustpilot Rating 4.7
Share this guide to help others get the best snipping tool for Mac!

Top 2. Built-in Snipping Tool on Mac
- Best for: Screenshot on Mac without additional software
- Price: Free
Does a Mac have a snipping tool? Yes. Mac computers come with built-in screenshot tools that work just like the Windows Snipping Tool. Instead of a standalone app, macOS uses keyboard shortcuts and a floating Screenshot panel to capture the screen. These built-in tools allow you to snip, edit, annotate, and save screenshots without installing anything.
🚩The main Mac Snipping Tool options include:
|
✅Snipping Shortcuts |
💡What to Capture |
🔗Where to Save |
|
Shift + Command + 3 |
The entire screen |
Desktop; PNG |
|
Shift + Command + 4 |
A selected area |
Desktop; PNG |
|
Control + Shift + Command + 4 |
A selected area |
Clipboard; PNG |
|
Shift + Command + 4 + Space |
A specific window |
Desktop; PNG |
|
Shift + Command + 5 |
Open the Screenshot toolbar (full screen, window, region, and screen recording options) |
Desktop; PNG |
Pros
- Available on your Mac without needing to install additional software
- Offers multiple capture options like save to documents, clipboard, or set up a timer
- Screenshots are saved as PNG, JPG, TIFF, PDF, or GIF format
Cons
- Not easy to edit the screenshot
- Requires different keyboard shortcuts for various functions, which can be confusing
Note: If you edit the screenshot, you need to set the following option: Option > Save > and then choose Preview. In this way, you can take a screenshot and edit it.
Top 3. Lightshot
- Best for: Offers quick capture, annotation, and one-click sharing capabilities
- Rating: 4.8 out of 5 - Software Advice
- Price: Free to use
Developed by Skillbrains, Lightshot is a free, popular, and lightweight screen-capture (screenshot) tool. It's available for macOS, Windows, and even as a browser extension for Chrome, Firefox, etc. The goal of Lightshot is simplicity + speed: let you quickly capture part of your screen, annotate, and share without a lot of extra steps.
Key Features
- Use the default hotkey Command + Shift + 9 to select any portion of the screen instantly.
- In-built editing and annotation to draw lines, arrows, rectangles, freehand, add text, highlight areas, etc.
- Save screenshots locally in PNG, JPG, BMP, copy to the clipboard, or share online via a link.
- Save and view a history of your screenshots in your online gallery.
- Supports visual search: take a screenshot and then search for visually similar images on Google.

Pros
- Free to use
- Intuitive, lightweight interface
- Compact built-in editor and annotation tools
- Cloud sharing and URL generation
Cons
- Shared URLs are publicly accessible and easily guessable
- Editing tools are quite limited
- No built-in scrolling screenshot for capturing long web pages
-
No cloud sync or team collaboration
Share this guide to help others get the best snipping tool for Mac!
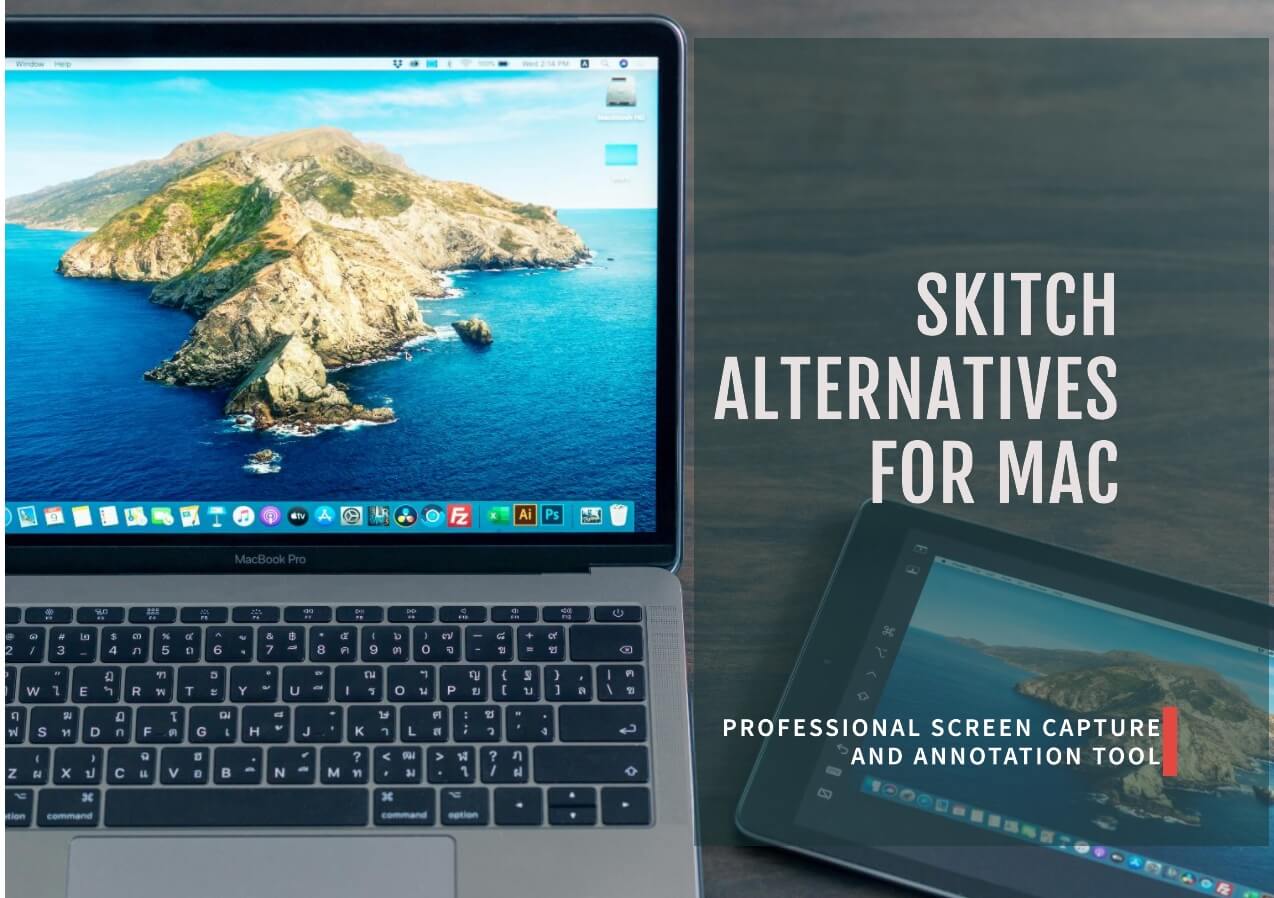
Top 4. Skitch
- Best for: Combines screenshot with powerful annotation features
- Rating: 4.8 out of 5 - Capterra
- macOS: Requires macOS 10.11 or later
Skitch is a well-known screenshot annotation tool originally developed by Plasq and later acquired by Evernote. This Mac equivalent of Snipping Too for MacBook Pro, MacBook Air, and iMac enjoys advanced annotation capabilities, such as arrows, shapes, text, blur/pixelation. Skitch is free to use for taking screenshots and annotating images, but to annotate PDF files, you need an Evernote Premium account.
Key Features
- Capture full screen, a window, or a custom region, even with timed screenshots.
- Annotate screen captures with arrows, lines, rectangles, ovals, freehand drawing, texts, highlighter, blur, pixelation, and crop.
- Drag and drop to share screenshots via Evernote or copy/paste or send into other apps.
- Export to common image formats: PNG, JPG, etc.
Pros
- Free, fast, and lightweight
- Intuitive annotation tools
- Excellent for simple markups
- Good integration with Evernote
- Clean and fluid sharing
Cons
- Lack advanced image editing features
- Basic color palette
- Tight Evernote dependency
-
Lack of active development and update
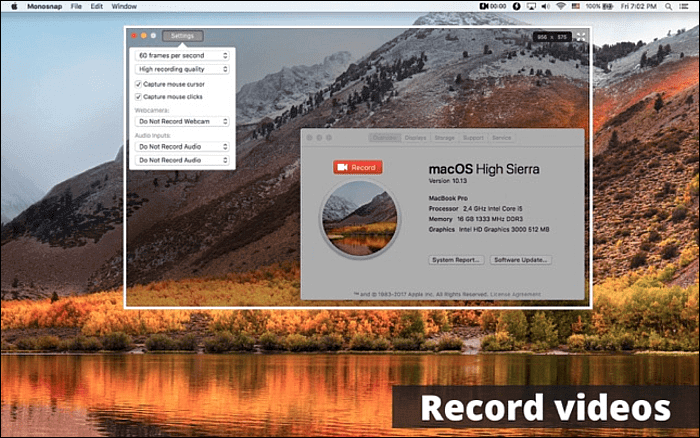
Top 5. Monosnap
- Best for: Screen capture with annotation tools and saving to cloud storage
- Rating: 4.8 out of 5 - Mac App Store
- System: Requires macOS 13.5 or later
Monosnap is a screenshot utility and screen recorder that supports capturing images, annotating them, and sharing or storing them via cloud or other services. This Mac snipping tool alternative has a free version, but some advanced or business-level features require payment. It integrates with various cloud services (like FTP, SFTP, WebDAV) so you can upload your screenshots to your own servers.
Key Features
- Capture a selected area, a full screen, or re-capture the same area with a timer.
- Record video of your screen.
- Annotation pictures with draw, text tools, blur tools, and crop or remove unnecessary parts.
- Pick the color of a pixel under your cursor.
- Support many hotkeys (configured in Preferences) for capture modes.
- Upload images to Monosnap Cloud Storage, FTP, SFTP, WebDAV servers or cloud services.
- Control image quality (e.g., JPEG quality) in preferences.
Pros
- Versatile capture modes
- Precise selection with its 8× magnifier
- Recording capabilitys with video and GOFs
- Customizable keyboard shortcuts boost effectivity
Cons
- Some advanced upload / storage integrations or features require a paid plan
-
Lags or memory leaks during long use or certain systems
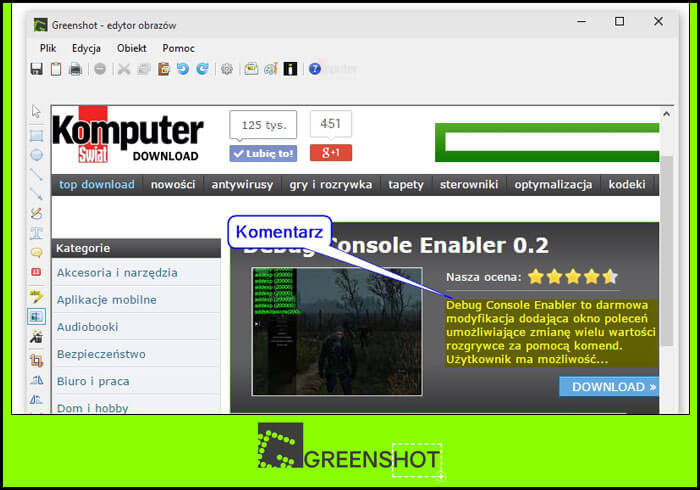
Top 6. Greenshot
- Best for: Technical docs, bug screenshots, requirements review, teaching materials, and quick social media sharing.
- Rating: 4.8 out of 5 - Capterra
- Available on: All Macs running OS X 10.12 and newer
Greenshot is a lightweight screenshot tool originally made for Windows. On Windows, it's open-source under the GNU GPL. There is also a macOS version, but on Mac it's a paid app (around $1.99). Its design is focused on productivity: it's useful for project managers, developers, testers, and anyone who regularly takes annotated screenshots.
Key Features
- Capture a selected region, full screen, or a window.
- Annotate screenshots by drawing arrows, lines, rectangles, ellipses, or freehand.
- Save to a file (PNG, JPG, BMP, etc.), copy to clipboard, send as email attachment, print, or upload to services.
- Very configurable keyboard shortcuts for different capture modes.
- Supports OCR, which can extract text from your screenshots.
- Custom filenaming patterns for organizing screenshots.
Pros
-
Very fast and easy to us
- The built-in editor covers most needs
- Multiple ways to save or share
- Extract text from screenshots
- Lightweight footprint
- Highly customizable hotkeys
- Multi-language support
Cons
- Mac version is limited / not free
- Interface feels dated
- Limited advanced editing
- Imgur privacy risk
-
Sparse updates (depending on version)
Top 7. CleanShot X
- Best for: Quick screenshot, record a tutorial, or annotate an image
- Rating: 4.9 out of 5 - G2
- Price: 30-day money back guarantee
CleanShot X is a dedicated screenshot + screen-recording utility for macOS. It's designed to be far more capable than the built-in Mac screenshot tools — offering over 50 features. You can purchase it via a one-time license (with optional paid upgrades) or access it through subscription services like Setapp. It has its own Cloud service (CleanShot Cloud) for uploading and sharing screenshots/recordings easily.
Key features
- After capturing, a small overlay shows up, letting you save, copy, drag & drop, annotate, or upload immediately.
- Built-in editor with arrows, rectangles, ellipses, lines, text, masks/pixelation, etc.
- Record video or optimized GIFs with system audio and mic sound.
- Capture content that doesn't fit on one screen (e.g. long web pages, long chats).
- Extract text from images/screenshots using on-device OCR.
- Pin a screenshot so that it stays on top of all windows.
- Option to hide desktop icons when capturing so your screenshots look cleaner.
Pros
- Combines screenshotting, scrolling capture, annotation, recording, OCR, and cloud sharing.
- Very smooth and intuitive overlay + quick access tools.
- Powerful annotation are significantly more capable than macOS's default markup.
- Precision capture with magnifier, crosshair mode, and freeze screen.
- Designed for macOS, optimized for Apple Silicon.
- You can reopen and re-edit your annotated screenshots.
Cons
- Not free
- Capturing the mouse pointer is limited
- Recording history might be auto-deleted after a day if not saved
-
Potential bugs and stability issues
Share this guide to help others get the best snipping tool for Mac!
Conclusion
Finding the right snipping tool for Mac depends on your specific needs and preferences. Whether you opt for the built-in tools or choose a third-party solution, there's a tool out there that can help you capture and annotate screenshots efficiently. Consider the features and user feedback provided in this article to make an informed decision.
If you need to screenshot something while recording or screenshot streaming services, EaseUS RecExperts is one of the best snipping tools for Mac users.
Download EaseUS Screen Recorder
Download EaseUS Screen Recorder
Trustpilot Rating 4.7
Apple Mac Snipping Tool FAQs
1. What is the best snipping tool for Mac?
The best snipping tool for Mac depends on your needs. For basic capture and annotation, Lightshot and Skitch are excellent choices. For more advanced features and versatility, EaseUS RecExperts and CleanShot X are top contenders.
2. Where are the screenshots saved on Mac?
By default, screenshots on your Mac are saved to the desktop, with the file name containing the date and time the screenshot was taken. To change the save location, follow these steps:
Step 1. Press Command + Shift + 5 to open the Screenshot Toolbar.
Step 2. Click Options.
Step 3. Select a new save location in Save to.
Alternatively, you can use the Control key to copy the screenshot directly to the clipboard instead of saving it to a file.
3. How do I take a screenshot on Mac?
To take a screenshot on Mac, press Shift + Command + 4, then drag the cursor to select the area you want to capture. Release the mouse button to take the screenshot.
4. Can I customize the screenshot shortcuts on Mac?
Yes, you can customize the screenshot shortcuts on Mac by going to System Settings > Keyboard > Keyboard Shortcuts > Screenshots.
5. How to make the snipping tool on Mac copy to the clipboard?
If you press Control while capturing (e.g., Control + Shift + Command + 4), the screenshot won't be saved as a file — it will copy directly to your clipboard so that you can paste it into apps like Notes, Word, Photoshop, or email.
✅ Article Update Log
1️⃣Updated the introduction of each solution to give users a more comprehensive understanding of the products.
2️⃣Expanded features, pros, and cons with additional details to help users better evaluate each product.