-
![]()
Daisy
Daisy is the Senior editor of the writing team for EaseUS. She has been working in EaseUS for over ten years, starting from a technical writer to a team leader of the content group. As a professional author for over 10 years, she writes a lot to help people overcome their tech troubles.…Read full bio -
Jane is an experienced editor for EaseUS focused on tech blog writing. Familiar with all kinds of video editing and screen recording software on the market, she specializes in composing posts about recording and editing videos. All the topics she chooses …Read full bio
-
![]()
Melissa Lee
Alin is an experienced technical blog writing editor. She knows the information about screen recording software on the market, and is also familiar with data cloning and data backup software. She is expert in writing posts about these products, aiming at providing users with effective solutions.…Read full bio -
Jean is recognized as one of the most professional writers in EaseUS. She has kept improving her writing skills over the past 10 years and helped millions of her readers solve their tech problems on PC, Mac, and iOS devices.…Read full bio
-
![]()
Jerry
Jerry is a fan of science and technology, aiming to make readers' tech life easy and enjoyable. He loves exploring new technologies and writing technical how-to tips. All the topics he chooses aim to offer users more instructive information.…Read full bio -
Larissa has rich experience in writing technical articles. After joining EaseUS, she frantically learned about data recovery, disk partitioning, data backup, screen recorder, disk clone, and other related knowledge. Now she is able to master the relevant content proficiently and write effective step-by-step guides on various computer issues.…Read full bio
-
![]()
Rel
Rel has always maintained a strong curiosity about the computer field and is committed to the research of the most efficient and practical computer problem solutions.…Read full bio -
![]()
Gemma
Gemma is member of EaseUS team and has been committed to creating valuable content in fields about file recovery, partition management, and data backup etc. for many years. She loves to help users solve various types of computer related issues.…Read full bio
Page Table of Contents
Rel
Updated on May 06, 2024
0 Views |
0 min read
Google Earth is an amazing map application that provides a 3D representation of the earth. Using it, you can move from one place to another place, explore the world and enjoy the cities and landscapes with simple clicks at home.
It would be incredible to record the tour on Google Earth. However, only the paid users can record the tour video from Google Earth. If you are not a paid user and want to record Google Earth, you will find the best solution in this article. Here we list 5 efficient ways to guide you on how to record Google Earth.
| Workable Solutions | Step-by-step Troubleshooting |
|---|---|
| 1. Record Google Earth on Windows | Launch EaseUS RecExperts. Hit "Full Screen"...Full steps |
| 2. Record Google Earth on Mac | Open the streaming video to capture...Full steps |
| 3. Capture Google Earth Online | Go to Screencapture's official website...Full steps |
How to Record Google Earth on Windows
There are many screen recorders for Windows users to make a Google earth zoom-in video. In this part, you will find two ways to do that using two different tools.
EaseUS RecExperts for Windows
This is one of the most popular screen recording software for Windows that has a high reputation worldwide. As its name implies, it can capture anything displayed on your Windows PC.
It makes it easy and possible to record streaming video, online courses, meetings, etc. You can flexibly choose the recorded area, including the entire screen or a selected area.
What's more, it also enables you to record computer audio, microphone, or both simultaneously. If you like to play games, you also can record your favorite gameplay with this best free screen recorder.
More Features:
- Friendly to both beginners and professionals
- Screen recorder with facecam
- Enable you to set a recording task at a specific time
- Export the recordings with high-quality in more than 10 formats
To enjoy all the features mentioned, click the download button below to install EaseUS RecExperts on your computer.
How to Record Google Earth Zoom in Video Easily:
Step 1. Launch EaseUS RecExperts. There are two modes for screen recording. Choose "Full Screen", this tool will capture the whole screen; choose "Region", you will need to select the recording area manually.

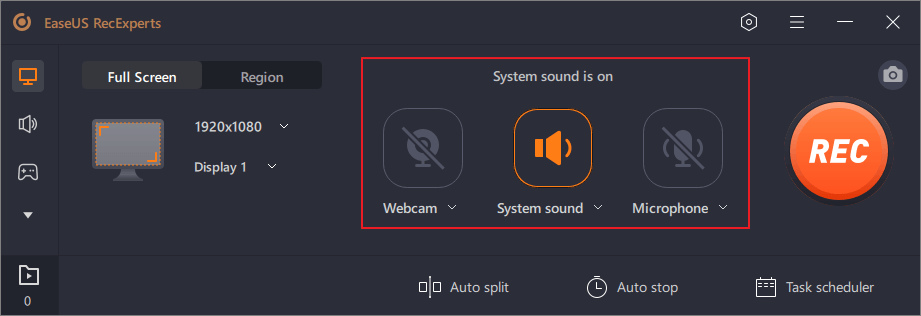
Step 2. After that, you can choose to record the webcam, system sound, or microphone as you like. Of course, you can turn them off if you only need to record the silent screen.
Step 3. Then, you can click the red "REC" button to start recording. Now you will see a menu bar on your screen. If you want to pause the recording, click on the white "Pause" button; to end the recording, click on the red "Stop" button.
Step 4. After recording, you will be led to the recording list interface. Here you can view or edit your recordings easily.

Built-in Screen Recorder
If you record video from Google Earth without other needs, you can rely on the built-in screen recording function. It enables you to capture Google Earth with your voice effortlessly.
How to Record Google Earth with Built-in Recorder:
Step 1. Open Google Earth. Then choose Add > Tour and click Record in the bar above the globe.
Step 2. Move to the lower-left corner in the media player and select the Record button to start recording. If you want to add a narration to the video, you also can click the Microphone button to capture your voice.
Step 3. Navigate to the places that you want to visit one by one.
Step 4. When you finish the recording, you can click the Stop button (the same as the Record button) to end the recording.
Step 5. After that, you can play the recorded video on the media player. To save the tour video, click on the Save button.
How to Record Google Earth Zoom In Video on Mac
There is a lot of other screen recording software that can help you capture video from Google Earth. Want to learn more? Just keep on reading.
EaseUS RecExperts for Mac
This is a lightweight but all-in-one screen and audio recorder on Mac, and you can use this great Mac screen recorder on many occasions. If you need to attend online meetings, it helps you record Webex meetings and Zoom meetings without much effort. If you have some online courses, it's also possible to record lectures online using this recorder.
Besides, this tool enables you to record sound from computer in high quality. So you can record a Google Earth zoom-in video with your narration to show your ideas or explain some things.
Features:
- Record part of screen or full of screen
- Choose audio sources freely
- Record a GIF
This is really a suitable and user-friendly recorder for Mac users. If you want to create a video by recording Google Earth, don't miss this tool.
Tutorial of Google Earth Video Capture on Mac:
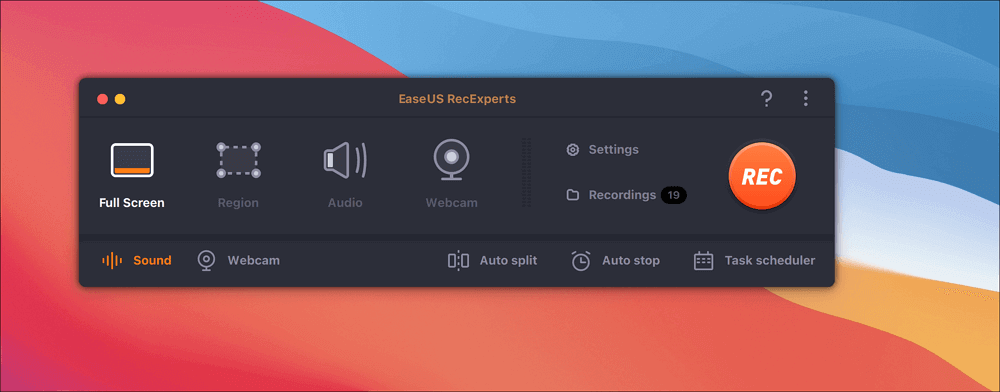
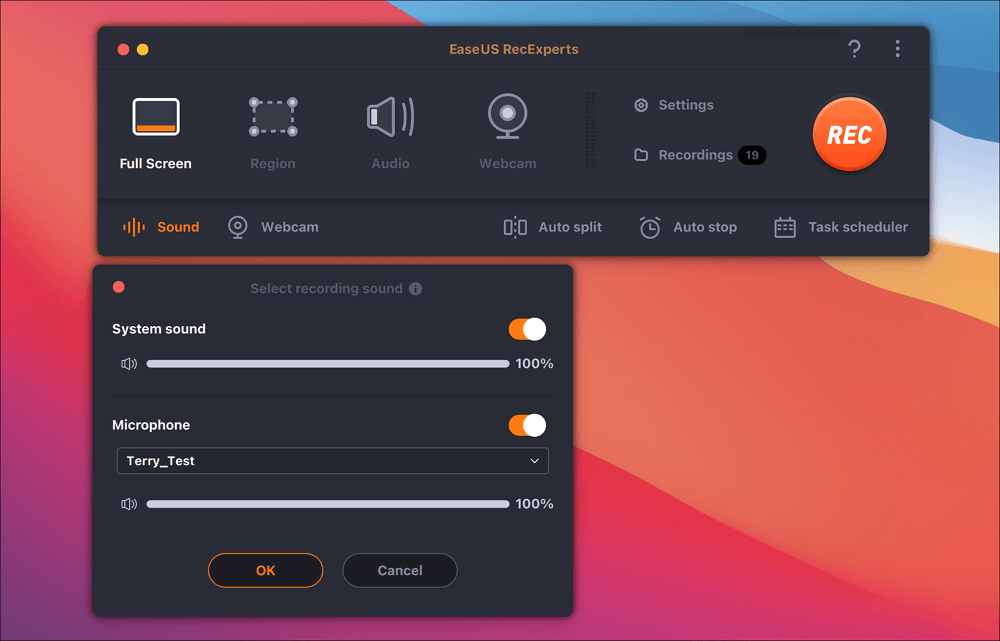
Step 1. Open the streaming video that you want to capture. Then launch EaseUS RecExperts to get used to its interface on your Mac. If you want to record the whole screen, you can click the "Full Screen" option. If you want to customize the recording area, hit "Region". Then, select the recording area with your mouse.
At the same time, to capture the screen with audio, you just hit the Sound icon in the lower left corner.
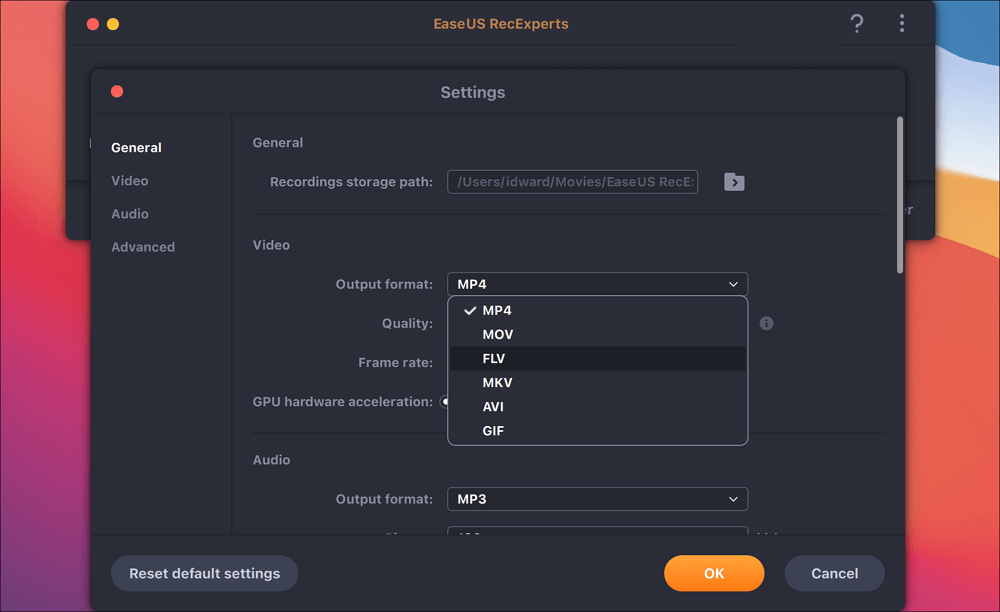
Step 2. Click "Settings" to apply more options, including changing the output format of the video, the quality, etc.
Step 3. Once you are satisfied with the settings, go back to the main screen and click the Sound icon. Then, enable the system or microphone sound if you want to record audio and screen at the same time. Click "OK" to ensure the audio options. After that, hit "REC" to start recording.
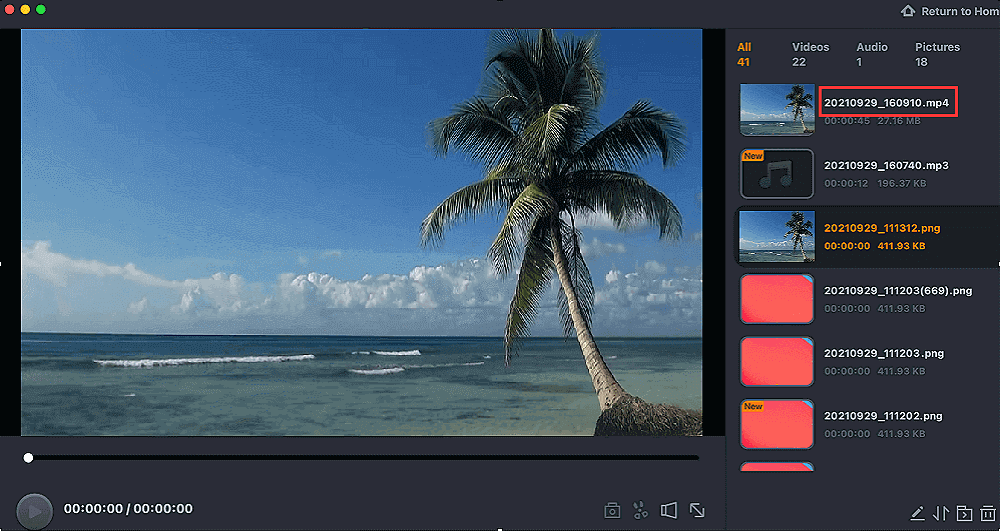
Step 4. Hit the Stop icon when you want to end the recording task. Then, watch the recorded video in "Recordings". The button can be found in the main interface. You can review the target saving from the lists.
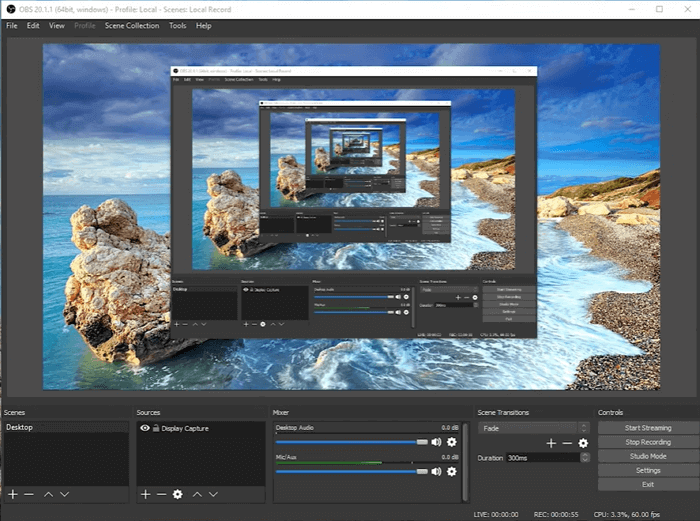
OBS Studio
Using this free screen recording software, you can create scenes of multiple sources, including windows captures, images, text, browse, webcams, capture cards, and more. And it can set up an unlimited number of scenes you can switch between seamlessly via custom transitions.
If you record audio with OBS Studio, you can get this job done efficiently, as it offers an intuitive audio mixer with per-source filters such as noise gate, noise suppression, and gain. To record a Google Earth video with OBS Studio, you can check the following tutorials.
How to Record a Tour on Google Earth:
Step 1. Download and launch OBS Studio on your computer.
Step 2. Click the "+" button at the bottom of the Sources and select Display Capture, followed by the "OK" option.
Step 3. Click on the Settings button to choose the Output tab and select a location to save the recorded videos.
Step 4. Once done, click the Start Recording button at the bottom right to begin recording. When you are done, choose the Stop Recording button to end the recording.
Download: https://obsproject.com/
How to Record Capture Earth Video Online
Screencapture is a free online screen recorder, allowing you to easily capture your browse activities or computer desktop without installing any third-party software.
While recording your screen, it also offers options to capture your webcam, microphone, or add watermark to video. Now take a look at the following tutorials to start recording Google Earth.
How to Record Google Earth Online:
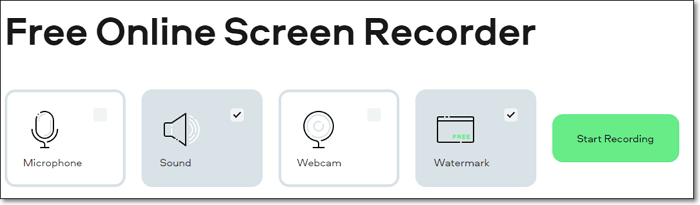
Step 1. Go to Screencapture's official website, and you will see four tabs on the main page: Microphone, Sound, Webcam, Watermark. You can choose any one of them based on your needs.
Step 2. Click the "Start Recording" button, and a new window will appear. Here you can choose all the resources you want to capture: a full screen, an application window, or a Chrome page.
Step 3. When you are ready, choose the "Share" option to start recording Google Earth.
Step 4. Once done, click "Stop Recording". Then you can preview the recorded Google Earth tour. If you are satisfied with it, you can save it to your computer by clicking the "Download" button. Or you can re-record Google Earth by choosing the "New Record" button.
Try: https://screencapture.com/
Conclusion
To sum up, you have many easy ways to record videos from Google Earth. This post offers you 5 quick and efficient ways to record Google Earth as a video. If you want to obtain a high-quality video, EaseUS RecExperts is what you can never miss. Now download it to explore more amazing functions.
EaseUS RecExperts

One-click to capture anything on screen!
No Time Limit, No watermark
Start Recording