-
![]()
Daisy
Daisy is the Senior editor of the writing team for EaseUS. She has been working in EaseUS for over ten years, starting from a technical writer to a team leader of the content group. As a professional author for over 10 years, she writes a lot to help people overcome their tech troubles.…Read full bio -
Jane is an experienced editor for EaseUS focused on tech blog writing. Familiar with all kinds of video editing and screen recording software on the market, she specializes in composing posts about recording and editing videos. All the topics she chooses …Read full bio
-
![]()
Alin
Alin is an experienced technical blog writing editor. She knows the information about screen recording software on the market, and is also familiar with data cloning and data backup software. She is expert in writing posts about these products, aiming at providing users with effective solutions.…Read full bio -
Jean is recognized as one of the most professional writers in EaseUS. She has kept improving her writing skills over the past 10 years and helped millions of her readers solve their tech problems on PC, Mac, and iOS devices.…Read full bio
-
![]()
Jerry
Jerry is a fan of science and technology, aiming to make readers' tech life easy and enjoyable. He loves exploring new technologies and writing technical how-to tips. All the topics he chooses aim to offer users more instructive information.…Read full bio -
![]()
Rel
Rel has always maintained a strong curiosity about the computer field and is committed to the research of the most efficient and practical computer problem solutions.…Read full bio -
![]()
Gemma
Gemma is member of EaseUS team and has been committed to creating valuable content in fields about file recovery, partition management, and data backup etc. for many years. She loves to help users solve various types of computer related issues.…Read full bio
Page Table of Contents

Jane Zhou
Updated on Oct 22, 2026
0 Views |
0 min read
If you're searching for a free Snipping Tool download, you may be trying to restore the app, access its screen recording features, or find out whether it needs to be installed separately.
Snipping Tool is a free Microsoft app included with Windows 10 and Windows 11, although some users may need to download it from the Microsoft Store. In this guide, you'll learn how to download and use Snipping Tool, plus discover the best alternatives if you need more advanced screenshot and screen recording features.
How to Download Snipping Tool on Windows 10 and 11 for Free
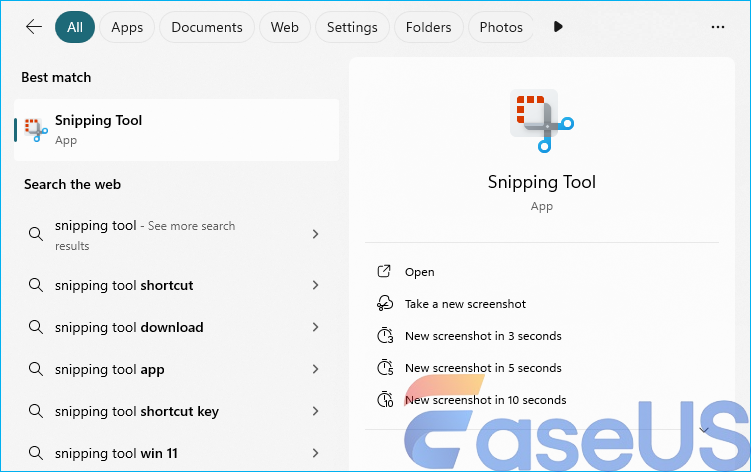
In most cases, Snipping Tool comes pre-installed on both Windows 10 and Windows 11, so you don't need to download it separately. To check whether it's already available on your PC, type Snipping Tool into the Windows Search bar and open the app from the results.
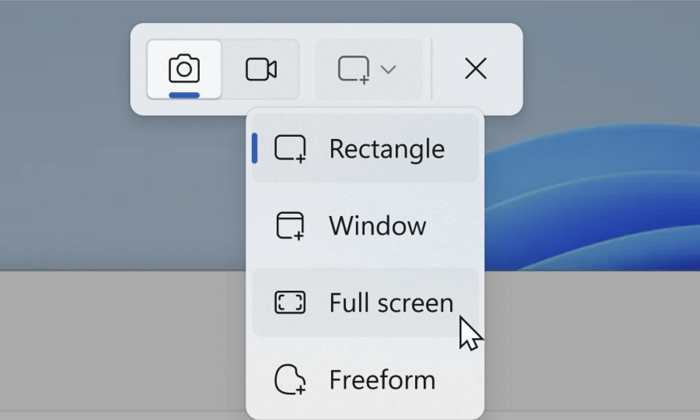
If you want to start taking screenshots immediately, press Windows + Shift + S. This shortcut launches the Snipping Tool capture toolbar, allowing you to select a rectangular area, window, full screen, or free-form screenshot.
Option 1. Download Snipping Tool from Microsoft Store
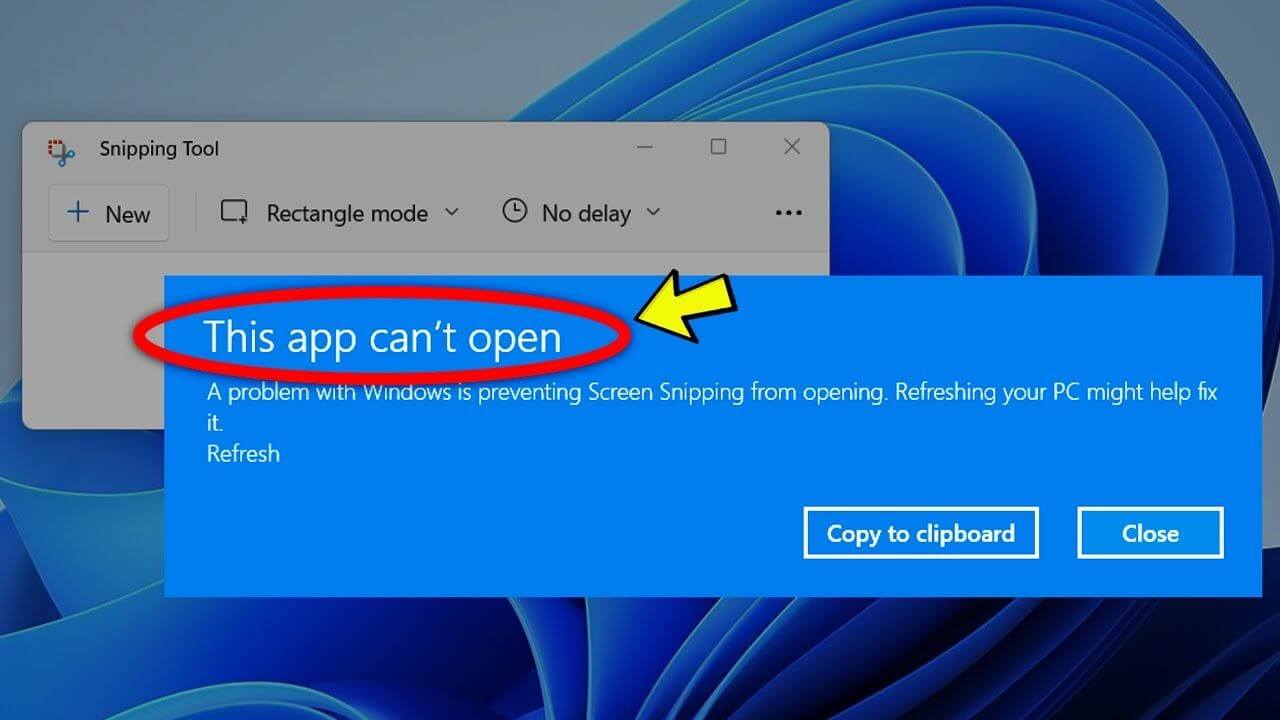
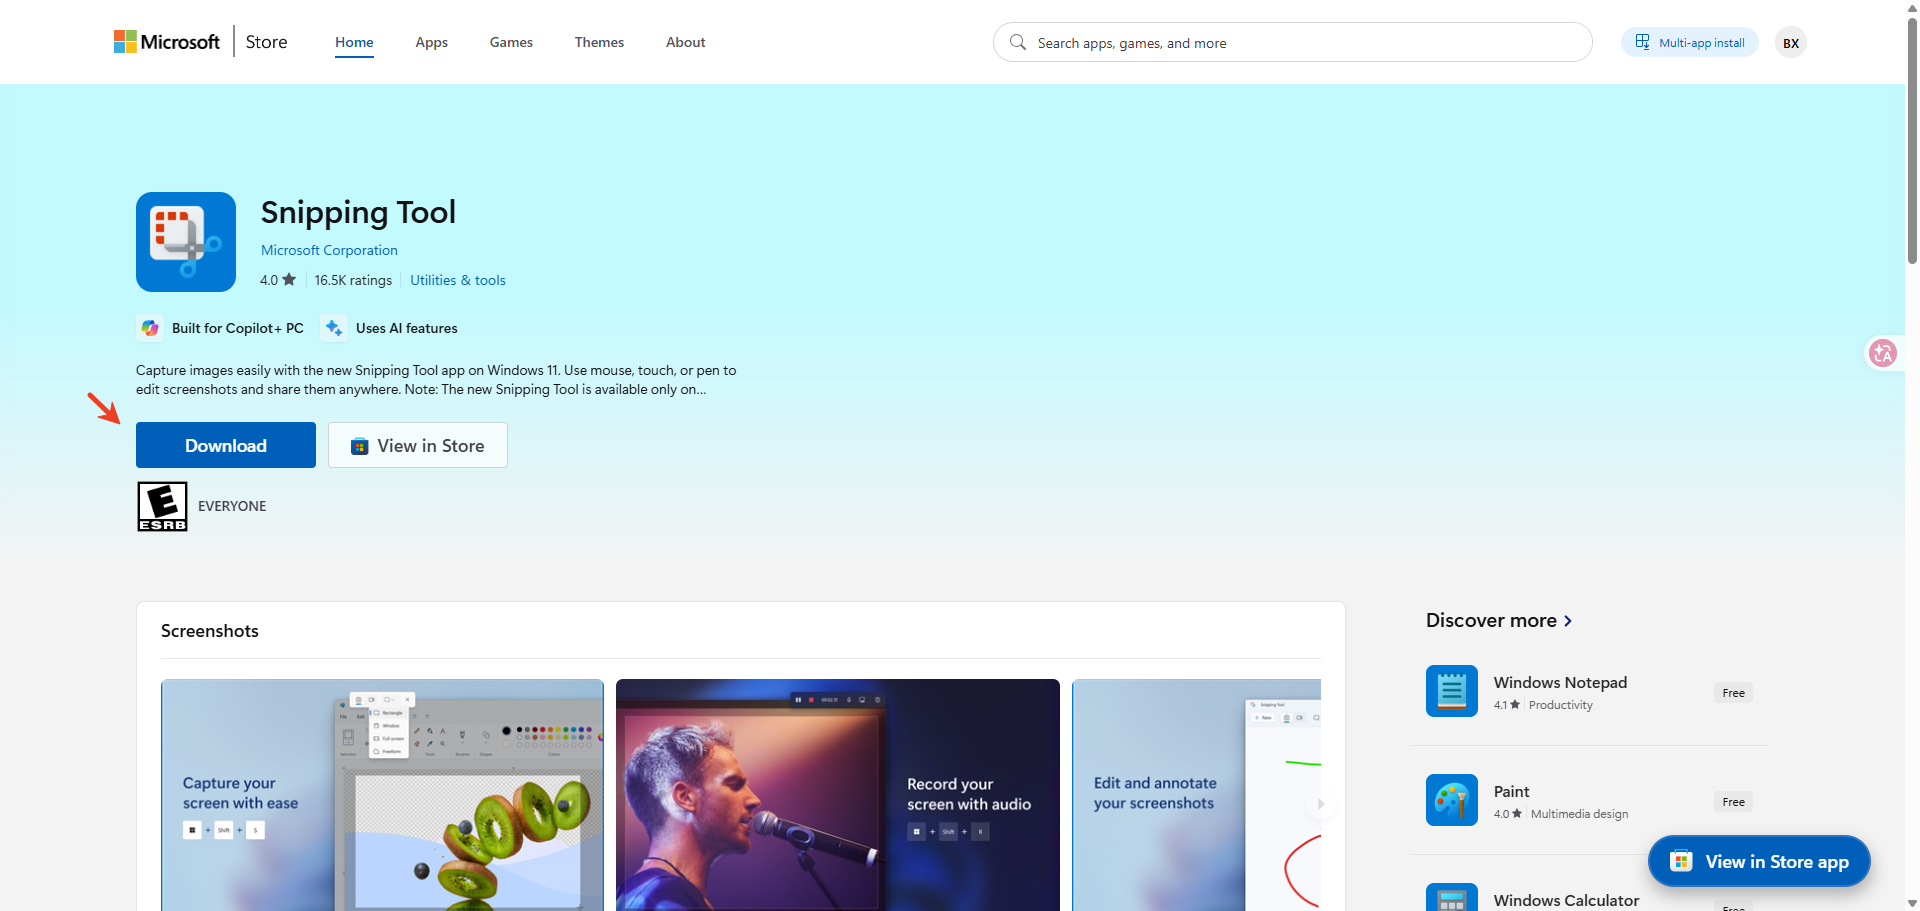
If Snipping Tool missing on Windows 11 or 10, it may have been removed during a system update, disabled by your organization, or not installed correctly. In that case, search for Microsoft Store in the Start menu, open it, search for Snipping Tool, and click Get to download and install the latest version.
Option 2. Download Snipping Tool Without Microsoft Store
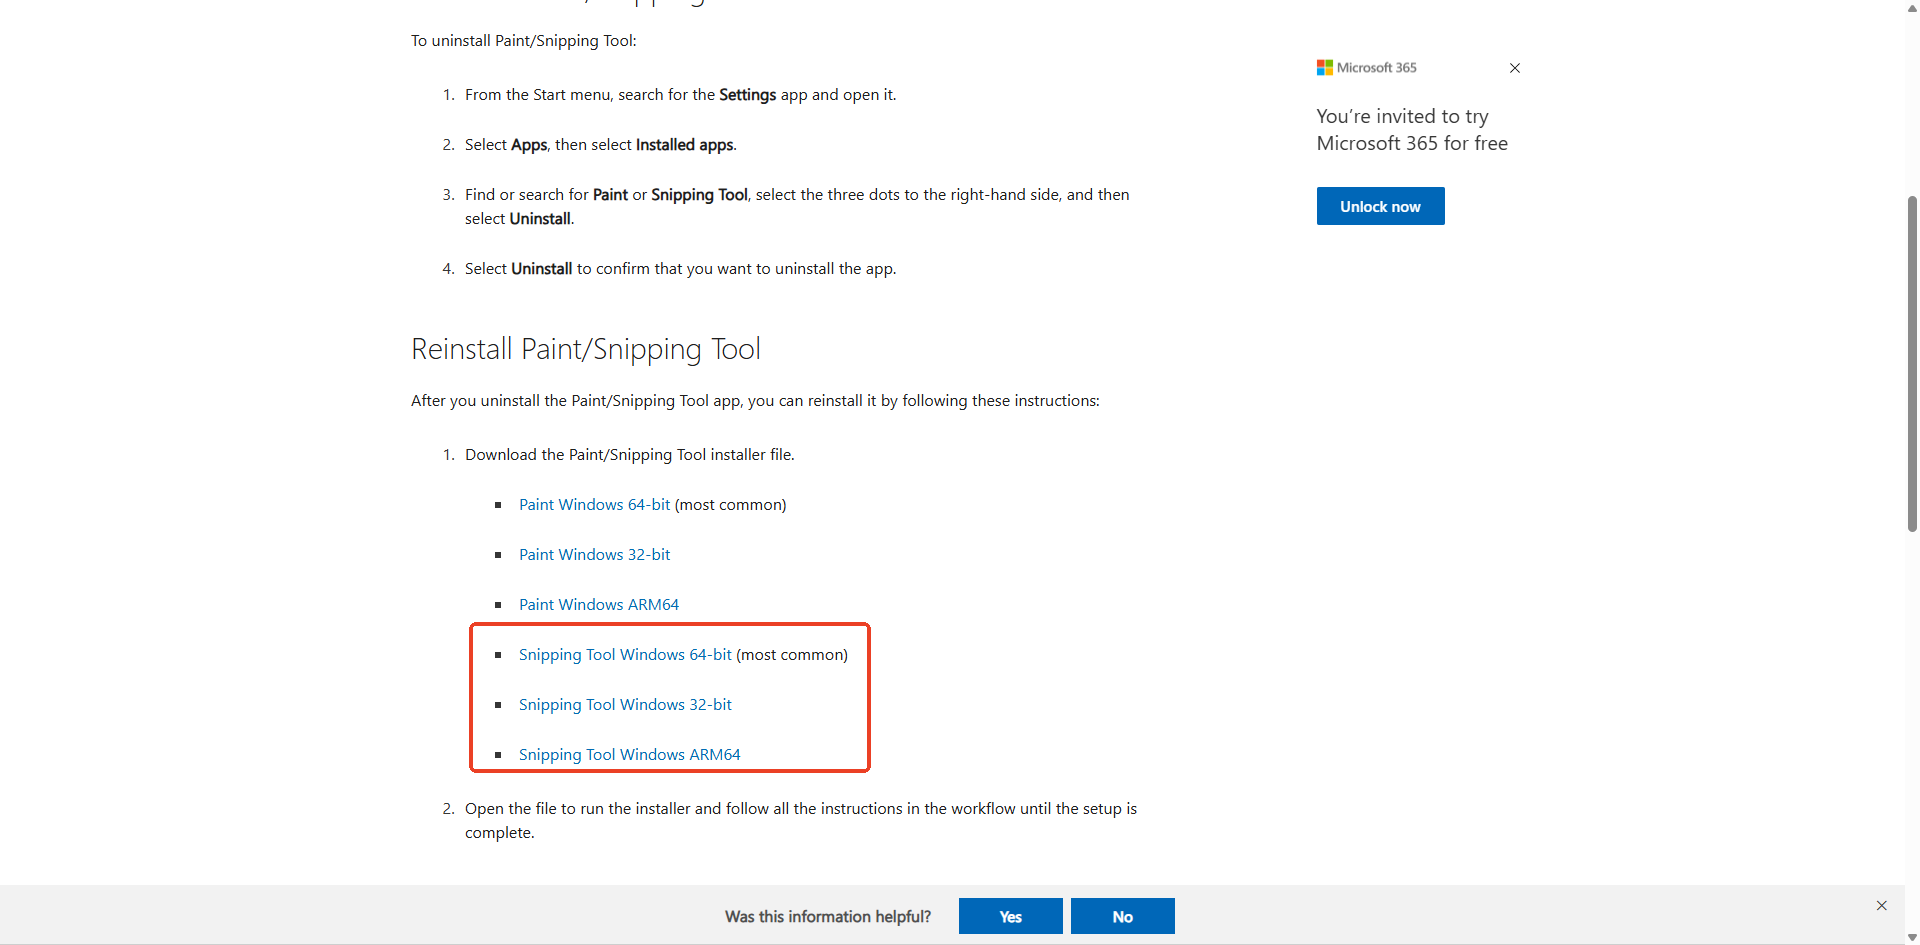
Some users may not have access to the Microsoft Store, especially on managed work devices or customized Windows installations. If you're looking to download Snipping Tool without the Microsoft Store, the easiest option is to install it using an offline installer package. After downloading the installer, simply run the setup file and follow the on-screen instructions to complete the installation.
What Can You Do with Snipping Tool?
Snipping Tool is more than just a screenshot utility. Depending on your Windows version, it can help you capture screenshots, annotate images, copy text from screenshots, and even record your screen. While it doesn't offer advanced editing or recording features, it's a convenient built-in tool for everyday tasks.
1. Take Screenshots with Snipping Tool
The most common use of Snipping Tool is capturing screenshots. You can take a screenshot of a selected area, a specific window, or your entire screen and then save, copy, or annotate the image.
How to take a screenshot with Snipping Tool:
Step 1. Open Snipping Tool from the Start menu or press Windows + Shift + S.
Step 2. Click +New to start a new capture.
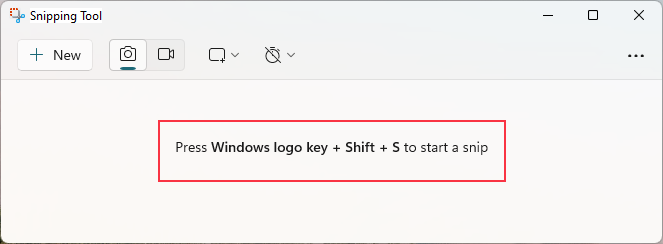
Step 3. Choose a capture mode:
- Rectangular Snip
- Free-form Snip
- Window Snip
- Full-screen Snip
Step 4. Select the area you want to capture.
Step 5. The screenshot will open in Snipping Tool automatically.
Step 6. Use the built-in annotation tools if needed.
Step 7. Click Save to store the screenshot on your computer.
2. Record Your Screen with Snipping Tool (Windows 11 Only)
Windows 11 adds a built-in screen recording feature to Snipping Tool, making it easy to capture on-screen activities without installing additional software. It's useful for creating quick tutorials, recording software demonstrations, or saving online content for reference.
How to record your screen with Snipping Tool:
Step 1. Open Snipping Tool.
Step 2. Select the Record tab at the top of the window.
Step 3. Click +New to start a recording session.
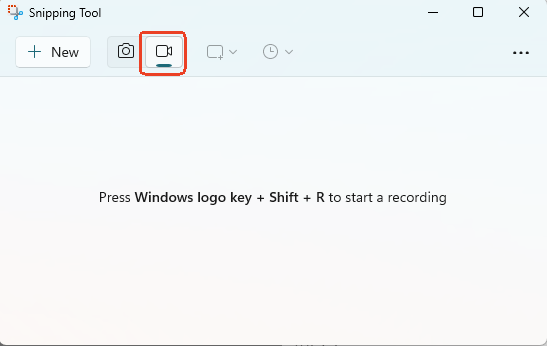
Step 4. Drag your cursor to select the area of the screen you want to record.
Step 5. Click Start to begin recording.

Step 6. Perform the actions you want to capture.
Step 7. Click Stop when finished.
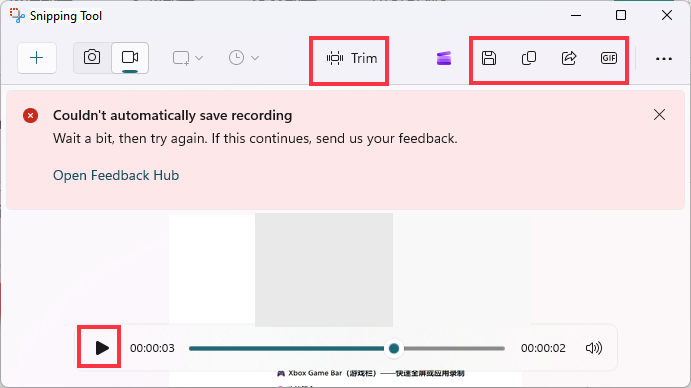
Step 8. Preview the recording and click Save to export it as a video file.
Best Snipping Tool Alternatives for Windows
Snipping Tool can record screen activity, but it lacks advanced features such as webcam recording, scheduled recording, virtual backgrounds, or professional video editing. If you need these capabilities, consider using a dedicated screen recorder instead.
Top 1. EaseUS RecExperts
- Applicable systems: Windows 11/10/8/7 & macOS 10.13 or later
- Best for: Users who need a more powerful Snipping Tool with screenshot and screen recording capabilities
|
Feature |
Snipping Tool |
EaseUS RecExperts |
|
Screenshots |
✅ |
✅ |
|
Screen Recording |
✅ |
✅ |
|
Audio Recording |
✅ |
✅ |
|
GIF Creation |
✅ |
✅ |
|
Webcam Recording |
❌ |
✅ |
|
Scheduled Recording |
❌ |
✅ |
|
Video Editing |
❌ |
✅ |
|
Windows |
✅ |
✅ |
|
Mac |
❌ |
✅ |
If Snipping Tool feels too basic for your needs, EaseUS RecExperts is one of the best alternatives to consider. It combines screenshot capture and screen recording in a single application, making it suitable for creating tutorials, recording meetings, capturing gameplay, or saving online content.
Unlike Snipping Tool, which mainly focuses on basic screenshots and simple screen recordings, EaseUS RecExperts offers more flexibility and advanced capture options.
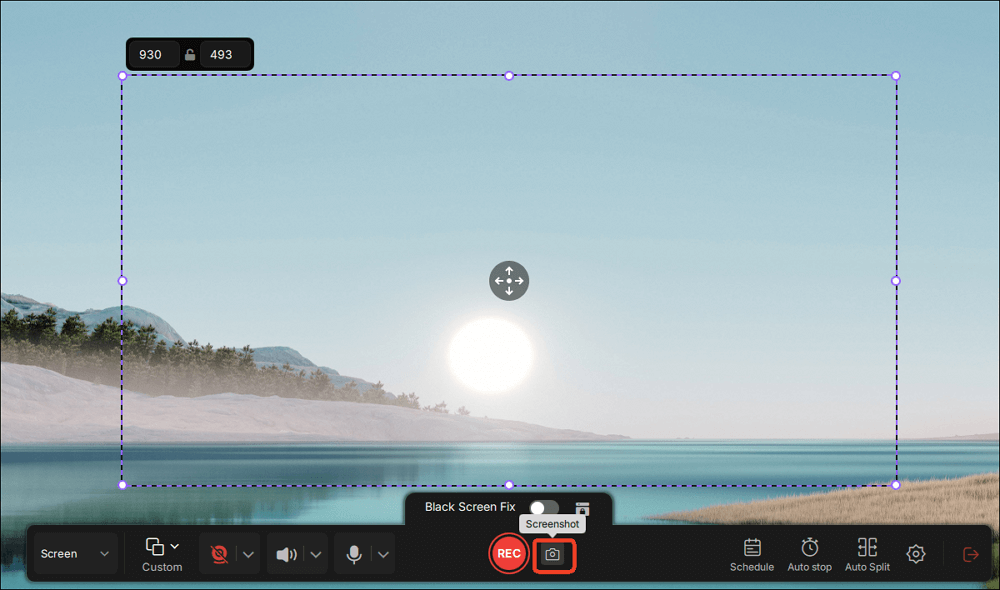
Key screenshot features:
- Capture the full screen, a selected region, a specific window, or a scrolling area
- Save screenshots as PNG, JPG, or BMP files
- Add text or image watermarks
- Create GIFs from screen activities
- Take screenshots using customizable hotkeys
Additional features beyond Snipping Tool:
- Record the screen in full screen or custom regions
- Record webcam videos
- Schedule recordings in advance
- Export recordings in multiple formats
- Edit videos and screenshots without third-party tools
For users who frequently switch between screenshots and screen recordings, EaseUS RecExperts provides a more complete workflow than the built-in Snipping Tool while remaining easy to use for beginners.
Share this best free snipping tool for Windows guide with others.

Top 2. EaseUS ScreenShot
- OS: Windows 11/10/8/7
- Best for: Take screenshots on Windows without downloading app
EaseUS ScreenShot is a 100% free screen-capture utility purpose-built for Windows 11/10/8/7. It offers a lightweight, no-cost solution for grabbing still images of your desktop. Whether you need a quick snip or a precisely timed capture with hotkey, the tool is designed for non-technical users who want reliable results without bloat.
It has a built-in editor for arrows, highlights, text, blurs, and shapes right after capture. You can customize the screenshot shortcut keys (such as double-clicking Ctrl) or save path as needed.
Features:
- Grab full screen, active window, or any free-form region
- Screen capture your screen as png, jpg, or bmp formats
- Save locally or copy to clipboard in seconds
- Supports every modern Windows edition from Windows 7 up to Windows 11

Top 3. PicPick
- Systems: Windows 11/10
- Best for: Take screenshots and edit them easily with the all-in-one graphic tool
If your Snipping Tool not working on Windows 11 or 10, PicPick is a good alternative. And it is available on all Windows. This free snipping tool lets you take screenshots of a full screen, an active window, or a scrolling window on your desktop. Once done, you can edit the captured image with text, arrows, shapes, stamps, or many tools in the Edit tab. If needed, you can also add effects, resize, or rotate the images with one simple click.
Last but not least, this snipping tool provides multiple ways to save, share, or send your screenshots, including Web, email, Dropbox, Google Drive, Facebook, Twitter, and more.
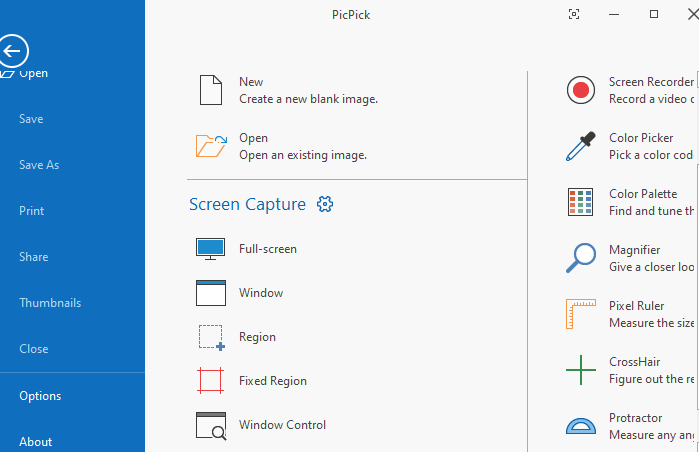
Key Features:
- Take snapshots in different modes
- Enhance the screenshots with plentiful effects and editing tools
- Allow setting hotkeys for snapshotting
- Share images on social platforms
Share this best free snipping tool for Windows guide with others.
Top 4. Snagit
- Applicable systems: Windows 11/10
Snagit is an excellent tool you cannot miss when it comes to snipping. This Windows snipping tool lets you take panoramic shots that can capture scrolling webpages or make videos using screenshots and audio.
More than that, it enables you to extract text from a screenshot so that you can use it in other documents. It is also worth mentioning that this snip tool for Windows includes a dozen integrations with products like Microsoft, Google Drive, Facebook, etc.
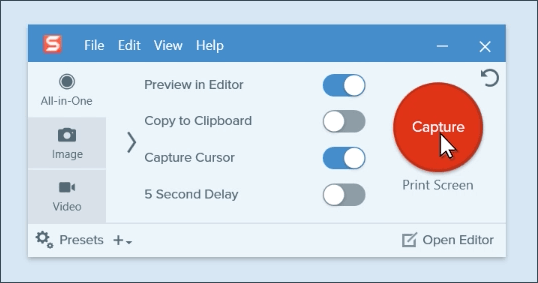
Key features:
- Available for both Windows and Mac
- Offer lots of annotations tools for capturing
- One click to record screen and videos
Top 5. ShareX
- OS: Windows 7 SP1 or later
- Best for: Free to screen capture and share to different platforms easily
Want to get open source screen capture? ShareX is an entirely open-source and lightweight Windows snipping tool. You can use it to snapshot on an entire screen, partial screen, or even a scrolling screen with markup tools. This freeware not only allows you to take screenshots but also edit the images or videos by adding effects. With ShareX screenshot tool, you can easily share screenshots to over 80 services, including Google Drive, Dropbox, or Imgur.
Apart from that, it is integrated with OCR technology. That means you can easily get the text from your screenshots and paste it into other documents. Is it not cool? If you have these requirements, get ShareX now.
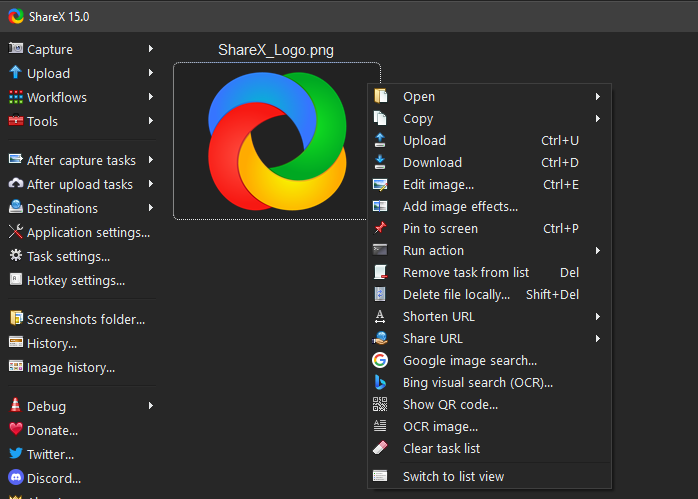
Key features:
- Allow recording and snapshotting
- OCR technology is available
- Act as a color picker, image combiner, and DNS changer
Top 6. Greenshot
- OS: Windows & Mac
Greenshot is another free and open source screenshot tool for Windows. This lightweight screenshot software offers multiple capture modes like full screen, window, rectangular area, scrolling web page (IE exclusive). Greenshot is best for technical documentation illustrations, bug screenshots, requirements review, teaching courseware, quick sharing on social media, etc.
The installer is only 4 MB, so it's extremely lightweight. Consequently, when you launch it directly, no window appears—it simply runs in the background. To access the GUI and all options, right-click the Greenshot icon in the system-tray area (you may need to click "Show hidden icons" in the bottom-right corner first).
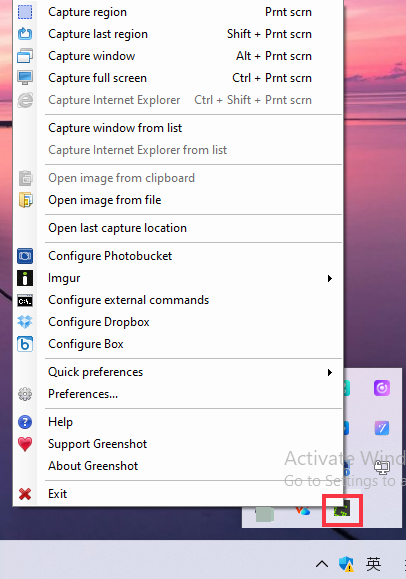
Features:
- Lightweight and customizable hotkeys with zone selection capabilities
- Save screenshots as JPG, BMP, PNG, TIFF, or even GIF
- With fully functional image editor
- Quick to share or upload screenshots to Microsoft, Dropbox, Imgur, Photobucket, or other platforms
Share this best free snipping tool for Windows guide with others.
Final Words
Here, you can learn six outstanding snipping tools for Windows, and get them for free. Which one do you prefer? If you want to find an open-source snapshot tool, ShareX or Greenshot is a nice option. If you are searching for a versatile program combining both recording and snapshotting, look no more than EaseUS RecExperts. It will simplify your work!
FAQs About Snipping Tool for Windows
1. Does Windows 10 have a Snipping Tool?
Yes, Windows 10 does have a snipping tool called Snip & Sketch. It allows you to take screenshots with simple clicks. However, this freeware cannot save your images as a JPG or GIF file. So if you have some advanced requirements, you can opt for some third-party software.
2. What is the best free Snipping Tool?
Everyone has a different definition of the best free Snipping Tool. So, here we picked out the top 5 screenshot tools:
- EaseUS RecExperts
- ShareX
- PicPick
- Jing
- Snagit
3. Is there a free Snipping Tool?
Yes. For basic work, the built-in Snip & Sketch for Windows lets you screenshot for free. If you have some other needs like editing or sharing, you can opt for ShareX.
4. How can I save a webpage as a PDF?
The straightforward method to save a website as a PDF file is to press Ctrl + P on your keyboard.
Step 1. Visit the webpage that you want to convert it to PDF.
Step 2. Press Ctrl+P and then click the Print button to save it to your local folder.
In this way, you can easily save a full webpage as a PDF without needing to install any software.
5. How do you take a screenshot on Windows 11 without the Snipping Tool?
To take screenshots on Windows 11 without the Snipping Tool, you can use EaseUS ScreenShot tool. It's totally free to capture high quality screenshots on your Windwos PC. At the same time, it is lightweight enough, with minimal RAM and CPU usage even during continuous use.
6. What are the best Windows 11 Snipping Tool alternatives?
Here are some excellent Snipping Tool alternatives:
- If you need both screenshots and high-quality screen recording in one package, go with EaseUS RecExperts. It handles 4K capture, webcam overlays, and multi-source audio without fuss.
- EaseUS ScreenShot is a free high quality snipping tool. You can quickly take a screenshot by double-clicking the Ctrl key.
- Looking for completely free and open-source power? Grab ShareX for endless automation and Greenshot when you just want a feather-light, no-nonsense snipping tool.
- For designers who want pixel-perfect stills with rulers, color pickers, and effects, PicPick is free for personal use.
7. How to download snipping tool on Mac?
Microsoft's Snipping Tool is only available for Windows and cannot be downloaded on macOS. However, Mac users can take screenshots using built-in shortcuts, such as:
- Command + Shift + 3 – Capture the entire screen
- Command + Shift + 4 – Capture a selected area
- Command + Shift + 5 – Open the Screenshot toolbar for screenshots and screen recordings
If you need more advanced features, such as scrolling screenshots, scheduled recordings, audio capture, or video editing, you can use a Snipping Tool alternative like EaseUS RecExperts for Mac.
8. How to download snipping tool on Chromebook?
Snipping Tool is not available for ChromeOS, so you cannot download it directly on a Chromebook. Fortunately, ChromeOS includes built-in screenshot and screen recording tools.
To capture your screen on a Chromebook:
- Press Shift + Ctrl + Show Windows.
- Choose Screenshot or Screen Record from the toolbar.
- Select the area you want to capture.
- Save the screenshot or recording automatically.
If you need more advanced capture features, you can also install screenshot or screen recording extensions from the Chrome Web Store.
9. How to Download Snipping Tool Without Microsoft Store?
If Microsoft Store is unavailable on your PC, you can still install Snipping Tool using an offline installer package. This is a common solution for users on managed work computers, customized Windows installations, or systems where Microsoft Store has been removed or disabled.
To download Snipping Tool without Microsoft Store:
- Download a trusted Snipping Tool offline installer from a reputable source.
- Run the installer and follow the on-screen instructions.
- Restart your computer if prompted.
- Open Snipping Tool from the Start menu or search bar to verify that the installation was successful.
Keep in mind that downloading software from unofficial websites may pose security risks. Whenever possible, install Snipping Tool through Microsoft Store to ensure you receive the latest updates and security fixes.