-
![]()
Daisy
Daisy is the Senior editor of the writing team for EaseUS. She has been working in EaseUS for over ten years, starting from a technical writer to a team leader of the content group. As a professional author for over 10 years, she writes a lot to help people overcome their tech troubles.…Read full bio -
Jane is an experienced editor for EaseUS focused on tech blog writing. Familiar with all kinds of video editing and screen recording software on the market, she specializes in composing posts about recording and editing videos. All the topics she chooses …Read full bio
-
![]()
Alin
Alin is an experienced technical blog writing editor. She knows the information about screen recording software on the market, and is also familiar with data cloning and data backup software. She is expert in writing posts about these products, aiming at providing users with effective solutions.…Read full bio -
Jean is recognized as one of the most professional writers in EaseUS. She has kept improving her writing skills over the past 10 years and helped millions of her readers solve their tech problems on PC, Mac, and iOS devices.…Read full bio
-
![]()
Jerry
Jerry is a fan of science and technology, aiming to make readers' tech life easy and enjoyable. He loves exploring new technologies and writing technical how-to tips. All the topics he chooses aim to offer users more instructive information.…Read full bio -
![]()
Rel
Rel has always maintained a strong curiosity about the computer field and is committed to the research of the most efficient and practical computer problem solutions.…Read full bio -
![]()
Gemma
Gemma is member of EaseUS team and has been committed to creating valuable content in fields about file recovery, partition management, and data backup etc. for many years. She loves to help users solve various types of computer related issues.…Read full bio -
![]()
Shelly
"I hope my articles can help solve your technical problems. If you are interested in other articles, you can check the articles at the bottom of this page. Similarly, you can also check my Twitter to get additional help."…Read full bio
Page Table of Contents
0 Views |
0 min read
Why Is GarageBand Not Working
GarageBand is a Mac audio recording software. This tool allows you to record and create audio effects for your songs. Although this application works fine most of the time, you can easily experience the issue of GarageBand not picking up the mic or the record button not working. The common causes of GarageBand not working include the following:
🎞️Outdated software: If you're running on outdated GarageBand software, you're likely to experience bugs, therefore failing to record your audio files.
🎯Incompatible external interfaces: Sometimes, GarageBand may fail to work because of incompatible external audio interfaces.
📸Corrupted project files: If the project file you want to run on GarageBand is corrupted, it may prevent the software from working correctly.
🎨Interference from custom preferences: Your GarageBand may fail to work correctly because of preexisting custom settings. Such settings could interfere with your project files.
GarageBand Not Working Solutions
To have GarageBand working correctly, you can try fixing the issues mentioned above one after the other. This section will discuss ways to fix the GarageBand not responding problem, including using an alternative tool. The table below shows the methods we'll discuss and their effectiveness. Keep reading to know how each method works.
Method 1. Use a GarageBand Alternative
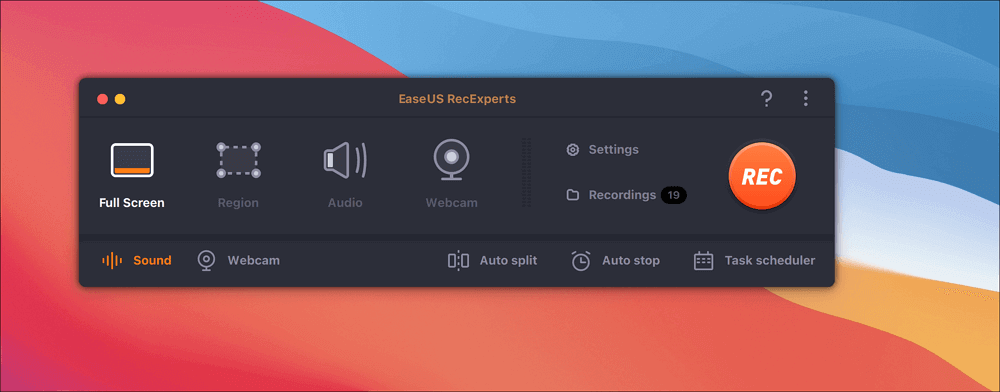
If GarageBand is not working correctly, one of the best solutions is to try the available alternatives. Although many alternatives exist, one great tool that we highly recommend is EaseUS RecExperts. This software is not a music/audio production tool like GarageBand but allows you to record audio on your Mac.

Therefore, it is the best alternative if you encounter issues like GarageBand not recording audio. Unlike GarageBand, this Mac screen recorder is quite reliable and has a high success rate. It lets you capture an audio stream or record audio from YouTube or other video streaming platforms.
Besides, it has an AI-powered noise reduction feature that cancels any noise on your audio/video recording. Also, the tool allows you to mute the recording without affecting the recorded file.
To start enjoying the features of this software, remember to download and install it on your computer today.
Method 2. Restart Your Mac and the App
One of the options you can try out when GarageBand crashes is to perform a simple restart. You can either restart the app or your Mac. This could fix the most common issues preventing the software from working correctly; if you want to restart the app on your Mac, press Command + Q.
This allows you to quit the app. You can then relaunch the app to check if the issue gets fixed. The second option is to restart your Mac. To do that, click on the Apple menu, then select the "Restart" option.

Have you solved your GarageBand problem? If yes, don't forget to share this post with others in need!
Method 3. Perform Software Update
Updating your Mac or iPhone could fix most of the issues preventing GarageBand from working. Normally, an update ensures that your device has the latest security features, allowing the app to run without any bugs. If you've not set automatic updates on your Mac, you can follow the steps below to perform software updates.
Step 1. Click on the Apple icon, then select "About This Mac."
Step 2. Go to the "Overview" tab and select "Software Update."

Step 3. Select the option to update your device if any software updates are available. Once the update process is complete, you can relaunch GarageBand and check whether it works correctly.
If you're using the app on your iPhone, you can perform a software update by going to "Settings">"General">"Software Update." From there, you can update your iPhone.
Method 4. Disabled AU Plugins
Sometimes, enabling AU plugins for your project could prevent the GarageBand app from working correctly. As a remedy, you can disable the logins and retry to check if the errors disappear. Follow the steps below:
Step 1. Launch the GarageBand project that is not working correctly.
Step 2. Next, navigate to the top of your screen and click the "GarageBand" tab.
Step 3. Click on "Preferences" > "Audio/MIDI," then uncheck the box for "Enable Audio Units." When prompted, click on the "Disable" option.

Step 4. You can then relaunch your project on GarageBand to see if it works properly.
Method 5. Reset GarageBand Preferences
Resetting your preference settings could also help fix the "GarageBand not working" problem. However, it's important to note your custom settings first so you can reapply them later. Follow the steps below to reset GarageBand preferences.
Step 1. Close the GarageBand app.
Step 2. Navigate to the search bar and type "Terminal." Select the Terminal from the search results to open it.

Step 3. Paste the following command in the Terminal window and hit Enter.
defaults delete com.apple.garageband10
Step 4. If you updated GarageBand recently, you can also run the command below:
defaults delete com.apple.garageband
Step 5. After running the above commands on Terminal, you can restart your Mac and confirm whether GarageBand works properly.
Method 6. Reinstall GarageBand on Your Mac
If you've tried the previous solutions, but GarageBand is still not working, another fix is to reinstall the app. This process entails deleting your device's existing application and downloading a new one from the App Store. With this, you have a high chance of fixing the bugs preventing your app from working correctly. Follow the steps below:
Step 1. Open Finder on your Mac, then go to "Applications."
Step 2. Locate GarageBand, press Ctrl, then select "Move to Bin."

Step 3. Next, go to the App Store and search for GarageBand in the applications listed. Click on the Install button to download the app. Once the download process is complete, run the app on your Mac. Check whether GarageBand now works correctly. If so, you can continue with your project.
Final Words
In summary, you may experience the "GarageBand not working" problem because of outdated software, incompatible external interfaces, corrupted project files, or interference from custom preferences. Ensure you fix these issues before retrying GarageBand for audio production on your Mac.
The best solution to GarageBand not working is to use a powerful alternative like EaseUS RecExperts. This tool allows you to record audio sounds on your Mac effectively and save them. EaseUS has an AI-powered noise reduction feature that cancels any noise on your audio/video recording. Please download EaseUS RecExperts today and use it as a GarageBand alternative.
GarageBand Not Working FAQs
Below are common questions about GarageBand not working.
1. Is GarageBand Not Free Anymore?
No, GarageBand is still free for all Mac users. It doesn't matter if you have a MacBook Air, MacBook Pro, or iMac since GarageBand will still work effectively. However, it's important to note that you cannot run this application on Windows PCs.
2. What Are the Cons of GarageBand?
The main cons of GarageBand include the following:
- Has large project files that could take up large storage
- Only comes with basic features; hence, it is not friendly to top-tier professionals
- It may cause your Mac to overheat, slowing things down
- You're likely to experience problems with the AU sampler
- It might stop working unexpectedly
3. How do you find your plugins on GarageBand?
You can follow the steps below to find your plugins on GarageBand:
Step 1. Start GarageBand.
Step 2. Navigate to the Plugins area under the Smart Control pane.
Step 3. Click on the empty plugin slot, then select an effect category.
Step 4. Next, go to the Audio Units submenu to select your preferred plugin. You'll then have the plugin window opened, displaying the available plugin controls.
EaseUS RecExperts

One-click to capture anything on screen!
No Time Limit, No watermark
Start Recording


