-
![]()
Daisy
Daisy is the Senior editor of the writing team for EaseUS. She has been working in EaseUS for over ten years, starting from a technical writer to a team leader of the content group. As a professional author for over 10 years, she writes a lot to help people overcome their tech troubles.…Read full bio -
Jane is an experienced editor for EaseUS focused on tech blog writing. Familiar with all kinds of video editing and screen recording software on the market, she specializes in composing posts about recording and editing videos. All the topics she chooses …Read full bio
-
![]()
Alin
Alin is an experienced technical blog writing editor. She knows the information about screen recording software on the market, and is also familiar with data cloning and data backup software. She is expert in writing posts about these products, aiming at providing users with effective solutions.…Read full bio -
Jean is recognized as one of the most professional writers in EaseUS. She has kept improving her writing skills over the past 10 years and helped millions of her readers solve their tech problems on PC, Mac, and iOS devices.…Read full bio
-
![]()
Jerry
Jerry is a fan of science and technology, aiming to make readers' tech life easy and enjoyable. He loves exploring new technologies and writing technical how-to tips. All the topics he chooses aim to offer users more instructive information.…Read full bio -
![]()
Rel
Rel has always maintained a strong curiosity about the computer field and is committed to the research of the most efficient and practical computer problem solutions.…Read full bio -
![]()
Gemma
Gemma is member of EaseUS team and has been committed to creating valuable content in fields about file recovery, partition management, and data backup etc. for many years. She loves to help users solve various types of computer related issues.…Read full bio -
![]()
Shelly
"I hope my articles can help solve your technical problems. If you are interested in other articles, you can check the articles at the bottom of this page. Similarly, you can also check my Twitter to get additional help."…Read full bio
Page Table of Contents
Alin
Updated on Jun 09, 2026
0 Views |
0 min read
Steam has a built-in screen recording feature to help gamers capture exciting moments by pressing the Steam video recording hotkey Ctrl+F11. This guide walks you through how to use the Steam game recording feature.
Steam Game Recording Overview
Steam's game recording feature is a powerful tool that allows you to capture gameplay footage with ease. It supports background recording for instant replays, manual recording when you need it, and in-game overlay for seamless editing and exporting. And it uses GPU encoding by default to reduce the impact on frame rate. This feature allows you to screen record Steam Deck and PC, making it accessible to all Steam users.
How to Use Steam Game Recording
To record gameplay on Steam using Steam's recording feature, the first step is to enable it. Follow these steps to get how to enable Steam recording:
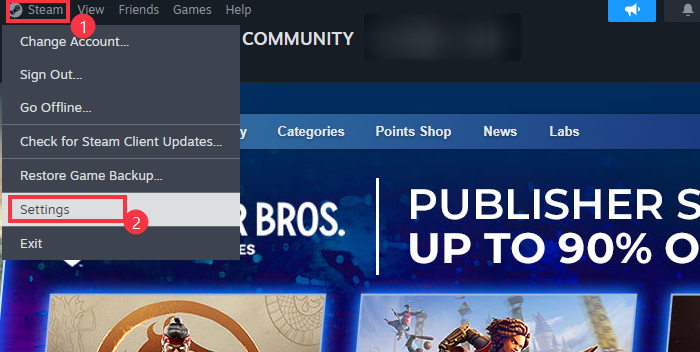
Step 1. Open Steam Settings
Log in to your Steam Client account. Go to Steam > Settings > Game Recording.
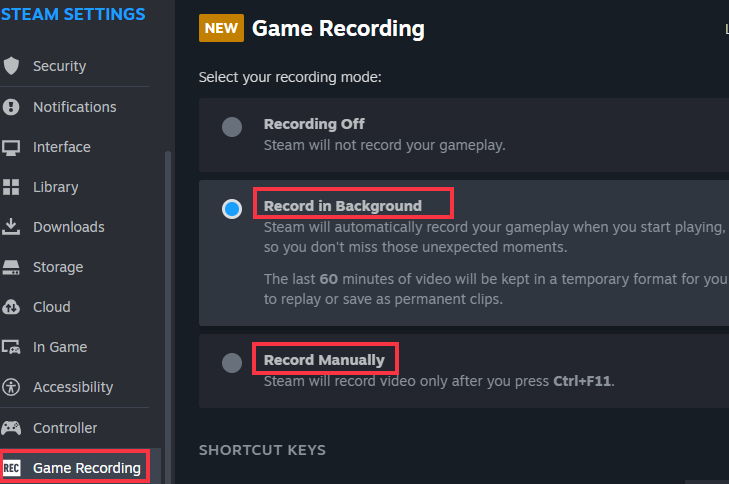
Step 2. Choose Recording Mode
Choose a recording mode that suits your needs:
- Record in Background: This mode automatically records your gameplay, allowing you to review and save clips later.
- Record Manually: This mode lets you start and stop recording manually, giving you control over what you capture.
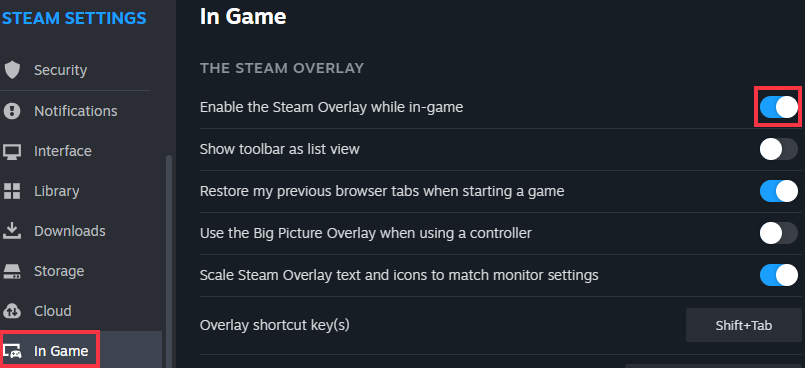
Step 3. Use the Steam Overlay
Ensure the Steam Overlay is enabled to access recording controls during gameplay. You can go to Steam> Settings > In Game to check the Enable the Steam Overlay while in-game option to turn on the Steam recording.
Step 4. Start Recording Steam Games
After enabling the Steam screen recorder, you can start game capturing. If you chose Manual Recording, press the hotkey (default is Ctrl + F11) to start recording. If you choose Recording in Background, Steam will automatically record your gameplay.
- Notice:
- You can not capture desktop or other applications with Steam Recording. You can only capture your gameplay footage of games played through the Steam Client.
Share this Steam recording guide with more people.

Customize Steam Recording Settings
Want a more personalized recording experience? You need to set your recording information, which will be described in detail below.
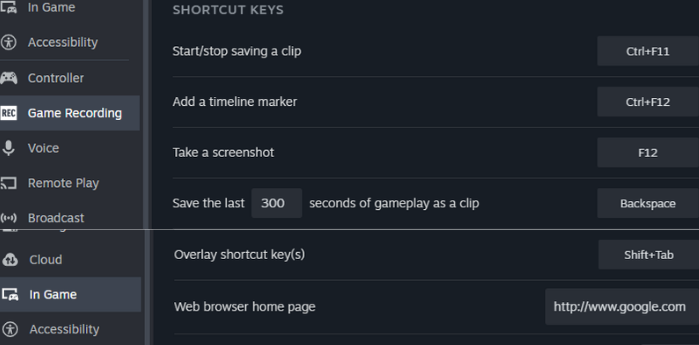
Steam Recording Hotkeys
Here are some shortcuts for Steam recording:
|
Function |
Shortcut Key |
|
Overlay shortcut key(s) |
Shift+Tab |
|
Start/stop saving a clip |
Ctrl+F11 |
|
Add a timeline marker |
Ctrl+F12 |
|
Take a screenshot |
F12 |
|
Save the last seconds of gameplay as a clip |
Backspace |
If you need to change the Steam recording shortcut as needed, you can navigate to Steam > Settings > In Game and Game Recording options to change.
Video Recording Settings
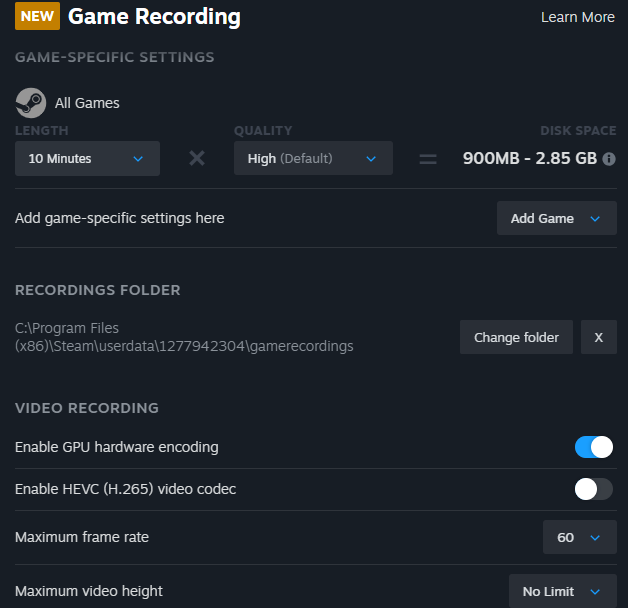
Customizing the recording quality and frame rate in Steam is crucial for balancing performance and video quality. In the settings menu, scroll down to Game Recording and find GAME-SPECIFIC SETTINGS, VIDEO RECORDING, AUDIO RECORDING.
You can adjust the following:
- Quality: Adjust the video quality from Low to Ultra, and roughly calculate the video size based on the duration and quality
- Maximum Frame Rate: Set the maximum frame rate as 60FPS or 30FPS for your recordings.
- Video Height: Choose the resolution height (e.g., 720p, 1080p, 2160p).
- Video Codec: Enable HEVC (H.265) video codec if needed.
- Bitrate: Adjust the bitrate to control the quality and file size of your recordings.
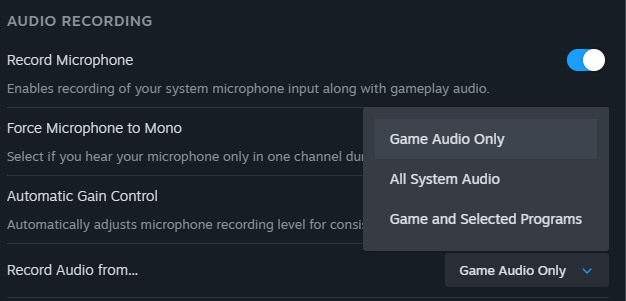
Audio Recording Settings
Enable "Record Microphone" to capture your voice along with gameplay audio. If your microphone audio is unbalanced, use "Force Microphone to Mono" to ensure it's heard in both channels. For consistent volume, turn on "Automatic Gain Control." Lastly, choose what audio to record: game audio only, all system audio, or other. These settings help improve the audio quality of your recordings.
How to Enable Steam Deck Screen Recording
The Steam Deck also comes with a built-in game recording feature, making it easy to capture your gameplay and save highlights. Here's a step-by-step guide on how to record Steam Deck games:
Step 1. Enable Game Recording
Press the Steam button to open the main menu. Go to Settings, scroll down, and select Game Recording. Choose your preferred recording mode:
- Record in background: Steam will automatically start recording when you launch a game and stop when you exit.
- Record on demand: You'll need to start and stop game recording yourself using the shortcut Steam + A.
Step 2. Customize Recording Settings
Inside the Game Recording menu, you can adjust several options to match your needs:
- Recording Quality (high, medium, or low)
- Maximum Frame Rate (e.g., 30 FPS or 60 FPS)
- Maximum Video Height (resolution setting)
- Audio Options (system sound, microphone, or both)
- Storage Limits to prevent large recordings from filling up your drive
Step 3. View and Edit Your Recordings
While playing, press the Steam button and navigate to Game Recording to view your saved recordings.
To flag key moments during gameplay, you can use timeline markers by pressing Ctrl+ Y. To create a highlight clip, use the editing tools inside the Game Recording overlay menu to trim and save your best moments.
✨ Tips:
- If storage space is limited, stick to manual recording or set strict storage caps.
- Timeline markers are a great way to cut down editing time later.
- Steam Deck's recording is perfect for making short highlights or sharing your gameplay with friends.
Share this Steam recording guide with more people.
Record Gameplay on PC with Steam Recording Alternative
While Steam Game Recording is convenient, it has limitations:
- Cannot record your desktop
- Cannot capture non-Steam games
- No advanced editing features
EaseUS RecExperts stands out in these cases. This PC game recorder can record all kinds of games played on Windows and Mac, including those from Steam, Epic, Origin, and LOL. With it, gamers can capture any gaming highlights without lags or loss of fps. Besides, this screen recorder can record multiple screens, audio, and webcam.
Key features:
- Available on Windows & Mac
- Support the schedule recording feature to capture gameplay automatically
- Auto split, auto stop, and exporting in MP4, AVI, MOV, and other formats.
- Support saving independent audio and video files
Steps on how to record Steam gameplay on PC with this professional game recorder:
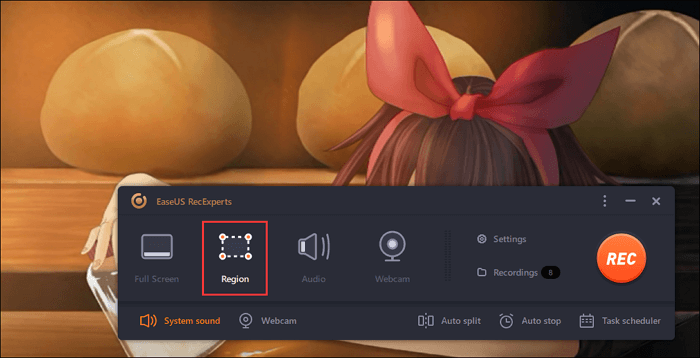
Step 1. Launch the EaseUS game recorder and click the Menu icon to open the Settings.
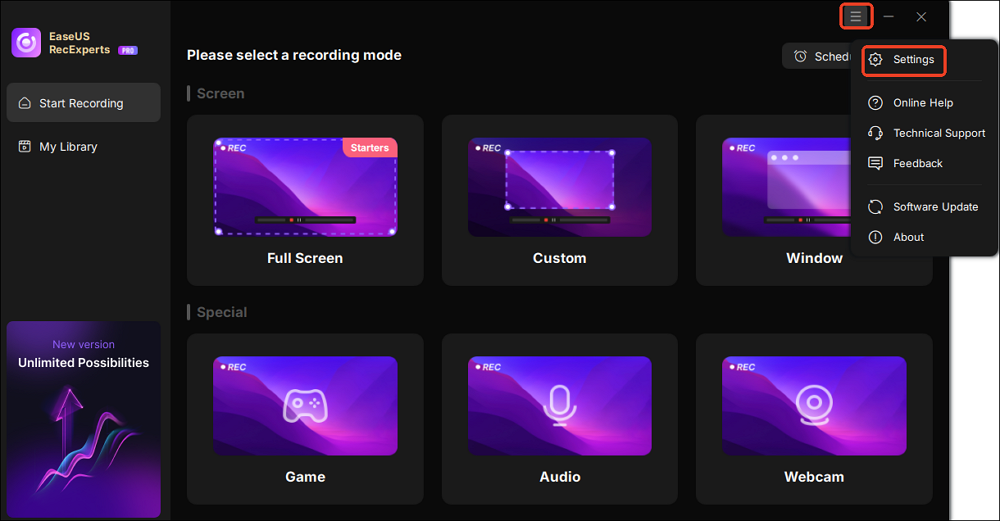
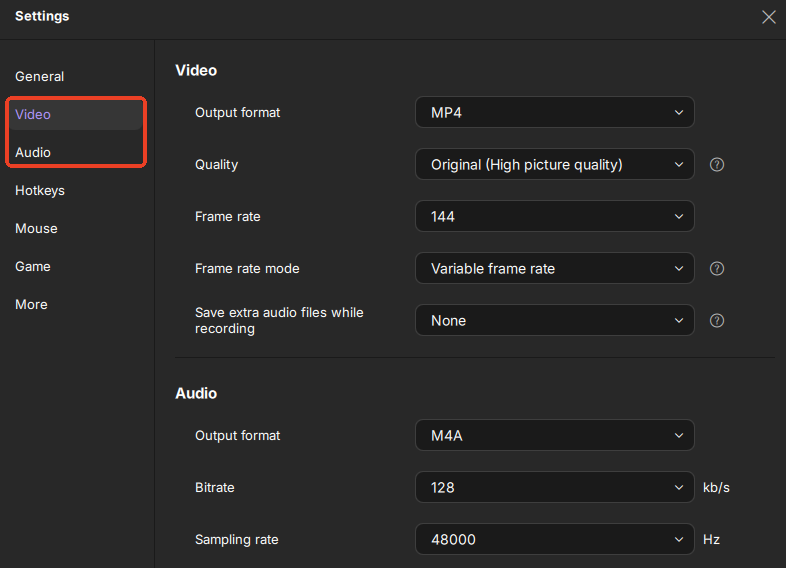
Step 2. Then, customize the settings under the video, audio, and game options as needed. This includes configuring the recording format and quality, exporting audio files, displaying overlay information, etc.
Step 3. Go back to the main interface and select Game mode. Pick the game window for the gameplay you want to capture, and select a webcam or audio source if desired.
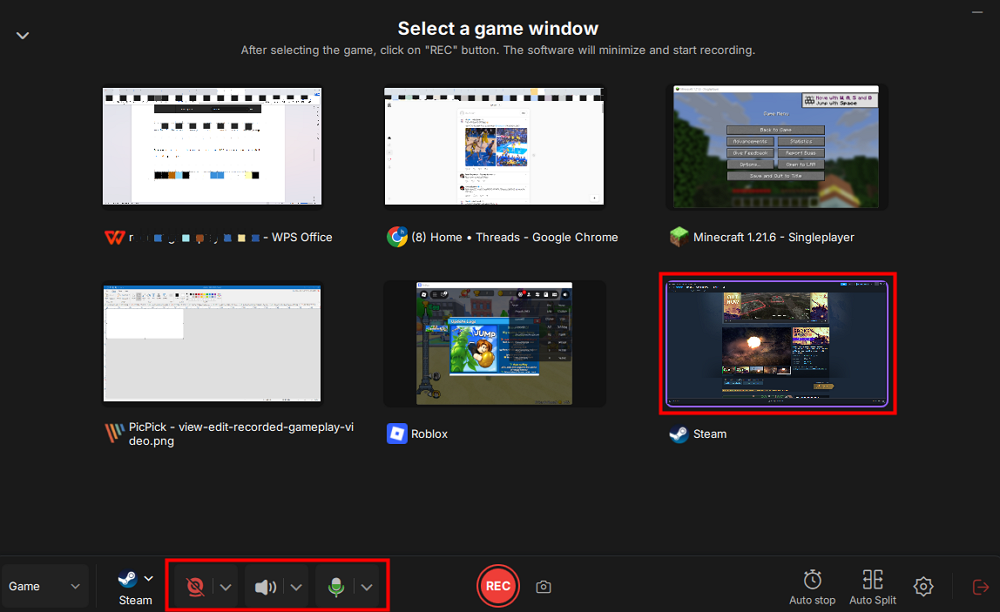
Lastly, press REC to start the game recording.
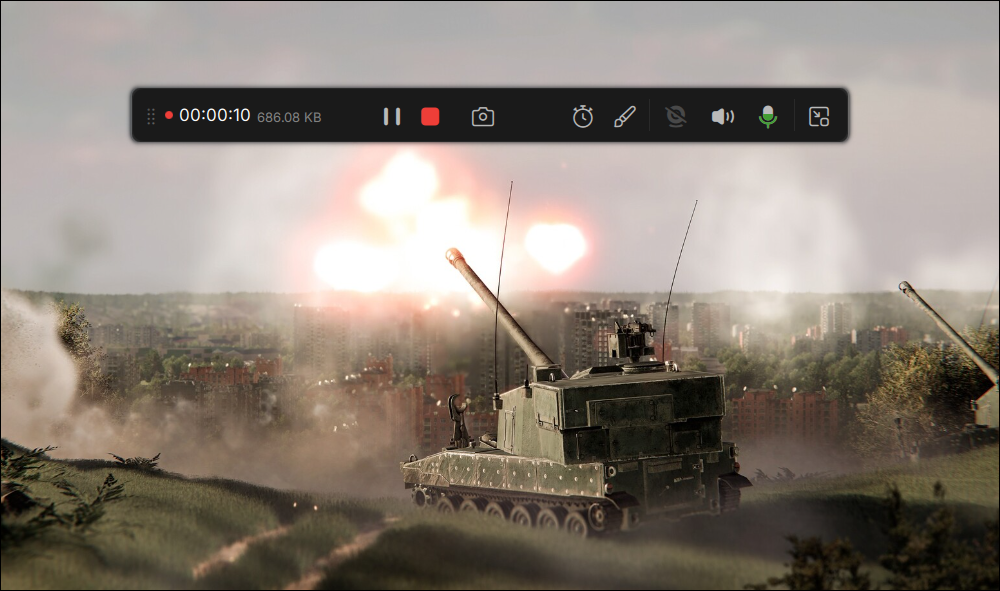
Step 4. You can click the Camera icon or press F11 to take screenshots while recording the game.

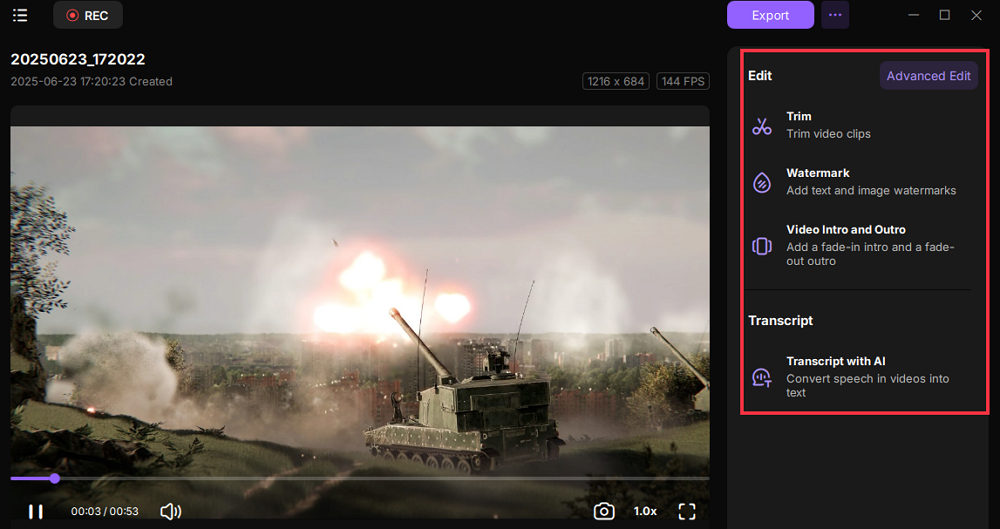
Step 5. Click the red square icon to stop recording. Then, go to My Library to preview the recorded gameplay video. Plus, you can edit the game video by using the built-in tools.
Bonus Tip: Steam Recording Failed to Export
Some Reddit users have reported encountering various issues when exporting Steam clips, such as only exporting less than 3 seconds of video or the export being interrupted midway. If you experience the "Steam recording failed to export" issue, you can resolve it by following these solutions:
1️⃣Check Storage Path & Disk Space: Go to Steam > Settings > Storage.
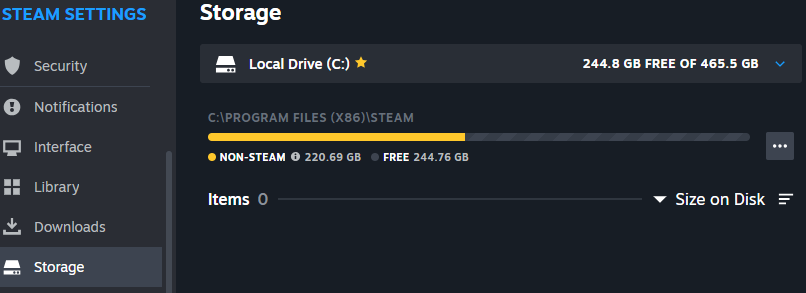
And Game Recording > Recordings Folder. Make sure the export folder exists and is writable. Free up disk space; at least 5 to 10 GB is available.

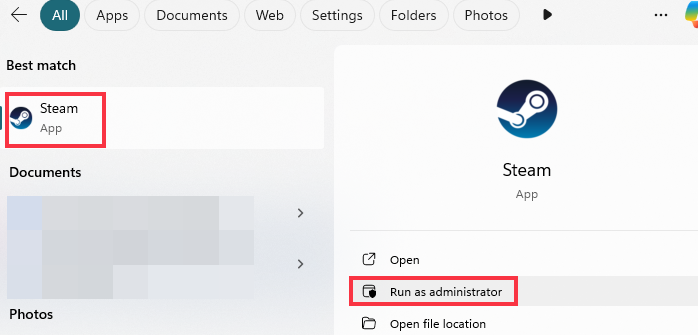
2️⃣Run Steam as Administrator: You can exit Steam and run it as Administrator again. This helps if Steam doesn't have permission to write files.
3️⃣Test with Other Recordings: You can try exporting a different clip. If only one fails, the recording file may be corrupted.
4️⃣Try a different export format: If exporting to H.265 (HEVC) fails, try exporting to H.264.
5️⃣Use a Third-Party Recorder: If Steam keeps failing, you can play back the clip inside Steam and use a tool like OBS Studio or EaseUS RecExperts to re-record and export it to MP4.
Share this Steam recording guide with more people.
Conclusion
Steam offers a built-in Game Recording feature for PC and Steam Deck users, making it easy to capture highlights with just a hotkey. However, if you need to record non-Steam games, desktop activities, add facecam overlays, or even fail to export Steam recordings, a third-party tool like EaseUS RecExperts is a better option, which can capture any epic gaming moment without lag.
How to Record on Steam FAQs
1. How to convert Steam recording to MP4?
To convert a Steam recording to MP4 format, follow these steps:
Step 1. Go to View > Recordings & Screenshots to find the recording you want to convert.
Step 2. Right-click on the recording and select Share and choose Export Video File.
Step 3. Select MP4 as the format and click Export to save the recorded file as an MP4.
2. How to fix the Steam game recording no audio issue?
You can check Steam> Settings > Game Recording > Audio Source and select the correct input (system or mic).
3. How to turn off Steam recording?
Go to Steam > Settings> Game Recording to choose the Recording Off mode.
4. Where are Steam recordings saved?
By default, the recorded game videos will be saved in the "recordings" folder, located within your Steam Library directory.
5. Does Steam recording affect performance?
Steam uses GPU encoding to reduce FPS impact, but lowering resolution/bitrate can further improve performance.