-
![]()
Daisy
Daisy is the Senior editor of the writing team for EaseUS. She has been working in EaseUS for over ten years, starting from a technical writer to a team leader of the content group. As a professional author for over 10 years, she writes a lot to help people overcome their tech troubles.…Read full bio -
Jane is an experienced editor for EaseUS focused on tech blog writing. Familiar with all kinds of video editing and screen recording software on the market, she specializes in composing posts about recording and editing videos. All the topics she chooses …Read full bio
-
![]()
Alin
Alin is an experienced technical blog writing editor. She knows the information about screen recording software on the market, and is also familiar with data cloning and data backup software. She is expert in writing posts about these products, aiming at providing users with effective solutions.…Read full bio -
Jean is recognized as one of the most professional writers in EaseUS. She has kept improving her writing skills over the past 10 years and helped millions of her readers solve their tech problems on PC, Mac, and iOS devices.…Read full bio
-
![]()
Jerry
Jerry is a fan of science and technology, aiming to make readers' tech life easy and enjoyable. He loves exploring new technologies and writing technical how-to tips. All the topics he chooses aim to offer users more instructive information.…Read full bio -
![]()
Rel
Rel has always maintained a strong curiosity about the computer field and is committed to the research of the most efficient and practical computer problem solutions.…Read full bio -
![]()
Gemma
Gemma is member of EaseUS team and has been committed to creating valuable content in fields about file recovery, partition management, and data backup etc. for many years. She loves to help users solve various types of computer related issues.…Read full bio -
![]()
Shelly
"I hope my articles can help solve your technical problems. If you are interested in other articles, you can check the articles at the bottom of this page. Similarly, you can also check my Twitter to get additional help."…Read full bio
Page Table of Contents
0 Views |
0 min read
Have you ever recorded Zoom meetings but failed to share them with others successfully because of the format? We all know that Zoom recordings will always be saved in its proprietary format, like M3U, VTT, etc. If you want to share these recorded sessions with others, you'd better convert them to a common video format, like MP4. So, in this blog, we will show you some ways to convert Zoom meetings to MP4 effortlessly. Without further ado, let's get started now!
Method 1. Record Zoom Meetings to MP4 Directly
For your convenience, you can actually use a high-quality screen recorder to record Zoom meetings into MP4 video directly. After testing many Zoom recording software on the market, we highly recommend EaseUS RecExperts.
This software lets you capture Zoom meetings in various formats, including MP4, MOV, MP3, AVI, etc. The schedule recording feature even lets you record Zoom meetings automatically at a specific time. Moreover, it offers annotation tools that allow you to annotate, add text, draw lines, and more during your recording simultaneously. It allows people to change their real background environment to a blur, classroom, studio, or scenery. You can also upload a picture as you like to be the virtual background.
Just download it to have a try.
Step 1. Open the video conference you want to record, such as a meeting on Zoom, Microsoft Teams, Google Meet, or Skype. Then, launch EaseUS RecExperts and choose Full Screen, Custom, or Window mode to record the entire meeting, a selected area, or just the meeting window without distractions.
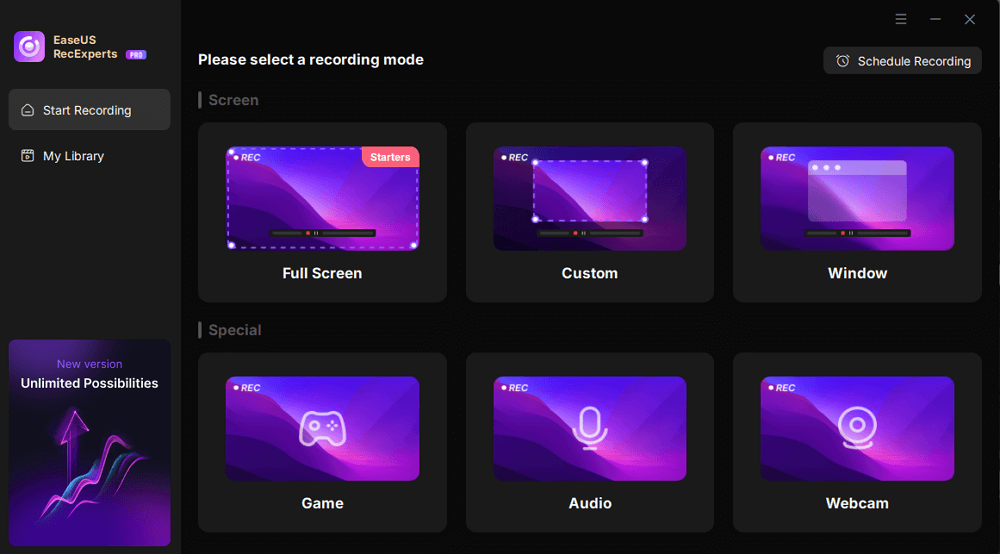
Step 2. Select your recording inputs by toggling on the Webcam, Speaker, and Microphone. You can decide whether to include your own voice, the system sound, or your video feed, depending on how you want to document the meeting.

Step 3. During the recording, you can click the Pencil icon to take notes or mark key points using the built-in annotation tools. This is especially useful for capturing highlights, action items, or speaker transitions without interrupting the meeting.

Step 4. Once everything is set, click the red REC button to begin recording. You can also use the hotkeys F10 to pause and F9 to stop for quick control during the session.
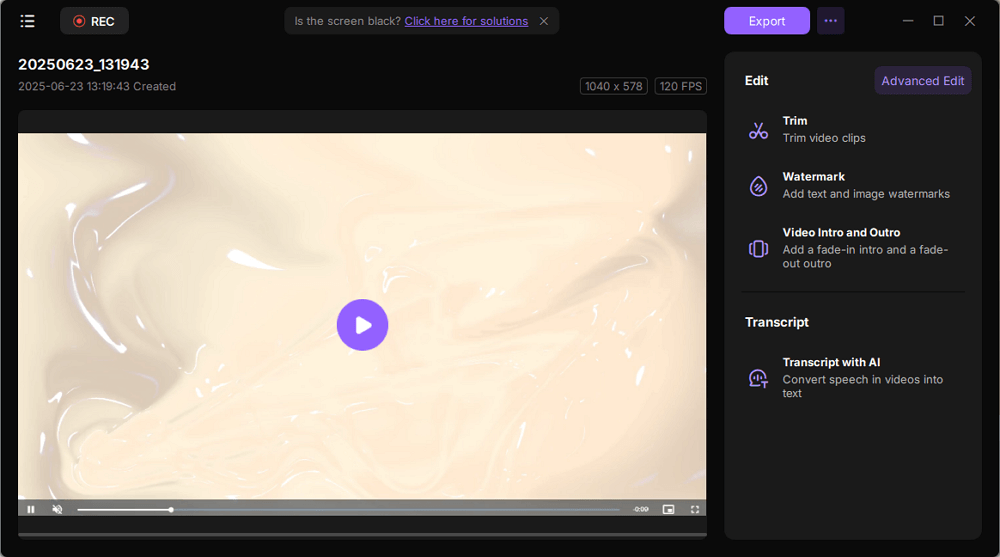
Step 5. After the meeting, the recording will appear in the pop-up preview interface. You can play back, rename, or edit the file. For efficient post-meeting follow-up, click Transcript with AI to generate an automatic text summary of what was discussed, perfect for review, sharing, or archiving.
Share this post to help more people now!
Method 2. Convert Zoom Meeting to MP4 within Zoom App
Actually, there is a built-in video converter in your Zoom desktop application, which allows you to change all your Zoom recordings into MP4 format. However, it cannot be 100 working to convert Zoom recordings via the desktop client, especially when the file is corrupted.
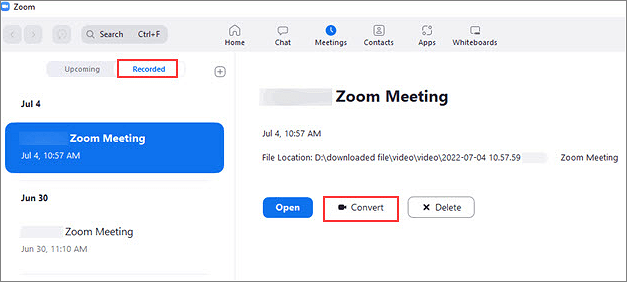
Step 1. Open the Zoom app on your computer, sign in with your login details, and choose the Meetings option on the home page.
Step 2. Click Recorded to navigate all your recorded meetings. Then, choose the one that you want to convert to MP4.
Step 3. Finally, click the Convert button to start your task immediately.
Method 3. Convert Zoom Meetings to MP4 using zTscoder
If you cannot find the Zoom recording that you want to convert in the Recorded tab, you can try the zTscoder. It is actually a part of the Zoom file package and can help you convert your recordings into various formats, including MP4. However, you need to keep in mind that Now, let's check how it works:
Step 1. Find the Zoom meeting file you want to convert to MP4 on your computer, which is usually in the Documents folder.
Step 2. Right-click on the file, and choose Open with > More apps.
Step 3. Next, scroll down to find the Look for another app on this PC option and choose it.
Step 4. Then, choose the zTscoder by following this path: C:\Users\UserName\AppData\Roaming\Zoom\bin.
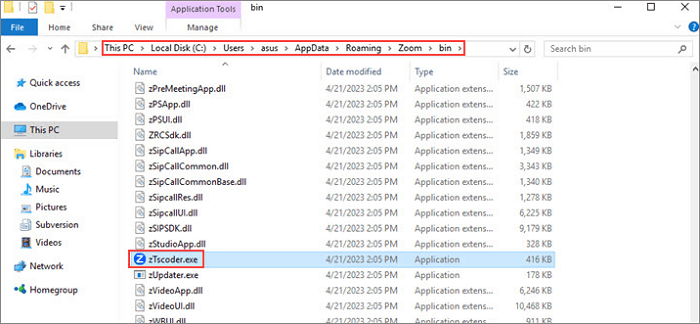
Step 5. Finally, the conversion process will start automatically, and you will get a new MP4 file.
Method 4. Convert Zoom Meetings to MP4 by Switching with New .zoom Files
This method relies on the fact that Zoom converts recordings to MP4 automatically when the meeting ends.
To use this method, you need to create and record a new meeting. Once the session ends, the newly created recording will be converted to MP4. You can replace the new recording file with the previous non-converted files. This will trick Zoom into converting the earlier files to MP4 as well.
Step 1. Open the Zoom app and click Meetings > Recorded to find the file that you want to convert to MP4.
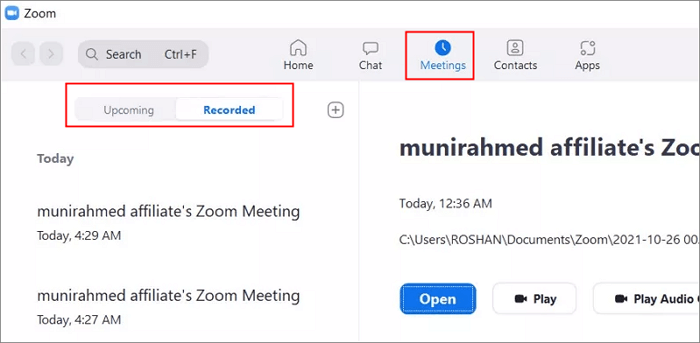
Step 2. Start a new meeting and stop it after a few seconds. Then, use the older Zoom meeting file to replace the new one in the same directory where Zoom files are stored.
Step 3. Next, stop and end the Zoom meeting. Once done, your .zoom file will be converted to MP4.
The Bottom Line
All the methods mentioned here are effective in helping you convert Zoom recordings to MP4. However, each solution has its own advantages and disadvantages and is suitable for different situations. If you want to find an easy yet 100% successful way, try the EaseUS RecExperts. This tool can directly record Zoom meetings in MP4 or even other video formats for later playback!
Convert Zoom Meetings to MP4 FAQs
Why can't I convert my Zoom recording?
Here are some factors you can have a look:
- You closed your laptop or turned off the computer
- You changed the name of the double_click_to_convert .zoom file during the conversion
- ...
Can Zoom recordings be downloaded as MP4?
Yes, Zoom recordings can be downloaded as MP4 files. When you record a Zoom meeting or webinar, the recording is saved in the cloud or on your local device (depending on your settings). You can then download the recording in MP4 format from the Zoom web portal or the Zoom desktop client.
What format is the Zoom meeting recorded in?
It is generally saved in MP4, M4A, M3U, TXTX, VTT, and CC.VTT formats.
EaseUS RecExperts

One-click to capture anything on screen!
No Time Limit, No watermark
Start Recording