-
![]()
Daisy
Daisy is the Senior editor of the writing team for EaseUS. She has been working in EaseUS for over ten years, starting from a technical writer to a team leader of the content group. As a professional author for over 10 years, she writes a lot to help people overcome their tech troubles.…Read full bio -
Jane is an experienced editor for EaseUS focused on tech blog writing. Familiar with all kinds of video editing and screen recording software on the market, she specializes in composing posts about recording and editing videos. All the topics she chooses …Read full bio
-
![]()
Alin
Alin is an experienced technical blog writing editor. She knows the information about screen recording software on the market, and is also familiar with data cloning and data backup software. She is expert in writing posts about these products, aiming at providing users with effective solutions.…Read full bio -
Jean is recognized as one of the most professional writers in EaseUS. She has kept improving her writing skills over the past 10 years and helped millions of her readers solve their tech problems on PC, Mac, and iOS devices.…Read full bio
-
![]()
Jerry
Jerry is a fan of science and technology, aiming to make readers' tech life easy and enjoyable. He loves exploring new technologies and writing technical how-to tips. All the topics he chooses aim to offer users more instructive information.…Read full bio -
![]()
Rel
Rel has always maintained a strong curiosity about the computer field and is committed to the research of the most efficient and practical computer problem solutions.…Read full bio -
![]()
Gemma
Gemma is member of EaseUS team and has been committed to creating valuable content in fields about file recovery, partition management, and data backup etc. for many years. She loves to help users solve various types of computer related issues.…Read full bio -
![]()
Shelly
"I hope my articles can help solve your technical problems. If you are interested in other articles, you can check the articles at the bottom of this page. Similarly, you can also check my Twitter to get additional help."…Read full bio
Page Table of Contents
Jerry
Updated on Jun 09, 2026
0 Views |
0 min read
PAGE CONTENT:
When you screen record on your computer, you may see a mouse pointer in your video, which can be disappointing. A visible mouse cursor can distract viewers or clutter professional content. Hiding the cursor can ensure a clean, focused result when recording tutorials, games, or demos. Under such circumstances, you may want to hide cursor while screen recording.
How can I record video but omit the mouse cursor
byu/SaltyMaybe7887 inffmpeg
So, is it possible, and is there a way to screen record while hiding the mouse? The answer is a definite yes! This article covers how to hide cursor when screen recording. Now, follow this blog to find more information about hiding the mouse pointer while recording the screen easily.
How to Hide Cursor While Recording Windows
When you screen record on Windows, you can hide the mouse cursor using built-in tools or third-party screen recorders. However, instead of simply removing the cursor, a more flexible approach is to adjust or minimize its visibility after recording. Let's see how to do it.
Method 1. Using EaseUS FocalFlow
Using a professional screen recorder is one of the best ways to control cursor visibility during screen recording. Instead of permanently hiding the cursor, tools like EaseUS FocalFlow allow you to record first and then adjust how the cursor appears in your video.
EaseUS FocalFlow is an AI-powered screen recorder and editor designed to create cleaner and more professional recordings. It not only captures your screen smoothly, but also lets you refine cursor visibility, reduce distractions, or highlight key actions with auto zoom and smooth motion effects. This makes it especially useful for tutorials, demos, and presentation videos where both clarity and visual focus matter.
⛳Here is how to record and adjust cursor visibility using EaseUS FocalFlow:
Step 1. Download, install, and launch FocalFlow.
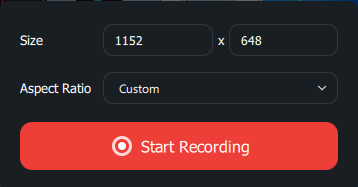
Step 2. Select recording mode (full screen, window, or custom area). Enable webcam, system audio, and microphone if needed.

Step 3. Click Start Recording. You can pause, stop, or delete the recording during the session.
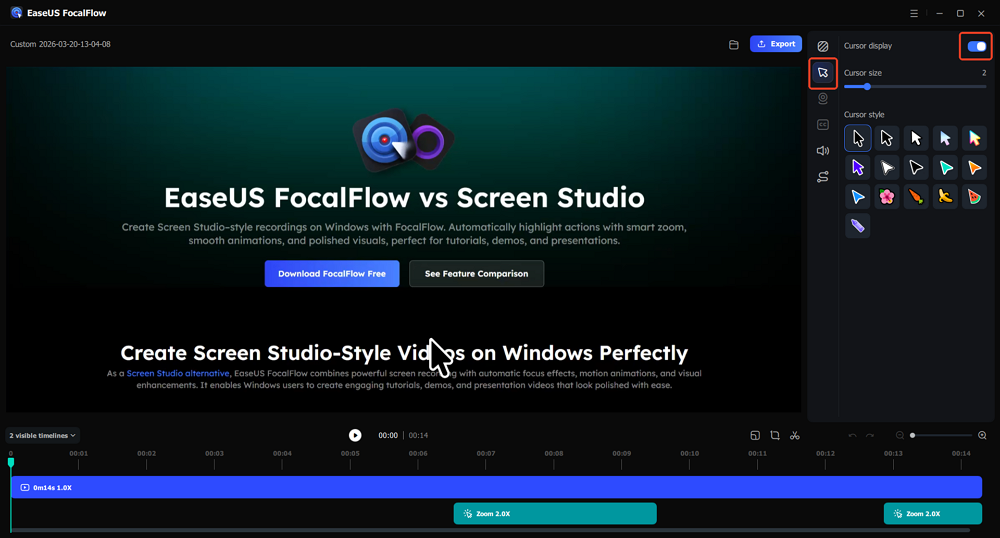
Step 4. After recording, the editor will open automatically. To hide the mouse cursor, select the Cursor tab. Turn the Cursor display off.
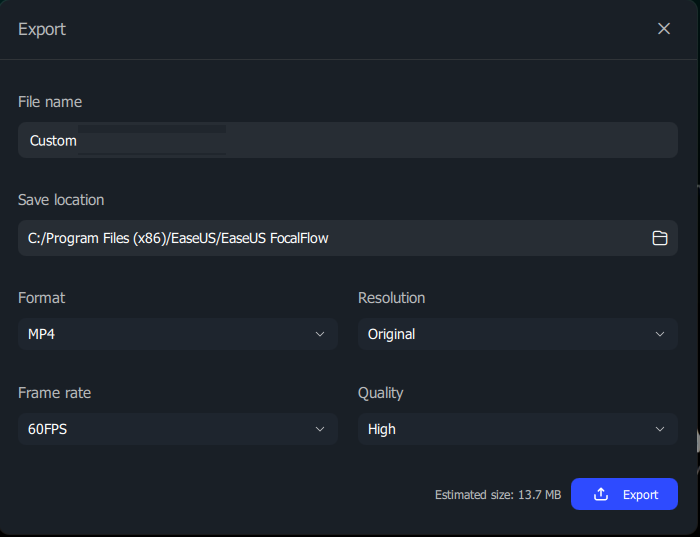
Step 5. Before export, you can change the file name, file location, and other parameters. Then export the file recording in one click.
- Tip
- Instead of completely hiding the cursor, using zoom and visual focus effects often creates a clearer and more engaging viewing experience.
Share this article on social media to help others find a reliable and safe way to hide mouse while screen recording!

Method 2. Using Xbox Game Bar
Windows also has a screen recording tool that can help you screen record without a mouse pointer in the video. If you do not want to download anything on your PC, try this Windows screen recorder to hide the mouse in screen recording. Here is how to hide cursor when screen recording Windows 11/10 using the Xbox Game Bar:
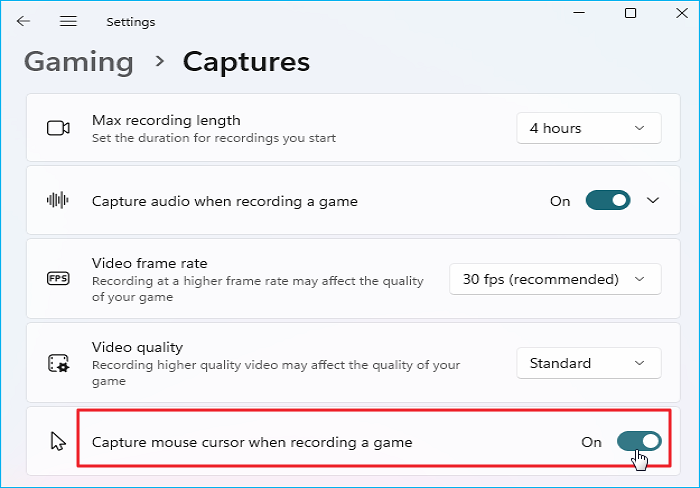
Step 1. Press Windows + X and click on Settings. Then Gaming. Go to the Captures tab. Uncheck Capture mouse cursor when recording a game.
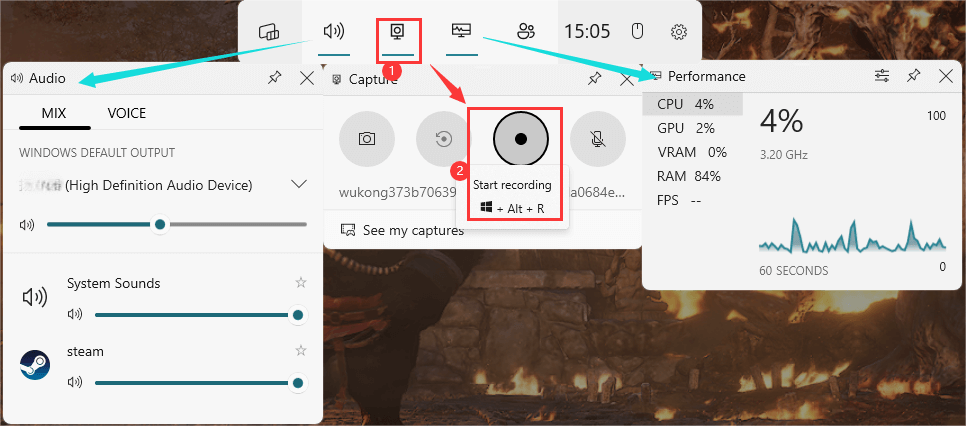
Step 2. Press Windows + G (Xbox Game Bar shortcut) to see all widgets in the top navigation.
Step 3. To do a video recording, click Capture (camera icon) to toggle the Capture widget or press Windows + ALT + R shortcuts to start recording.
Step 4. Press Stop recording in the recording bar or Windows + ALT + R to end the recording.
How to Hide Cursor When Screen Recording Mac
If you want to know how to hide mouse cursor in Mac screen recordings, you can also use the EaseUS Screen Recorder. Besides you can also use Screenflick to capture Mac screen without the mouse or cursor. Alternatively, try QickTime Player to screen record without the mouse pointer without downloading. Here is a guide on QuickTime screen recording without cursor:
Step 1. Launch QuickTime Player from the Applications folder.
Step 2. Select File > New Screen Recording or press Control-Command-N.

Step 3. Click Options to uncheck Show Mouse Clicks.
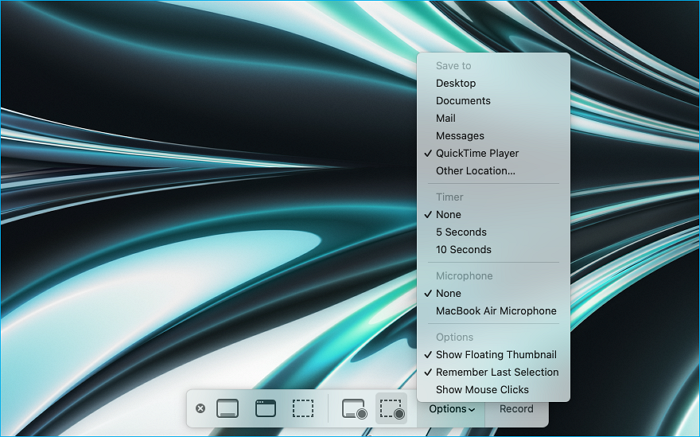
Step 4. Click Record to hide mouse screen recording Quicktime on Mac.
If your QuickTime Player is not working, refer to the following article:

QuickTime Screen Recording Not Working
QuickTime Player allows seamless screen recording and video recording. But is your QuickTime not working? Read more >>
Share this article on social media to help others find a reliable and safe way to hide mouse while screen recording!
How to Hide Cursor When Screen Recording Android
Some Android's built-in screen recorders have the feature that lets you screen record without the mouse. You can also try some Android screen recorders, such as AZ Screen Recorder, to hide mouse while screen recording. Here is how to hide mouse cursor when screen recording on Android:
Method 1. Use Built-in Android Screen Recording Settings
For Android 11 and later:
Step 1. Swipe down from the top right corner and tap Screen Record.
Step 2. Before starting recording, press the gear icon to open settings.
Step 3. Disable options like "Show touches" or "Tap visualizer".
Method 2. Use Third-Party Android Screen Recorder
Here is how to use AZ Screen Recorder to record on Android without mouse pointer:
Step 1. Download and install AZ Screen Recorder.
Step 2. Open the Recorder and navigate to Settings > Recording Settings.
Step 3. Turn off Show touches and Show front camera.
Step 4. Start recording.
To Wrap Things Up
This article tells how to hide mouse when screen recording in detail. Hiding the cursor during screen recording is simple with the right tools. You can use EaseUS FocalFlow, Xbox Game Bar, and QuickTime Player to record screen on your computer without the mouse pointer. For quick results, use EaseUS Screen Recorder. It can help you record a video easily and quickly. Most importantly, it provides advanced settings to meet your video-playing or editing needs. Start your screen recording now with the EaseUS recorder!
FAQs on How to Hide Mouse During Screen Capture
Below are some frequently asked questions about "how to hide mouse cursor in screen recording."
1. Can I hide the cursor in Zoom recordings?
Yes! In Zoom, access Settings > Recording > Hide cursor during recording. You can also try professional screen recorder like EaseUS FocalFlow to high mose while recording.
2. How to record the mouse cursor while recording the screen on Linux?
On the interface popping up at the bottom-right, there is a pointer icon. If you click that before you record, it's the toggle option for recording the mouse pointer.
3. How do I hide my cursor while recording on a Chromebook?
Chromebooks have a built-in screen recorder, but it doesn't hide the cursor. To minimize distractions:
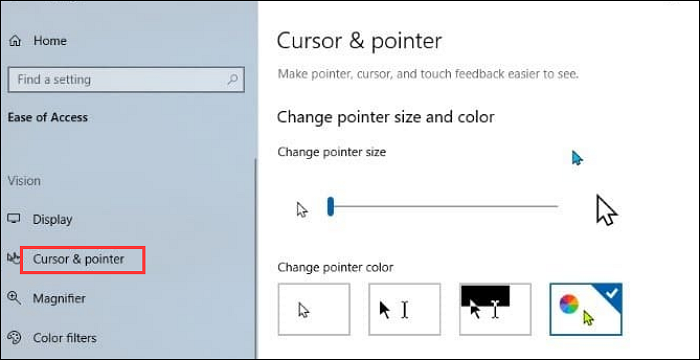
Reduce cursor size:
- Go to Settings - Device - Mouse and Touchpad.
- Adjust Cursor size to Small.
Disable touchscreen highlights (if applicable):
- Go to Settings - Device - Touchpad and disable Enable tap-to-click.
To this end, you can use third-party Chrome extensions screen recorders, like Screencastify, Loom, and Nimbus.
4. How do I hide the cursor in Snipping Tool?
The Windows Snipping Tool always captures the cursor. If you want to screen record without the mouse or cursor, try EaseUS FocalFlow.