-
![]()
Daisy
Daisy is the Senior editor of the writing team for EaseUS. She has been working in EaseUS for over ten years, starting from a technical writer to a team leader of the content group. As a professional author for over 10 years, she writes a lot to help people overcome their tech troubles.…Read full bio -
Jane is an experienced editor for EaseUS focused on tech blog writing. Familiar with all kinds of video editing and screen recording software on the market, she specializes in composing posts about recording and editing videos. All the topics she chooses …Read full bio
-
![]()
Alin
Alin is an experienced technical blog writing editor. She knows the information about screen recording software on the market, and is also familiar with data cloning and data backup software. She is expert in writing posts about these products, aiming at providing users with effective solutions.…Read full bio -
Jean is recognized as one of the most professional writers in EaseUS. She has kept improving her writing skills over the past 10 years and helped millions of her readers solve their tech problems on PC, Mac, and iOS devices.…Read full bio
-
![]()
Jerry
Jerry is a fan of science and technology, aiming to make readers' tech life easy and enjoyable. He loves exploring new technologies and writing technical how-to tips. All the topics he chooses aim to offer users more instructive information.…Read full bio -
![]()
Rel
Rel has always maintained a strong curiosity about the computer field and is committed to the research of the most efficient and practical computer problem solutions.…Read full bio -
![]()
Gemma
Gemma is member of EaseUS team and has been committed to creating valuable content in fields about file recovery, partition management, and data backup etc. for many years. She loves to help users solve various types of computer related issues.…Read full bio -
![]()
Shelly
"I hope my articles can help solve your technical problems. If you are interested in other articles, you can check the articles at the bottom of this page. Similarly, you can also check my Twitter to get additional help."…Read full bio
Page Table of Contents
Jane Zhou
Updated on Jul 21, 2026
0 Views |
0 min read
Amazon Fire TV Stick, commonly known as Firestick, is a widely popular media streaming device that allows you to watch content from major platforms like YouTube, Netflix, Prime Video, Hulu, Disney+, and ESPN on your TV. However, many users often wonder: Can I record programs from my Firestick for offline viewing?
While Firestick doesn't come with a built-in recording feature, you can still record its screen using DVR-enabled apps, third-party recorders, or an HDMI capture device. This article will walk you through effective methods on how to record on Firestick.
What is the Firestick
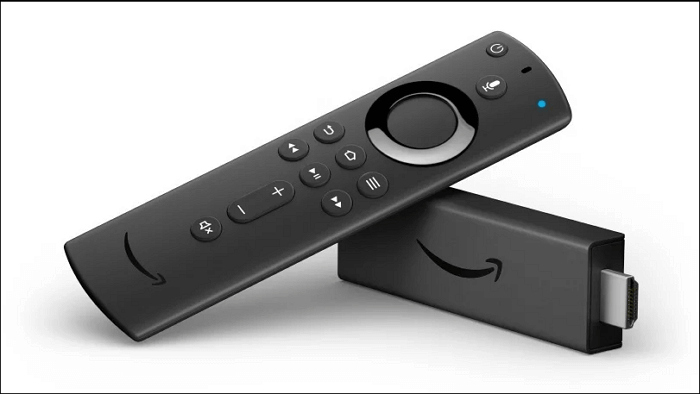
The Firestick is a media streaming device sold by Amazon. It looks like a USB flash size, and you can plug it directly into your TV's or computer's HDMI port to view videos from Netflix, Amazon Prime, Disney, Hulu, and YouTube. It lets you stream movies, TV shows, music, games, and more.
It also supports Alexa voice control and can connect with other Amazon smart devices like Echo for added functionality. Amazon offers several versions of the Fire Stick, such as Fire TV Stick 4K, 4K MAX, Fire TV Cube, Fire TV Stick Lite.
Can you record on a Firestick?
Yes, it's possible to record from a Firestick using the right methods for offline viewing or saving content. Next, let's delve into these options step by step.
Share this guide on how to record from a Firestick with others.

How to Record Shows on Firestick on Computer - No Time Limit
- Best for: Recording 4K shows or movies from fire TV stick with ease
Want to record shows on Firestick without a time limit in high quality, or there is less space on your Fire TV Stick? Then, you can use EaseUS RecExperts to record Firestick programmes or live TV on a PC or Mac.
This screen recording software supports capturing 1080p/4K video with audio. It makes it easy to record from Netflix, Amazon Prime Video, Disney+, or other streaming services without a black screen. Additionally, this video screen recorder allows you to record as long as you want without a watermark. With its scheduled recording feature, you can also save streaming content at a specific time. In this way, you can easily record from a Fire TV Stick to a USB or local drive.
- Adjust output formats flexibly, including formats, quality, etc.
- Let you capture screen, audio, webcam, or all at the same time
- Screenshot Disney+, Netflix, or other streaming services easily
- Provide some basic editing tools
Well, as for capturing videos from Fire TV Stick on the computer, all you need is to plug the Fire Stick into your computer's HDMI port, then start recording with this software.
Steps on how to record on Firestick with this third-party streaming video recorder:
Stage 1. Connect to Your Computer
Plug the Firestick into your computer's HDMI, then find and play the video you will record.
Stage 2. Record Firestick Shows using EaseUS RecExperts
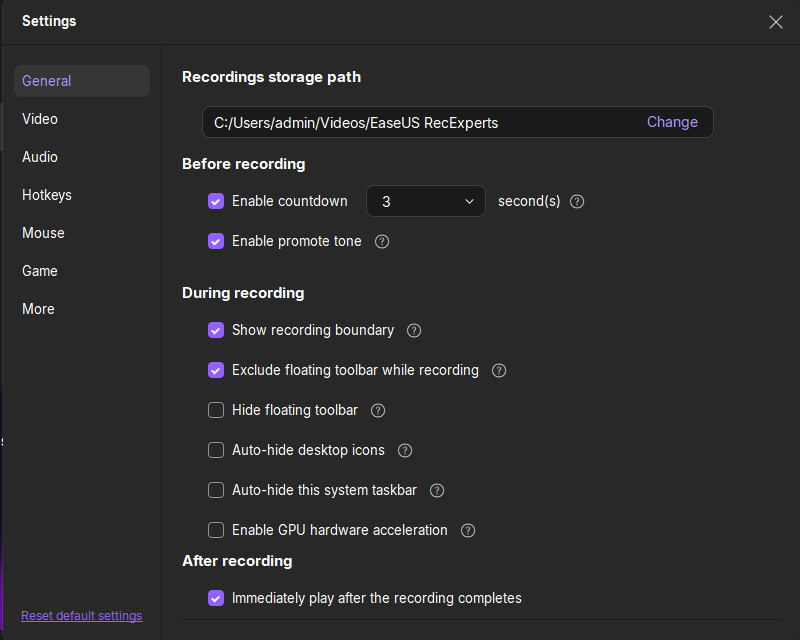
Step 1. Launch EaseUS RecExperts and adjust your recording settings.
Before you start recording, you can customize your settings by clicking the Menu icon (three horizontal lines) in the top-right corner and selecting Settings. From there, you can change the save location, video format, frame rate, audio format, and other preferences. All changes will be saved automatically.
Step 2. Choose a recording mode based on your needs.
On the main interface, you'll see several recording options: Full Screen, Custom, Window, Game, Audio, and Webcam. Simply click the one that matches what you want to record.

Step 3. Set up your webcam and audio sources.
In the toolbar, you can turn the Webcam, Speaker, and Microphone on or off by clicking their icons. If multiple devices are connected, click the small arrow next to each icon to choose your preferred input source.

Step 4. Start and control the screen recording.
Click the red REC button to begin recording. A floating toolbar will appear on your screen, where you can pause the recording using the pause icon or stop it by clicking the red square icon.
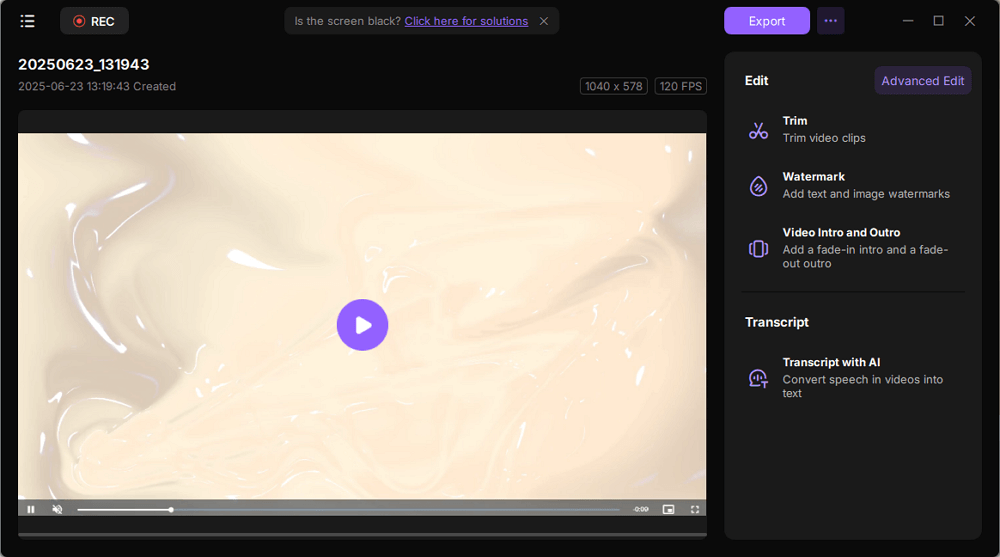
Step 5. Preview, edit, and manage your recordings.
Once you stop recording, you'll be taken to the preview window. Here, you can watch your video, trim it, add watermarks, transcribe audio to text, and organize your recordings. To record again with the same settings, just click the REC button in the top-left corner.
Share this guide on how to record from a Firestick with others.
How to Screen Record on Firestick
If you used to watch Firestick shows and want to record them on TV, then this section is what you want. Just continue reading to learn more information.
#1. Screen Record Firestick with Amazon Screen Recorder
Amazon Store provides a wide range of apps that can help you do screen recording activities, and you just need to download one of them, then you can start your Firestick shows recording. Next, we will show you how to get it done with detailed tutorials:
Step 1. Hit the search icon on the Home Screen, then type "Screen Recorder" into the search box to select the one you like. Just install it.
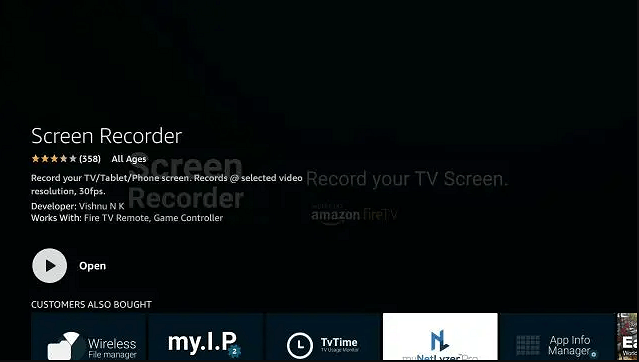
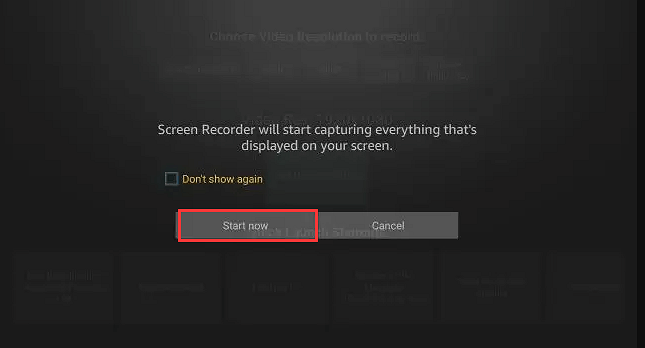
Step 2. Open the screen recorder app you have installed, and you will see a prompt. Here, you need to select "Start Now" to begin the recording.
Step 3. Select the streaming videos or some others you want to record. When you want to stop the recording, just open the screen recorder again and hit the "Stop Recorder" icon.
Step 4. Once done, you just have recorded the Fire TV Stick successfully.
Note: You can't record DRM-protected video or audio from apps like Prime Video or Netflix.
#2. How to Record from a Firestick with DVR
Suitable for: Record TV shows without downloading with the DVR capability of YouTube TV, Sling TV, Hulu + Live TV, etc.
Although the Firestick itself does not include built-in recording capabilities, you can still record live TV and on-demand content by using cloud DVR features offered by certain streaming services, such as YouTube TV, Hulu + Live TV, Sling TV. These services allow you to schedule, manage, and playback recorded shows.
Note:
- The recordings are not on the Firestick's local storage, but saved on cloud.
- Certain DVR services cannot record other streaming platforms' videos
Here are the steps how to record on Firestick with YouTube TV DVR:
Step 1. Download and install the YouTube TV app from the Firestick App Store.
Step 2. Sign in with your YouTube TV account.
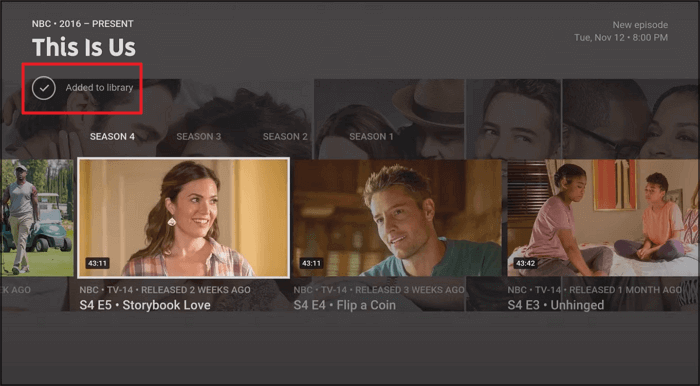
Step 3. Search for a show, channel, or live event that you want to record. Then, click the "+" (Add to Library) button to enable auto-recording.
Step 4. Recorded content will be stored in your Library tab for later viewing.
Share this guide on how to record from a Firestick with others.
How to Record with Firestick Remote
If you have Fire TV Recast, you can record Live TV with it. Below are the steps to complete the task. Now let's dive into it:
Step 1. Find the video content or show you want to record. Just perform a search with the on-screen keyboard to find it. Or you can say 'Alexa, xxx', and it will show you a lot of results related to your voice command.
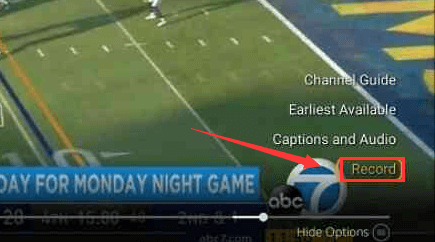
Step 2. Choose the right one and start watching it. Then press the Menu button on your remote controller, and it will open the list of options at the lower right corner of your TV screen.
Step 3. Navigate down the options and select Record to begin your Fire TV Stick recording.
How to Record from Firestick to USB Stick
To record movies or programs from Fire TV Stick to a USB Stick, you can connect the Fire TV Stick to a computer with the help of an HDMI splitter and a video capture card. Fire TV Stick content is HDCP protected; you can use an HDMI Splitter to transmit the content to the computer. Then, using screen recording software like EaseUS RecExperts or OBS Studio to capture Firestick content to USB stick.
Here are the steps on how to save Firestick recording to usb:
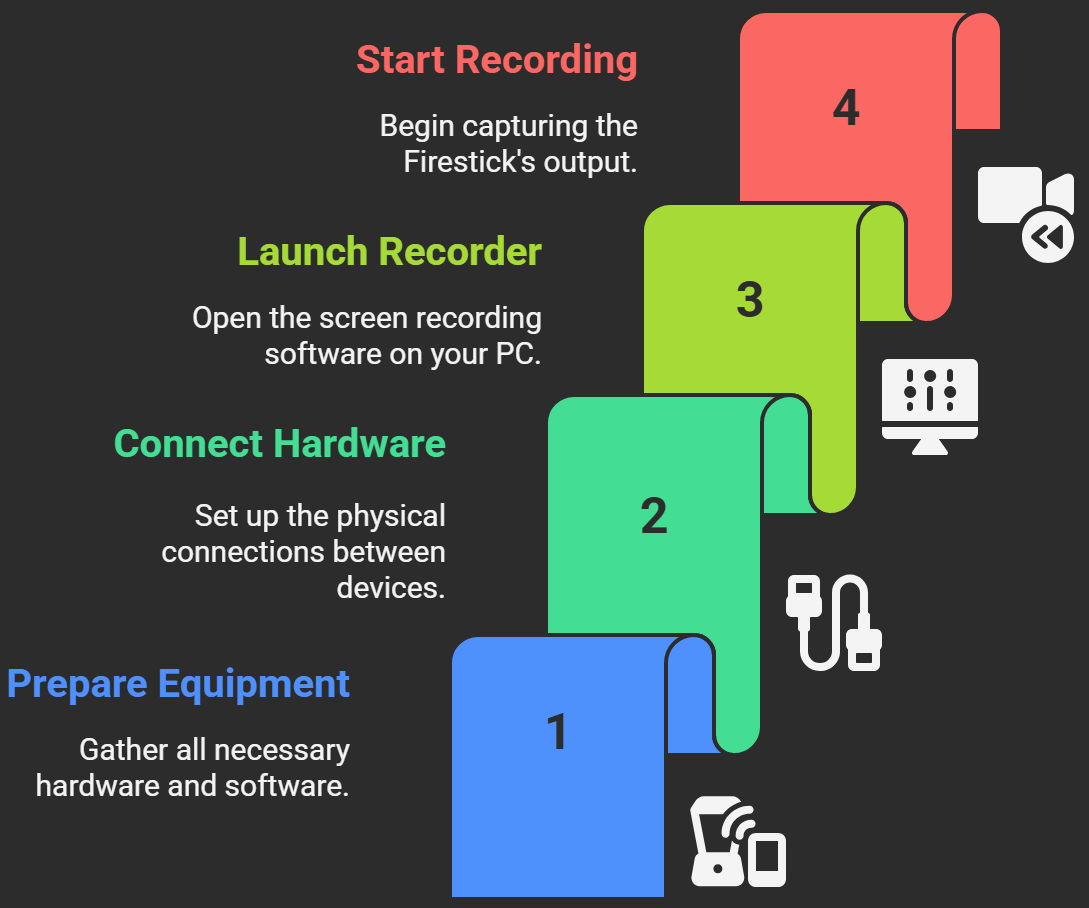
Step 1. To begin, you'll need to prepare these things: Amazon Fire TV Stick, HDMI Splitter, HDMI Capture Card, a PC, USB stick and screen recording software.
Step 2. Set Up the Hardware Connections
- 1. Plug your Firestick into the HDMI input of the HDCP-compliant HDMI splitter.
- 2. Connect the other HDMI output of the splitter to your HDMI Capture Card.
- 3. Insert the capture card's connector into your computer.
- 4. Plug your USB stick into the PC and ensure it's detected properly. Then, your Firestick's output is routed through the capture card into your computer.
Step 3. Launch the screen recorder on your PC and choose the recording source as the Capture Device.
Step 4. Set the output path to USB stick. Then, click the start recording or REC icon to start recording.
How to Record from Firestick to DVD Recorder
- Best for: Record Firestick TVs to play on smart TV
This part is right for you if you want to record TV shows from Firestick to a DVD recorder. But first, you must prepare a DVD recorder and then connect it to the smart TV. Once done, you can check the below guide:
Step 1. Connect the composite cable, S-video, and RCA audio cable between a smart TV and DVD recorder. Next, connect the composite video cable and RCA audio cable to the TV and DVD recorder outputs. After that, make sure the TV is coming through the DVD recorder.
Step 2. Turn yo the appropriate input, typically L1 or L3 for rear inputs, and L2 for front inputs with the DVD recorder.
Step 3. To capture a TV program, you need to set the DVD recorder to channel 3 or 4 and set the channel you want to record using the DTV converter or set-top box. Once done, it will capture the video contents from Firestick to a DVD recorder.

Tips and Considerations for Recording on Fire Stick
Here are some things that need to consider before recording Amazon Firestick TV:
- Older or lower-end Firestick devices may experience lag or crashes during recording, so it's recommended to use the Fire TV Stick 4K Max.
- It's also advisable to use an external storage device of at least 32GB to prevent recording interruptions.
- Prolonged recording sessions may cause the device to overheat, so ensure proper ventilation.
- Many apps use HDCP to block recording of copyrighted content like Netflix, often causing black screens. To capture such videos for personal use, try recording via a browser with hardware acceleration turned off.
- DVR recordings are limited to content you are authorized to view.
- All recordings should be for personal use only and must not be shared or used for commercial purposes.
Share this guide on how to record from a Firestick with others.
The Bottom Line
This post shows you some practical ways to screen record on Firestick, and you can pick any of them to start your recording. For those who want to record Firestick shows on a computer, just pick EaseUS RecExperts. This is an easy yet smart screen recorder, assisting you in capturing almost anything on your computer. Most importantly, there is no time limit and no watermark, which means you can record as long as you want. So, don't hesitate to click the below button to get it!
How to Record on Firestick FAQs
Have doubts, still? Check the frequently asked questions and answers collected here.
1. Can you record shows with Firestick?
Yes, you can. You just need to choose the show that you want to record, press the Menu button on your remote, and select the three dots next to your chosen program in the Fire TV app.
2. Where is the DVR tab on Firestick?
The interface changed, so many people can't find the DVR tab from where it was. You can find it by following the two ways here:
- Select Find from the main menu and the Library option, and you will be led to the DVR window.
- Or, press the Voice button and simply say DVR to it. Then, the DVR interface will appear.
3. How do I record from my Firestick to an external hard drive?
Plug in your USB drive, go to Settings > My Fire TV > USB Drive. Now you can choose to format it as an external storage. You'd better make a backup of important data, as all content on the USB drive will be erased.
4. How do I record live TV?
The most recommended way to record live TV is to use a screen recorder like EaseUS RecExperts. You can record screens, audio, webcam, and game with it on your Windows and Mac computers easily.
5. How to record IPTV on Firestick?
You can use an IPTV player with record function like TiviMate. Here are the simple steps on how to IPTV on Firestick:
Step 1. Download and install TiviMate from the Amazon Appstore.
Step 2. Use a USB OTG adapter to connect a USB flash drive to your Firestick's micro-USB port.
Step 3. If it's your first time using the drive, you need to format the USB Drive. Go to Settings > My Fire TV > USB Drive > Format to Internal Storage.
Step 4. Open TiviMate > go to Settings > DVR > Recording folder. Select the USB storage path (usually looks like /storage/xxxx-xxxx).
Step 5. Choose the program you want to record and tap Record. the file will be saved directly to your USB drive.