-
![]()
Daisy
Daisy is the Senior editor of the writing team for EaseUS. She has been working in EaseUS for over ten years, starting from a technical writer to a team leader of the content group. As a professional author for over 10 years, she writes a lot to help people overcome their tech troubles.…Read full bio -
Jane is an experienced editor for EaseUS focused on tech blog writing. Familiar with all kinds of video editing and screen recording software on the market, she specializes in composing posts about recording and editing videos. All the topics she chooses …Read full bio
-
![]()
Alin
Alin is an experienced technical blog writing editor. She knows the information about screen recording software on the market, and is also familiar with data cloning and data backup software. She is expert in writing posts about these products, aiming at providing users with effective solutions.…Read full bio -
Jean is recognized as one of the most professional writers in EaseUS. She has kept improving her writing skills over the past 10 years and helped millions of her readers solve their tech problems on PC, Mac, and iOS devices.…Read full bio
-
![]()
Jerry
Jerry is a fan of science and technology, aiming to make readers' tech life easy and enjoyable. He loves exploring new technologies and writing technical how-to tips. All the topics he chooses aim to offer users more instructive information.…Read full bio -
![]()
Rel
Rel has always maintained a strong curiosity about the computer field and is committed to the research of the most efficient and practical computer problem solutions.…Read full bio -
![]()
Gemma
Gemma is member of EaseUS team and has been committed to creating valuable content in fields about file recovery, partition management, and data backup etc. for many years. She loves to help users solve various types of computer related issues.…Read full bio -
![]()
Shelly
"I hope my articles can help solve your technical problems. If you are interested in other articles, you can check the articles at the bottom of this page. Similarly, you can also check my Twitter to get additional help."…Read full bio
Page Table of Contents
Jane Zhou
Updated on Jun 09, 2026
0 Views |
0 min read
Xbox Game Bar and Snipping Tool offer the fastest built-in way to screen record on Windows 11, but they have limitations like a lack of editing features or are not suitable for long-duration recording.
Additionally, some third-party Windows 11 screen recorders, like EaseUS RecExperts, provide more advanced options and controls.
Screen recording in Windows 11 has become an essential task for creating tutorials, capturing gameplay, or recording software demonstrations. Have you ever needed to record your screen but weren't sure which tool to use?
This article provides a comprehensive overview of Windows 11 screen recording methods, including step-by-step instructions, shortcut keys, and tips for achieving clear audio and smooth video, making it easy for both beginners and advanced users to get professional results.
Best Way to Record Screen on Windows 11 with Audio
Record your screen on Windows 11 with both system and microphone audio with simple click.
Whether you want to record full screen, partial screen, or even a specific portion of the screen on a Windows 11 PC, you can always rely on a simple screen recorder called EaseUS RecExperts. This Windows 11 screen recorder is a fantastic choice for recording tutorials, gameplay, presentations, meetings, or online courses on Windows laptops, such as Lenovo, HP, or ASUS.
It offers various advanced video capture tools to meet your different needs. For instance, you can use it to capture multiple screens and windows on your computer or record the screen on Windows 11 with audio or webcam in a few clicks. Most importantly, there will be no watermark or time limit! The software supports multiple output formats (e.g., MP4, AVI, MOV) and offers customizable settings for resolution, frame rate, and audio quality, giving users full control over their recordings.
Here's how to screen record on Windows 11 with a simple screen recorder:
Step 1. Launch EaseUS RecExperts. You'll see six recording modes available. Choose Full Screen to capture everything on your display, Custom to record a selected area, Window to record a specific app window, Game for optimized gameplay recording, Audio to capture system or microphone sound only, and Webcam to record your webcam feed.

Step 2. Select your input sources. You can freely enable or disable the Webcam, Speaker, or Microphone depending on your needs. If you only want to record a silent screen, simply turn all of them off.

Step 3. Click the red REC button to start recording. A floating control bar will appear on your screen. To pause the recording, click the Pause button (white); to stop it, click the Stop button (red).
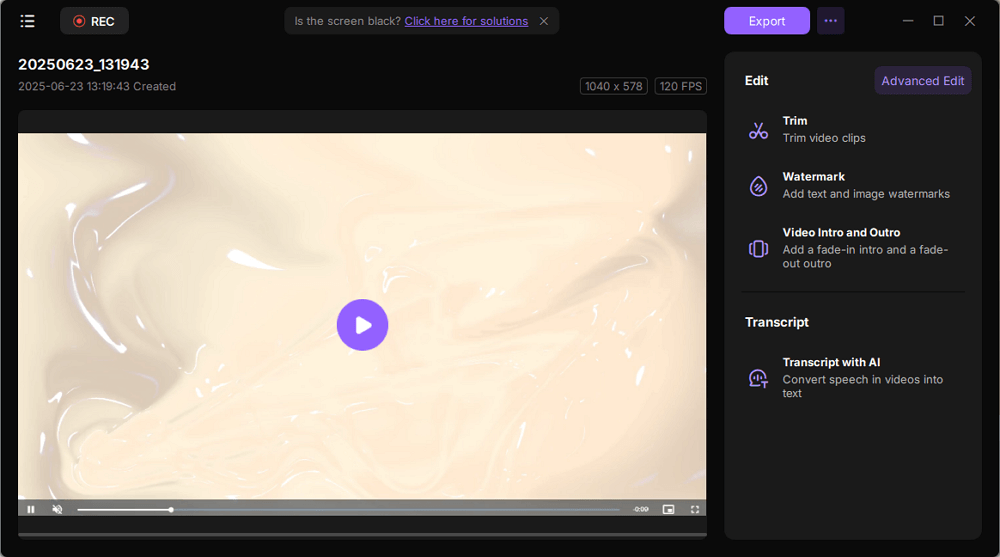
Step 4. After recording, you'll be taken to the preview window, where you can watch, trim, or edit your recording with ease.
Also, you can watch the tutorial video below:
- 00:00 Introduction
- 00:16 Method 1. Use Xbox Game Bar
- 01:08 Method 2. Use EaseUS RecExperts
- 02:31 Method 3. Use Snipping Tool
Don't forget to share this post about screen recording in Windows 11 with others!
Game Bar Shortcut for Screen Recording in Windows 11
Xbox Game Bar is a built-in screen recording and game overlay tool in Windows 11, primarily used for recording gameplay, but also commonly used for recording applications and screen activity. It supports full-screen recording and allows users to record system audio and microphone input simultaneously. Using the keyboard shortcut Win+G, you can quickly start or stop recording, making it ideal for quick recordings, game highlights, or software demonstrations requiring voice commentary.
However, this Windows 11 screen recorder also has some notable limitations:
- It does not support custom area selection.
- It cannot record the Windows desktop or File Explorer.
- Compared to professional screen recording software, its recording quality and frame rate options are relatively limited.
- Some users have reported issues such as dropped frames, audio desynchronization, or unstable performance during long recording sessions.
Check out the following tutorial to record full screen Windows 11 laptops with Game Bar:
Step 1. Press Windows+G to open the Xbox Game Bar, or you can search for it in the Start menu search box.
Step 2. In the control panel, select the Capture(Camera icon) to screenshot or record your screen.
Step 3. From the capture panel, one can choose the "Mic" for using it while capturing a Windows 11 screen with audio. Also, you can press the hotkeys Windows+Alt+M.

Step 4. Once done, click on the "Start Recording" icon or press Windows + Alt + R to start the Windows 11 screen recording.
Step 5. After capturing the video, you can click the "stop recording" icon on the Capture Status Bar.
More Game Bar shortcut for Screen Recording in Windows 11:
|
Function |
Keyboard Shortcut |
Description |
|
Open Xbox Game Bar |
Win + G |
Launches the Xbox Game Bar overlay to access recording and other widgets |
|
Start / Stop Screen Recording |
Win + Alt + R |
Starts or stops recording the current game or active app window |
|
Turn Microphone On / Off |
Win + Alt + M |
Toggles microphone recording during an active screen recording |
|
Record Last 30–60 Seconds |
Win + Alt + G |
Saves the previous gameplay moments (background recording must be enabled) |
|
Take Screenshot |
Win + Alt + PrtScn |
Captures a screenshot of the active game or app |
|
Open Capture Widget |
Win + Alt + B |
Opens the Capture widget directly (may vary by system) |

Where Is Screen Recording Saved in Windows 11?
If you don't know where to find your screen recordings on a Windows 11 HP laptop, you will find the answer in this post. Read more >>
Screen Record in Windows 11 with Audio via Snipping Tool
If you cannot record the screen on Windows 11 with Game Bar, you can switch to the Snipping Tool. Snipping Tool is a native screenshot and screen recording tool built into Windows 11, allowing users to record video clips without installing any third-party software. Unlike the Xbox Game Bar, Snipping Tool lets you select a specific portion of the screen to record, making it well-suited for tutorials, how-to videos, and localized on-screen demonstrations. It can also be used to create high-quality GIFs from recordings.
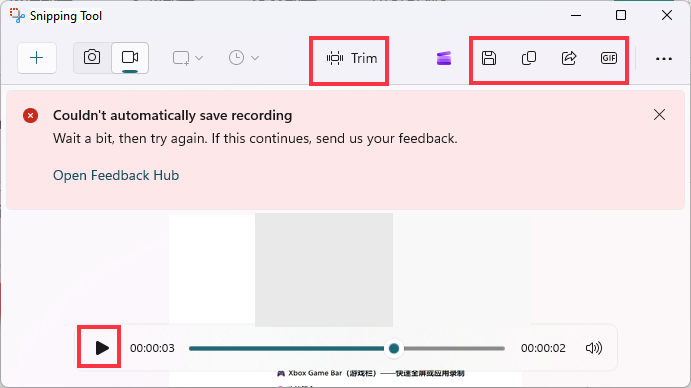
However, recordings can only be saved in MP4 format. In real-world use, I've often encountered issues such as recordings failing to save automatically, as well as degraded audio quality, especially intermittent or distorted sound. In addition, there is no dedicated keyboard shortcut in Windows 11 that allows you to start screen recording with Snipping Tool directly; you must open the tool manually before recording.
Steps on How to record video on Windows 11 with the built-in Snipping Tool:
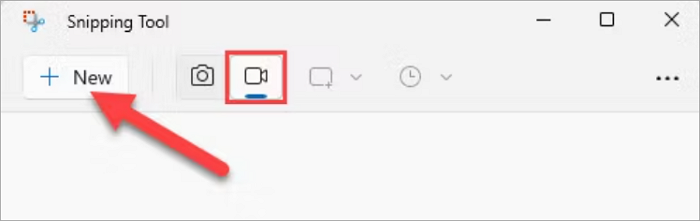
Step 1. Open the Snipping Tool, then click Record(Video recorder icon) and hit the +New options in the top toolbar.
Step 2. Drag your mouse to select the area that you want to record. And configure the microphone and system audio options. Then, click the Start button to begin recording.
Step 3. Click Stop to preview, save, share, or create a GIF as needed.
Don't forget to share this post about screen recording in Windows 11 with others!
How to Record Video on Windows 11 with PowerPoint
The last method to do screen recording activity in Windows 11 is to use PowerPoint. This program offers its own screen-capturing utility for saving recordings in a slideshow. The word does not say more, so let's jump into the detailed steps to learn how to screen record on Windows 11:
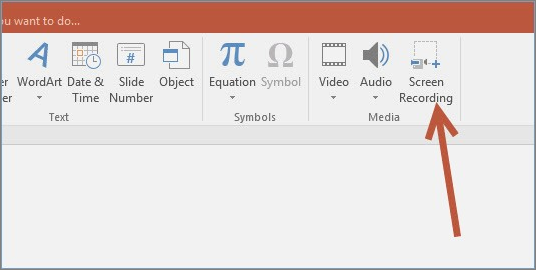
Step 1. Open the PowerPoint and a new file on your computer. Next, click "Insert" to choose the Screen Recording button.
Step 2. Click "Select Area" to choose the recording area, and click the red button to start your screen recording in Windows 11.
Step 3. When you want to complete the Windows 11 screen recording activity, press the stop button or enter Win + Shift + Q.
Step 4. At last, the recording is automatically added to the slideshow. If you want to save it elsewhere, right-click on the video and select "Save Media as" to choose the saving path.
The Bottom Line
In this post, you can learn how to screen record on Windows 11 in the above ways. Tools like Game Bar, Snipping Tool, and PowerPoint are good options for those who need to do some simple screen recording activities.
However, suppose you want to obtain more features like schedule recording, add webcam, overlay, etc.. In that case, you can opt for EaseUS RecExperts, the most incredible option for users who want to make efficient screen recording videos.
How to Screen Record on Windows 11 FAQs
1. How do I record my screen on PC 11?
A built-in screen recorder called Game Bar is available on Windows 11 PC. Pressing Windows + ALT + R, you can start your screen recording activity.
2. How do I record my screen on Windows 11 with sound?
If you record your screen with microphone sound on Windows 11, you can rely on its built-in screen recorder easily.
However, if you want to capture the screen and system sound, you can use EaseUS RecExperts. Launch it, select the recording area, and choose the audio source. Once done, you can click REC to begin your recording.
3. What is the shortcut to record your laptop screen?
To enable the screen recording feature on your laptop, you can press Windows + ALT + G on your keyboard.
To start recording quickly, you can press Windows + ALT + R.
4. How long can you screen record on Windows 11?
On Windows 11, the maximum screen-recording length is dictated by the app you choose:
- Xbox Game Bar – up to 4 h per clip.
- Snipping Tool – no built-in time cap, but it is intended for short, ad-hoc captures; long sessions often end in save failures or stutters.
- Third-party recorders (e.g., EaseUS RecExperts, OBS Studio, Bandicam) generally allow much longer recordings, often limited only by available storage and system performance.
5. Does Windows 11 have a built-in screen recorder?
Yes, Windows 11 has two built-in screen recording tools: Xbox Game Bar for full-screen or app recordings with audio, and Snipping Tool for recording a selected portion of the screen.