-
![]()
Daisy
Daisy is the Senior editor of the writing team for EaseUS. She has been working in EaseUS for over ten years, starting from a technical writer to a team leader of the content group. As a professional author for over 10 years, she writes a lot to help people overcome their tech troubles.…Read full bio -
Jane is an experienced editor for EaseUS focused on tech blog writing. Familiar with all kinds of video editing and screen recording software on the market, she specializes in composing posts about recording and editing videos. All the topics she chooses …Read full bio
-
![]()
Alin
Alin is an experienced technical blog writing editor. She knows the information about screen recording software on the market, and is also familiar with data cloning and data backup software. She is expert in writing posts about these products, aiming at providing users with effective solutions.…Read full bio -
Jean is recognized as one of the most professional writers in EaseUS. She has kept improving her writing skills over the past 10 years and helped millions of her readers solve their tech problems on PC, Mac, and iOS devices.…Read full bio
-
![]()
Jerry
Jerry is a fan of science and technology, aiming to make readers' tech life easy and enjoyable. He loves exploring new technologies and writing technical how-to tips. All the topics he chooses aim to offer users more instructive information.…Read full bio -
![]()
Rel
Rel has always maintained a strong curiosity about the computer field and is committed to the research of the most efficient and practical computer problem solutions.…Read full bio -
![]()
Gemma
Gemma is member of EaseUS team and has been committed to creating valuable content in fields about file recovery, partition management, and data backup etc. for many years. She loves to help users solve various types of computer related issues.…Read full bio -
![]()
Shelly
"I hope my articles can help solve your technical problems. If you are interested in other articles, you can check the articles at the bottom of this page. Similarly, you can also check my Twitter to get additional help."…Read full bio
Page Table of Contents
Jean
Updated on Jun 09, 2026
0 Views |
0 min read
QuickTime Player is Apple's built-in screen recording tool on macOS. It allows users to record the screen with microphone audio, but it cannot record internal audio on Mac by default. Despite this limitation, many users still choose QuickTime because it's free, preinstalled, lightweight, and easy to use.
In this guide, you'll learn how to use QuickTime to record screen content, plus one free and one paid method to record internal audio, with a quick comparison to help you choose.
|
Method |
Cost |
Difficulty |
Best for |
|
Free |
Medium |
Tech-savvy users |
|
|
Paid |
Easy |
Beginners / Pros |
Why QuickTime Screen Recording No Audio
Many users only notice the issue after finishing a screen recording: the video looks fine, but QuickTime screen recording no audio. This commonly happens when recording online videos, browser tabs, app demos, or tutorials. You might expect background music or in-app audio, but the recording is silent unless you spoke into a microphone.
This isn't a bug. As a free screen recorder for Mac, QuickTime records screen visuals and a single audio input, limited to microphone devices. On macOS, system audio is protected at the OS level, so apps like QuickTime can't directly capture sound from other applications or browsers.
To record a screen video with internal audio on a MacBook, the sound must first be routed through a virtual audio device. That's why tools like BlackHole (free) and Loopback (paid) are commonly used alongside QuickTime.

Share this post to help more users!

How to Use QuickTime Player to Record Screen and Audio
There are many workarounds online, but this section focuses on the two most reliable and widely used options for Mac users: BlackHole and Loopback. Both work by routing system audio through a virtual device so QuickTime can record it. Each method below includes clear step-by-step instructions.
👉Quick choice guide:
- BlackHole → Free, more manual setup
- Loopback → Paid, easier, and more flexible
Way 1. QuickTime Recording Screen with Audio via BlackHole
- Supported OS: macOS Mavericks (10.10) and newer
- Price: Free
- Best for:Users who want a no-cost solution and don't mind manual setup
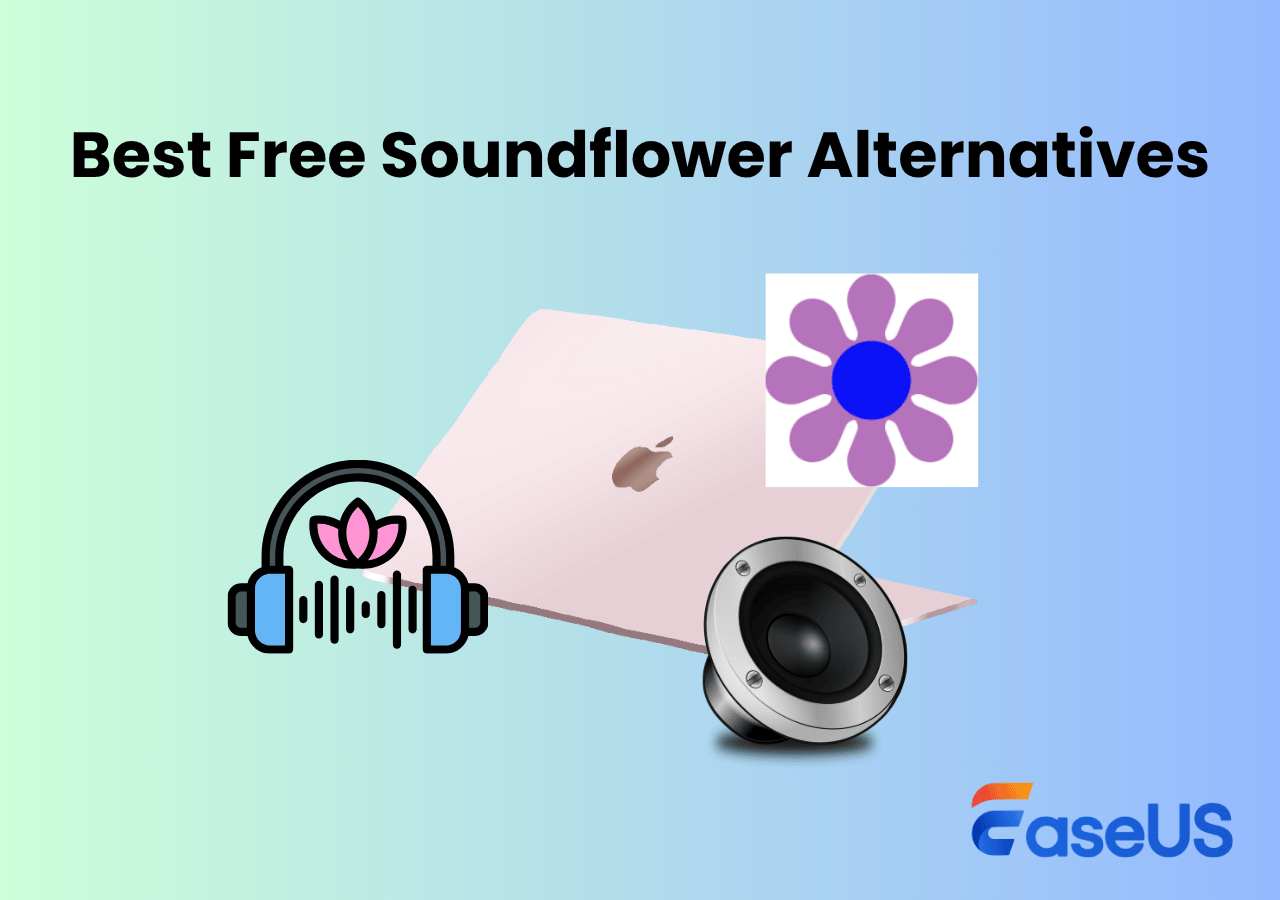
As a Soundflower alternative, BlackHole is an open-source virtual audio driver that allows QuickTime to record system and app audio on macOS. It's actively maintained and compatible with modern macOS versions. Soundflower isn't included here because it's no longer maintained and has been reported to cause stability issues on newer systems.
When used with QuickTime, BlackHole acts as a virtual audio bridge. System and application audio are routed to the BlackHole device via macOS audio settings, and QuickTime records BlackHole as its audio input. Because routing happens at the system level, users may need to switch devices manually or create a Multi-Output Device to monitor audio.
BlackHole's main advantage is that it's free and powerful. However, Reddit users often mention a steeper setup process and occasional monitoring or sync issues, especially for beginners.
🚩Here is how to record screen and audio on Mac with QuickTime and BlackHole:
Before you start: You'll route system audio to BlackHole, select it in QuickTime, then start recording.
Step 1: Download BlackHole
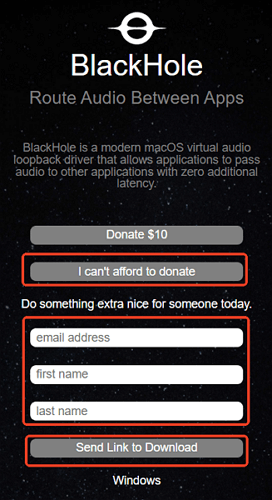
Visit the Existential Audio website, click "I can't afford to donate," enter your email, and download the link from your inbox. Choose the BlackHole 2ch version for most users.
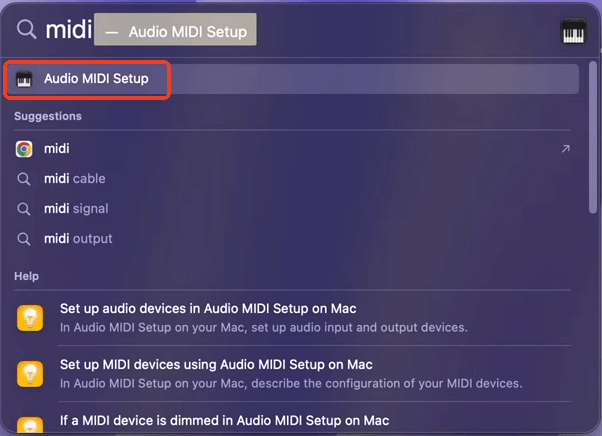
Step 2: Open Audio MIDI Setup
Go to Applications > Utilities > Audio MIDI Setup.
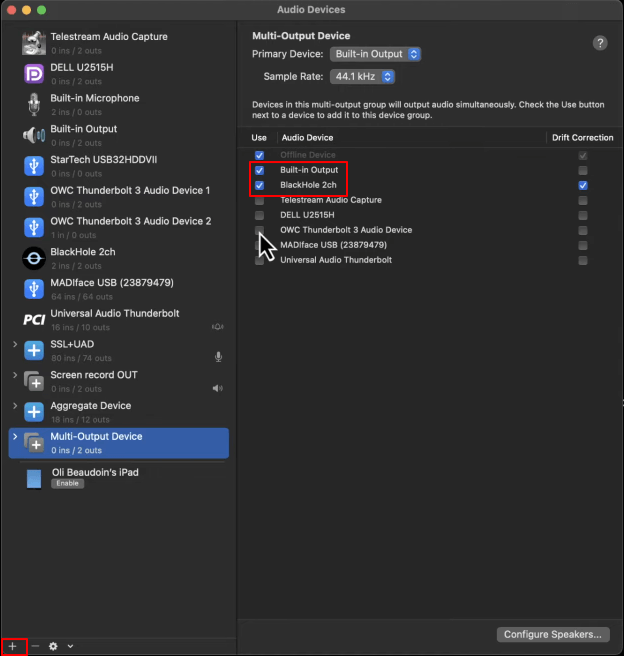
Step 3: Create a Multi-Output Device
Click the + button, select Multi-Output Device, and check Built-in Output (or Mac Speakers) and BlackHole 2ch.
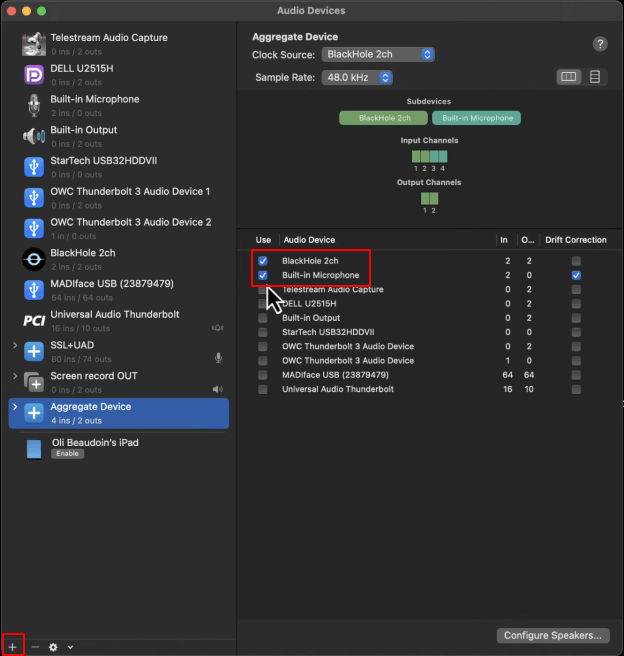
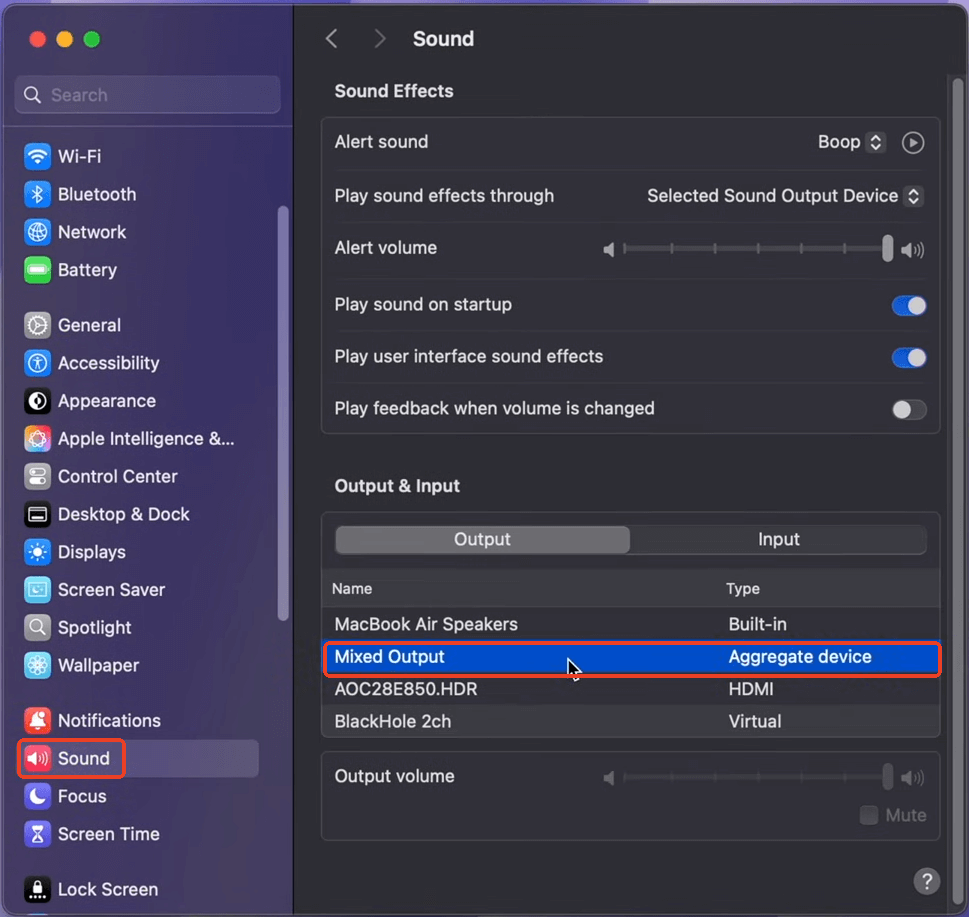
Step 4: Create an Aggregate Device
Click +, choose Aggregate Device, and check both Built-in Microphone and BlackHole 2ch.
Step 5: Adjust System Audio
Go to Apple menu > System Settings > Sound > Output, and select your Multi-Output Device. Adjust system volume before recording, as it can't be changed during capture.
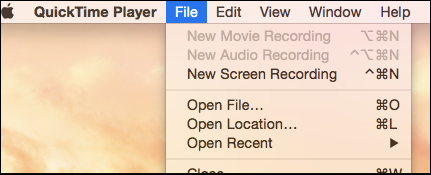
Step 6: Start Screen Recording in QuickTime
Open QuickTime Player and select File > New Screen Recording.
Step 7: Select the Audio Input
Click the arrow next to the Record button and choose BlackHole 2ch.
Step 8: Record and Stop
Click Record to start, then stop using the menu bar Stop button or the Command-Control-Esc shortcut.
![]()
Optional: How to Uninstall Black Hole on Mac
- Download the official BlackHole uninstaller (PKG) for your version
- Run the PKG and follow the instructions
- Open Audio MIDI Setup and remove any BlackHole devices you created
- Restart your Mac
Way 2. QuickTime Player Record Screen and Sound with Loopback
- Supported OS: macOS 10.13 (High Sierra) and newer, including macOS 26 (Tahoe)
- Price: a free, fully functional trial with 20 minutes of use; $99 for lifetime use
- Best for: Users who want an easy, flexible way to capture both system audio and microphone input
Loopback is a virtual audio routing tool that lets QuickTime record streaming audio on Mac alongside your microphone. It uses a visual interface to add audio sources, adjust volume, and monitor output, making setup more intuitive than manual routing.
With Loopback, you create a virtual device that combines app audio and mic input into a single feed. QuickTime records this device as its audio source, while Loopback handles monitoring and routing in the background.
Loopback's main advantage is ease of use and stability. While it's paid, it avoids many routing and sync issues common with free solutions.
🚩Here is how to use QuickTime and Loopback to record screen and sound on Mac:
Step 1: Create a virtual audio device in Loopback
Open Loopback and click + New Virtual Device. Name it anything you like.

Step 2: Add the microphone and application audio sources
Click the + button in the Sources column and add your microphone, and select the applications you want to record. Only added apps will be captured.

Step 3: Configure monitoring (optional but recommended)
Disable "Mute when capturing" for apps you want to hear. Or add a Monitor block to listen through headphones, avoiding echo or feedback when recording both microphone and system audio.
Step 4: Select the Loopback device in QuickTime
- Open QuickTime Player > New Screen Recording, click the arrow next to Record, and choose your Loopback device as the microphone.
- Start recording. QuickTime will capture screen video, app audio, and mic input.

Pro Tips for QuickTime Screen Recording
- Large file sizes: A 5-minute 1080p recording is usually 300–500 MB. Trim clips or compress them with tools like HandBrake.
- Default format: Recordings are saved as MOV (H.264) with limited export options.
- No built-in FaceCam: QuickTime can't record webcam and screen at the same time.
- Basic editing only: Supports trimming, but not overlays or multi-track audio.
FAQs About QuickTime Screen Recording
1. How to stop QuickTime screen recording?
You can stop a QuickTime screen recording by clicking the Stop button in the macOS menu bar. Or use shortcut Command + Control + Esc to stop recording instantly.
2. How to use QuickTime to record screen iPhone?
Connect your iPhone to your Mac with a cable. Open QuickTime Player > File > New Movie Recording, then click the arrow next to the record button and select your iPhone as the camera source. QuickTime will mirror your iPhone screen, allowing you to record it.
3. Why does my QuickTime screen recording have no audio?
QuickTime can only record microphone input by default. It can't capture system or app audio due to macOS restrictions. To record internal sound, you'll need a virtual audio device like BlackHole or Loopback.
4. Where are QuickTime screen recordings saved?
By default, QuickTime saves screen recordings to your Desktop. You can choose a different location before recording by clicking Options in the screen recording window.
5. Can QuickTime record screen and webcam at the same time?
No. QuickTime doesn't support recording the screen and facecam simultaneously. If you need both, consider using third-party screen recording software.
6. What file format does QuickTime use for screen recordings?
QuickTime saves screen recordings in MOV format (H.264) by default. The format offers good quality but limited compression and export options.