-
![]()
Daisy
Daisy is the Senior editor of the writing team for EaseUS. She has been working in EaseUS for over ten years, starting from a technical writer to a team leader of the content group. As a professional author for over 10 years, she writes a lot to help people overcome their tech troubles.…Read full bio -
Jane is an experienced editor for EaseUS focused on tech blog writing. Familiar with all kinds of video editing and screen recording software on the market, she specializes in composing posts about recording and editing videos. All the topics she chooses …Read full bio
-
![]()
Alin
Alin is an experienced technical blog writing editor. She knows the information about screen recording software on the market, and is also familiar with data cloning and data backup software. She is expert in writing posts about these products, aiming at providing users with effective solutions.…Read full bio -
Jean is recognized as one of the most professional writers in EaseUS. She has kept improving her writing skills over the past 10 years and helped millions of her readers solve their tech problems on PC, Mac, and iOS devices.…Read full bio
-
![]()
Jerry
Jerry is a fan of science and technology, aiming to make readers' tech life easy and enjoyable. He loves exploring new technologies and writing technical how-to tips. All the topics he chooses aim to offer users more instructive information.…Read full bio -
![]()
Rel
Rel has always maintained a strong curiosity about the computer field and is committed to the research of the most efficient and practical computer problem solutions.…Read full bio -
![]()
Gemma
Gemma is member of EaseUS team and has been committed to creating valuable content in fields about file recovery, partition management, and data backup etc. for many years. She loves to help users solve various types of computer related issues.…Read full bio -
![]()
Shelly
"I hope my articles can help solve your technical problems. If you are interested in other articles, you can check the articles at the bottom of this page. Similarly, you can also check my Twitter to get additional help."…Read full bio
Page Table of Contents
0 Views |
0 min read
As one of the leading graphic design platforms, Canva provides versatile templates and tools for creating videos, presentations, social media posts, posters, logos, etc.
Sometimes, users need to video record yourself presenting or talking for e-learning or social media platforms. So, does Canva have screen recording? If yes, how to record on Canva? Read this article and get detailed instructions.
PAGE CONTENT:
Does Canva Have a Screen Recorder?
Yes, Canva offers a built-in screen recorder to record your face, share your screen, and add designs to your videos for free. Two features in Canva allow you to record: (1) Presentations > Present and record; (2) Video > Record yourself.
If you use Canva on your desktop app or Chrome and Edge browsers, you can use this Canva webcam recorder for PC to capture every move. However, you cannot record yourself in Canva using phones because the Canva recording studio is not available in its mobile apps.
The best part of Canva video recording is creating a design with massive templates and elements for multiple video platforms such as YouTube, Instagram, and TikTok. Then, screen record yourself on these designs directly. Once the recording is done, you can add designs to visualize your recordings more.
If you are interested in the detailed steps for recording on Canva on your desktop app or browser, move to the next part.
Share this post to help more people!
How to Record a Presentation in Canva
The first way to let you record on Canva is to use its Presentation feature. You can use this method if you need to record a presentation on Mac or Windows computers. To do so:
Step 1. Launch the Canva app or browse its official website on your computer.
Step 2. Click Presentation from the main interface to create a new presentation. Or upload an existing one to Canva and open it.

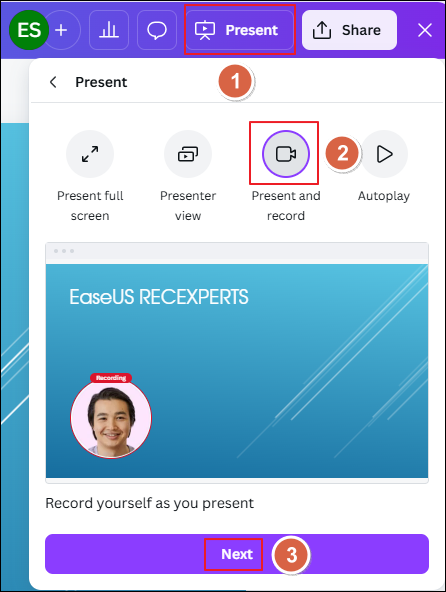
Step 3. On the upper-right corner of Canva, click Present > Present and record > Next > Go to recording studio.
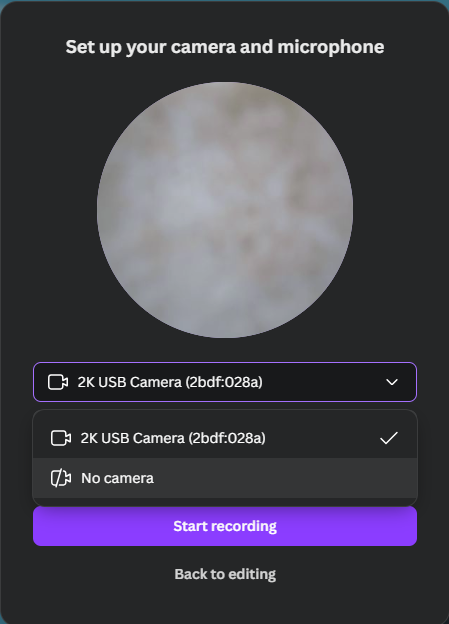
Step 4. You will be asked to give Canva access to your camera and microphone. If you want to record on Canva without camera, select No camera from the list. Then, click Start recording.
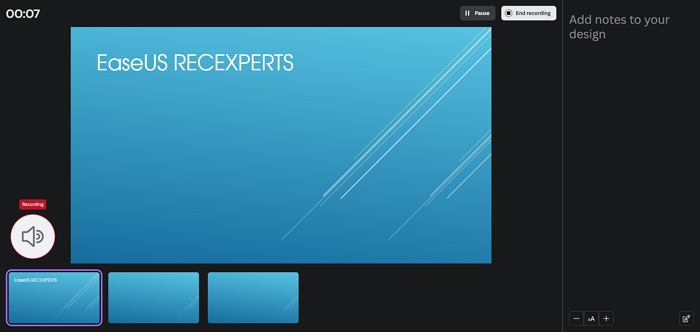
Step 5. After the 3-second countdown timer ends, the recording session will be initiated automatically. You can add annotations to your presentations now.
🌟Notes:
- The camera feed is in the bottom left corner. You cannot drag and move the webcam.
- You can type in the right panel to add notes to your design.
- You can pause the recording during the session.
Step 5. To stop recording, click End recording. You can:
- Click Copy to get a link to your recording. You can share this link with students, friends, or colleagues. Or you can open the link yourself with a browser, which lets you preview the recording online, change the playback speed, and show/hide the caption.
- Click Download to save the Canva recording to your PC or laptop directly.
- Click Save and exit to enter a popup that asks you to Copy, Download, or Delete the recording again.
- Click Discard to delete the recording directly.
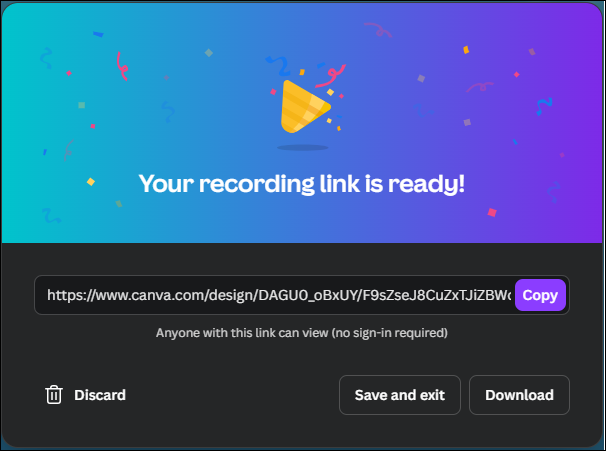
🌟Note: If you share this link with others first and delete this recording, then anyone you shared the recording with can still see a view-only version of your recording. You need to delete the public view link to permanently remove their access to this design.
How to Record a Video on Canva
If you want to record a simple video on Canva, another option is suited for creating videos for social media sharing. To do so:
Step 1. Launch the Canva app or browse its official website on your computer.
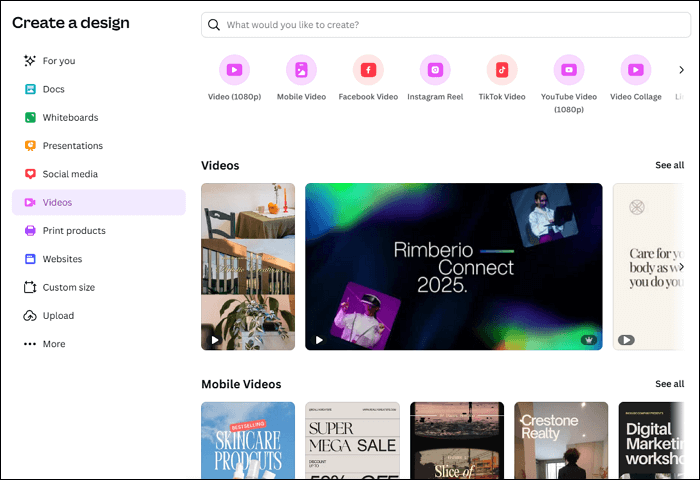
Step 2. Click Video from the main interface. You can select a portrait or landscape mode for social media platforms such as YouTube, Facebook, Instagram, and TikTok. (It supports a maximum resolution of 1920 x 1080 pixels)
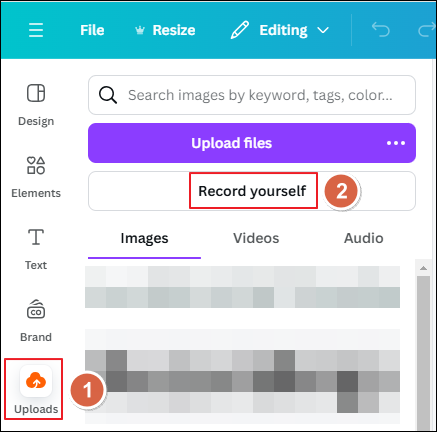
Step 3. On the left panel, go to Uploads > Record yourself.
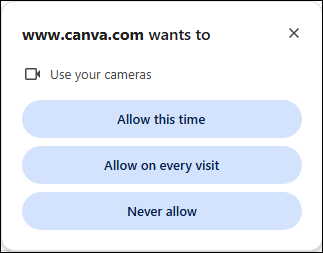
Step 4. Give permission to your camera and microphone according to your needs. Web users will see a popup; desktop users can change the permission from the app's toolbar.
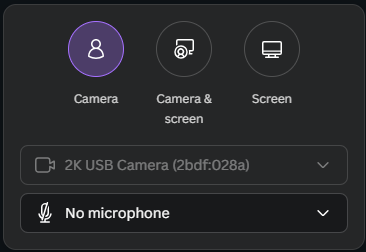
Step 5. Here are three recording modes for you: Camera; Camera & screen; Screen.
- Camera: you can record on Canva with camera and microphone in this mode. Make sure at least turn one camera or microphone in this mode.
- Camera & screen: you can record camera and share a tab, window, or the entire screen at the same time in this mode.
- Screen: you can capture the screen only and share a tab, window, or the entire screen at the same time. But you cannot turn on your camera or microphone in this mode.
Step 6. After choosing the recording mode, click Record. The recording session will get started automatically once the 3-second countdown timer ends.
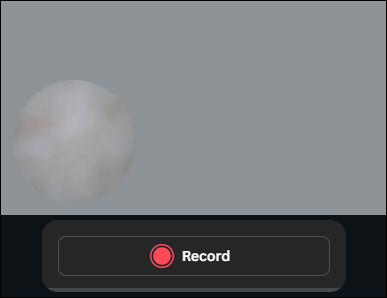
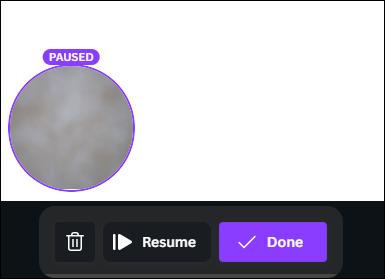
Step 7. You can Pause and Resume during the process. To stop recording on Canva, click Done.
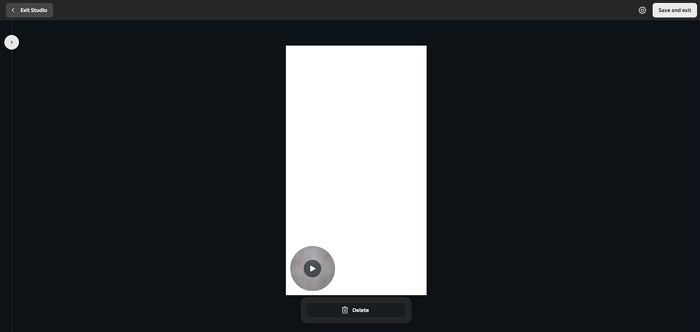
Step 8. Click Save and exit to save the recording to Canva; or click Delete to discard the recording file.
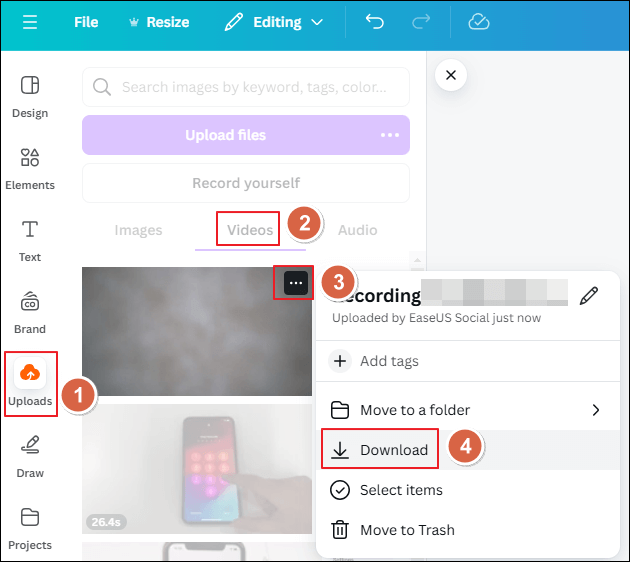
Step 9. To see your Canva recordings, go to Uploads > Videos. You can click the three dots > Download to save it to your computer.
The Best Alternative to Canva Screen Recorder
Although Canva provides a native screen recording tool to help users capture webcam, microphone, and screen activity, here are some limitations of Canva screen recorder you need to pay attention to:
- Cannot record the audio only. You need to record the sound in a video and extract audio from the video.
- The Canva recording files downloaded from the web version support WEBM only.
- Canva only supports full-screen recording. You are unable to record part of screen.
- The place of the camera feed is fixed and cannot be moved.
- Recording Canva for a long time in the browser may take too many resources and cause glitches.
If you want more comprehensive and advanced recording features, we recommend you use a professional screen recorder on your Windows or Mac. EaseUS RecExperts is a free and robust screen recording tool that helps you easily record the webcam, audio, and screen activities.
Apart from the functions of the Canva screen recorder, EaseUS RecExperts supports more features. For example, you can record audio and video separately for later video editing, add highlights and annotations to your presentations when recording for better audience engagement, and capture any region of your screen for clearer focus.
Download EaseUS RecExperts to your computer and screen record everything without watermark, lag, or time limit.
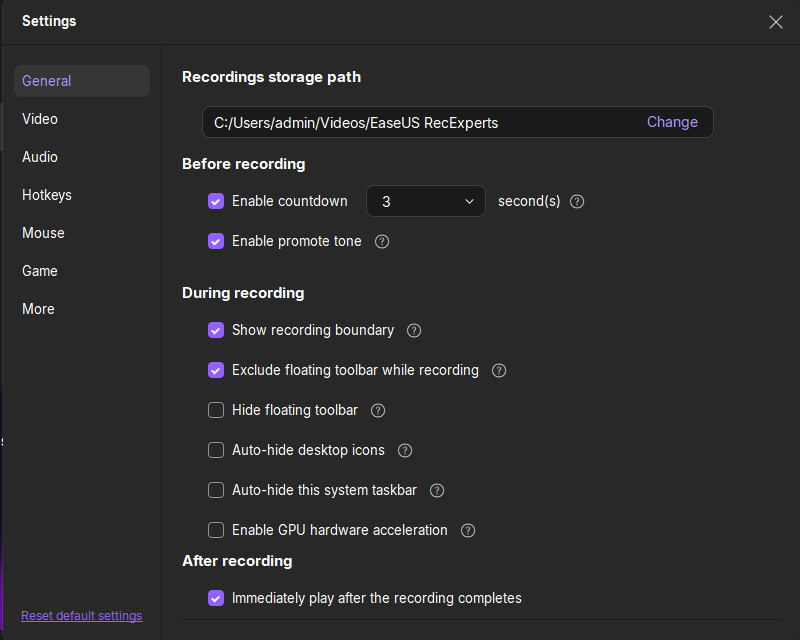
Step 1. Launch EaseUS RecExperts and adjust your recording settings.
Before you start recording, you can customize your settings by clicking the Menu icon (three horizontal lines) in the top-right corner and selecting Settings. From there, you can change the save location, video format, frame rate, audio format, and other preferences. All changes will be saved automatically.
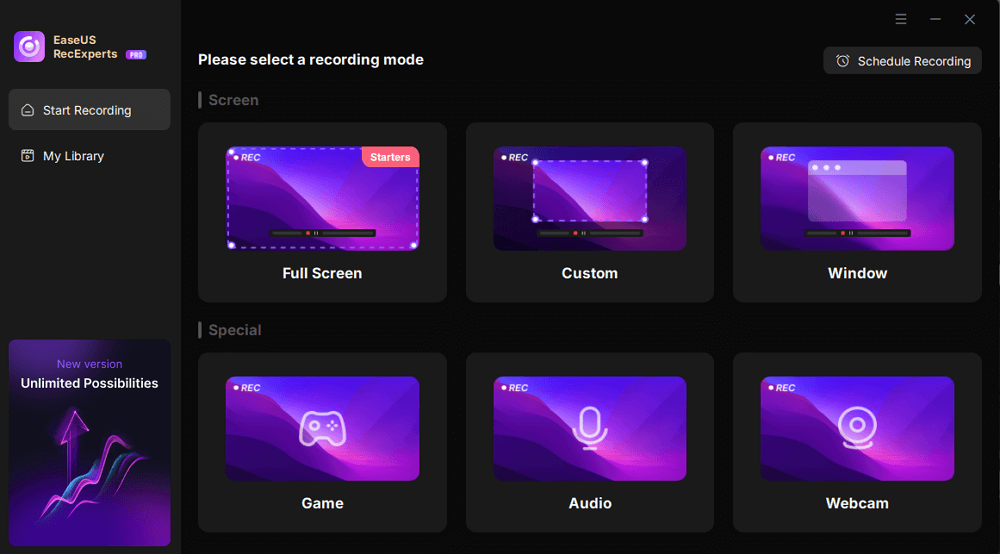
Step 2. Choose a recording mode based on your needs.
On the main interface, you'll see several recording options: Full Screen, Custom, Window, Game, Audio, and Webcam. Simply click the one that matches what you want to record.
Step 3. Set up your webcam and audio sources.
In the toolbar, you can turn the Webcam, Speaker, and Microphone on or off by clicking their icons. If multiple devices are connected, click the small arrow next to each icon to choose your preferred input source.

Step 4. Start and control the screen recording.
Click the red REC button to begin recording. A floating toolbar will appear on your screen, where you can pause the recording using the pause icon or stop it by clicking the red square icon.
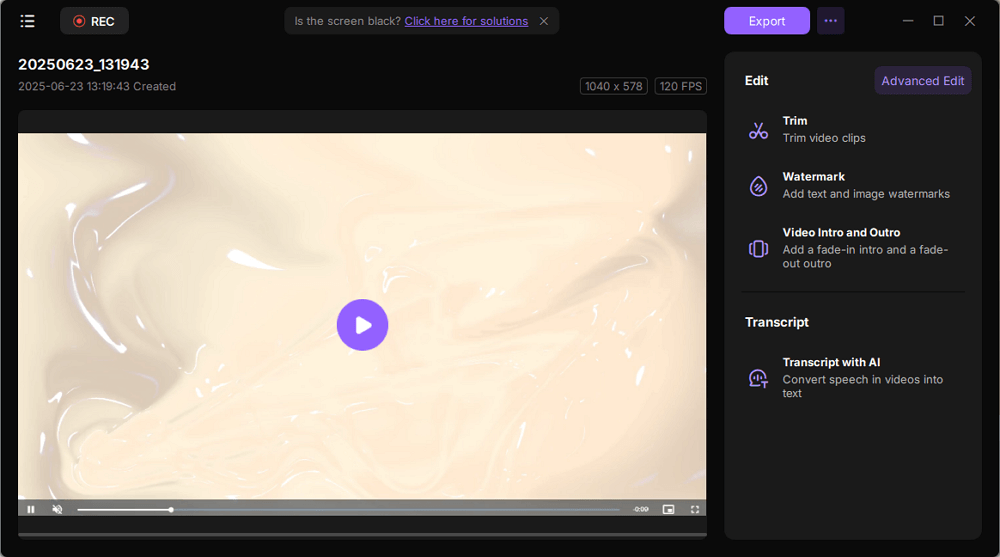
Step 5. Preview, edit, and manage your recordings.
Once you stop recording, you'll be taken to the preview window. Here, you can watch your video, trim it, add watermarks, transcribe audio to text, and organize your recordings. To record again with the same settings, just click the REC button in the top-left corner.
Final Thoughts
So far, do you know does Canva have screen recording? Canva provides a built-in screen recording feature for free to help users record a webcam, microphone, and screen. During the recording session, you can also share a browser tab, window, or entire screen. Moreover, you can add versatile Canva designs to your recordings to make your work more creative and visualized.
You can download and use EaseUS RecExperts on your Windows computers if you need more advanced recording features.
Does Canva Have Screen Recording FAQs
Check more frequently asked questions and answers on how to record in Canva.
1. Does Canva know if I screen record?
Canva does not have specific features that can detect screen recording. However, it's important to respect copyright and intellectual property rights when using digital content.
2. Does Canva screen record during test?
Canva does not have a built-in screen recording feature for tests or assessments. However, some online testing platforms might use third-party tools to record your screen to prevent cheating or ensure academic integrity.
3. Why Canva Record yourself not showing?
If you're having trouble finding or using the "Record yourself" feature in Canva, here are some common reasons and troubleshooting steps you can take:
- Check if you're using a compatible browser. Canva typically works best on up-to-date versions of Chrome and Microsoft Edge. If you're using an unsupported browser, the feature may not appear.
- Ensure that Canva has permission to access your camera and microphone. You can usually check this in your browser settings.
- A stable internet connection is required for the feature to work properly. If you have connectivity issues, the feature might not load.
- Sometimes, browser cache or cookies can interfere with how web applications function. Try clearing your browser's cache and cookies, then reload Canva.
- Logging out of your account and logging back in can sometimes resolve display issues.
EaseUS RecExperts

One-click to capture anything on screen!
No Time Limit, No watermark
Start Recording