-
![]()
Daisy
Daisy is the Senior editor of the writing team for EaseUS. She has been working in EaseUS for over ten years, starting from a technical writer to a team leader of the content group. As a professional author for over 10 years, she writes a lot to help people overcome their tech troubles.…Read full bio -
Jane is an experienced editor for EaseUS focused on tech blog writing. Familiar with all kinds of video editing and screen recording software on the market, she specializes in composing posts about recording and editing videos. All the topics she chooses …Read full bio
-
![]()
Alin
Alin is an experienced technical blog writing editor. She knows the information about screen recording software on the market, and is also familiar with data cloning and data backup software. She is expert in writing posts about these products, aiming at providing users with effective solutions.…Read full bio -
Jean is recognized as one of the most professional writers in EaseUS. She has kept improving her writing skills over the past 10 years and helped millions of her readers solve their tech problems on PC, Mac, and iOS devices.…Read full bio
-
![]()
Jerry
Jerry is a fan of science and technology, aiming to make readers' tech life easy and enjoyable. He loves exploring new technologies and writing technical how-to tips. All the topics he chooses aim to offer users more instructive information.…Read full bio -
![]()
Rel
Rel has always maintained a strong curiosity about the computer field and is committed to the research of the most efficient and practical computer problem solutions.…Read full bio -
![]()
Gemma
Gemma is member of EaseUS team and has been committed to creating valuable content in fields about file recovery, partition management, and data backup etc. for many years. She loves to help users solve various types of computer related issues.…Read full bio -
![]()
Shelly
"I hope my articles can help solve your technical problems. If you are interested in other articles, you can check the articles at the bottom of this page. Similarly, you can also check my Twitter to get additional help."…Read full bio
Page Table of Contents
Jane Zhou
Updated on Jun 09, 2026
0 Views |
0 min read
Open Broadcasting Software (OBS) is a free open-source screen recorder designed for streaming and recording gameplay and other apps. However, users may find it tricky for how to record audio on OBS. Fret not; let's follow this stepwise guide and use OBS record audio only in MP3, including system, application, and microphone sounds.
PAGE CONTENT:
OBS Record Audio Only from Desktop Windows 10/11 PC
"I'm trying to record desktop audio along with my mic for 3-4 hour sessions, but I keep running into issues with saving it as an MP3 or other common formats... Reddit User
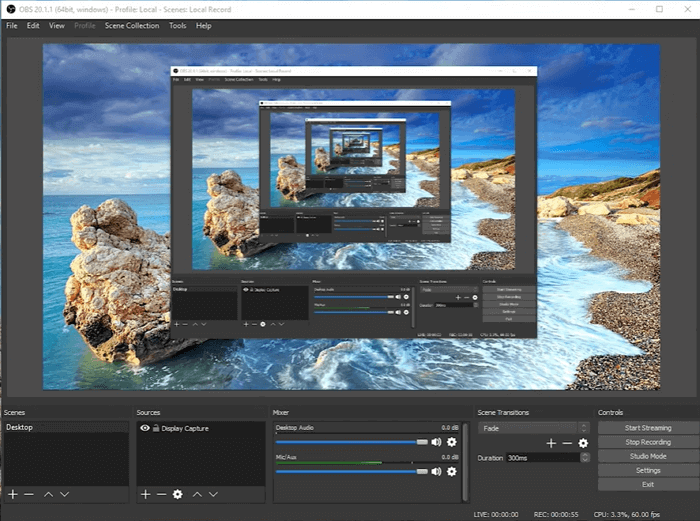
Most OBS users know how to record live streams from YouTube, Twitch, and other platforms. However, they may be unfamiliar with OBS recording audio on desktop PCs.
In fact, OBS can record system sound and microphone voice together or separately in an audio file. It helps capture computer audio in various formats, including MP3, WAV, VOC, VVC, and more, catering to editing and sharing.
🚩Check how to record audio with OBS on Windows PC:
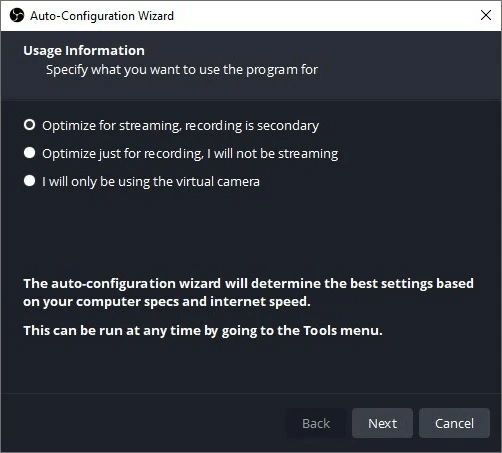
Step 1. Download, install, and launch the OBS Windows version.
- Go to the OBS official website to download it on your Windows 10 or 11 PC.
- Run the auto-configuration wizard and follow the steps to complete the setup on your Windows.
- Select "Optimize just for recording…" to record desktop audio.
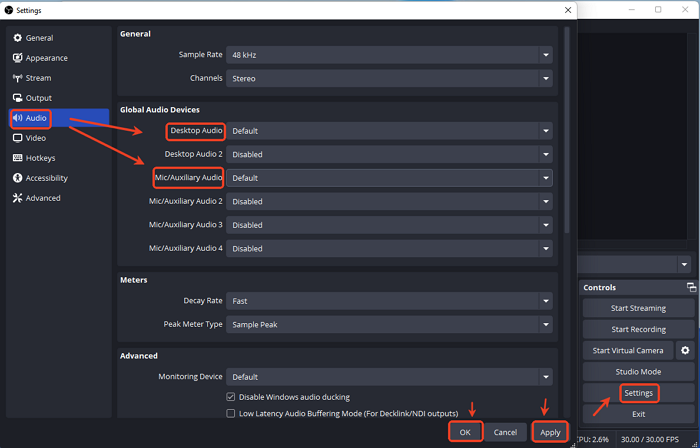
Step 2. Set up audio output devices.
- On the bottom-right corner, go to "Settings" > "Audio".
- Under "Global Audio Devices", choose "Desktop Audio" (internal audio) and "Mic/Auxiliary Audio" (mic sound) if needed.
- Click "Apply" and "OK" to save the changes.
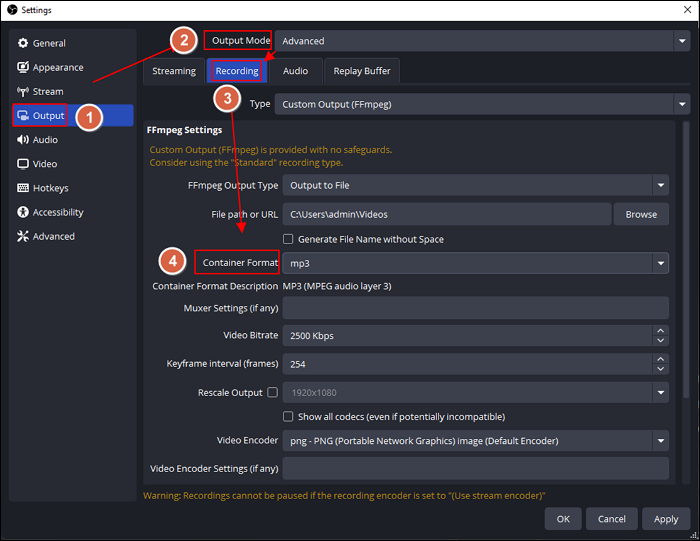
Step 3. Adjust an audio-only output format.
- Go to "Settings" > "Output".
- Switch the "Output Mode" from "Simple" to "Advanced".
- Select the "Recording" tab.
- Under "FFmpeg Settings", select an audio format from the "Container Format". Here, we take "mp3" as an example.
- Click "Apply" and "OK" to save the changes.
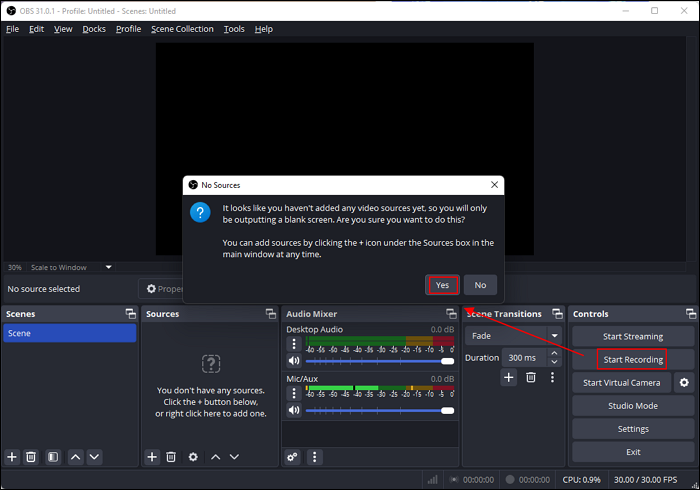
Step 4. Start recording audio on OBS.
- Click "Start Recording" > "Yes" to confirm the popup. (Here, we need to capture the audio on OBS, so we will not add a video source). The session will begin instantly.
- Now, play the audio you want to capture and speak to the mic if needed.
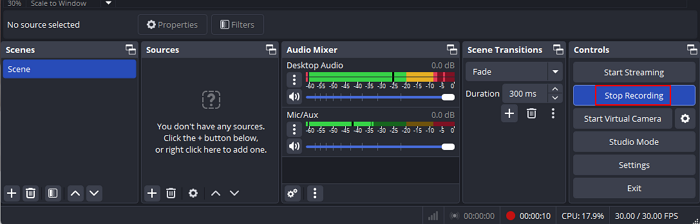
Step 5. Stop recording when done.
- Click "Stop Recording" if you want to end the task.
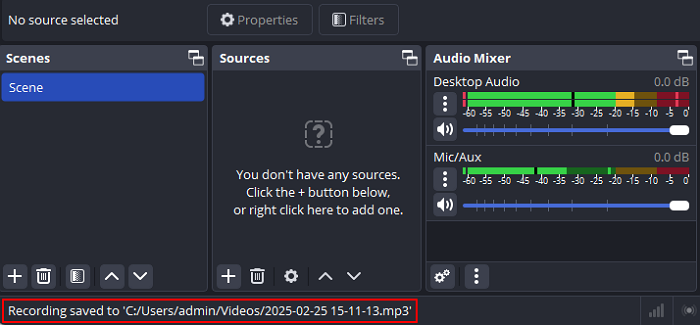
Step 6. Access the recording audio in File Explorer.
- The OBS recording file (.mp3) will be saved in "C:\Users\admin\Videos" by default. You can preview the audio file here.
- To change the recording path in OBS, go to "File" > "Settings" > "Output" > "Recording".
❌OBS recording audio limitations:
- There is no pause button during recording. Only click Stop Recording as long as the task is done.
- There is no preview option after recording. You are suggested to do a test in advance for longer and more complicated recording scenarios.
Share this post to help users learn how to record audio with OBS!

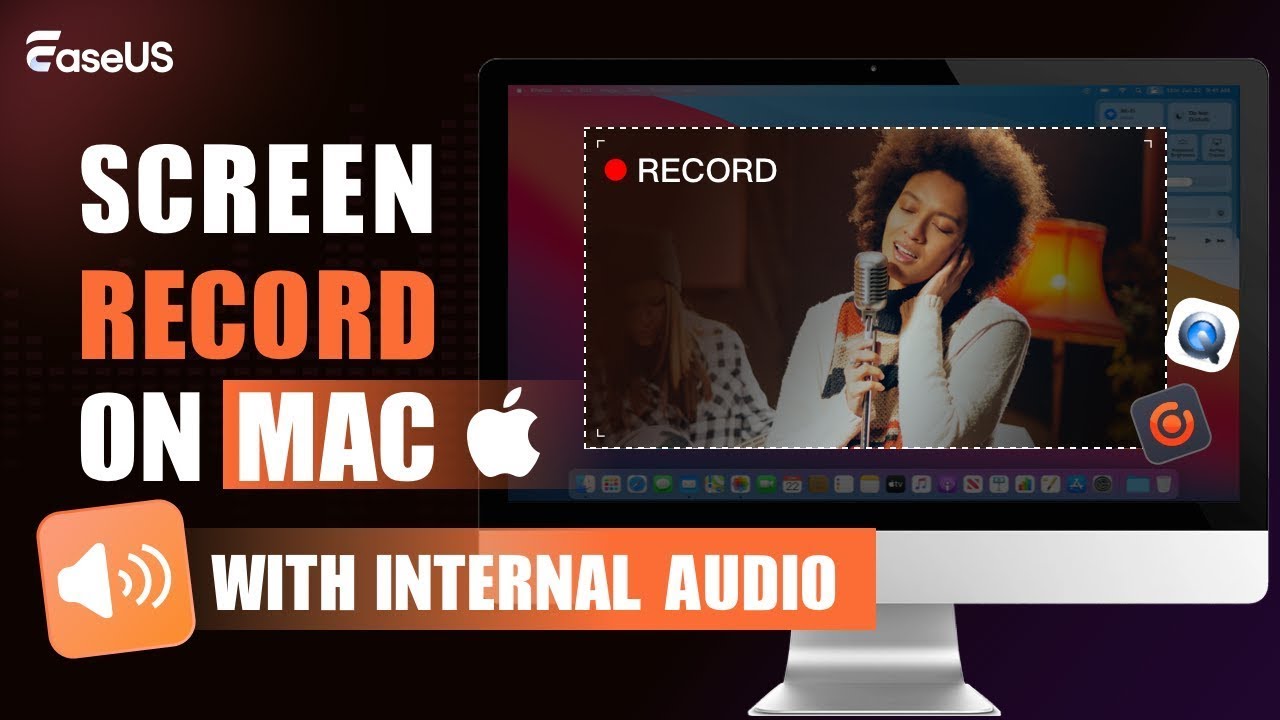
How to Record Audio on OBS on Mac
OBS is also an excellent Mac screen recorder. However, unlike Windows, Mac has disabled the internal audio recording for Mac devices, so you must use a third-party plugin like iShowU Audio Capture to solve your query.
🚩Check how to capture desktop audio OBS on Mac devices.
Step 1. Install OBS Studio and iShowU Audio Capture and launch them on your macOS. Tap the Audio MIDI Setup and click the + symbol at the bottom left.
Step 2. Choose your main devices as the Create Multi-Output Device and iShowU Audio Capture.
Step 3. Visit the System Preferences and click the Sound Preference. Once the screen opens up, click Multi-Output Device.
Step 4. Lastly, open OBS Studio, click Settings, and navigate to the audio section. Keep the Desktop Audio as disabled and choose the Mic/Auxiliary Audio as iShowU Audio Capture. Once you finish it, start recording your desktop audio on Mac.
👉If you still have doubts, you can watch the tutorial video below:
- 00:31-01:54 Method 1. Record with QuickTime Player
- 01:54-03:16 Method 2. Record with EaseUS RecExperts
If you find this complicated, you can download EaseUS RecExperts for free to record internal audio on Mac.
Download EaseUS Screen Recorder
Download EaseUS Screen Recorder
Trustpilot Rating 4.7
Share this post to help users learn how to record audio with OBS!
Best Alternative to OBS Audio Recording
OBS Studio is undoubtedly one of the finest screen recorders for Mac and Windows users. However, because of its inevitable limitations, it might not be the best tool to settle for screen and audio recording. For example, you may encounter issues like OBS not recording audio.
You can consider an OBS alternative like the EaseUS RecExperts for an enriching recording experience.
- Easy to use: record system, applications, and microphone with few clicks, suitable for both beginners and professionals
- Multiple audio formats: MP3, WMV, AAC, OGG, FLAC, and more, accessible for audio editing and sharing
- High-quality audio recording: lossless play track, noise cancellation, and microphone boost
- Versatile recording features: record audio only, record screen with sound, record webcam overlay, etc.
- Preview and edit: play, preview, compress, and edit the audio file instantly after recording
Download it for free for hands-on experience with its features and functions and enhance your screen and recording experience.
Step 1. Launch EaseUS RecExperts and choose Audio mode (looks like a speaker) from the main interface.

Step 2. Select the sound source by clicking on the speaker sign (the system sound) or the mic sign (the microphone). Or, you can record them both at the same time.
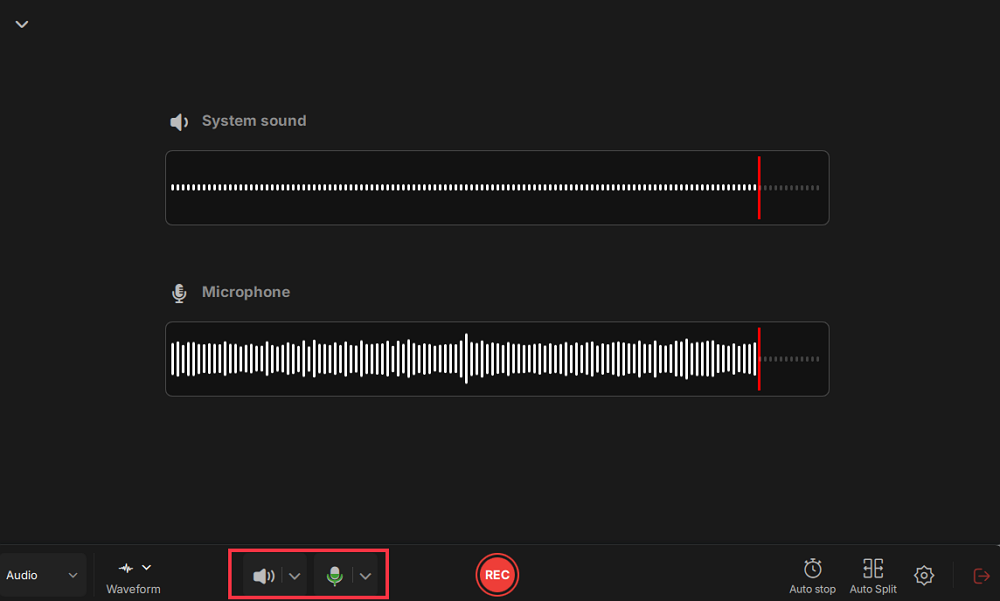
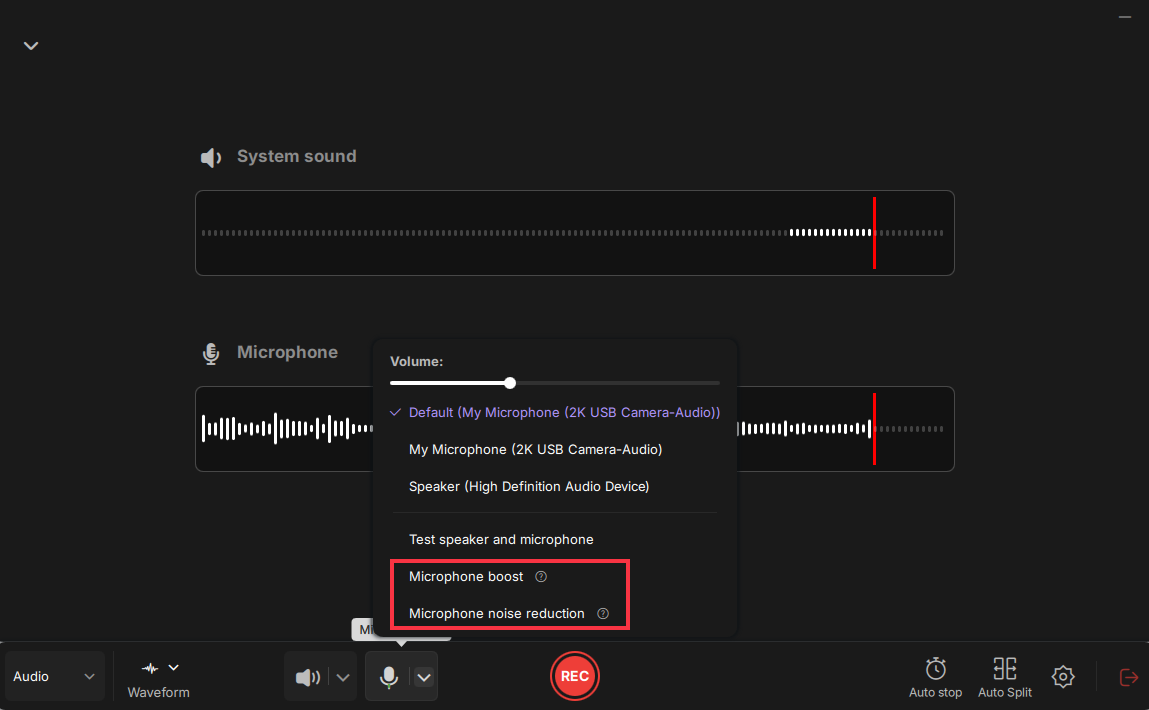
Step 3. Click the drop-down buttons next to the Speaker and Microphone to adjust the audio source settings.
- In the Speaker tab, you can adjust the volume, test the speaker and microphone, record silently, or open the volume mixer.
- In the Microphone tab, you can also enable Microphone boost and Microphone noise reduction features.
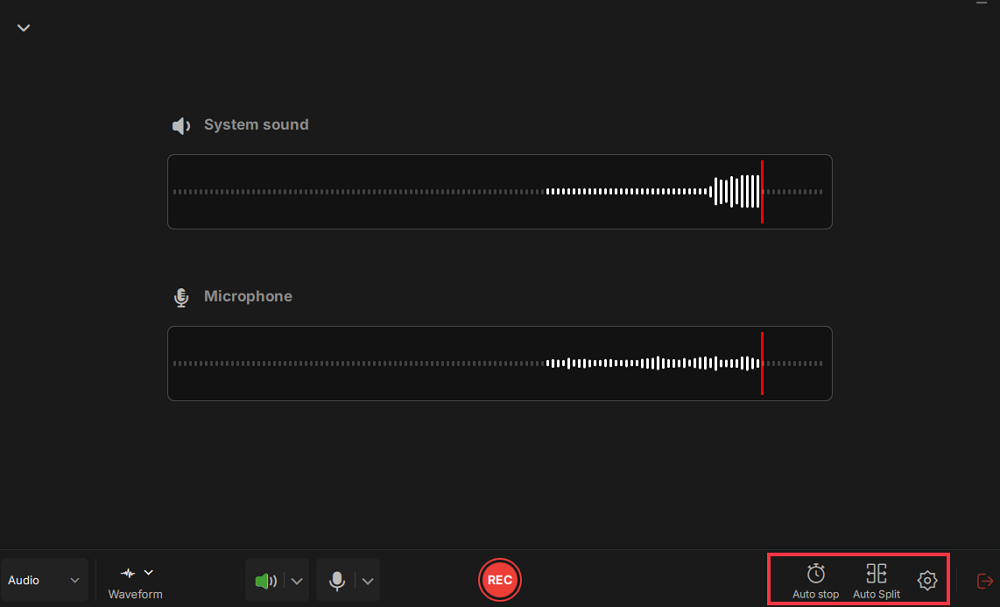
Step 4. To change the output format, bitrate, or sampling rate, you can click the Settings button in the lower right corner of the page. Of course, you can also set the automatic stop audio recording and automatic audio segmentation as needed.
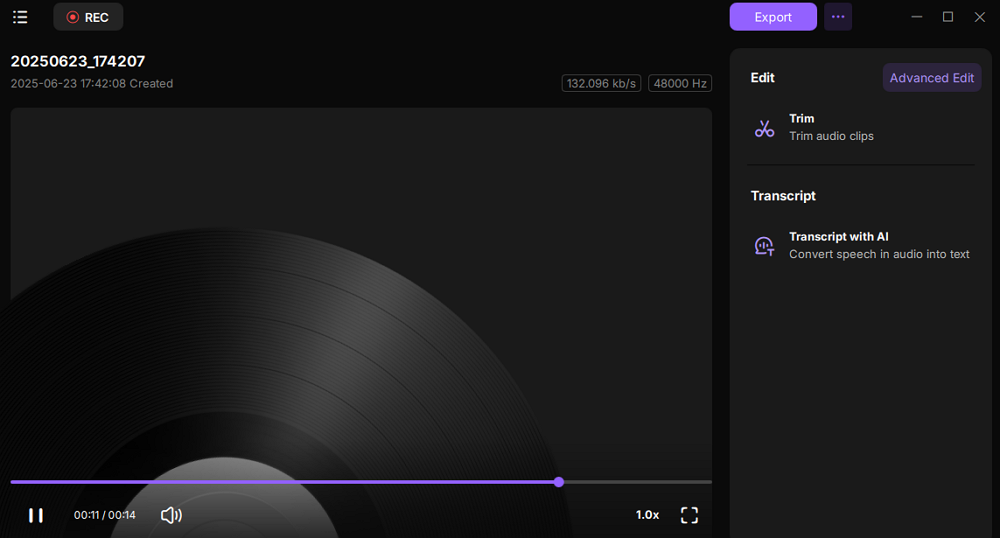
Step 5. Hit the REC button to start recording audio. To finish it, just click on the red square icon to stop the recording.
Step 6. Once finished, the audio recording will be saved automatically. You can listen to or edit the recording with built-in tools.
Share this post to help users learn how to record audio with OBS!
The Bottom Line
OBS Studio is a good software for how to record audio on OBS. Here, we have sailed you through your issues on recording desktop audio using OBS for Windows and Mac PCs. Unfortunately, OBS lacks additional benefits like recording selected regions or scheduling your recordings beforehand.
So we recommend you use EaseUS RecExperts, a beginner-friendly tool that provides professional expertise in seconds. Instead, with EaseUS, you can easily record desktop audio, save it in multiple formats, and engage in a delightful screen recording experience. So, try it for free today!
OBS Capture Computer Audio FAQs
We have covered the deeper details of how to record desktop audio with OBS on Windows and Mac PCs. However, if your queries remain unanswered, you must immediately check these popular questions.
1. Why does OBS not record desktop audio?
OBS is a screen recorder program designed to record video files with a microphone and desktop audio. You cannot record only desktop audio and save it as an MP3 file.
However, if an issue persists in recording the desktop audio, you must check the Audio Device Settings. Open Settings > Click Sounds > Select your device and set the speakers as the preferred choice. Save the changes and restart the program to resolve your issue.
2. How do I record internal audio with OBS?
Here are some quick steps to record internal audio with OBS:
- Install OBS and add a new Scene in the Scene section
- Tap the + icon in the Source section
- Select the Audio Output Capture to record desktop sound
- Adjust audio levels from the Audio Mixer box
- Click Properties to select a specific input for audio recording
- Hit the Start Recording button in the Controls section
3. How do I isolate desktop audio in OBS?
To isolate desktop audio in OBS, you must:
- Open the OBS Settings and scroll to audio.
- Under Global Audio Devices, set Desktop Audio to disabled and the Mic/Auxiliary Audio (first) to your own Mic device.
- Set the second Mic/Auxiliary Audio device as disabled.
4. Does OBS record mic and desktop audio separately?
Yes. OBS lets you record mic and desktop audio separately. You must look in the Audio Mixer pane of your sound sources and select the little cog. Then, visit the Advanced Audio Properties; you can set the left and right balance for any audio source and checkmark the mono box.