-
![]()
Daisy
Daisy is the Senior editor of the writing team for EaseUS. She has been working in EaseUS for over ten years, starting from a technical writer to a team leader of the content group. As a professional author for over 10 years, she writes a lot to help people overcome their tech troubles.…Read full bio -
Jane is an experienced editor for EaseUS focused on tech blog writing. Familiar with all kinds of video editing and screen recording software on the market, she specializes in composing posts about recording and editing videos. All the topics she chooses …Read full bio
-
![]()
Alin
Alin is an experienced technical blog writing editor. She knows the information about screen recording software on the market, and is also familiar with data cloning and data backup software. She is expert in writing posts about these products, aiming at providing users with effective solutions.…Read full bio -
Jean is recognized as one of the most professional writers in EaseUS. She has kept improving her writing skills over the past 10 years and helped millions of her readers solve their tech problems on PC, Mac, and iOS devices.…Read full bio
-
![]()
Jerry
Jerry is a fan of science and technology, aiming to make readers' tech life easy and enjoyable. He loves exploring new technologies and writing technical how-to tips. All the topics he chooses aim to offer users more instructive information.…Read full bio -
![]()
Rel
Rel has always maintained a strong curiosity about the computer field and is committed to the research of the most efficient and practical computer problem solutions.…Read full bio -
![]()
Gemma
Gemma is member of EaseUS team and has been committed to creating valuable content in fields about file recovery, partition management, and data backup etc. for many years. She loves to help users solve various types of computer related issues.…Read full bio -
![]()
Shelly
"I hope my articles can help solve your technical problems. If you are interested in other articles, you can check the articles at the bottom of this page. Similarly, you can also check my Twitter to get additional help."…Read full bio
Page Table of Contents
Jane Zhou
Updated on Jun 09, 2026
0 Views |
0 min read
Whether you want to capture gameplay, record a Zoom meeting, or create a tutorial, recording your screen with audio is key. However, does screen recording record audio? How to record screen and voice at the same time? Don't worry. This post will introduce the best screen recorder with voice over for Windows, Mac, and mobile devices. Whether you're a beginner or a pro, you'll find the best tool here.
A Quick Navigation to the Methods on Different Devices:
| System | Tools | Effectiveness | Difficulty |
|---|---|---|---|
| Windows | EaseUS RecExperts |
High - Record screen with sound from microphone and system. Edit recordings with built-in features. |
Very Easy |
| Xbox Game Bar |
Medium - Limited recording options and fewer resolution choices. |
Medium | |
| macOS | EaseUS Mac Screen Recorder |
High - Record screen with audio on Mac quickly and smoothly. |
Very Easy |
| QuickTime Player |
Medium - Built-in screen recorder with complicated operation |
Difficulty | |
|
Windows Mac Website |
EaseUS Free Online Screen Recorder | High - Capture screen with voice online without installing app | Very Easy |
|
iPhone iPad |
iOS Built-in Screen Recorder |
High - Record screen and voice easily |
Simple |
| Android | Android Built-in Screen Recorder |
High - Record screen and voice easily |
Simple |
✅From the comparison above, we can see that EaseUS RecExperts is the most effective screen and voice recorder suitable for all levels of users. Download it for your Windows or Mac computer now!
How to Screen Record With Voice on Windows
This section will introduce some feasible screen recorders with voice over to screen record with audio on Windows devices, including Windows 11/10/8/7 devices.
1️⃣Screen Record on Windows with Audio via Professional Software
The straightforward way to screen record with voice is to use EaseUS RecExperts. This Windows screen recorder with audio is versatile but easy to use, and even beginners can use it to capture video and audio simultaneously on a computer. This powerful screen and audio recorder supports capturing various audio sources, like system sound, microphone, or others, which means that you screen record and talk at the same time easily.
Features
- Offers video/audio trimmer to edit the recordings effortlessly.
- Record audio from YouTube or other streaming videos without any restrictions.
- Capture screen and voice from desktop, app, or browser tab.
- Supports to record multiple screens.
Here's how to do screen recording with voice on Windows by using EaseUS RecExperts:
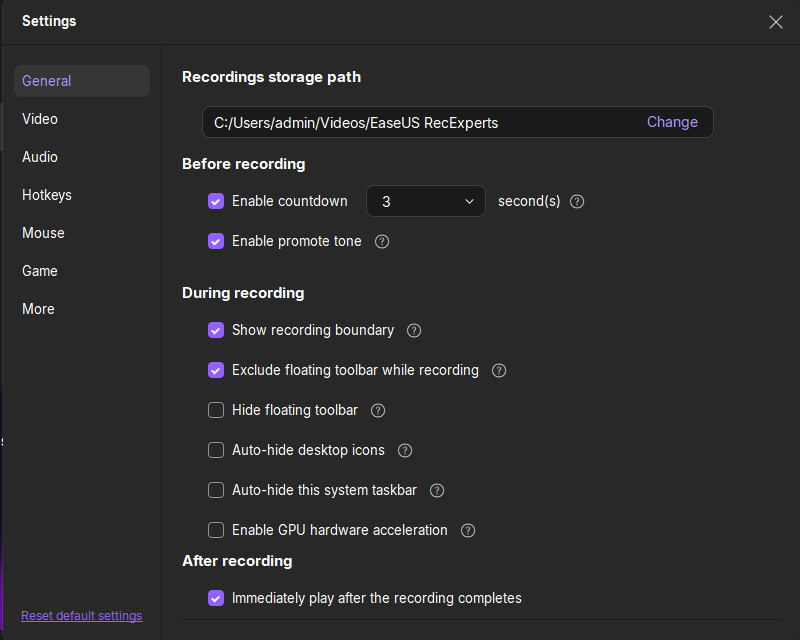
Step 1. Launch EaseUS RecExperts and adjust your recording settings.
Before you start recording, you can customize your settings by clicking the Menu icon (three horizontal lines) in the top-right corner and selecting Settings. From there, you can change the save location, video format, frame rate, audio format, and other preferences. All changes will be saved automatically.
Step 2. Choose a recording mode based on your needs.
On the main interface, you'll see several recording options: Full Screen, Custom, Window, Game, Audio, and Webcam. Simply click the one that matches what you want to record.

Step 3. Set up your webcam and audio sources.
In the toolbar, you can turn the Webcam, Speaker, and Microphone on or off by clicking their icons. If multiple devices are connected, click the small arrow next to each icon to choose your preferred input source.

Step 4. Start and control the screen recording.
Click the red REC button to begin recording. A floating toolbar will appear on your screen, where you can pause the recording using the pause icon or stop it by clicking the red square icon.
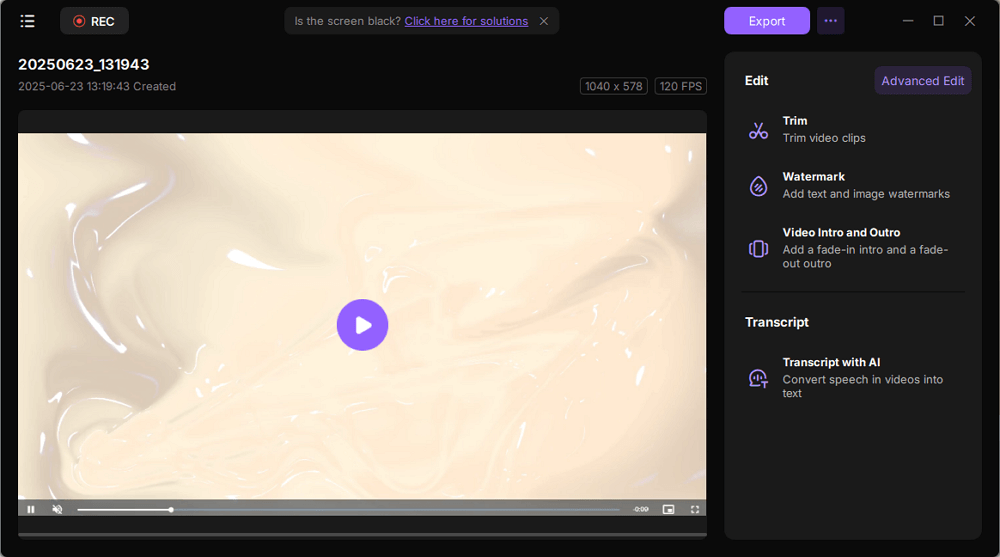
Step 5. Preview, edit, and manage your recordings.
Once you stop recording, you'll be taken to the preview window. Here, you can watch your video, trim it, add watermarks, transcribe audio to text, and organize your recordings. To record again with the same settings, just click the REC button in the top-left corner.
Share this guide on how to screen record with voice with others.

2️⃣ Record Screen With Sound using Game Bar
Another easy way to get sound on Windows screen recording is to use the Xbox Game Bar, built-in Windows 10 and later versions. This Windows game recorder with sound is designed to capture gameplay without lagging. You can press Win + G to activate the Game Bar to capture screen and audio quickly. With its help, you can add your voice to screen recording hassle-free.
If you encounter Xbox Game Bar not working on Windows 10/10 issues, please check this guide or use its alternatives like EaseUS screen and voice recorder.
Here's how to do screen recording with voice on Windows 10 by using Xbox Game Bar:
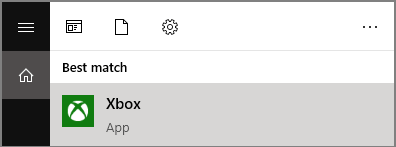
Step 1. Type Xbox in the search bar in Windows 10/11, and open the Xbox app by double-clicking the search result.
Step 2. Press Windows + G on your keyboard simultaneously to open the Game Bar. Click Yes, it is a game to allow Xbox to record your screen.

Step 3. Click Start Recording when your recording ends, press Windows + G, and click the red button to stop your recordings. Then, access the recordings within the Xbox app by navigating to Start > Game DVR.
👨🏼🔬Note: Compared with EaseUS RecExperts, the Xbox Game Bar owns fewer recording options and doesn't allow you to clip or trim videos after recording. So, if you have advanced screen recording requirements, EaseUS RecExperts is more suitable.
How to Screen Record and Voiceover on Mac
To screen record on Mac with voiceover, You can use a professional screen and sound recorder like EaseUS Mac Screen Recorder or the Mac system's built-in recording software QuickTime Player
1️⃣ Record Screen with Audio on Mac via EaseUS Mac Screen Recorder
Although Mac comes with QuickTime Player, it also has many weaknesses, such as low audio and video quality, low performance, etc. To avoid these problems, you must find an alternative, such as EaseUS Mac Screen Recorder, helping to record your voice while screen recording with ease.
Download EaseUS Screen Recorder
Download EaseUS Screen Recorder
Trustpilot Rating 4.7
This Mac screen recorder enables you to record your screen, webcam, and audio with simple clicks and an intuitive workflow. This audio and video capture software supports capturing audio from the system, microphone, or external audio device while recording the screen.
How to screen recording with audio on Mac:
Step 1. Run EaseUS RecExperts on your device and you will see two recording modes. You can choose "Full Screen"to record the whole screen or choose "Region" to select the recording area manually before recording.

Step 2. After that, you can choose to record the webcam, system sound, microphone or record none of them as you like. You can also set auto split, auto recording with various functions on the interface.
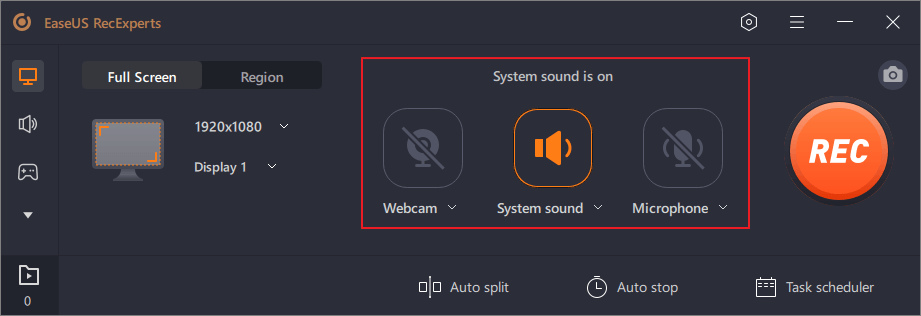
Step 3. Then, you can click the red "REC" button to start recording. Here will be a menu bar on your screen. To pause the recording, click on the white double vertical bar; to end the recording, click on the red square sign.
Step 4. After recording, you will be led to the list interface. Here you can view or edit your recordings. To start a new recording, just click on the "REC" button on the top of the interface.

Share this guide on how to screen record with voice with others.
2️⃣ Use QuickTime Player to Record Voice in Screen Recording
Of course, QuickTime Player is the built-in screen recorder on Mac with sound. It is beneficial for creating instructional videos, presentations, and tutorials. However, if you want to screen record on Mac with internal audio to create some tutorials and gameplay highlights for YouTube, you need to switch to other programs, as QuickTime is not capable of capturing the system sound.
Now follow the below steps to start recording screen with microphone:
👨🏼🔬Note: QuickTime Player requires more steps, and you need to make sure you follow each step correctly.
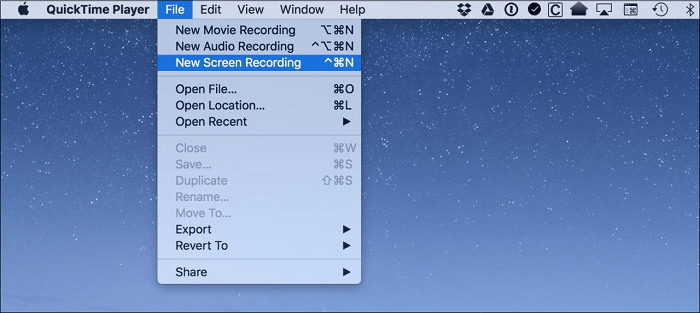
Step 1. Open the QuickTime app on your Mac. Click on "File" > "New Screen Recording" or "New Audio Recording" in the drop-down menu, depending on what you want to do. If you're going to record audio and video at the same time, just select Screen Recording.
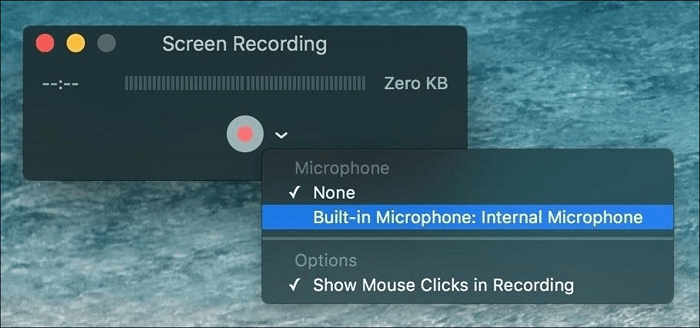
Step 2. Once you see the Recording Interface, click on the arrow right next to the record button. Then, you will need to select a microphone to add microphone to screen recording.
Step 3. Open the app, video, document, or picture that you want to record and simply press the Record button on QuickTime.
Step 4. If you want to record the entire screen, just click anywhere on it. If you're going only to record a section, click and drag the cursor to create a new window.
Step 5. When you finish recording, press the Stop button on QuickTime's menu bar.
Record Screen with Voice via Free Online Recorder
Apart from using an app to record screens with sound, you can also use an online tool like EaseUS Free Online Screen Recorder to achieve this goal.
This is a totally free and powerful tool to help you record screen with voice from desktop or website. It supports capturing audio from the system and microphone. You can also record screen, audio, and webcam at the same time.
Here are the steps on how to record screen and audio via this EaseUS online recording tool:
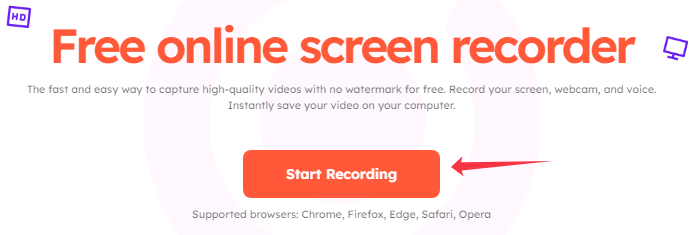
Step 1. Visit its official website and click on the Start Recording button.
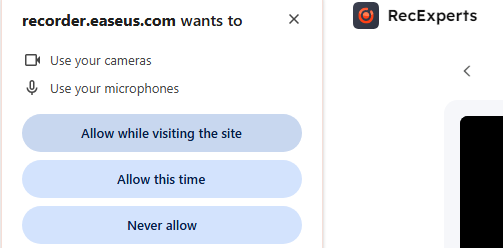
Step 2. Choose the Allow while visiting the site option to get permission to access the camera and microphone.
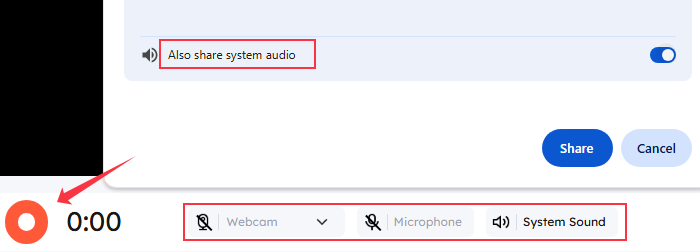
Step 3. Select the Chrome tab, Window, or Entire screen as needed. Be sure to check Also share tab audio.
Step 4. Turn on the Microphone to screen record with your voice and the System sound button. Click on the Recording button to begin recording.
Share this guide on how to screen record with voice with others.
How to Screen Record with Voice on iPhone/iPad
How to record your voice while screen recording on iPhone or iPad? It's very easy with the help of the iOS's built-in screen voice recorder! This free screen and voice recorder come with all iOS devices. Please turn on the microphone option if you need to record the microphone sound. It can record your screen and voice in high definition.
The steps on how to record screen and voice on iPhone/iPad:
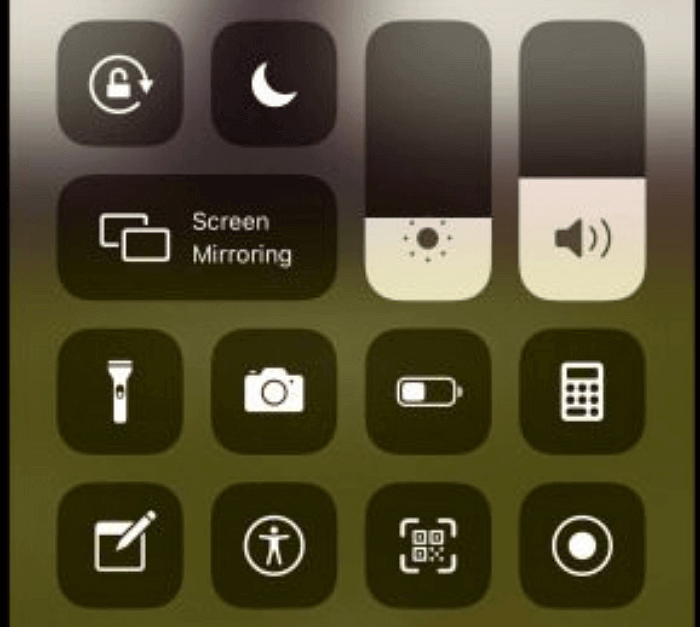
Step 1. Open the "Control Center" and long-press the "Screen Record icon" button to launch the recording function.
Step 2. Select the video or app you want to record and click the "Microphone" button to add voice to screen recording.
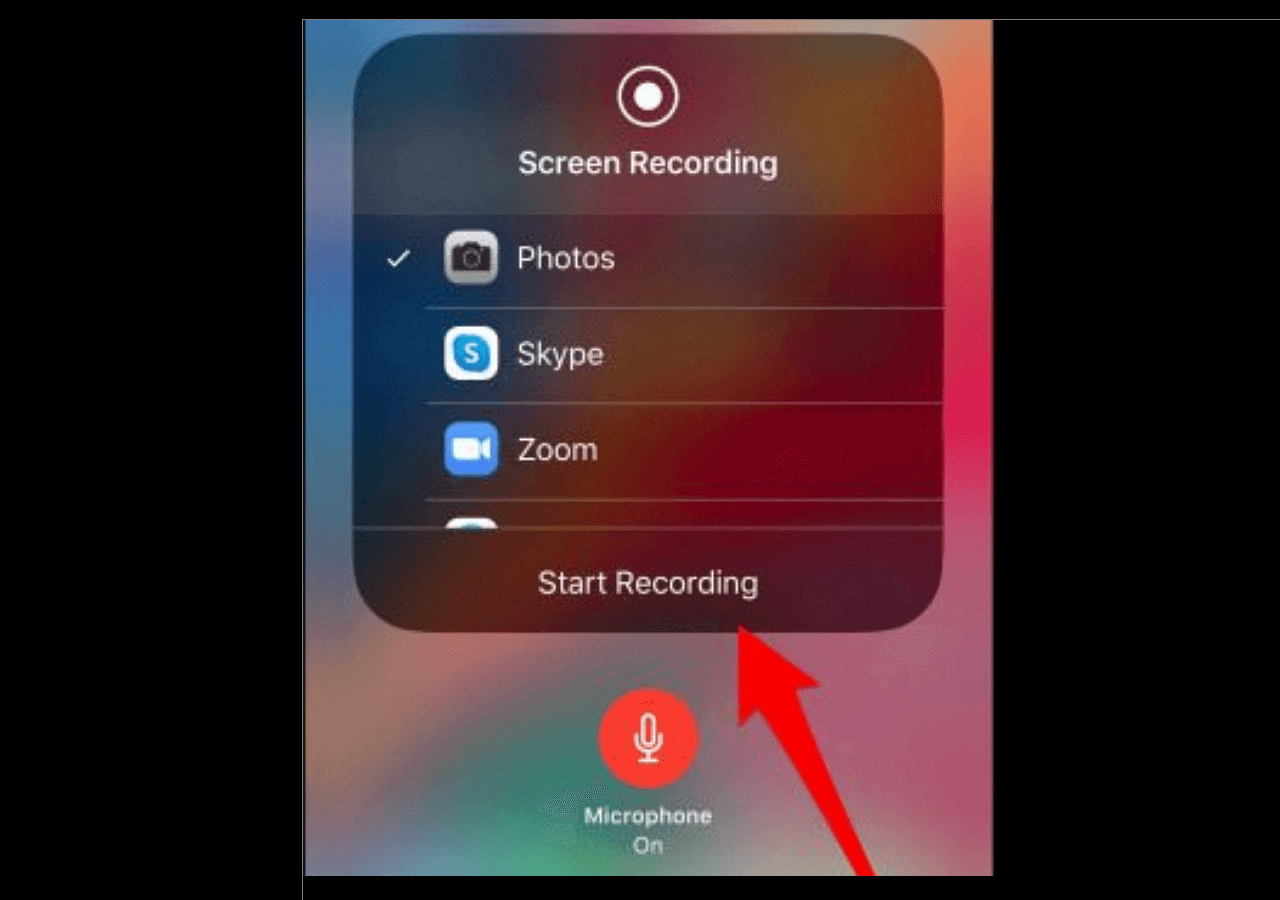
Step 3. Then click "Start Recording" and your phone will record the screen and voice. When you finish recording, tap "Stop Recording" to end the operation and save the recording file.
How to Screen Record on Android With Audio
In this section, we'll go through how to screen record on Android with sound utilizing the built-in screen recording feature in the most recent Android versions. (Android 11 or up devices come with a built-in screen recorder that can help you capture the screen with audio easily.)
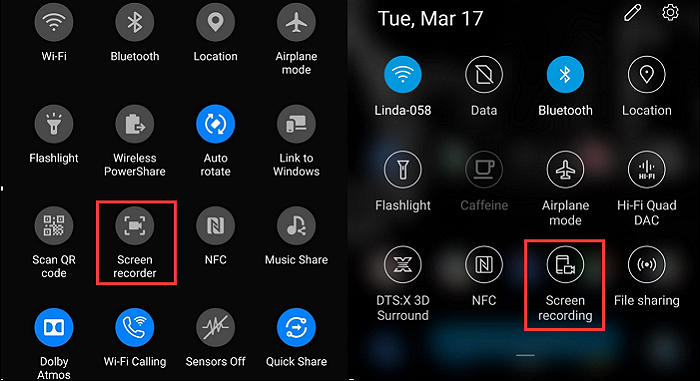
Step 1. Swipe down from the top right corner of the screen to get access to Quick Settings,
Step 2. Tap the "Screen Recorder (or Screen Recording)" icon and give permission to the device to record the screen.
Step 3. Choose a sound source(Microphone or internal audio).
Step 4. Click "Start Recording" to begin the screen recording process. (Usually, it will wait 3 or 5 seconds before starting.)
Step 5. You'll see a toolbar appear on the top. Click "Stop Recording" when finished, and your recordings will be saved to the photo library.
Share this guide on how to screen record with voice with others.
Conclusion
To sum up, this post talked about the best screen recorder with voice on Windows, macOS, iPhone, and Android and taught you how to screen record with voice. You can choose the best one according to your needs. EaseUS RecExperts is a worthy choice for beginners, as its user interface makes it extremely easy to use among those screen and audio recorders.
How to Screen Record with Voice FAQs
1. Why is there no sound on my iPhone screen recording?
The common reason is that you don't enable the microphone option before starting your iPhone screen recording. To overcome this issue, you can follow the below simple steps:
- Swipe up to bring up the Control Centre
- Find and hold the Screen Record button until you see the microphone audio option
- Then, tap on the microphone icon to turn it to red
2. Can you screen record and voice record at the same time?
It's easy to screen record while talking. To record screen and audio on iPhone or Android, you can use their built-in screen recording feature. To record screen and sound on Mac and Windows, choosing a professional screen recorder with voice over like EaseUS RecExperts is the best option.
3. How do I record my iPhone screen with audio?
It is easy to record iPhone screen with audio. When you start recording, you can press the microphone button to enable the audio recording function. Once done, you can record the iPhone screen with your voice.
4. Does screen recording record sound?
Of course. It's easy to screen record with audio. You can enable the microphone option if you want to record sound during your screen recording. By default, both computers and mobile phones allow you to use microphone audio to narrate your recordings.